Showing posts with label Tomatoes. Show all posts

Saturday, October 08, 2016

ANTIPASTO PASTA OR KALE SALAD


Long story short: Here is a bunch of stuff I didn’t think I liked (Raw chickpeas! Pepperoncini! Artichokes!) in a big bowl with a lot of tasty salty briny things, all swimming in an amazing garlicky oregano dressing. I love it.

Long story slightly longer: My friend S brought a delicious pasta salad to one of our picnics earlier this summer, explaining that she’d adapted it from the Smitten Kitchen version of Nancy Silverton’s chopped salad from Mozza. Despite the presence of the aforementioned stuff I didn’t think I liked, I adored it and immediately wanted to re-create it for myself (and A, who was out of town and had thus missed out). I did, and we both loved it.

I have a surfeit of pasta recipes, though, plus I’m trying not to eat pasta every single week, so I also wanted to try this in straight-up salad form, but the traditional iceberg lettuce format of the original didn’t appeal to me. Considering this concoction is chock-full of items cured, pickled, and preserved, I thought it could use a little more veggie oomph, and kale seemed a natural fit. It plays well with Italian ingredients, its sturdiness stands up to the heavy dressing, and it has enough flavor of its own to avoid getting lost in the shuffle. I was right; this made an excellent salad—a truth that was tested when A had to fly to Indiana unexpectedly on the day I’d planned to make it, leaving me with all six servings to eat on my own. Sure, I was a bit weary of antipasto salad by the end of the week, but none went uneaten. It was really that good.

A few notes: The Smitten Kitchen recipe called for way, way too much salt considering all the processed ingredients bringing serious sodium of their own. I halved it and it was plenty. I also halved the salami and cheese quantities and still thought there was plenty of each. I’m not a huge provolone fan and had trouble finding any (except presliced sandwich cheese) at Trader Joe’s, so I used Pecorino Romano. For the pasta salad I cut it into matchsticks, but that made it too assertive, so I simply shredded it for the kale version and it was perfect. S had added a few pickled cherry peppers to her salad for a bit of heat, and I followed her lead. She also used artichokes, so I bought some for the very first time and dutifully added them in. I guess they bring another vegetable to the mix, but honestly, artichokes do absolutely nothing for me. They hardly taste like anything. I’ve tried them multiple times in many formats and still don’t understand why people seem to be so gaga for them. I’ll finish the jar, but I’m not sure I’ll bother buying any more in the future. Adding arugula to the pasta version of the salad was also S’s idea, and it brings a nice, fresh, green element to what—let’s face it—is not exactly the healthiest salad on the spectrum. It is, however, a substantial, satisfying, protein-rich, all-seasons crowd-pleasing main dish I’ll be making again and again, in both forms.

4 cloves garlic
1 generous tablespoon dried oregano
1 teaspoon kosher salt
Freshly ground black pepper to taste
2 tablespoons lemon juice
¼ cup red wine vinegar
¼ cup extra-virgin olive oil
1 (15-ounce) can chickpeas, drained and rinsed
1 small red onion, peeled and sliced into paper-thin rings
4 ounces Pecorino Romano cheese, coarsely shredded
4-6 ounces sliced salami, cut into ¼-inch ribbons
4 medium or 8 small pickled pepperoncini, sliced into rings
2-4 pickled cherry peppers, diced (optional)
4-6 jarred artichoke hearts, diced (optional)
1 pint cherry tomatoes, halved or quartered
For the pasta salad:
12 ounces rotini, cooked, drained and rinsed in cold water
6 generous handfuls arugula
For the kale salad:
1 very large or 2 small bunches Tuscan kale, ribs removed, leaves thinly sliced
  1. To make the dressing, roughly chop the garlic and then add the oregano, salt and up to ½ teaspoon ground pepper. Chop the mixture together and use the side of a knife or a mortar and pestle to make a grainy herb paste. Transfer the paste to a small bowl, then add the lemon juice and vinegar. Mix with a fork, allowing the salt to dissolve, then add the oil and whisk until well combined. The dressing should be thick with garlic and oregano.
  2. For the pasta salad: Combine the cooled pasta, chickpeas, red onion, cheese, salami, pepperoncini, cherry peppers and artichokes (if using), and cherry tomatoes in a large bowl. Add about half the dressing, toss well, and then add remaining dressing to taste (I used all of it). Adjust seasonings to taste. Fold in the arugula immediately before serving.
  3. For the kale salad: Combine the shredded kale with about half the dressing in a large bowl. Toss with your hands, massaging the kale until it becomes tender. Let sit for at least 15 minutes while you prepare the other ingredients. Add the chickpeas, red onion, cheese, salami, pepperoncini, cherry peppers and artichokes (if using), and cherry tomatoes to the bowl. Toss well and add remaining dressing to taste (I didn’t quite use all of it). Adjust seasonings to taste.
Serves: 6-8
Time: 30-40 minutes
Leftover potential: Great. For the pasta salad, store the arugula separately and add one generous handful to each serving directly before you eat it.

Wednesday, September 07, 2016

PESTO CHICKEN SALAD SANDWICHES


This is going to be one of those posts where I marvel at suddenly liking something I used to abhor. Beans, corn tortillas, fish, mayonnaise, cauliflower, runny eggs, cabbage, potato salad—the list goes on. I would wonder who I even am anymore, except that I still consistently detest beets and olives. In fact, with every new food obstacle conquered, I feel even safer in declaring my hatred of beet and olives a fundamental and unshakeable aspect of my being. As a reformed picky eater, I have diminishing patience for picky eating in others, yet I believe it’s legit to allow everyone two or three really vehement food dislikes, especially if they’ve given those items a good fair shake and still can’t get on board.

All this is to say that I was always repulsed by chicken salad (which was of course a side effect of my feelings about mayonnaise), and then I saw a photo of these sandwiches from Damn Delicious on some random food site roundup and craved them desperately. This is one of those things that’s so simple and sensible it’s barely a recipe you need to write down—essentially just a caprese sandwich, bulked out with chicken that’s perked up with pesto and made creamy with a bit of yogurt. But it never occurred to me before, so maybe it’ll be news to you too. Although it’s nothing fancy, it’s easy, fresh, and satisfying summer fare. What’s more, I suddenly find myself bookmarking all sorts of chicken salad recipes right and left. Maybe it’s the maturing effects of time teaching me to broaden my horizons, or perhaps it’s just the endless SoCal summers making cold, creamy, and crunchy seem like the best way to eat everything.

1 cup packed fresh basil leaves
3 cloves garlic, peeled
3 tablespoons pine nuts, toasted if desired (I used sliced almonds)
1/3 cup grated Parmesan
Kosher salt and freshly ground black pepper, to taste
1/3 cup olive oil
2 cups cooked shredded or diced chicken breast (I recommend poached chicken)
¼ cup Greek yogurt
1 baguette, halved lengthwise and cut into 4 equal pieces (I used 4 split Italian-style sandwich rolls and thought the slightly softer texture worked well), toasted (I brushed the flat surface with a bit of olive oil and ran them under the broiler until golden brown)
2 cups arugula
2 medium tomatoes, thinly sliced
8 ounces fresh mozzarella, sliced
  1. To make the pesto, combine basil, garlic, pine nuts, and Parmesan in the bowl of a food processor; season with salt and pepper to taste. With the motor running, add olive oil in a slow stream until emulsified.
  2. In a large bowl, combine chicken, ½ cup pesto, Greek yogurt, and salt and pepper to taste.
  3. Serve chicken pesto mixture on baguette/rolls with arugula, tomatoes, and mozzarella.
Serves: 4
Time: 25 minutes
Leftover potential: Good; chicken salad mixture will keep for several days in the fridge. Store all the other sandwich components separately and assemble them just before serving.

Wednesday, August 24, 2016

GREEK CHICKEN FARRO SALAD


I’ve talked about this before, but one thing I’m still wrestling with—even after 12 years in the food blog game—is the feeling that I need to have a perfectly curated recipe collection with just one ideal example of each type of recipe. (Being an editor, essentially a professional content curator, doesn’t help. It’s a difficult reflex to turn off at the end of the day.) When I see a recipe that looks enticing but has notable similarities to a recipe I already have, I have to resist the urge to click on by. I remind myself that there are only so many ingredients in the world, so there’s bound to be overlap from time to time, trying new recipes is fun and low-stakes, and who cares if my recipe collection is sprawling and inconsistent? Plus, every now and then you find a better roasted chicken or a kickass cauliflower soup that supplants the old one.

Thus, when I saw this pasta salad recipe at Budget Bytes, my first impulse was to pass it over, even though it looked delicious. After all, I already have a favorite pasta salad recipe, and this one was basically Mediterranean pepper salad meets chicken gyros meets tabbouleh anyway. I’m covered! But I still wanted it, so I threw caution to the wind and made it—using farro instead, because I’m trying not to eat pasta every week. And you know what? Despite having very similar ingredients and flavor profile to dishes I’ve already tried, this one is its own thing—and that thing is a fresh, colorful, crunchy, savory, lemon-bright, utterly satisfying main-dish salad, aka everything I want in a summer meal. Even A, not a farro fan, pronounced it “not bad,” which translates into high praise. So lesson learned, I guess? Life is messy and repetitive, but sometimes it brings us good salad.

Marinade/dressing:
1 lemon
¼ cup olive oil
3 cloves garlic, divided
1½ teaspoons dried oregano
½ teaspoon salt
Freshly ground black pepper to taste
Salad:
1 pound boneless, skinless chicken thighs
1 cup farro
1 large red or yellow bell pepper, diced
1 pint cherry tomatoes, halved
2 medium Persian cucumbers, diced
½ cup chopped fresh parsley
2-4 ounces feta
  1. Remove the zest from the lemon and set it aside. Squeeze the juice from the lemon into a separate bowl. You’ll need at least ¼ cup juice.
  2. Prepare the dressing/marinade by mincing two of the three cloves of garlic and combining them in a small bowl with ¼ cup lemon juice, olive oil, oregano, salt, pepper, and a pinch of the lemon zest. Whisk these ingredients until well combined.
  3. Place the chicken thighs in a ziplock bag and add half of the dressing, saving the rest to add to the salad later. Mince one more clove of garlic and add it to the chicken and marinade. Squeeze the air out and massage the bag to make sure the thighs are well coated in the marinade. Refrigerate the chicken for at least 30 minutes, up to 24 hours.
  4. While the chicken is marinating, cook the farro according to the package directions, drain in a colander, and let cool to room temperature.
  5. Heat a skillet over medium heat. Remove the chicken thighs from the marinade, add them to the pan, and cook on each side until they are well browned and cooked through (about 5 minutes per side). Remove the cooked chicken from the skillet and let it rest for about 5 minutes. Once it’s slightly cooled, chop the chicken into bite-sized pieces.
  6. Finally, build the salad. Add the cooked and cooled farro to a large bowl. Top with the bell pepper, tomatoes, cucumber, parsley, and chopped chicken. Crumble the feta over the top and add a pinch or two of the lemon zest. Pour the remaining dressing over the salad and toss to coat. Serve immediately or refrigerate until ready to eat.
Serves: 4-6
Time: 1 hour, plus 30 minutes to 24 hours marinating time
Leftover potential: Great.

Monday, September 28, 2015

GARDEN VEGETABLE PIZZA


I’m always on the lookout for more veggie pizza recipes, especially ones that can work as somewhat light, summery fare—since pizza is about the only thing I’ll suffer turning the oven on for during even the worst heatwave. This recipe from Annie’s Eats meets both criteria, with a colorful confetti of seasonal bounty. You could use goat cheese, feta, or another crumbly cheese instead if you must, but I love the creamy-garlicky Boursin here. (A is not a fan, however, so I’ll be scarfing this one solo.)

I highly recommend using a mandoline to get the summer squash slices as thin as possible; I was always too scared to use one, but I recently acquired this Oxo slicer/grater set and only belatedly realized it was basically a mandoline in disguise. Surprise, surprise, I love it! The cheese graters are just OK, but I could slice and julienne things all day long. However, you’re going to have to slice your cherry tomatoes by hand, and it’s just as much of a pain as you think it would be. If you want to use Roma or another larger tomato instead, I’d understand.

The only change I’ve made to the recipe is to thinly slice the red onion. Against my better judgment, I followed the original instructions to chop it, and the oniony flavor ended up almost overwhelming the whole pizza. Thin slices are less intrusive—and as a bonus, you can use your mandoline for that too! I also garnished with more basil, because nothing beats that fresh green taste with summer vegetables.

2 tablespoons olive oil, plus extra to taste
2 cloves garlic, finely minced
½ teaspoon red pepper flakes
1 pound pizza dough
1 very small zucchini, very thinly sliced
1 very small yellow squash, very thinly sliced
1 teaspoon kosher salt
6 ounces mozzarella cheese, shredded
1 cup grape or cherry tomatoes, sliced
½ red onion, thinly sliced
2-3 ounces soft garlic herb cheese, such as Boursin
¼ cup chopped fresh basil leaves, plus extra to taste
  1. Heat the oil in a small skillet over medium-low heat. Stir in the garlic and red pepper flakes. Let the oil infuse for about 5 to 10 minutes, reducing the heat if the garlic starts to brown. Remove from the heat.
  2. Meanwhile, place the zucchini and squash slices in a colander and toss with the salt. Let stand 15 to 20 minutes to allow excess water to drain from the vegetables. Lay the slices out on a clean kitchen towel and blot the surface to remove additional water and the salt.
  3. To make the pizza, heat the oven to 450 degrees. Roll out the pizza dough on a baking sheet dusted with cornmeal. Brush the center of the dough with the garlic-infused oil. Evenly sprinkle on the mozzarella, then layer the zucchini and squash slices in concentric circles over the cheese. Top with the tomatoes, red onion, Boursin and basil.
  4. Bake 10 to 12 minutes, or until the cheese is melted and bubbling and the crust is lightly browned. Remove from the oven, let cool slightly, slice, and garnish with additional fresh basil.
Serves: 4
Time: 1 hour
Leftover potential: Good.

Tuesday, July 28, 2015

GRILLED CHICKEN PANZANELLA


I’ve had my old reliable bread-and-tomato salad recipe for more than a decade now, but there’s always room for innovation. I usually serve my panzanella alongside grilled chicken, so when I saw a Serious Eats recipe that just put the chicken right into the salad, it seemed like the logical next step. I do so love a one-dish meal.

Through three rounds of trial and (not very much) error, I’ve evolved the perfect hybrid between old and new. From my previous version, I kept the herb mixture (cilantro and dill as well as basil) and the trick of adding a couple of tablespoons of water to extend the dressing without making it too oily. I also swiped a simple grilled-chicken marinade from other recipes in my arsenal, and used my usual stovetop method of toasting the croutons. The new recipe not only adds the chicken, but also crisp cucumbers and a sweet hit of balsamic in the red-wine vinaigrette. The result might be one of my favorite summer salads, colorful, juicy, deeply flavorful and perfectly filling.

2 tablespoons lemon juice
2 large garlic cloves, smashed, plus 1 small garlic clove, minced
12 tablespoons olive oil, divided
Kosher salt and freshly ground black pepper to taste
1 to 1½ pounds boneless, skinless, chicken breasts (about 2 large), halved lengthwise
4 cups 1-inch cubed French bread
3 to 4 large ripe tomatoes, cored and cut into 1-inch cubes
2 large Persian cucumbers, halved and cut into ½-inch-thick half-moons
½ small red onion, sliced thinly
½ cup chopped basil
¼ cup chopped cilantro
2-3 tablespoons chopped fresh dill
3 tablespoons red wine vinegar
2 tablespoons balsamic vinegar
  1. In a large zip-top bag or a large glass bowl with a lid, mix together the lemon juice, 2 smashed cloves garlic, ¼ cup olive oil, 1 teaspoon salt, and pepper to taste. Add the chicken breasts, make sure they get thoroughly coated with the marinade, and let them marinate at least one hour.
  2. Meanwhile, heat 2 tablespoons oil in a large skillet over medium heat. Add bread cubes, toss well, and sauté until lightly toasted, stirring occasionally. Season with salt and pepper, and let cool to room temperature.
  3. Grill the chicken until cooked through, let cool to room temperature, and cut into 1-inch cubes.
  4. Place tomatoes, cucumbers, onion, herbs, and chicken in a large bowl.
  5. Whisk remaining 6 tablespoons oil, red wine vinegar, balsamic vinegar, 1 small clove minced garlic, 2-3 tablespoons water, 1 teaspoon salt, and pepper to taste in a medium bowl until combined.
  6. Pour about ¾ of the dressing over the salad and toss thoroughly to moisten. Add bread cubes, toss well, add remaining dressing if needed, season to taste with salt and pepper, and let sit for about 15 minutes before eating.
Serves: 4 to 6
Time: 1½ hours
Leftover potential: Good, but store bread cubes separately, adding to the leftover portions about 15 minutes before you eat them.

Thursday, February 12, 2015

KALE COBB SALAD


Meet our new favorite salad. I feel a little silly being like, “Hey guys, look what I just discovered!” when Cobb salad has been around since the 1930s, but the addition of kale makes it hip, right?

Having grown up with a horror of so many ingredients all mixed together, especially cold meat and eggs, I never really gained much familiarity with the classic salads of yore, and I certainly never saw a Cobb look remotely appealing until I paged to this recipe in Dinner: The Playbook (yes, again; and here is the original post at Dinner: A Love Story). It was so pretty, and I realized, Wait! I like avocado and bacon and tomatoes and cheese and eggs and chicken! I also love kale, and swapping it in for lettuce here isn’t just blind trend-following—it gives you a definitive green presence that stands up to the weight of all those hefty toppings and, better still, lasts for days without wilting so you can stash the leftovers all ready to go. We’ve already eaten this twice in one month, and it’s destined to become a year-round staple. I love the rainbow of wholesome ingredients and fact that it makes a perfectly easy, protein-packed work lunch that’s hearty without being heavy; A loves that it’s a satisfying meal with a variety of flavors and textures, especially bacon and blue cheese to help temper his kale skepticism.

I made a few slight modifications—omitted sugar from the vinaigrette, massaged the kale with half the dressing right away and let it marinate a bit (key, in my view, to a successful kale salad), and increased some of the toppings to make an even more substantial main dish—one egg and one slice of bacon per serving, and more tomatoes to amp up the color. And I went a bit easy on the cheese, because blue isn’t my favorite, although it definitely adds an important flavor contrast here. The original recipe says you can use feta instead, and the second time around I tried that and preferred it, with just a light dusting of blue for a hint of funk.

A came in just now to prod me to go to bed on time, but granted me a reprieve as soon as he saw what I was working on, saying, “The world needs to know about Cobb salad.” So there you have it! It may not be breaking news, but just in case you weren’t aware, Cobb salad—this one, at least—is delicious.


1 heaping teaspoon Dijon mustard
¼ cup red wine vinegar
A squeeze of lemon juice
Salt and pepper to taste
1/3 cup olive oil
1 large bunch Tuscan kale, stemmed and thinly sliced
2-4 hard-boiled eggs, peeled and chopped
1 to 1½ cups poached, grilled, or roasted chicken breast, shredded or cubed
3-4 slices bacon, cooked and crumbled
2-4 tablespoons thinly sliced scallions or minced chives
½ to 1 cup cherry or grape tomatoes, halved (or quartered if large)
1 avocado, diced
¼ to ½ cup crumbled blue or feta cheese
  1. In a small bowl, mix the mustard, vinegar, and lemon juice, then season generously with salt and pepper to taste. Gradually whisk in the olive oil until emulsified.
  2. Place the shredded kale in a large bowl and drizzle with about half of the vinaigrette. Mix thoroughly with your hands until the leaves are evenly coated, and let sit for at least 15 minutes while you assemble the remaining ingredients.
  3. Portion out the dressed kale equally into four salad bowls. Top each portion with a quarter of the eggs, chicken, bacon, scallions, tomato, avocado, and cheese, then drizzle with a quarter of the remaining dressing and toss gently. (If you prefer, you can just mix all the ingredients together in a very large serving bowl and go from there. Or you can place each component in a separate bowl and let everyone assemble their own, salad-bar style, especially if you have picky eaters on hand.)
Serves: 4
Time: 30 minutes (1 hour if you need to boil the eggs, cook the bacon and poach the chicken)
Leftover potential: Awesome. 

Thursday, August 21, 2014

ROASTED TOMATO, KALE, AND FARRO SALAD


I’m fond of farro, but not unconditionally; its appeal depends a lot on the company it keeps. The first time I tried it, in a salad with butternut squash, I didn’t like it. The second, third, and fourth times, with beef, mushrooms, and tomatoes, respectively, I loved it. But the fifth time, recently, with peaches and arugula (so pretty!), was less successful. Lesson learned: For me, the keys to a good farro dish are bold flavors, especially umami and acid. So when I saw a recipe online for orzo with roasted tomatoes and kale, I thought, “I bet that would work well with farro!”—and I was right.

Roasted tomatoes have become staples in my kitchen. They were on my list of favorite recipes of 2012, got added to a pizza that made the list in 2013, and are a major component of the pizza that will probably end up one of my 2014 greatest hits. It was actually that 2013 roasted tomato, kale, and feta pizza that inspired me to add feta to this salad, and its strong briny creaminess is another important counterbalance to the earthy, chewy farro. I amped up the tartness with a basic balsamic vinaigrette (the orzo recipe only had oil, no vinegar), and long story short, I loved the end result. It’s enough to inspire me to turn on the oven even in the dog days of summer, but it will also make a perfect winter salad during the long stretches when kale dominates the produce displays (particularly since you don’t need perfect in-season tomatoes for roasting; the insipid grocery-store kind do just as well). Grains and greens, cheese and caramelized tomatoes—what more can you ask for?

1 pound cherry or grape tomatoes (about 3 cups), halved
½ cup olive oil, divided
1 tablespoon maple syrup (preferably Grade B)
¾ teaspoon salt, divided, plus extra to taste
1 cup uncooked farro
2 tablespoons balsamic vinegar
1 small garlic clove, minced
Freshly ground black pepper to taste
1 bunch Tuscan kale, stemmed and thinly sliced
About 4 ounces feta cheese, crumbled
  1. Preheat the oven to 350 degrees. Place the cherry tomatoes on a parchment-lined rimmed baking sheet. In a small bowl, whisk together ¼ cup olive oil, maple syrup, and ½ teaspoon salt. Pour the mixture over the tomatoes and gently toss until well coated. Arrange the tomatoes in a single layer, cut side up, and roast, without stirring, until the tomatoes shrink a bit and caramelize around the edges, 45 to 60 minutes. (You can do this up to a week ahead of time if you like—just let the tomatoes cool, scrape them into a glass or plastic container along with any liquid that was left on the baking sheet, seal tightly, and store in the refrigerator.)
  2. While the tomatoes roast, in a medium saucepan combine the farro and enough cold water to cover it by about an inch. Soak for 20 minutes. Drain well and return the farro to the pan, again covering it with cold water. Add a few generous pinches of salt and bring to a boil over high heat. Lower the heat, cover, and simmer for 20 minutes, until the farro is tender but still has some bite. Drain well and spread on a clean baking sheet to cool.
  3. While farro is cooking and cooling, whisk together the balsamic vinegar, minced garlic, ¼ teaspoon salt, pepper to taste, and ¼ cup olive oil in a small bowl until emulsified.
  4. Place the shredded kale in a large bowl and toss with about half the dressing. Mix well with your hands and let sit for at least 15 minutes until softened.
  5. When the farro and tomatoes have cooled to room temperature, add them to the kale along with the rest of the dressing. Crumble in feta to taste and toss well. Season to taste with salt and pepper.
Serves: 4-5
Time: 1½ hours
Leftover potential: Great.

Saturday, July 05, 2014

SALMON SALAD


I never thought I’d be interested in something called “salmon salad.” Let’s face it, it sounds weird—even though it’s basically just a modified Nicoise with salmon instead of tuna. But cold cooked fish is not my thing, and recently I’ve decided to face the fact that salmon isn’t my thing either, no matter how it’s cooked (raw is a different story; I could eat salmon sushi all day long). Yet the photo in Dinner: A Love Story still drew me in, with its rainbow of purple potatoes, green beans and cucumbers and herbs, yellow corn, red tomatoes, and the lovely pink salmon. Those are all my favorite summer vegetables, and I love lemony-mustardy vinaigrettes like this one—would all that be enough to make chilled salmon palatable?

Short answer: Yes, for me. A was not a fan of this one, but I kind of love it. It turns out that tearing it into little bits and mixing it with lots of other things mitigates most of the textural issues I have with cooked salmon. This salad is a great way to get me to eat fish AND make it portable—the leftovers keep well for several days and can be consumed at work without inflicting any of the dreaded fish-reheating smell (the scourge of so many office kitchens) on your colleagues. I still prefer white fish overall, but this beautifully refreshing summer salad is my new favorite way to work the occasional smattering of salmon into my diet.

My only notable changes to the original recipe were to add dill, which is just so perfect with salmon (and green beans, and potatoes, and cucumber…), and to omit the sugar from the vinaigrette. I made it as written the first time, but I should have remembered that I never add sugar to my dressings—not surprisingly, it tasted too sweet to me. I prefer things acidic, and the starchy potatoes and dense salmon can definitely stand up to tart flavors. I’ve marked the sugar as optional here; I’d recommend tasting the dressing without it first, and then adding it in ½ teaspoon increments to take the sour edge off if needed.

¼ cup red wine vinegar
2 teaspoons Dijon mustard
1 teaspoon sugar (optional)
About 1 teaspoon fresh lemon or lime juice, to taste
½ cup olive oil
Salt and pepper to taste
1 pound salmon fillet
1 large handful (about 1 cup) small red, purple or yellow potatoes, halved or quartered depending on size
2 ears corn
1 large handful (about 1 cup) thin green beans, trimmed and chopped into 1-inch pieces
1 cup cherry or grape tomatoes, halved
1 medium Persian cucumber, seeded and chopped
4 scallions (white and light green parts), chopped
2 tablespoons chopped fresh cilantro (parsley would also be good here if you don’t have cilantro)
2 tablespoons chopped fresh dill
  1. Preheat the oven to 400 degrees.
  2. To make the vinaigrette, in a small bowl whisk together the vinegar, mustard, sugar (if desired), lemon/lime juice, oil, and salt and pepper to taste. Set aside.
  3. To make the salmon, sprinkle the fish with salt and pepper. Roast in a foil-lined baking dish for 15 minutes. Set aside and let cool.
  4. Meanwhile, bring a medium pot of salted water to a boil. Add the potatoes and cook until a knife slices through them with no resistance, about 10-12 minutes. Using a slotted spoon, remove the potatoes to a colander and let cool.
  5. Add the corn to the same pot of water. Boil for 4 minutes. Remove to a cutting board and allow to cool.
  6. Add beans to the same pot of water and cook for 3 minutes. Remove with a slotted spoon and let cool in a colander.
  7. Place the tomatoes, cucumber, scallions, cilantro, and dill in a large bowl. When potatoes and green beans are room temperature, add them to the mixture. Cut the kernels off the corn cobs and add those to the bowl. Gently flake the salmon apart into bite-sized chunks and add it to the salad. Pour on the vinaigrette and toss gently.
Serves: 4
Time: 45 minutes
Leftover potential: Good.

Thursday, March 06, 2014

ROASTED TOMATO PIZZA MARGHERITA


I have all these exotic pizza recipes in my repertoire, from asparagus to zucchini (with hummus and strawberry in between), without a basic Margherita. We make tomato-sauce pizza at least once a month, but we always load it up with our favorite toppings: mushroom and sausage for me, pepperoni and jalapeno for A. Yet cheese pizza was my favorite as a picky child, and as an adult I’ve come to appreciate its sophisticated cousin, Margherita, as the archetypal authentic Neopolitan standard at fancy artisan pizzerias, where its simplicity lets high-quality crust, sauce, and cheese shine through. Making it at home, though, seemed like it might be too…plain, at least until I spotted a delectable-looking “Pizza Margherita, Fancified” at Annie’s Eats. With a double hit of tomatoes—in a sauce spiked with cream as well as in my favorite secret-weapon roasted form—it seemed anything but dull.

And indeed (although it is not a true Margherita), this pizza was a minor revelation for me, mostly because it threw into question why I’ve been bothering to make pizza sauce out of canned tomato sauce all these years. My old sauce recipe is pretty great, doctored up with herbs, balsamic vinegar, even soy sauce—yet this simple concoction of butter, pureed canned tomatoes, tomato paste, a tiny bit of onion, garlic, and red pepper flakes gives it a serious run for its money. The tomato flavor is so much fresher and brighter this way that I feel myself slowly gravitating toward making it my go-to sauce.

The original quantities were a bit odd, calling for less than a full can of tomatoes, but I’ve found that if I use a whole can and increase the other ingredients accordingly, I can make enough for three pizzas in one fell swoop, allowing me to stockpile reserves in the freezer for later use. (If you only feel like making enough for one go-round, for some reason, use the original version at Annie’s Eats.) The cream in the sauce is delicious but not necessary—I might add a bit if I happened to have it sitting around, but it’s almost too decadent for frequent eating, and the sauce is plenty great without it. For the roasted tomatoes, I swapped in my usual recipe. Not much else to it but crust and cheese and basil, but the results are incredibly tasty and far from plain. Even A, who tends to feel that any vegetarian pizza I make would be better with meat (usually bacon) added, really enjoys this (although I’ve also found that sprinkling on some pepperoni and sautéed sliced mushrooms doesn’t hurt when I feel like branching out from the Margherita concept). Only time will tell if this really becomes my regular tomato-sauce pizza recipe, but regardless it’s a delicious diversion.

Tomato sauce (makes enough for three pizzas; freeze the rest for later use):
1 28-ounce can whole tomatoes in tomato puree (I use Trader Joe’s San Marzano)
2 tablespoons butter
6 tablespoons minced onion
2 tablespoons tomato paste
3 cloves garlic, minced
1 teaspoon red pepper flakes
Salt and pepper to taste
¼-½ cup heavy cream (optional)
Pizza:
1 pint cherry or grape tomatoes
¼ cup olive oil
1 tablespoon Grade B maple syrup
½ teaspoon coarse salt
1 pound pizza dough
4 ounces shredded mozzarella cheese
1-2 ounces grated Parmesan cheese
¼-½ cup fresh basil, coarsely chopped
  1. To make the sauce, puree the tomatoes and their liquid in a blender or food processor (or using an immersion blender) until smooth. Melt the butter in a medium saucepan over medium heat. Add the onion and cook about 1 minute, until it begins to soften. Stir in the tomato paste, garlic and red pepper flakes and mix just until fragrant, about 30 seconds. Stir in the tomato puree, lower the heat to medium-low, and simmer about 5-8 minutes, until the sauce is slightly thickened. Season to taste with salt and pepper. Remove the pan from the heat and stir in the cream, if using. Divide the sauce into three equal portions and freeze two of them for in airtight containers for later use.
  2. To make the pizza, preheat the oven to 350 degrees. Slice the tomatoes in half and place them on a parchment-lined rimmed baking sheet. In a small bowl, whisk together the olive oil, maple syrup, and salt. Pour the mixture over the tomatoes and gently toss until well coated. Arrange the tomatoes in a single layer, cut side up, and roast, without stirring, until the tomatoes shrink a bit and caramelize around the edges, 45 to 60 minutes. (You can do this up to a week ahead of time if you like—just let the tomatoes cool, scrape them into a glass or plastic container along with any liquid that was left on the baking sheet, seal tightly, and store in the refrigerator.).
  3. Increase the oven temperature to 450 degrees and roll out the pizza dough on a baking sheet dusted with cornmeal. Spread with an even layer of the tomato sauce. Sprinkle the mozzarella in an even layer over the sauce, and sprinkle the Parmesan over that. Dot the roasted tomatoes evenly over the cheese.
  4. Transfer the pizza to the oven and bake until the cheese is melted and bubbling and the crust is lightly browned, about 10-12 minutes. Remove from the oven and sprinkle the chopped basil over the top of the pizza. Let cool slightly before slicing and serving.
Serves: 4
Time: 2 hours (some work can be done ahead)
Leftover potential: Good; reheat on a dry skillet on the stovetop.

Monday, December 23, 2013

OPEN-FACED EGG, TOMATO, AND CHEESE SANDWICHES


Breakfast sandwiches...I never really saw the appeal, but then I haven’t been wild about eggs until recently. Now an egg on toast sounds cozy and lovely to me—for dinner. An egg on toast with mustard, melted cheddar, and tomato sounds even better. You probably don’t even need a recipe for that, but it wouldn’t have occurred to me without this post from Everybody Likes Sandwiches via Poppytalk. I had some fat sourdough English muffins from a neighborhood restaurant, La Grande Orange, each half just the right size to hold a slice of tomato and an egg comfortably (suddenly this breakfast sandwich thing is making sense). A quick egg-frying and broiler-toasting later, and you’ve got a crispy-gooey delight for any time of day. The cheese that oozes off the bread and browns on the baking sheet is my favorite part. I also love the way the egg yolks get just a little more solid in the oven—still soft, but more gelatinous and less runny. Throw some salad or roasted asparagus on the side and peel an orange to round out your lazy dinner.

1 large tomato, thickly sliced
2 large, thick slices of rustic bread or 2 sturdy split English muffins
2-4 thick slices sharp cheddar cheese (or whatever cheese you prefer, as long as it melts well—Edam and Harvati are also good options)
Dijon mustard to taste
Butter
2-4 large eggs
Salt and pepper to taste

1. Preheat the broiler.

2. Run the bread under the broiler for a few minutes until lightly toasted (sometimes I find it easier to just use a toaster for this).

3. Place the bread on a baking sheet. Spread mustard over the bread, then add the tomatoes and cheese (enough to cover the whole surface of the bread). Place under the broiler for a couple of minutes, just until cheese is melted.

4. Heat a large, heavy skillet over medium-low heat. Add enough butter (1 tablespoon or less) to just coat the bottom of the pan when it melts. When the butter starts to bubble, crack in the eggs and cook until whites are set on the bottom.

5. Slide the eggs on top of the toast (one per English muffin, or one to two per slice of bread depending on the size) and sprinkle with salt and pepper. Return to the broiler for 30 seconds or so, just until the top of the white is fully set and the yolk appears cloudy (or go for a full minute if you want your yolks solid).

Serves: 2
Time: 15 minutes
Leftover potential: No. Eat immediately and make more later.

Wednesday, October 30, 2013

ONE-PAN FARRO WITH TOMATOES


I couldn’t definitively declare that I liked farro until I successfully prepared it in a context that didn’t involve mushrooms. When this recipe appeared at Smitten Kitchen, it seemed like the perfect opportunity: colorful, summery, bright with tomato and basil, and about as far from earthy brown mushrooms as you can get. As a bonus, it’s a nifty cooking method—just throw the ingredients into a pot and boil for 30 minutes, end of story. I had my doubts that something so easy and breezy could really result in deep and complex flavors, but I was happy to be proven wrong. The onions and tomatoes break down into a savory sauce that makes the farro sing.

The first time, I followed the Smitten Kitchen directions exactly and it was good. Then I spotted another spin on the same dish at The Kitchen Sink Recipes, mostly the same but with the quantities slightly increased (which appealed to me because the original recipe had yielded a slightly awkward three main-dish servings, and especially after discovering that the leftovers tasted even better the next day, I prefer to have at least four) and with arugula instead of basil (which appealed to me because I love arugula and because if I can cram enough vegetables into the main dish I don’t have to bother with making a side salad). I made a few tweaks, upping the garlic and adding back in the basil. Matters were slightly complicated by the fact that I’d accidentally bought Trader Joe’s 10-Minute Farro, which has already been parboiled and which I feared would become disgustingly mushy if subjected to the 30-minute boil needed to cook off all the liquid the recipe calls for. (Online opinions seem divided on the TJ’s farro, with many loving it but others finding it no match for the regular stuff.) I decided to make the best of it by skipping the presoak and forging ahead as written—and the farro turned out perfectly, just as chewy as ever, so I’m tempted to keep using the TJ’s version, especially since it comes in convenient 1½-cup bags, exactly the quantity needed for this recipe. I served it with a poached egg on top and it was even more heavenly.

This really is a miraculous recipe, a wholesome weeknight meal that coaxes big taste out of simple ingredients. And if you haven’t tried farro before, this may be the way to do it: easy, no fuss, with familiar elements that transform into something even better.

Note, August 2016: I value this as a hearty vegetarian entree, but in an effort to make it more appealing to A, I have tried it with Italian sausage (about 8 ounces, chicken or pork, crumbled and browned in a separate skillet, drained, and added to the farro with the arugula and Parmesan in Step 3) and I gotta say it’s a pretty delicious variation.

3 cups water
1½ cups semi-pearled farro
1 medium yellow onion, quartered and sliced thinly
2 large cloves garlic, halved and sliced thinly
4 cups (2 pints) halved grape or cherry tomatoes
1¼ teaspoons kosher salt, plus extra to taste
¼ teaspoon red pepper flakes
1 tablespoon olive oil, plus extra to taste
2 cups baby arugula
1 handful basil leaves, sliced into thin ribbons
¼ cup grated Parmesan cheese, plus more for serving

1. Place water and farro in a medium saucepan to presoak for at least 5-10 minutes while you prepare the other ingredients. (Skip the soaking if using 10-minute farro.)

2. Add the onion, garlic, tomatoes, salt, red pepper flakes, and 1 tablespoon olive oil to the farro. Bring uncovered pan to a boil. Set a timer for 30 minutes and reduce heat to a gentle simmer, stirring occasionally. When the timer rings, the farro should be perfectly cooked (tender but still a bit chewy) and the liquid should be mostly absorbed.

3. Add the arugula and Parmesan; stir to combine and to wilt the arugula.

4. Transfer to serving bowls, drizzle with a bit more olive oil, and sprinkle with basil and additional Parmesan to taste.

Serves: 4
Time: 45 minutes
Leftover potential: Great; tastes even better the next day.

Wednesday, January 09, 2013

ROASTED TOMATO, KALE, AND FETA PIZZA


When I named Roasted Cherry Tomatoes as one of my top 10 2012 recipes, I mentioned that I’d finally managed to do something with them beyond shoving them directly into my mouth. That something was this pizza recipe, which I adapted from Annie’s Eats to use the tomato-roasting method I’m already used to. As you can imagine, since it features not only the roasted tomatoes but also two of my other food obsessions, kale and feta, I adored the result; the earthy kale and salty cheese are the perfect foils for the tart-sweet tomatoes.

The original recipe had you make a garlic-and-hot-pepper-infused oil that you brushed onto the crust before adding the other toppings, but I’m lazy, and I figured my tomatoes would already be adding enough oil, so I just added the garlic and red pepper flakes to the kale when I sautéed it and it was just dandy.

All my pizza recipe quantities are approximate (I usually just eyeball the toppings until it seems like I’ve added enough), but since I made it quite a while ago, this one may be even more so. I made a full batch of roasted tomatoes—some leftover cherry tomatoes I had lying around, plus some small plum-like heirloom tomatoes that I cut into slices—but I don’t think I put them all on the pizza; I probably just snacked on the rest. And I may have used more cheese. Just do what feels right to you, but definitely make this pizza, because it’s a winner. I’m already hungry for more.

1 pint cherry tomatoes, any color, stemmed (you can also use 5–6 plum tomatoes)
¼ cup + 1 tablespoon extra-virgin olive oil, divided
1 tablespoon Grade B maple syrup
½ teaspoon coarse salt, plus extra to taste
2 cloves garlic, minced
½ teaspoon red pepper flakes
3-4 cups kale leaves, stemmed and roughly chopped
1 pound pizza dough
2 ounces mozzarella, shredded
4 ounces crumbled feta cheese

1. Preheat the oven to 350 degrees. Slice the cherry tomatoes in half (or, if using plum tomatoes, slice them into ½-inch-thick slices) and place them on a parchment-lined rimmed baking sheet. In a small bowl, whisk together the ¼ cup olive oil, maple syrup, and ½ teaspoon salt. Pour the mixture over the tomatoes and gently toss until well coated. Arrange the tomatoes in a single layer, cut side up, and roast, without stirring, until the tomatoes shrink a bit and caramelize around the edges, 45 to 60 minutes. (You can do this up to a week ahead of time if you like—just let the tomatoes cool, scrape them into a glass or plastic container along with any liquid that was left on the baking sheet, seal tightly, and store in the refrigerator.)

2. In a medium skillet over medium heat, heat the remaining 1 tablespoon of the olive oil. Add the garlic and red pepper flakes and cook for 1 minute, then add the kale to the pan and cook, stirring occasionally, just until the leaves are wilted. Season with a little salt to taste, then remove from the heat and set aside.

3. Preheat the oven to 450 degrees. Roll out the pizza dough on a baking sheet dusted with cornmeal. Sprinkle the shredded mozzarella over the dough, then add the wilted kale, roasted tomatoes to taste (you may not use all of them), and feta.

4. Bake pizza until the cheese is melted and bubbling and the crust is lightly browned, about 10–12 minutes. Remove from the oven and let cool slightly before slicing and serving.

Serves: 4
Time: 1½ hours
Leftover potential: Good.

Wednesday, October 03, 2012

CHICKEN GYROS: NEW AND IMPROVED


Chicken gyros have become one of our favorite meals, but I’m always stumped about what to serve with them. Granted, the gyros are generously sized, and there are tomatoes, onions, and a little cucumber on top, but I find myself wanting more vegetables, because let’s face it, Greek salads are delicious. My beloved Mediterranean pepper salad, however, in all its colorful, creamy-briny glory, already has a fair amount of overlap with the gyro ingredients: tomatoes, cucumbers, and onions, check, check, check. Making both seemed too labor-intensive and redundant, and A was suspicious of the idea of flat-out replacing the gyro toppings with the salad. So when I found myself craving gyros yet again and puzzling over side dishes, I decided to take my problem to Food Blog Search to see what other people usually serve with them. There, I discovered that Bridget from The Way the Cookie Crumbles had already resolved my very conundrum: How to combine this precise chicken gyro recipe from Elly Says Opa with that exact Mediterranean pepper salad recipe from Smitten Kitchen!

Noting that each time she made the two dishes together, more and more of the salad kept making its way atop the gyros, Bridget figured out a clever way to streamline the two into a single recipe. The key is to make the chicken marinade do double duty, using a couple of tablespoons of it (pre-contact with raw chicken, of course) in lieu of the salad dressing/onion-pickling brine. She also added a few other brilliant innovations, such saving a little unused marinade to toss with the cooked chicken, which moistens the meat and seriously amplifies the flavor, and halving the tzatziki quantity (we always ended up with tons left over, yet I kept on making the full amount for some reason). I added back in one key ingredient from the original recipe, the tablespoon of dried oregano, which for me really brings the Greek taste, and magically, I had the perfect gyros meal I’d been dreaming of. Our pitas are now piled ridiculously high with toppings, and yes, sometimes they collapse entirely and dump their contents onto our plates, but then we just eat everything with a fork. If putting peppers and feta on gyros is wrong, I don’t want to be right. I didn’t think I could love gyros more, but this revamped version is replacing my old one for good.

For the chicken:
¼ cup juice from 1 to 2 lemons
2 tablespoons olive oil
3 medium garlic cloves, crushed
1 tablespoon red wine vinegar
1 teaspoon sugar
2 teaspoons salt, divided
¾ teaspoon freshly ground black pepper
1 tablespoon dried oregano
2 tablespoons plain yogurt
1½ pounds boneless, skinless chicken pieces (thighs, breasts, or a combo)

For the tzatziki:
1–2 small Persian cucumbers
½ teaspoon kosher salt
8 ounces Greek yogurt (I use 2%)
1 tablespoon freshly squeezed lemon juice
1½ teaspoons white wine vinegar
1 clove garlic, minced
¼ teaspoon freshly ground black pepper
½ tablespoon minced fresh dill (optional)

For serving:
½ red onion, halved lengthwise and sliced thinly
1 small red bell pepper and 1 small yellow bell pepper, quartered lengthwise and sliced thinly
1–2 small Persian cucumbers, halved lengthwise and sliced thinly
1 tomato, chopped, or 1 cup cherry or grape tomatoes, halved
½ cup crumbled feta
4-6 Greek-style (pocketless) pitas

1. In a medium bowl, whisk together all the chicken marinade ingredients except 1 teaspoon salt, the yogurt, and the chicken. Measure out 3 generous tablespoons of the marinade into a small bowl; set aside. Add the yogurt and another teaspoon of salt to the remaining marinade. Place the chicken in the marinade; cover with plastic wrap, and refrigerate 15 minutes to 1 hour.

2. Meanwhile, for the tzatziki, grate or shred the cucumber, place it in a colander in the sink or over a small bowl, and add the salt. Set aside for at least 15 minutes to drain. Transfer the cucumber to a clean kitchen towel and squeeze dry. Combine the drained cucumber with the yogurt, lemon juice, vinegar, garlic, pepper, and dill.

3. Add 2 tablespoons of the reserved marinade to a bowl and add the sliced onion. Set aside to lightly pickle while you prepare the remaining toppings. Mix the bell pepper, sliced cucumbers, tomato, and feta into the bowl with the onion.

4. Prepare the grill or broiler. Remove the chicken from the marinade and grill/broil until cooked through. Allow it to rest for a few minutes, then slice into strips. Toss the chicken with the remaining 1 tablespoon reserved marinade.

5. Heat your pitas for a few minutes in a warm oven, in a skillet on the stove, or on the grill, or cover them with a damp paper towel and microwave for about 30 seconds. Top each pita with some chicken, tzatziki, and vegetable mixture.

Serves: 4–6
Time: 1–1½ hours
Leftover potential: Good; store chicken, tzatziki, vegetable topping, and pita separately.

Monday, September 17, 2012

ROASTED CHERRY TOMATOES


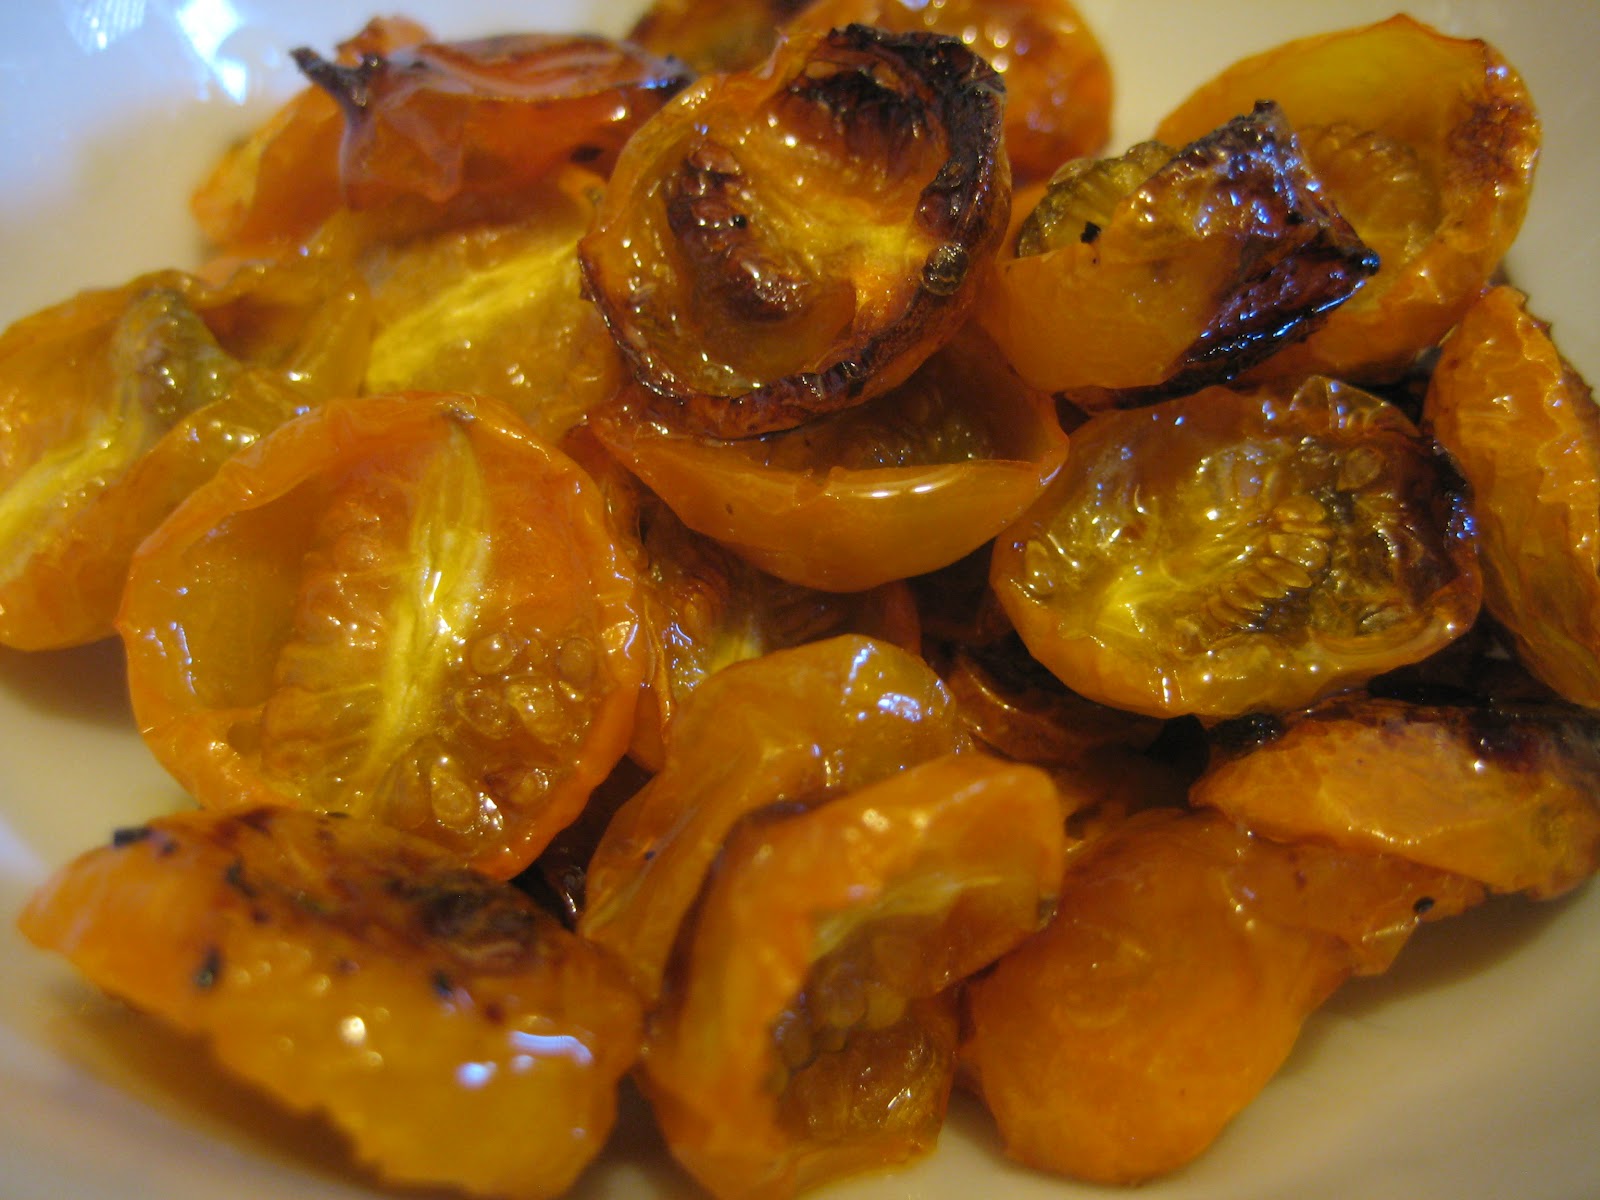
Here’s another secret I’ve been keeping from you: the best thing ever to do with leftover cherry tomatoes (or grape tomatoes, or whatever shape the little guys happen to be). I don’t know about you, but often I used to be plagued by partially used baskets of small tomatoes; sure, you can just eat the really good height-of-summer ones out of hand, but what about the slightly softened, wizened ones that remain at the end of the week, or the less-than-desirable wintertime grocery-store ones that taste OK when cooked but are bland when raw? If I couldn’t sneak them into a meal somewhere, too often they’d end up in the trash. One Friday, faced with yet another wilting cherry tomato surplus, I started Food Blog Searching and found this recipe at Leite’s Culinaria, from Heidi Swanson’s Super Natural Every Day. I didn’t have to buy any special ingredients, and it was so easy to throw together that I figured the stakes would be low if I failed, so I decided to give it a shot, letting the tomatoes brown in the often while I watched a movie, filling the apartment with a wonderful aroma. Putting maple syrup on tomatoes felt strange, but that dash of extra sweetness was the key to transforming my wrinkly old bottom-of-bowl specimens into amazingly addictive bits of caramelized tomato candy. (For best results, use Grade B syrup, which lends a tantalizing smokiness.)

I’ve always hated sun-dried tomatoes—the raisins of the tomato world!—but these were worlds away from any of the bitter, leathery monstrosities I’ve ever had. The flavor concentrates, but some juiciness remains, along with an irresistible tender-chewy texture (yes, these will stick in your teeth and you will love it) and the perfect sweet-tart-salty balance that all the finest snacks possess. I ate every single one straight off the baking sheet that day, and I’ve made these probably a dozen times since then, often just a half-recipe or less, depending on how many orphaned cherry tomatoes are on hand. The recipe is so simple, barely a recipe at all once you’ve made it a couple of times, that I tend to do this as an afterthought and immediately devour the evidence without photographing it. But finally, this time around, the lighting was pretty good and I already had my camera in the kitchen to document something else I was working on when these tomatoes came out of the oven, and now I can finally share these with you. Make them before tomato season is over! Or, if you must, make them in January with out-of-season ones from South America; it’s the best treatment for those poor things and will convert them into something far better. If you don’t want to eat them straight out of the oven, I’m sure they’re wonderful on pizzas, pasta, salads, and more. Just don’t forget to snack on the hardened puddles of syrupy juice that adhere to the edges of the parchment—they may look blackened and burnt, but peel them up and pop them in your mouth and they’re like little bites of toffee. Tomato toffee!

1 pint cherry tomatoes, any color, stemmed
¼ cup extra-virgin olive oil
1 tablespoon Grade B maple syrup
½ teaspoon coarse salt

1. Preheat the oven to 350 degrees.

2. Slice the tomatoes in half and place them on a parchment-lined rimmed baking sheet.

3. In a small bowl, whisk together the olive oil, maple syrup, and salt. Pour the mixture over the tomatoes and gently toss until well coated. Arrange the tomatoes in a single layer, cut side up, and roast, without stirring, until the tomatoes shrink a bit and caramelize around the edges, 45 to 60 minutes.

Time: 1 hour
Leftover potential: Good; I like to eat them right away, but they’ll keep for about a week in the refrigerator. Just let them cool, scrape them into a glass or plastic container along with any liquid that was left on the baking sheet, and seal tightly.

Wednesday, July 25, 2012

PESTO CAVATAPPI WITH MUSHROOMS AND TOMATOES


In my misguided youth (specifically, the college and immediate postcollege years), I had a brief but intense love affair with Noodles & Company. It was a new chain at the time, and “upscale” fast food was still a new concept. My tastes, cash flow, and cooking skills were still at beginner’s levels, so a cheap, convenient place that served plentiful pasta in a variety of styles was ideal for my lifestyle. The quality was decent, and while I wouldn’t go out of my way to eat there now, I wouldn’t turn up my nose if it were the best available option in a pinch. Not that I’ve tested this assertion; there are no locations in L.A., so I haven’t eaten at Noodles in at least 8 years. But I’ve still got a soft spot in my heart for it. Recently we visited A’s hometowm of Bloomington, Indiana, where a few years ago the awesome old movie theatre on the main drag closed and was made over into a Noodles & Company location. This is pretty much the height of corporate soullessness, yet as we walked by it and A shook his fist in rage, I’ll admit that a small part of me was thinking, “Mmm…pesto cavatappi.”

Although the macaroni and cheese (with spinach and tomatoes added) was also a favorite, my most-ordered dish at Noodles was always the pesto cavatappi, a delightfully curly pasta shape tossed with mushrooms, tomatoes, and a pesto-white-wine-cream sauce. It suddenly struck me that this is the kind of thing I could easily make for myself now—and make it better, to boot—and that copycat recipes were probably widely available on the Internet. Sure enough, they were, but they all varied widely, and I couldn’t manage to find one authoritative version I was really happy with. Still, it’s hardly rocket science to toss together pasta, homemade pesto, mushrooms, and tomatoes, so I figured I could wing it. This recipe at Cooking With Cristina seemed the likeliest candidate, since it was based on one posted at Yahoo Answers by a supposed former Noodles cook, but I also threw in a few elements (red pepper flakes, garlic) from this version, just for added zip. (I rarely worry that new things I cook will fail spectacularly, but I always fear that they might turn out bland and boring.) I wanted to use a full box of pasta (I love having pasta leftovers in the fridge and hate half-empty boxes in the cupboard), so I tried to increase the other quantities accordingly (and I increased the vegetables even more, because I love vegetable-heavy pasta dishes). I used my own recipe for pesto, which is just the Better Homes and Gardens Cookbook one minus the pine nuts (too expensive, they always seem to go bad before I can use them up, and ever since I started reading about pine nut mouth on the Internet I’ve been mildly afraid of them).

The result was delicious and really did taste like my memories of pesto cavatappi, but it wasn’t pesto-y enough, so I made it again with double the amount. A also thought there could have been more mushrooms, so I doubled those too. These were both excellent decisions. I increased the wine and cream quantities a bit to compensate, although the sauce ended up on the soupy side, so I’m not sure I’d go quite that far next time, which is why I’ve just given a range of measurements below. Overall, this is a wonderfully colorful and flavorful pasta dish that’s easy to make. The wine, cream (such a small quantity it’s indetectible if you don’t know it’s there, yet it adds a luxurious texture), and vegetables elevate it far above basic pasta with pesto, which (maybe because it was one of the first things I learned to cook on my own) always seems a bit dull to me now. A is less passionate about pasta on the whole than I am, but he devoured this one eagerly. I was glad to be able to serve myself a nice dose of nostalgia, but in a way that fits my cooking style today.

2 cups firmly packed fresh basil leaves
1 cup firmly packed fresh parsley sprigs, stems removed
1 cup grated Parmesan or Romano cheese, plus extra to taste
4 large cloves garlic, divided
½ teaspoon salt, plus extra to taste
½ cup + 1 tablespoon olive oil, divided
1 pound cremini mushrooms, sliced
¼–½ teaspoon red pepper flakes
1 pint (2 cups) cherry or grape tomatoes, sliced in half
⅓–½ cup white wine
¼–⅓ cup heavy cream
1 pound cavatappi
Freshly ground black pepper to taste

1. Place basil, parsley, 1 cup cheese, 2 peeled and quartered garlic cloves, and ½ teaspoon salt in a food processor or blender and puree into a paste. Add ½ cup olive oil and continue to process until the pesto has the consistency of softened butter. There should be about 1 cup of pesto.

2. Bring a large pot of salted water to a boil and cook the pasta until al dente. Drain.

3. While the pasta is cooking, heat a large skillet over medium heat and add the remaining 1 tablespoon olive oil. When it’s warm, add the sliced mushrooms and sauté for about 5 minutes. Mince the remaining 2 cloves garlic and add them to the skillet along with the red pepper flakes. Cook 1 minute, then add the tomatoes and cook for 5 to 10 minutes, until the mushrooms have released their juices. Add the wine and reduce for about 2 minutes, then add the cream and cook for another couple of minutes, or until most of the liquid has evaporated (you still want some moisture, but the sauce shouldn’t be too soupy). Add the pesto, stir well, and remove from heat.

4. Add the cooked pasta to the sauce and toss well. Season with salt and pepper to taste. Serve garnished with additional grated Parmesan or Romano cheese.

Serves: 6
Time: 1 hour
Leftover potential: Great.

Monday, June 11, 2012

ENFRIJOLADAS


I used to hate corn tortillas. I can only attribute this to having grown up in the Midwest, because ever since I moved to Southern California, I’ve gradually grown to love them, which I assume is I because I’ve finally been exposed to fresh, handmade, tender tortillas instead of the dry, mealy ones of my memories. (I don’t mean to malign the Midwest; Minnesota actually has a large Mexican population and you can get excellent tortillas there now, but if they existed in the 1980s and 1990s, I didn’t encounter them or was too picky to try them.) I still don’t really bother with average mass-produced corn tortillas, but every now and then I make a pilgrimage to my favorite Mexican grocery for a warm stack of their housemade ones. The only problem is that the smallest package of these still contains dozens of tortillas (I’ve never counted, but I’d say at least 48), and with no preservatives in them, they only stay moist, soft, and taco-worthy for a few days. Granted, this heap of tortillas sets me back less than $2, but I hate to see them go to waste. The less-fresh ones are great for making quesadillas or tostadas or baking into chips to dip in salsa, and of course they’re delicious in soup, but even after all that I can still find myself with leftovers, so I’ve been on the lookout for other ideas.

When I spotted a recipe for enfrijoladas—basically, enchiladas made with a bean sauce instead of tomato sauce—at Tasty Kitchen, it seemed like the perfect solution. But at second glance, I was a bit put off by the fact that the sauce was made out of canned refried beans, thinned with broth. (Nothing especially wrong with canned refried beans, mind you, but I’m a recent convert to bean-loving, and in my bean-hating days, refried beans grossed me out the most.) Wouldn’t it make more sense to puree freshly cooked dry beans, or even canned beans, in their liquid? I hit the Internet to find out, and after a lot of searching I found what I was looking for at Pati’s Mexican Table: a series of recipes for frijolas de olla (cooked beans), pureed beans, frijoles colados (refried pureed beans), and finally enfrijoladas. Pati’s enfrijoladas were simpler and more authentic, with no cheese filling, no baking, and no toppings beyond queso fresco, avocado, and crema—lovely, I’m sure, but I liked the idea of filling and baking them and making some sort of salsa-like toppings, so I combined Pati’s many recipes for the bean mixture with the Tasty Kitchen method, then improvised my own topping out of various fresh southwesternish vegetables.

I feel a bit sheepish posting this here because I don’t think I’ve perfected it yet, but if I don’t get it written down I’m afraid I’ll forget it entirely. And my enfrijoladas were very good, even though I think my bean mixture was still a bit too thick overall and I probably used a bit too much of it (after the first few tortillas tore I thinned it further, but the end result was still on the clumpy, casserole-ish side, with the enfrijoladas completely breaking down when I tried to get them out of the pan). Luckily, they were so delicious that I didn’t really care what they looked like, and the colorful topping helped to mask my aesthetic sins. This may seem like a lot of work to go through for what is basically an inside-out bean and cheese enchilada, but none of the steps were especially hard and I think the end result was worth it.

You could basically put whatever you want inside these; plain cheese was sufficient for me, but to ease A’s suspicions about such a bean-heavy dish, I threw in a little cooked chicken from my stash in the freezer, and it did add some texture. You could also put whatever you want on top, but I must say I was very pleased with my version.

P.S. I really recommend refrying your beans in bacon fat. It adds a wonderful smoky flavor that makes all the difference, in my opinion.

1 pound dry pinto or black beans
1 large yellow or white onion, peeled and halved
1 tablespoon kosher or sea salt, plus more to taste
2–3 tablespoons canola oil or bacon fat
12–16 corn tortillas (you may want to have extras on hand in case some of them tear)
2 to 3 cups grated pepper Jack cheese
1 to 2 cups cooked cubed or shredded chicken (optional)
1 pint cherry tomatoes, halved
Cooked kernels from 1 ear of corn
2–4 green onions, sliced
Chopped cilantro to taste
Several radishes, sliced (optional)
1 ripe avocado, peeled and diced
Juice of 1 large lime

1. Rinse the beans in cold water and drain. Place them in a large, heavy pot and cover with about 10 cups of water, or enough water to come up to at least 3 inches above the top of the beans. Add half of the onion (just the entire piece, no need to cut it up). Bring to a boil over high heat. Reduce heat to medium-low and let simmer, partially covered, for about 1½ hours, or cover pot entirely and transfer to a preheated 250-degree oven for 75 to 90 minutes. When the beans are tender, add 1 tablespoon salt. Let them continue simmering for about another 15 minutes, or until the beans are so soft that they come apart if you hold one between your fingers. If the beans are not yet soft and the pot is drying out, add more water. When the beans are cooked, remove the onion with a slotted spoon and discard.

2. Drain the beans, reserving the liquid. Place the beans and 2 cups of the cooking liquid in a blender or food processor and puree until smooth.

3. Heat a large sauté pan over medium heat. Add the oil or bacon fat and heat until hot but not smoking, about 1 to 2 minutes. Dice the other half of the onion, add it to the pan, and sauté for 3 to 4 minutes, until it is softened and translucent, and has started to slightly brown along the edges. Add the pureed beans a cupful at a time over the sautéed onion, and let the mixture season for 3 to 4 minutes.

4. Reduce heat to low. Gradually add more bean cooking liquid (you can also use chicken or vegetable broth) to thin the bean mixture to a soupy/saucelike consistency. For me, this was at least 2 cups, and I probably could have used more, but your mileage may vary—just experiment until you find the right consistency. If the sauce is too thick, the tortillas will tear when you dunk them in and try to lift them out again; if that happens, just add more liquid and try again with a new tortilla. (The torn bean-soaked tortillas make a good snack for the cook.) Season sauce with salt to taste. I also stirred in a little bit of salsa for additional flavor; I might do more of that next time.

5. Preheat the oven to 350 degrees.

6. Heat your tortillas in the microwave until soft and pliable (or heat them briefly on a hot skillet on the stove). One by one, dip them into the bean mixture so that the tortilla is coated on both sides. Lay the tortilla in a 13-by-9-inch glass baking dish. Sprinkle a couple of tablespoons of grated cheese on one half of the tortilla and top with a little chicken, if desired. Fold the tortilla in half to cover the filling. Repeat with remaining tortillas until dish is full. Pour some of the remaining bean sauce over the tortillas in the baking dish (just do this to your taste; you don’t want to drown them, so you might not use it all—I probably could have used a little less). Sprinkle with remaining grated cheese, to taste.

7. Bake for about 10 or 15 minutes, or until the cheese has melted.

8. Meanwhile, mix together tomatoes, corn, green onions, cilantro, radishes (if desired), and avocado in a medium bowl. Add the lime juice and salt to taste, and toss well.

9. Serve the enfrijoladas topped with the tomato mixture.

Serves: 4–8
Time: 3 hours
Leftover potential: Good, but store topping separately.

Thursday, February 16, 2012

WHITE BEANS WITH SAUSAGE AND TOMATOES


Genius: Beans + sausage + cherry tomatoes + aromatics + oven = a simple version of cassoulet. Hearty but not heavy, comforting, flavorful, and oh so easy, this is the best kind of winter one-dish meal. Just toss some stuff in a pan, throw it in the oven while you relax, put the crusty, bubbling, richly fragrant dish on the table with a green salad and maybe some bread, and let the compliments roll in.

The recipe is from chef Pam Anderson (not to be confused with Baywatch Pam Anderson, although I’m sure she gets that all the time, poor woman), via The Merry Gourmet via Dinner With Julie, where I spotted it and instantly fell in love. My rendition falls somewhere between the original and Julie’s halved, slightly streamlined version. The quantities are flexible; I used 1½ pints tomatoes and 4 largish sausages, but go ahead and adjust to your tastes. I did find that my casserole was looking a bit drier than I’d like near the end of cooking, maybe because I used cooked dry beans (I had some that needed to be used up) instead of canned, so I had a brainwave and dumped in a splash of white wine to loosen things up and then put it back in the oven long enough for the alcohol to burn off. I noticed that the original version called for the canned beans to be undrained, whereas Julie’s version has you drain and rinse them. In general, I prefer to get rid of that odd, salty solution, but perhaps it would have taken care of the dryness situation. In my case, I could have used some of the bean cooking liquid if I’d had the presence of mind to keep it around, but the wine produced such an excellent flavor boost that I’m going to recommend it if you have some handy. Also, be sure to use the best sausage you can find, since it takes center stage here; I love a lot of the different flavors of Trader Joe’s precooked chicken sausages (the Cajun andouille is my go-to spicy), but their Italian sausage is just OK, so I sprang for big hot Italian pork sausages from the Whole Foods meat counter (they apparently grind and season their own sausage at each store; who knew?) and was quite pleased with it. When everything was finished cooking, I took the sausages out of the bean mixture and sliced them, then set them atop each serving, just for ease of eating. But do whatever you want; it’s that kind of party.

1 to 2 pints cherry or grape tomatoes
4 to 6 fresh sweet or hot Italian sausages
1 medium onion, cut into eighths
4 large garlic cloves, sliced
2 tablespoons olive oil
1 tablespoon balsamic vinegar
Leaves from a few sprigs of fresh thyme or rosemary
1 to 2 bay leaves
Salt and freshly ground black pepper to taste
1 to 2 15-ounce cans white beans, rinsed and drained, or about 2 to 3 cups cooked dry beans
Dry white wine to taste (optional)

1. Adjust oven rack to lowest position and heat oven to 425 degrees.

2. Combine tomatoes, sausages, onion, garlic, olive oil, vinegar, thyme or rosemary, bay leaves, and a generous sprinkling of salt and pepper in a large heavy roasting pan or Dutch oven. Set pan in oven and roast until sausages are brown and tomatoes have broken down, about 45 minutes.

3. Remove pan from oven, stir in beans, and if the mixture looks a bit dry, add a little white wine, water, or bean can/cooking liquid. Continue to roast until casserole has heated through, about 10 to 20 minutes longer. Remove bay leaves before serving.

Serves: 4–6
Time: 75 minutes
Leftover potential: Good

Friday, November 11, 2011

WARM SPINACH SALAD WITH SAUSAGE AND ROASTED VEGETABLES


I did a pretty good job of overcoming my slight resentment of main-dish salads this past summer; thanks to recipes like this, this, and this, we quite happily ate salad as an entrée almost once a week. As winter approaches, raw, cold meals become far less appealing, yet I don’t want to break this healthy Salad Night habit completely. I have a couple of warm salad recipes, but now I’m on the prowl for more. I have no idea what series of link-clickings led me to this one at For the Love of Cooking, but why even bother talking about that when we should be talking about how much this salad kicks ass? Yes, I just swore, albeit mildly, about a salad, on a blog that my mother reads. That’s how good it is. If I were talking to you about it in person, I might swear downright emphatically. WE $@*!ing LOVED THIS #&!% SALAD.

Really, this is quite similar to a recipe I already have, but served over spinach, with a balsamic Dijon vinaigrette and some cheese on top, additions I would have never thought to make. It manages to be simultaneously wholesome and hearty, with all the fresh and colorful appeal of a salad in a warm, filling, satisfying meal. The combination of vegetables is perfect; along with the expected onion, potatoes, and garlic, you get asparagus (which, sure, may not exactly be in season right now, but we all know how awesome it is when roasted), mushrooms (which I never think to roast but are great that way), and tomatoes (which I have a whole treatise on; see below). Although I usually roll my eyes when some online recipe commenter talks about how they added chicken to a perfectly good vegetarian dish to “make it a meal,” as though meals are somehow not complete without meat products, I gotta say that the savory, meaty sausage does really make this feel like a meal. The spinach wilts gently under all this caramelized, roasty goodness. The dressing adds moisture and a welcome zesty acidity, and the feta does its usual salty, creamy, fabulous thing. All that and it’s easy to throw together on a weeknight.

I made only minimal changes. I probably ended up using more vegetables than called for—I got greedy when picking out my mix of cute little potatoes, and I threw in the whole 8-ounce package of mushrooms and the entire bunch of asparagus because I didn’t want to get stuck with the orphaned vegetables. The original recipe called for 12 ounces of spinach, which, although it’s technically 4 servings according to the nutritional information on the package, is a tremendous quantity in its raw state; maybe my vegetables and sausage weren’t piping-hot enough to wilt the greens sufficiently when I put the salad together, but that amount of spinach wouldn’t have fit in any of my entrée bowls. I just eyeballed it, using one to two generous handfuls of spinach per serving, which probably came to more like 8 or even 6 ounces total.

I also used cherry tomatoes instead of the little on-the-vine ones used in the original recipe or the plum ones used in its Real Simple source. I’ve recently fallen in love with roasted cherry tomatoes (the maple syrup in the recipe I use sounds weird, but go with it! It adds a sweet smokiness without tasting anything like pancakes; I typically scarf them all straight off the baking sheet before I can manage to take a photo of them, which is why I haven’t posted the recipe yet), but of course the key to the ones I’m used to is letting them roast face-up, undisturbed, until they dry and wrinkle. Here, roasting the tomatoes with the other vegetables and tossing them periodically, they break down quite a bit, so their juices leak out and spread over the baking sheet, meaning that all the vegetables turned out much less crisp than I’d envisioned. I think this could be resolved by either (a) roasting the tomatoes ahead of time using my usual recipe (I’ve been meaning to try adding those to salads anyhow, if I can ever stop snacking on them) or (b) roasting the tomatoes at the same time as the other vegetables, but undisturbed on a second baking sheet, not to mention there’s always the option of (c) just using larger tomatoes as the original recipe does. I may give one of those methods a try in the near future just for kicks, but I don’t know if any changes are really necessary, because the recipe turned out so damn delicious just as I made it, and it’s certain to be a Salad Night staple for us throughout the winter.

UPDATE, 1/13: If the idea of out-of-season asparagus doesn't appeal, substitute a couple of handfuls of trimmed green beans, cut into 1-to-2-inch pieces. It's just as excellent.

1 cup cherry, grape, or plum tomatoes, halved
1 medium red onion, sliced into wedges
1 cup baby potatoes, halved, or quartered if larger (I used a mix of yellow, red, and purple)
1 cup mushrooms, quartered (I used cremini)
1 bunch (about 12 spears) asparagus, tough ends removed, remaining spears cut into 2-inch pieces
4 large cloves garlic, with skins left on
1 tablespoon olive oil
Coarse salt and freshly ground pepper to taste
4 Italian sausages (I used Trader Joe’s Garlic and Herb Chicken Sausage, which I highly recommend)
2 tablespoons balsamic vinegar
3 tablespoons olive oil
2 tablespoons water
2 tablespoons coarse-grain Dijon mustard
1 small clove garlic, minced
6 to 12 ounces fresh spinach
2 to 4 ounces feta cheese, crumbled

1. Preheat the oven to 400 degrees. Line a baking sheet with tin foil and coat with cooking spray. Place the tomatoes, onions, potatoes, mushrooms, and 4 whole unpeeled garlic cloves on the baking sheet. Drizzle with 1 tablespoon olive oil and season with salt and pepper to taste. Place in the oven and roast for 20 to 25 minutes, stirring occasionally. Add the asparagus and continue to roast for 10 minutes, or until the asparagus and potatoes are fork-tender.

2. While the vegetables are roasting, make the salad dressing by whisking the vinegar, 3 tablespoons olive oil, mustard, water, and 1 small minced garlic clove together in a small bowl until emulsified, then season with salt and pepper to taste.

3. Also while the vegetables are roasting, cook the sausages in a skillet over medium heat for 10 minutes or until done.

4. Once the veggies are out of the oven, carefully remove the skin from the garlic cloves and then slice the roasted garlic. Toss the warm vegetables (including the garlic) and sliced sausages with the spinach and dressing until evenly coated. Top with feta.

Serves: 4
Time: 1 hour
Leftover potential: Good, if not yet mixed together. Store all the elements (roasted vegetables and sausage, spinach, dressing, and cheese) separately, and when you want to eat them, reheat the vegetables and sausage and then add to the spinach, dressing, and cheese.