Friday, February 17, 2012

KALE SALAD WITH SQUASH, CHEDDAR, AND ALMONDS


As avid a kale fan as I am, can you believe that this was my first time trying it raw? I hadn’t been deliberately avoiding it, but now I’m regretting not trying it sooner, because I’m head over heels. This—from Northern Spy Food Co. in NYC via Food52—was a particularly excellent choice as an inaugural recipe, since it pairs kale with squash and lemon, the usual suspect, but also with aged cheddar and almonds, which are a bit more surprising. I was in it for the cheddar and kale and squash, in that order, and thought the almonds looked unnecessary, but I’m so glad I left them in because the combination of flavors and textures was really amazing. (The original recipe called for optional shaved Pecorino, as well, and I halfheartedly threw a few fragments of Parmesan on there, but it’s totally superfluous; the cheddar provides all the sharp creaminess this salad needs, and I won’t bother with the second cheese in the future.) If you’re suspicious of raw kale, this will be your gateway drug, and if you’re already an old hand at kale salads, this will probably shake up your usual routine.

As a bonus, the cheese and nuts add enough protein to make this light vitamin powerhouse feel quite filling. Unsure how much salad the recipe would yield or how much we’d like it, I served this alongside white beans with sausage and tomatoes, and while the two dishes complemented each other nicely, it was almost too much food. The salad portions were generous, and I think that with some fruit (pears spring to mind) and maybe some bread, this would make a lovely lunch or light dinner all on its own. I’d still serve it as a side again, but alongside a smaller main course, like soup, or a single piece of chicken.

Oh, and the leftovers are magical! Usually when I have salad leftovers I painstakingly store each component separately—greens in one container, toppings in another, dressing in a third, and so on—to prevent wilting and sogginess, until I have a teetering tower of Tupperware in the fridge. Kale is so hardy, though, that you can dress it one night and find it totally unchanged the next day. A ate his leftovers several days later and reported them still good. That makes this a perfect salad to take to work, without having to corral and tote a dozen little bowls in your lunchbag.

I couldn’t find Cabot clothbound cheddar, but I picked out some Old Quebec vintage cheddar at random from Whole Foods’ bewildering cheese selection, and it was plenty delicious. And although I’m usually not one for kitchen tips and tricks, I read somewhere that a pizza cutter is the perfect tool for trimming the ribs off of kale, and I must testify that I tried it and it works wonderfully, especially with the flat, narrow Tuscan leaves. (It also does a great job of slicing the leaves into ribbons once you’ve removed the ribs.) The more you know!

1 cup cubed butternut or other winter squash
4½ tablespoons extra-virgin olive oil, divided
Salt and freshly ground pepper to taste
1 large bunch Tuscan (aka lacinato or dinosaur) kale, ribs removed and discarded, leaves finely sliced, about 5 cups
½ cup almonds, cut roughly in half
½ cup crumbled or finely chopped Cabot clothbound cheddar (or any other good, aged cheddar)
2 tablespoons freshly squeezed lemon juice

1. Preheat oven to 425 degrees. Toss squash cubes ½ tablespoon olive oil, and season with salt and pepper to taste. Spread on a baking sheet (line with parchment for easier cleanup), leaving space between the cubes. Roast until tender and caramelized, about 40 minutes, tossing with a spatula every 10 to 15 minutes. Remove from oven and let cool slightly, leaving the oven on.

2. Toast the almonds on a baking sheet (I just used the same baking sheet, after removing the roasted squash) in the oven until they start to smell nutty, tossing once, about 10 minutes. Let cool.

3. In a large mixing bowl, toss the kale with the almonds, cheddar, and squash. Add lemon juice and olive oil, season to taste with salt and pepper, and toss well.

Serves: 4
Time: 1 hour
Leftover potential: Surprisingly good.

Thursday, February 16, 2012

WHITE BEANS WITH SAUSAGE AND TOMATOES


Genius: Beans + sausage + cherry tomatoes + aromatics + oven = a simple version of cassoulet. Hearty but not heavy, comforting, flavorful, and oh so easy, this is the best kind of winter one-dish meal. Just toss some stuff in a pan, throw it in the oven while you relax, put the crusty, bubbling, richly fragrant dish on the table with a green salad and maybe some bread, and let the compliments roll in.

The recipe is from chef Pam Anderson (not to be confused with Baywatch Pam Anderson, although I’m sure she gets that all the time, poor woman), via The Merry Gourmet via Dinner With Julie, where I spotted it and instantly fell in love. My rendition falls somewhere between the original and Julie’s halved, slightly streamlined version. The quantities are flexible; I used 1½ pints tomatoes and 4 largish sausages, but go ahead and adjust to your tastes. I did find that my casserole was looking a bit drier than I’d like near the end of cooking, maybe because I used cooked dry beans (I had some that needed to be used up) instead of canned, so I had a brainwave and dumped in a splash of white wine to loosen things up and then put it back in the oven long enough for the alcohol to burn off. I noticed that the original version called for the canned beans to be undrained, whereas Julie’s version has you drain and rinse them. In general, I prefer to get rid of that odd, salty solution, but perhaps it would have taken care of the dryness situation. In my case, I could have used some of the bean cooking liquid if I’d had the presence of mind to keep it around, but the wine produced such an excellent flavor boost that I’m going to recommend it if you have some handy. Also, be sure to use the best sausage you can find, since it takes center stage here; I love a lot of the different flavors of Trader Joe’s precooked chicken sausages (the Cajun andouille is my go-to spicy), but their Italian sausage is just OK, so I sprang for big hot Italian pork sausages from the Whole Foods meat counter (they apparently grind and season their own sausage at each store; who knew?) and was quite pleased with it. When everything was finished cooking, I took the sausages out of the bean mixture and sliced them, then set them atop each serving, just for ease of eating. But do whatever you want; it’s that kind of party.

1 to 2 pints cherry or grape tomatoes
4 to 6 fresh sweet or hot Italian sausages
1 medium onion, cut into eighths
4 large garlic cloves, sliced
2 tablespoons olive oil
1 tablespoon balsamic vinegar
Leaves from a few sprigs of fresh thyme or rosemary
1 to 2 bay leaves
Salt and freshly ground black pepper to taste
1 to 2 15-ounce cans white beans, rinsed and drained, or about 2 to 3 cups cooked dry beans
Dry white wine to taste (optional)

1. Adjust oven rack to lowest position and heat oven to 425 degrees.

2. Combine tomatoes, sausages, onion, garlic, olive oil, vinegar, thyme or rosemary, bay leaves, and a generous sprinkling of salt and pepper in a large heavy roasting pan or Dutch oven. Set pan in oven and roast until sausages are brown and tomatoes have broken down, about 45 minutes.

3. Remove pan from oven, stir in beans, and if the mixture looks a bit dry, add a little white wine, water, or bean can/cooking liquid. Continue to roast until casserole has heated through, about 10 to 20 minutes longer. Remove bay leaves before serving.

Serves: 4–6
Time: 75 minutes
Leftover potential: Good

Wednesday, February 15, 2012

CHILI LIME PEANUTS


Although I’m not a huge snacker, when my hunger pangs strike I tend to lose all capacity for rational thought, so I try to make sure I always have some quick and wholesome munchies on hand to restore my sanity between mealtimes. Nuts are the most satiating pick-me-up I’ve tried, but the plain ones can get a bit dull after a while. The Internet is rife with seasoned nut recipes, and I’ve been bookmarking them avidly for years, intending to spice up my snacking routine, but when I finally started sorting through them all, I realized that the majority fall on the sweet end of the flavor spectrum; even those that claim to be spicy have an equally strong dose of sugar. Candied nuts are great for special occasions (they make easy homemade holiday gifts, for instance), but they’re a bit much for every day.

It’s actually harder than I expected to find straight-up savory nut recipes. I do have a great one for rosemary cashews with only a couple of teaspoons of sugar, which I make every year at Christmas, but (a) those are so delicious that I can’t stop gobbling them, and nuts are only a healthy snack if you eat them in small quantities, and (b) I like the idea of having special recipes I only bring out once a year, so making them regularly would take away the magic. I tried another recipe that had promising-looking savory elements like Worcestershire sauce and an array of spices, and although it was definitely tasty, it was far too sweet and buttery to qualify as sensible emergency rations. Then I unearthed this recipe from Serious Eats, and it is absolutely perfect. There’s a tiny bit of sugar, but only enough to temper the sourness of the lime; the dominant flavor is spice. I’d been worried about the heat level, but it was just right for me—enough to bring a glow to my cheeks and make my mouth feel like something’s going on in there, but not so much that I need to eat them with a beverage clutched in my hand to put out the fire. (If your heat tolerance falls below “medium,” though, I’d recommend cutting back to ½ teaspoon cayenne for starters.) These zesty peanuts are definitely addictive, but not so much that I can’t resist shoving them all in my mouth, and the bold flavor excites my taste buds enough that even a moderate portion feels like a richly satisfying snack. Plus, they’re insanely easy to make, with only about 5 to 10 minutes of hands-on labor. I can’t wait to try them on a hot summer day, washed down by a cold beer—but they’re just as lovely when eaten out of a Tupperware container from my purse when I start to feel cranky and shaky while standing in a long checkout line at Kohl’s.

I doubled the lime zest, because I was juicing two limes anyway, so why just zest one of them? It probably wasn’t necessary, because the lime flavor comes through more clearly than you might expect, but I’m a citrus fiend and I enjoy that sort of thing. My seasoning-to-nut ratio was also a bit off, because I bought a 1-pound package of peanuts at Trader Joe’s that claimed to contain “about 16” quarter-cup servings, which I assumed would be approximately the 4 cups the recipe required. Upon taking them home and measuring them out myself, I learned that this is only true if you think that 3½ cups is “about” 4. But you know what? It turned out just fine, and I wouldn’t change a thing. These are going to be one of my go-to snacks from now on. If you don’t like peanuts or are allergic, I assume the recipe would work just as well with other nuts; I can’t wait to try it with cashews.

Freshly grated zest of 1–2 limes
¼ cup freshly squeezed lime juice (from 2–3 large limes)
2 tablespoons chili powder (I used half regular and half chipotle)
1 tablespoon kosher salt
2 teaspoons sugar
¾ teaspoon cayenne pepper
4 cups shelled, unsalted peanuts

1. Preheat oven to 250 degrees.

2. Whisk lime zest, lime juice, chili powder, salt, sugar, and cayenne pepper together in a large bowl. Add peanuts and stir until evenly coated.

3. Scrape nuts onto a large, rimmed baking sheet (line with parchment if desired, for ease in cleanup). Bake until nuts are fragrant, dry, and beginning to darken, about 30 minutes.

Yields: 4 cups (about 16 servings)
Time: 40 minutes
Leftover potential: Excellent; will keep in an airtight container at room temperature for at least a couple of weeks.

Friday, February 03, 2012

BUTTERMILK ROASTED CHICKEN


Sure, it’s fun to slather it in mustard or coat it in breadcrumbs or top it with complicated sauces, but sometimes you just want chicken that tastes like chicken, you know? Roasting a chicken is not hard, but sometimes you don’t feel like wrangling the whole damn bird (ugh, carving exhausts me), or maybe you only want your favorite parts (because I am young at heart, I dig the drumsticks). Yet you still want your chickeny chicken to be incredibly moist and flavorful, am I right? For those occasions, there is buttermilk chicken.

Adapted by the Smitten Kitchen from Nigella Lawson, this clever recipe takes the buttermilk brine that’s the secret to nearly every good fried chicken recipe and…doesn’t fry it. After a daylong soak in its salty, sweet, tangy, garlicky bath, the chicken gets tossed in a baking dish and thrown into the oven with absolutely no further effort from you—and the simple flavors mean that you can get away with serving pretty much anything as a side dish. It just may be the ultimate weeknight chicken dinner.

I’ll admit I was skeptical the whole way through; after a commenter pointed out the similarity, all I could think of when I looked at the raw chicken covered in creamy pink marinade was the Ramona book where the Quimby girls improvise a meal out of chicken, banana yogurt, and chili powder. But sure enough, the end result was some of the juiciest, most tender roasted chicken I’ve ever made.

2 cups buttermilk
5 garlic cloves, peeled and smashed
1 tablespoon table salt
1 tablespoon granulated sugar
1½ teaspoons paprika, plus extra for sprinkling (I used smoked paprika, which was tasty)
Lots of freshly ground black pepper
2½ to 3 pounds skin-on, bone-in chicken parts (I used all drumsticks)
Drizzle of olive oil
Flaked or coarse sea salt, to finish

1. In a large bowl, whisk buttermilk with garlic, table salt, sugar, paprika, and lots of freshly ground black pepper. Place chicken parts in a gallon-sized freezer bag or a lidded container and pour buttermilk brine over them, then swish it around so that all parts are covered. Refrigerate for 24 hours (that’s the optimal time, but in a pinch you can do as few as 2 hours and up to 48).

2. When ready to roast, preheat oven to 425 degrees. Line a baking dish with foil. Remove chicken from buttermilk brine and arrange in dish. Drizzle lightly with olive oil, then sprinkle with additional paprika and sea salt to taste. Roast for 30 to 40 minutes, until cooked through and browned.

Serves: 4
Time: 45 minutes, plus 24 hours of brining
Leftover potential: OK.

Tuesday, January 31, 2012

ROASTED CARROTS AND PARSNIPS WITH FENNEL AND ORANGE


The Crispy Pork Medallions recipe was accompanied in Cooking Light by a basic roasted root vegetable medley, but that looked kind of boring. Still, I needed something to go with it and I love roasted vegetables, so I turned to Food Blog Search to see if it would bring me something more thrilling, and ding! This recipe from The Kitchn caught my eye immediately. I enjoyed a brief flirtation with roasted parsnips last winter, although I think it’s odd that I complained about them being hard to find, because they are plentiful at the farmers’ market right now; maybe they were out of season by March? If so, I’d better eat my weight in them right now, because I freakin’ love those ugly buggers. They’re not unlike carrots, but sweeter when cooked, with an addictive peppery undertone (Wikipedia describes this as “reminiscent of butterscotch, honey, and soft cardamom,” a description I’m not sure I would have come up with myself, but I adore all three of those things, so OK!) and the softer, buttery texture of sweet potatoes. The balsamic-glazed variety is still my favorite, but this one is a close runner-up, since it also has fennel, one of my other winter vegetable obsessions, plus carrots and oranges to brighten things up. The oranges are an especially nice touch; I generally hew towards lemon and lime when cooking with citrus, but oranges and carrots make very good friends. Roasting an orange felt strange, but it resulted in awesome flavor.

The first time I made this (yes, I’ve made it twice, along with the pork; I think these two recipes will become inextricably linked for me, because they really are perfect together) I followed the original recipe a bit too literally; I ended up with vegetable pieces that were too big and took too long to cook, which wasn’t helped by the fact that I had peeled and sliced my oranges, which meant they dissolved into puddles of juice and made my vegetables steam instead of getting crisp and brown. It all worked out in the end, but after practicing a second time I’ve made some changes: More parsnips, because they are awesome; smaller vegetable pieces; and oranges that are just quartered (as in this recipe, where I roast lemons) and then squeezed over the vegetables, once during roasting to create a glaze, and once just before serving for an extra burst of flavor. The result is a festival of warm, comforting, caramelized winter vegetables, with enough zips of color and citrus flavor to lift you out of the dark seasonal doldrums.

¾ pound carrots
¾ pound parsnips
1 medium fennel bulb
2 medium oranges
3 tablespoons olive oil
1 tablespoon maple syrup (I recommend Grade B)
Coarse salt to taste
Freshly ground black pepper to taste

1. Preheat oven to 425 degrees.

2. Peel the carrots and parsnips, or just scrub them well. Cut them in half crosswise and then into quarters (or, if they are large, eighths) lengthwise, so they are in uniform chunks (sticks about 2 to 4 inches long and ½ to 1 inch wide worked well for me). If the parsnips have a tough, woody center, cut it out.

3. Cut the fennel into wedges (I did eighths).

4. Wash the oranges and slice them into quarters.

5. In a large bowl, toss the carrots, parsnips, fennel, and oranges with the olive oil and maple syrup and season generously with salt and pepper. Spread out evenly on a large rimmed baking sheet (line with parchment or foil for easier cleanup).

6. Roast, turning occasionally, until tender and browned, about 30 minutes. Five minutes before the end of cooking, use a tongs to squeeze the juice from half of the orange pieces over the vegetables, tossing to coat; return baking sheet to oven and finish roasting.

7. Remove vegetables from oven, use a tongs to squeeze the remaining orange pieces over the vegetables (discard orange pieces after squeezing), season vegetables to taste, and serve.

Serves: 2-4
Time: 45 minutes
Leftover potential: OK; they reheat fine, if a bit less crisp, if you can manage not to scarf them all down immediately.

Monday, January 30, 2012

CRISPY PORK MEDALLIONS


Hey, pork! Even though I came of age in the late 1980s, during the heady days of the famous “The Other White Meat” campaign (“the fifth most memorable promotional tagline in the history of contemporary advertising”*), it never really occurs to me to eat whole cuts of pork. I’m not tempted to order it in restaurants; I’ve only prepared it once at home—and that was really just because I had some wild rice to use up. I use ground pork on occasion, and I love sausage and bacon and prosciutto and pulled pork and carnitas and all that jazz, so I have no problem with the flavor; I just don’t gravitate toward big pieces of meat (not even steaks) and at this point, eight years into a food blog, I’m rather embarrassed that I don’t know how to buy or cook pork. I’m not even sure what made me dogear the page of Cooking Light that featured this recipe, except that it looked easy and tasty and involved the now-apparently-omnipresent-in-my-kitchen combo of Dijon and panko breading. Plus, it looked like something A would like, and I figured he deserved a break from all that quinoa.

I did what I always do when I see something promising-looking in Cooking Light, which was to flag the page in the actual magazine, wait a couple of weeks, and then go to the online version of the recipe to see what the ratings look like and whether there are any frequently-suggested tips, tricks, additions, or other edits. (There are a lot of loopy commenters out there, but in my experience, when nearly everyone says something like “Double the sauce” or “Halve the salt,” they’re usually on to something.) This one had a five-star rating with no real suggestions for improvement, which surprised me a bit because it looked so incredibly simple as to risk blandness. I figured it was time to take the plunge, so I went out and bought myself a pork tenderloin. And wow, those things are magical! Sure, they’re rather comically tubular, but they’re affordable ($4.99/pound at Trader Joe’s) and incredibly easy to deal with. The meat was moist and tender, and flavorful enough that I think I’d like it even if it weren’t enrobed in delicious mustard.

I’m not sure if I have a faulty meat thermometer (very likely) or I’m still getting used to my new oven or pork tenderloins vary or what, but I struggled just a bit making this even though the instructions are laughably straightforward. The first time, my pork simply refused to reach the correct temperature. Being so inexperienced as a pork cooker, I was paranoid about undercooking and ended up baking it more than twice as long as the recipe dictated. I’d gotten started later than I’d planned and the new side dish I was making also took much longer than expected, so by the time my pork finally registered 145 degrees, at about 9:30 on a Sunday night, I was thoroughly Over It. So convinced was I that the entire meal was going to be a disaster that I didn’t even take photos. Then, of course, everything was delicious, so I had to turn around and make it again so I could get photos for this site. The second time, I approached it with a Zen “this will take however long it takes” attitude, and I managed to overcook the pork—it was still just as tasty as ever, just a bit on the dry side. I’m contemplating sticking to 8 minutes next time, no matter what the thermometer says. But these are small matters; the important thing is that this recipe manages to get a lot of flavor out of just a few ingredients and a simple cooking technique. Also, I am now officially interested in pork, so pigs, hide your tenderloins! I’m off to troll the food sites for recipes.

*Hilariously to me, the National Pork Board now refers to “The Other White Meat” as its “heritage brand,” having switched to the vague and tepid motto “Be Inspired.”

2 tablespoons Dijon mustard
1 pound pork tenderloin, trimmed and cut into 8 medallions
½ cup panko (Japanese breadcrumbs)
1 tablespoon chopped fresh thyme
1 tablespoon minced fresh parsley
¼ teaspoon salt
Freshly ground black pepper to taste
2 tablespoons extra-virgin olive oil

1. Preheat oven to 450 degrees.

2. Rub mustard evenly over pork medallions. Combine panko, thyme, parsley, salt, and pepper in a large bowl.

3. Heat a large ovenproof skillet over medium-high heat. Add oil to pan; swirl to coat.

4. When skillet is hot, dredge pork medallions one by one in panko mixture and add them to the skillet. Sauté 2 minutes or until golden brown on the bottom. Turn pork over, then place skillet in oven and bake for 8 minutes or until pork reaches an internal temperature of 145 degrees. Let stand 3 minutes before serving.

Serves: 4
Time: 30 minutes
Leftover potential: OK, although breadcrumbs will not remain crisp.

Friday, January 27, 2012

KALE AND BUTTERNUT SQUASH PIZZA


Butternut squash and kale are like the peanut butter and jelly of the winter-vegetable world; the sweetness of the squash complements the bitterness of the kale so perfectly that as soon as I see one in a recipe, I always look for the other. Plus their colors look great together! So I’m a bit surprised that it took me so long to put them both on a pizza. I have kale pizzas and I have squash pizzas, but never have the twain met until now. Apparently I’d been secretly craving it, though, because I realized that I’d bookmarked two nearly identical pizza recipes—one with sweet potatoes and the other with squash—in the span of a couple of weeks. A hasn’t been wild about the sweet potato pizzas I’ve made in the past, so this squash version from The Way the Cookie Crumbles won out.

There’s nothing too surprising here—the squash is roasted with red onions, a nice touch, while the kale gets sautéed with garlic, also nice, and then they both get cozy together under a blanket of cheese. The only change I made was, upon stumbling on an orphaned cheese remnant in the fridge and remembering how well a sharper cheese worked on my last squash pizza—to swap in Gruyere for half of the mozzarella. It definitely made a good pizza even better, so I’m memorializing it in my adaptation of the recipe below.

I don’t think I’ll ever get tired of trying new pizza-topping combinations. I’m making up for 20 years of being strictly a plain cheese pizza eater.

1 pound pizza dough
1½ tablespoons olive oil, divided
Salt and freshly ground black pepper to taste
1 medium butternut squash, peeled, seeded, and cut into bite-sized cubes (you could also use another kind of similarly textured winter squash, like acorn or delicata)
2 small red onions, cut into wedges
1 medium bunch kale, cut in thin ribbons
2 garlic cloves, sliced
1 cup shredded mozzarella cheese
1 cup shredded Gruyere or Asiago cheese

1. Preheat the oven to 400 degrees.

2. Transfer the squash and onions to a large baking sheet; season with a generous pinch of salt and pepper and coat with 1 tablespoon oil. Bake, stirring once halfway through, until softened and browned, about 30 minutes. Remove from oven and increase heat to 450 degrees.

3. Meanwhile, heat the remaining ½ tablespoon oil with the garlic in a large skillet. Add the kale and a pinch of salt; cook, stirring constantly, until wilted, about 2 minutes. Remove from the heat and set aside.

4. Roll out the dough and place it on a baking sheet coated with cornmeal or olive oil.

5. Top the dough with the roasted vegetables, kale, and cheese. Bake for 8 to 10 minutes, until the crust is browned around the edges.

Serves: 4
Time: 1 hour
Leftover potential: Good.

Thursday, January 26, 2012

QUINOA FRITTERS WITH POACHED EGGS


The more quinoa I eat, the more I love it. Unfortunately, after an initial favorable response, A seems to like quinoa less and less every time I serve it, no matter how alluringly it’s prepared. He tolerates it, but unenthusiastically, and I’m stuck with all the leftovers. The man does love fritters, though, as do I, so when I saw this recipe for quinoa cakes at Annie’s Eats, I bookmarked it right away. In truth, I mainly fell in love with the photograph, which presented just the kind of colorful, healthy, light, simple-but-not-spartan food I feel like eating after ODing on holiday cookies. It didn’t hurt that the quinoa cake was crowned with a lovely poached egg, and after some early skepticism about them (I was a runny-yolk-phobe for years), I am becoming quite infatuated with poached eggs, to the point that I’ve started craving them. Never mind that I’d never made one before; it’s a new year and time to face new challenges! As a bonus, maybe I could interest A in quinoa if it was packaged in a different format, or at least placate him about the fact that I was trying yet another new quinoa recipe. (I presented them as “fritters” instead of “cakes” because I thought it would attract him more, but as you’ll see below, “fritter” also turned out to be the more accurate term for my rendition.)

I’m so glad I took the plunge, because first of all, quinoa tastes great when it’s formed into a patty with cheese, herbs, and seasonings and pan-fried until crispy and browned. A devoured his happily, declaring it to be his favorite quinoa preparation by far (this may be damning with faint praise, but I’ll take it), and even ate the leftovers the next day without prompting. I had a little trouble executing the original recipe as written; it said I should be able to form the quinoa mixture into patties before placing it in the skillet, but mine was so wet and loose there was no way that was going to happen. I noticed that a few of the recipe commenters had also encountered this, and some had increased the quantity of breadcrumbs to thicken the mixture, but I didn’t feel like making more (since the recipe didn’t specify whether they should be dry or fresh*, I had made fresh ones out of some stale bread). So I did what I always do with my troublesome falafel recipe and treated it like a fritter, dolloping the batter into the hot oil with a measuring cup. I’ll admit that little pieces of quinoa crumbled everywhere when I tried to press the dollops into rough patty shapes, and I thought for sure we’d end up eating some sort of pan-fried quinoa hash-like mess, but luckily the eggs worked their magic, and by the time the patties had gotten nice and brown on their undersides (probably overbrowned, as you can see in the photo, because I was so scared about what was going to happen when I tried to turn them over that I kept delaying the inevitable and letting them get good and firm, but luckily overbrowned quinoa still tastes good, maybe even better for all I know), the cakes were holding together well enough to be flipped over without coming apart. And the little scattered crumbs of quinoa in the pan made a great snack for the chef; quinoa develops the most addictive nutty flavor and crunchy-chewy texture when fried, which is what really makes this recipe wonderful.

*Just today, I looked back at the recipe comments and saw that someone had asked which kind of breadcrumbs to use, and Annie had replied that she used dried ones—specifically, panko. Perhaps if I’d done that, my patties would have been more like cakes and less like fritters, but I’m not sure how much I care, because once I’d overcome my initial anxiety that I’d bungled the recipe and made a giant mess, I liked them just the way they were, all blobby and unphotogenic—er, I mean, “rustic” and “free-form”—and most importantly, tasty. Next time I’ll try panko, though, just for comparison.

Also, poaching eggs turned out to be not as difficult as I’d feared, at least as long as you’re not a perfectionist. I’m not going to give you instructions on it yet, because I’m still honing my method—the first time I used this helpful tutorial from the Smitten Kitchen, but I’m not really coordinated enough to make that nice little whirlpool in the water and my eggs whites scattered a lot, so the second time I turned to Simply Recipes and employed canning jar rings (why not? I have so many!) to help the eggs stay in one place. This worked pretty niftily, but I didn’t really get that fluffy height so many of the best poached eggs have, plus the egg-encrusted rings are devilish to clean. Clearly more practice is needed, because I haven’t made a perfect poached egg yet; sometimes I overcook them a bit and sometimes I undercook them a bit, and most of the time they’re unsightly, but luckily, even an imperfect poached egg tastes great, so I’m not to worried. Once I’ve got it down to a science, I’ll let you know, but in the meantime, the experimentation is fun and tasty. I’m already daydreaming about other meals that could be topped off with eggs.

The original recipe directed you to make six patties, but I was pretty hungry, too impatient to go through frying two separate batches, and unsure how the quinoa cakes would reheat as leftovers (well, as it turns out), so I just made four. For us, one of these larger fritters turned out be the perfect quantity for one meal, so I’m sticking with four in the future. For a breakfast, brunch, or light lunch, you could serve the fritters atop some spinach or arugula; it adds some color and nutrients, and the egg yolk coats the greens delightfully. Since we were having these as a dinner entrée, I served a generous salad on the side instead.

½ cup uncooked quinoa
1 cup water
2 large eggs, plus 4 large eggs for poaching
½ teaspoon coarse salt, plus extra to taste
Freshly ground black pepper to taste
⅓ cup minced fresh chives
2 large shallots, finely chopped
⅓ cup grated Parmesan cheese
3 cloves garlic, minced
½ cup breadcrumbs (I used fresh, but just discovered that the original recipe used dried, so…whatever)
2 tablespoons olive oil
Fresh arugula or spinach (optional)

1. Place quinoa in a fine-mesh strainer, rinse thoroughly with cold water, and drain. Place quinoa in a small saucepan with 1 cup water and a pinch of salt. Bring to a boil, cover, and simmer over low heat for 15 to 20 minutes, until all liquid is absorbed. Spread quinoa on a platter or baking sheet and let cool to room temperature. (You can do this up to a few days before making the fritters, if you want; just refrigerate in an airtight container until ready to use.)

2. In a medium bowl, lightly beat two eggs. Add the quinoa, ½ teaspoon salt, chives, shallots, Parmesan, and garlic, plus pepper to taste, and stir to blend. Mix in the breadcrumbs and stir gently until evenly incorporated.

3. Heat olive oil in a large skillet over medium-high heat and swirl to coat. When the oil is hot, press about one-quarter of the quinoa mixture tightly into a ½ cup dry measuring cup (it will be a heaping ½ cup) and then drop it out of the measuring cup into the skillet, pressing down slightly with the back of a spatula to form a patty. Repeat with the remaining quinoa mixture, for a total of four fritters. Let cook until the bottom side is well browned. Carefully flip the patties with a spatula and let the second side cook until golden brown.

4. While the fritters are cooking, poach four eggs.

5. Serve each fritters atop a bed of greens, if desired, and top each patty with a poached egg. Season with salt and pepper to taste; serve immediately.

Serves: 4
Time: 40 minutes
Leftover potential: The fritters keep quite well in the refrigerator and, when reheated with a short zap in the microwave followed by a short stint in a dry skillet over medium heat to regain their outer crispness, are nearly as good as new. Poached eggs don’t keep at all, however, so if you plan to have leftovers, don’t poach the eggs for the leftover portions until it’s time to reheat the fritters.

Wednesday, January 18, 2012

QUINOA WITH ROASTED BROCCOLI, ARUGULA, AND FETA


Happy New Year! I know that at 19 days old, 2012 is already losing that new-year smell, but please suspend your disbelief…and try to graciously overlook the fact that I’m still catching up on posting recipes from the end of 2011. Luckily, this one fits in perfectly with the detox/diet/healthy eating narratives that dominate the food blogs—and, let’s face it, pretty much all media—every time January rolls around. (I love my fruits and vegetables, but if I see one more green smoothie recipe pop up in my Google Reader, I’m going to—well, strenuously roll my eyes, at least.) Sure, it’s lean and low-carb, packed full of greens and protein, but what drew me to this warm salad-ish dish at The Kitchen Sink Recipes was how thoroughly it combines nearly all my food obsessions into a single tidy package: Roasted vegetables, lemon, red pepper flakes, arugula, quinoa, feta, and mustard (my new bestie!) are all keywords that make me sit up and take notice when reading an ingredient list, so imagine my joy to see the whole passel of them hanging out together at one big party.

Not surprisingly, then, I loved this. A hasn’t taken to quinoa the way I have, and as much as I’d hoped he would like this one, I was secretly comforted by the thought that I’d have all the leftovers to myself. Light but filling, virtuous but boldly flavored, it makes a perfect workday lunch, and tastes equally good eaten warm or cold. I think there was maybe supposed to be red onion in the mix (the original post mentions it and I think I can spot it in the photos, but it’s left out of the recipe), but I didn’t miss it. The recipe is easy and straightforward; the only change I’d be tempted to make would be to add the zest of the lemon as well as the juice, for a little extra hit of citrus. Otherwise: perfection. If you haven’t tried quinoa yet, what are you waiting for? Make it your new year’s resolution, and start with this recipe.

POSTSCRIPT: I made this again last night, with the following additions: 1 small minced shallot and the grated zest of the lemon, both added to the Dijon-lemon juice mixture in Step 4. I'll definitely be including those in the recipe from now on.

1 cup quinoa
2 cups water
Kosher salt to taste
1 large head broccoli
2 tablespoons extra-virgin olive oil, divided
¼ teaspoon red pepper flakes
1 tablespoon coarse-grained Dijon mustard
1 lemon, freshly squeezed
2 cups baby arugula
¼ cup crumbled feta

1. Preheat oven to 475 degrees. Line a baking sheet with parchment paper and set aside.

2. Place quinoa in a fine-mesh strainer, rinse thoroughly with cold water, and drain. Combine quinoa, water, and a big pinch of salt in a pot. Cover and bring to a boil. Reduce heat to medium-low and cook for 20 to 25 minutes, until the quinoa has absorbed the water. Remove from heat and set aside (keep covered).

3. Meanwhile, prepare the broccoli. Cut the florets into bite-sized pieces Trim the woody end from the stalks, and, using a vegetable peeler, trim the tough outside layer from the stalks; slice the stalks into coins. Toss the florets and stalk slices in 1 tablespoon oil, a pinch of salt, and red pepper flakes. Roast for 20 to 25 minutes, until the broccoli is browned in spots.

4. In a large bowl, whisk together the mustard and lemon juice. Whisk in the remaining 1 tablespoon olive oil. Add the arugula. Add the quinoa and broccoli, when they are cooked, and toss to wilt the arugula and coat everything with dressing. Top with feta.

Serves: 3–4
Time: 1 hour
Leftover potential: Good.

Friday, December 16, 2011

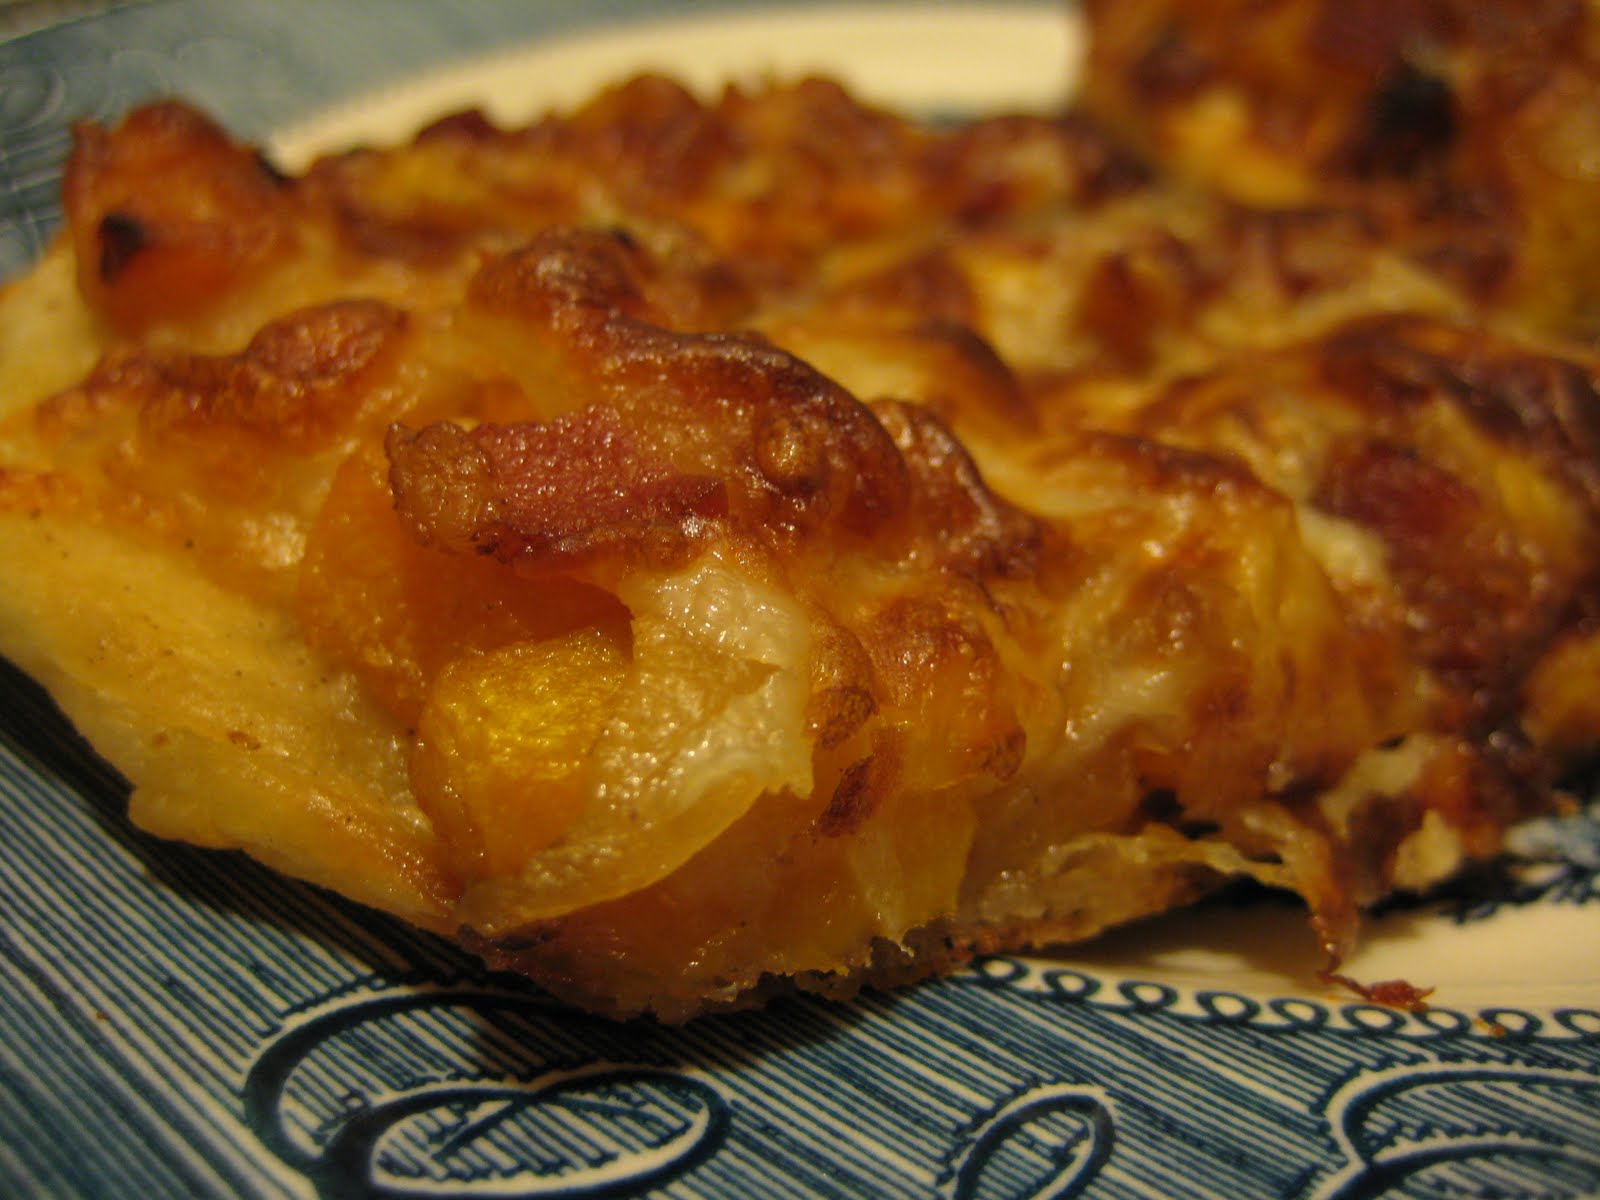
ROASTED SQUASH PIZZA WITH CARAMELIZED ONIONS AND BACON


Just when I think I’m running out of pizza-topping combinations to try, another one presents itself. As soon as I saw this recipe at Dinner With Julie, I knew it would be perfect, and perfect it was—an addictive, comforting blend of smoky, salty, sweet, and creamy.

My one misstep was in using a package of pre-cubed butternut squash from Trader Joe’s; normally I frown upon such things, but we’d missed that week’s farmers’ market due to our Thanksgiving trip to Minnesota. I could’ve picked up a whole squash at the grocery store, but I wanted to make things easier on myself post-vacation, and I figured TJ’s usually has pretty good produce, so… Live and learn, right? The squash was so slimy and soggy that it took forever to roast properly; it just kept steaming away in the oven without browning, and I had to bake it nearly twice as long just to get any color and crispness on it. Then, when I popped a piece into my mouth, I discovered it was nearly flavorless, so I desperately sprinkled a little brown sugar over the rest and threw it back into the oven until the sugar caramelized. That seemed to help the sweetness along and the pizza tasted great, but: never again.

On the plus side, I had been planning to just use mozzarella on this, but then I remembered I had some cheese odds and ends left over from making kale pizza a few weeks before, so I added those into the mix. I think the Asiago in particular really made this spectacular, balancing out the sweetness of the squash and onions with its pungent sharpness. And, of course, the bacon didn’t hurt either. I’ve had a run of just-OK pizza experiments lately, but this one was an unequivocal success, probably the best I’ve tried since July’s corn-feta-cilantro-lime awesomeness.

About 1 pound butternut or other winter squash, peeled, seeded, and cubed
1 tablespoon olive oil
Salt and pepper to taste
4 slices bacon, diced
1 large onion, halved and thinly sliced
1 pound pizza dough
Shredded cheese to taste (I used a mixture of mozzarella, Asiago, and Fontina, which I highly recommend)

1. Preheat oven to 400 degrees.

2. Place the cubed squash on a rimmed baking sheet, toss with olive oil and salt and pepper to taste, and roast for 20 to 30 minutes, stirring once, until soft and browned. Remove from oven and set aside, then increase the oven temperature to 450 degrees.

3. Meanwhile, cook the bacon in a skillet over medium heat until crisp. Remove with a slotted spoon and set aside on a paper-towel-lined plate to drain. Add the onion to the drippings in the skillet and sauté until tender and caramelized.

4. Roll out the pizza dough, place it on a baking sheet coated with cornmeal or olive oil, and scatter half the cheese over it. Add the squash, onions, and bacon, then top with the remaining cheese. Bake for 10 to 15 minutes, until bubbly and golden.

Serves: 4
Time: 75 minutes
Leftover potential: Good.

Monday, December 12, 2011

JALAPENO-CHEDDAR SKILLET CORNBREAD


It’s odd, but I don’t think I’d ever made cornbread before this. I’ve eaten some that I’ve liked over the years (mostly at barbecue/soul food restaurants), but generally I can take or leave it, and I mostly leave it. At its worst, it can be dry, crumbly, and bland. Everyone talks about how much better it is when cooked in a cast-iron skillet, though, so ever since I got a skillet of my own I’ve been thinking I might give it a try. A couple of months ago, I stumbled across the perfect-looking recipe at A Cozy Kitchen. Pouring the hot oil from the skillet into the batter seemed a little weird (and perilous—wear sturdy oven mitts!), but since the recipe was adapted from no less an authority than the Homesick Texan herself, I couldn’t argue. Aside from that little adventure, the bread was easy to make and turned out perfectly: crisp-crusted without and tender within, with the buttermilk and cheese warding off dryness and the jalapeno providing a nice kick. Maybe it was the skillet or maybe it was the recipe, but the bread had a bit more structural integrity than some I’ve seen; it held its shape well when sliced and wasn’t overly crumbly. I served it with chili, but it would have been just as satisfying on its own, with a little butter.

So consider me a cornbread convert! This will definitely be replacing tortilla chips as my chili accompaniment of choice, and I’m contemplating pairing it it with black bean soup soon. I didn’t have any bacon grease on hand, but I’d love to try that next time instead of canola oil; a little bit of porky smokiness would really put this over the top.


2 tablespoons vegetable oil or bacon drippings
2 cups cornmeal (yellow or white)
½ cup sifted all-purpose flour
1 teaspoon baking powder
1½ teaspoons salt
1 large egg, lightly beaten
2 cups buttermilk, shaken
2 jalapeños, diced
1¼ cup shredded cheddar cheese, divided

1. Preheat oven to 450 degrees. Put the oil or drippings in a 12-inch cast-iron skillet and place it in the oven for a few minutes until it’s sizzling.

2. Meanwhile, mix together dry ingredients in a large bowl and set aside. Whisk egg and buttermilk in a medium bowl. Mix the wet ingredients into the dry ingredients, then fold in jalapeños and 1 cup of shredded cheddar.

3. Take the cast-iron skillet out of the oven, pour hot oil/drippings into batter, and mix. Pour batter into skillet and top with remaining ¼ cup cheddar. Bake for 20 minutes, until brown on top and pulling away from the sides of the skillet.

4. Turn bread out of the skillet, slice into wedges or squares, and serve.

Serves: About 8
Time: 30 minutes
Leftover potential: Good; can be frozen.

Wednesday, December 07, 2011

CRISPY CHICKEN AND APPLE SALAD


In my ongoing quest for satisfying cold-weather salads, I have bookmarked approximately one million that involve apples and/or dried cranberries, all very subtly different. This one, originally from Everyday Food, which I spotted at Serious Eats, combines those two uber-autumnal/wintry ingredients with lettuce, slices of breaded pan-fried chicken breast, and a creamy dressing. The original dressing looked unappetizing to me—it was basically just a mixture of mayonnaise and buttermilk, with a little vinegar and parsley thrown in—and it is a sign of my newfound passion for mustard that I immediately thought, “But this salad would be perfect with a little Grey Poupon!” So instead I used a lighter, spunkier yogurt-Dijon vinaigrette lifted from one of my very favorite salads, a dressing that has become my go-to default whenever I need to improvise. As I suspected, it was a delectable counterpoint to the chicken and the crisp, sweet-tart fruit. When I ate the leftovers for lunch the next day, I threw in a handful of walnuts, and that made everything even better, so I’m suggesting it as an option below. This isn’t a revolutionary combination of flavors—it’s so intuitive, I’m pretty sure I’ve seen similar salads on fast-food menus, although of course the homemade version is infinitely better—but it makes an easy, wholesome, pleasing meal. We both really liked it, so I’m guessing it’s going to become a regular menu staple around here.

¼ cup all-purpose flour
1¼ teaspoons salt, divided
Freshly ground black pepper to taste
1 large egg
1 cup panko breadcrumbs
1 pound boneless, skinless chicken breasts, gently pounded to an even thickness
5 tablespoons olive oil, divided
3 tablespoons white wine vinegar
3 tablespoons plain yogurt
1½ teaspoons Dijon mustard
8 cups red-leaf lettuce leaves
2 large apples, cut into thin wedges
½ cup dried cranberries
½ cup toasted walnuts (optional)

1. On three small plates, set up the dredging stations: the flour on one, the egg whisked with 1 tablespoon of water on another, and the breacrumbs on the third. Season the flour with ¼ teaspoon salt and some freshly ground black pepper, and the panko with ½ teaspoon salt. Dry the chicken breasts thoroughly with paper towels until tacky.

2. In a medium skillet, heat 2 tablespoons olive oil over medium until shimmering.

3. Dredge the chicken in the flour and shake off the excess, then in the egg mixture, allowing the excess to drip off, and finally in the breadcrumbs, pressing gently to adhere. Add the chicken to the skillet and cook until golden, then flip and finish cooking, 8 to 10 minutes total. Drain on paper towels, allow to cool for a few moments, and then slice into strips.

4. While the chicken cooks, whisk together vinegar, yogurt, mustard, and ½ teaspoon salt in a small bowl; season with pepper to taste. Add 3 tablespoons olive oil in a slow, steady stream, whisking until emulsified.

5. Lay the lettuce in a serving bowl or on a platter and scatter with the apples and cranberries (and walnuts, if desired). Lay the chicken over the top, drizzle with dressing, and serve.

Serves: 4
Time: 30 minutes
Leftover potential: OK, although chicken will be less crispy the next day; store all components (chicken, dressing, walnuts, unsliced apples, and cranberries) separately and assemble right before eating.

Tuesday, December 06, 2011

CHICKEN A LA DIABLE


Devil chicken! Except, of course, this zesty, spicy, crispy baked chicken is actually quite divine. I spotted it at Serious Eats and pegged it as an easy weeknight dinner, which it certainly was. I love that I’ve now gone from mustard hating to grudging acceptance to actually perking up whenever I see it in an ingredient list. It’s such a great shortcut to add a lot of zip and savor to food, especially meat; I can’t believe I ever turned up my nose at it. Using it as a coating for chicken is as brilliant as you would expect. Throw on some red pepper flakes, thyme, breadcrumbs, an egg wash to hold it all together, and naturally some butter, and you’ve got tasty Frenchy comfort food. I served it with spinach-apple salad, which was a perfect accompaniment.

2 tablespoons smooth Dijon mustard
1 tablespoon coarse-grain Dijon mustard
½ teaspoon hot red pepper flakes
2 eggs
4 whole chicken legs (bone-in, skin-on)
Salt to taste
2 tablespoons minced fresh thyme
½ cup panko breadcrumbs
3 tablespoons unsalted butter, cut into small cubes

1. Preheat oven to 375 degrees.

2. In a small bowl, combine mustards and red pepper and mix well to blend. Season chicken legs with salt, then use a pastry brush to paint the mustard mixture evenly on all the legs.

3. On a plate or in a shallow bowl, combine eggs and whisk lightly with a fork to blend. In another, combine the breadcrumbs with the thyme. Dredge the chicken in the eggs, then in the breadcrumbs, coating them as evenly as possible, and then transfer to a baking dish.

4. Dot the chicken pieces evenly with butter, then bake until the juices run clear, 30 to 40 minutes.

Serves: 4
Time: 1 hour
Leftover potential: OK (although the leftovers won’t be as crispy)

Friday, December 02, 2011

PUMPKIN PUDDING


After the cookies and the pancakes, I still had some pumpkin puree left, so of course I had to make pumpkin pudding, as part of my ongoing quest to make every kind of pudding in the world, ever. I found the recipe at Sugarcrafter, probably via Food Blog Search. It was as easy as any other pudding (in other words, surprisingly easy) and tasted about as you’d expect, like a lighter, creamier pumpkin pie filling. It didn’t rock my world, but I will certainly make it again, especially when I have extra pumpkin puree to use up.

It amuses me how many ways there are to make pudding; some recipes have you add the egg right away and stir continually (and then strain the pudding to make sure there are no cooked egg bits floating around), others have you add it midway through (which means tempering the egg mixture with some hot milk), and a few have you add it at the end (which means there’s always a small risk of raw-ish egg, since you’re just relying on the heat of the milk to cook it). Whichever way you do it doesn’t seem to have a great impact on the end result, so perhaps it’s just a matter of personal preference. I’m not too afraid of raw egg, and in this case I didn’t balk at straining the pudding since I knew I’d want to get rid of any stray stringy pumpkin pieces, but in general I’m of the add-it-midway-and-temper school, so I might do that next time I make this. Otherwise, I saw no need to tinker with the recipe, except that of course I once again shoved nutmeg to the background in favor of cardamom, because I don’t understand why the rest of the world refuses to use it.

And here ends my experimentation with pumpkin for this year…unless I buy another can, in which case this whole merry-go-round will start up again.

1¾ cups milk
1 egg
½ cup canned pumpkin
½ teaspoon ground cinnamon
¼ teaspoon ground cardamom
⅛ teaspoon ground nutmeg
⅛ teaspoon ground cloves
2 tablespoons cornstarch
¼ cup + 2 tablespoons brown sugar

1. In a medium bowl, whisk together the milk and egg.

2. In another bowl, combine the pumpkin and spices.

3. In a saucepan over medium heat, combine the cornstarch and sugar. Gradually whisk in the milk mixture, scraping the bottom and sides with a rubber spatula to break up lumps. Bring to a boil and cook until the mixture thickens and coats the spatula, stirring constantly. Remove from the heat.

4. Add the pumpkin mixture to the pudding, stirring to combine. Place the pan back over low heat and warm until heated through. Strain through a fine mesh strainer into a bowl to remove any lumps. Transfer the mixture to a clean bowl or bowls (if you don’t like pudding skin, place plastic wrap directly on the surface of the pudding so that a skin will not form). Refrigerate at least an hour before serving.

Serves: 4
Time: 30 minutes
Leftover potential: Good; lasts a few days in an airtight container in the refrigerator.

Wednesday, November 30, 2011

CURRIED COCONUT CARROT SOUP


As soon as fall arrived, I started craving all things orange: sweet potatoes, butternut squash, and even, finally, pumpkin. As soon as I saw this soup at The Kitchn, I wanted it in my belleh. I could eat pureed soups for days on end, but I try to keep my desire for them at reasonable levels because A prefers the chunky stuff; still, I already had three carrot soups in my collection, so adding another seemed like madness. But this one was different! Although curried orange-hued soups are hardly new territory, I hadn’t made one before (although last winter’s lentil version alerted me to how delicious curried soups can be), and besides, the addition of coconut milk was calling out to me.

As with most vegetable soups, this was a cinch to throw together. My can of coconut milk was only something like 13.5 ounces and the mixture looked a bit thick after pureeing, so I added a little 1% milk to thin it out. Then I excitedly took a taste and…meh. I added more salt, usually the remedy for an iffy soup, but was still a bit disappointed. I wasn’t getting a strong curry taste and knew my curry powder was pretty ancient, so I would have added more…except my jar was empty; I’d only just been able to scrape out the tablespoon the recipe required. A little acid seemed as though it might perk things up, so my thoughts turned to citrus. I didn’t have a lemon, but I did have a nice, fat lime. I know lime plays well with coconut, ginger, and curry, and it seemed as though it would complement the carrot nicely. I squeezed in the whole lime and—zowie! Just this one little extra ingredient took the soup from blah to bombastic. I felt like a culinary genius.

I’d like to try the recipe again with some fresh curry powder, just to see if that would have remedied my problem, but as a citrus fiend I’ll still be making the lime (or, in a pinch, I think lemon would be just as good) a permanent component. With it, this soup was fantastic—sweet from the carrots, bright from the citrus, creamy from the coconut, earthy from the curry, and with a surprising kick from the red pepper flakes. (I loved the way the heat blossomed after each bite, but if you’re spicy-foods-averse, maybe start with ¼ teaspoon and see how it goes; you can always garnish with more later.) This will be a wonderful warming, cheerful soup in the depths of winter (not that the depths get very deep in Southern California), particularly when I have a cold. Serve it with some multigrain rolls and you’re all set to feel simultaneously hippie-healthy and cozily indulgent.

2 tablespoons olive or coconut oil
1 onion, peeled and roughly chopped
6 cups unpeeled, roughly chopped carrots (about 8 medium-sized carrots)
3½ cups vegetable stock (I used homemade chicken stock)
One 15-ounce can full-fat coconut milk
1½ tablespoons freshly chopped ginger root
1 tablespoon curry powder
½ teaspoon red pepper flakes
Salt and pepper to taste
Juice of 1 lime (or 1 lemon)

1. Heat the oil in a large soup pot over medium heat. Add the onions and sauté until tender, about 7 minutes. Add the carrots and cook for another 5 minutes. Pour in the stock and coconut milk. Add the ginger, curry powder, and chili flakes. Put a lid on the pot and cook until the carrots are softened, about 10 or 15 minutes.

2. When carrots are soft, carefully blend the soup in batches in a blender, or use an immersion blender to puree until smooth. Season with salt and pepper and add lime juice to taste.

Serves: 6 to 8
Time: 45 minutes
Leftover potential: Great. Keeps for a week in the fridge or indefinitely in the freezer.

Monday, November 21, 2011

SPINACH-APPLE SALAD WITH MAPLE-CIDER VINAIGRETTE


Hot damn, this is a great fall-winter salad. I saw something similar on Annie’s Eats last month and thought it looked good, although I wasn’t quite sold on the dressing. (You can tell I’ve truly become a mustard convert, because I looked at the recipe and thought, “But where’s the Dijon?”) Then I skimmed the comments and noticed that someone mentioned making “almost the exact same thing but it had a maple-cider vinaigrette…and curry spiced pecans.” One quick Google later and I located that very recipe, from Southern Living, on MyRecipes, where it had an “Outstanding” rating—and Dijon in the dressing. Sold!

I made no changes to the recipe, except to halve the quantities because two people don’t need eight servings of salad (hence all the rather odd measurements; I went with “pinch” for the spices rather than “1/16 teaspoon,” but if you have a measuring spoon that small, by all means, go for precision) and to substitute feta for the goat cheese because I don’t like goat cheese. It sounds like kind of a hassle to have to candy the pecans, but (a) it’s actually super-easy, reminding me that I should make spiced, candied nuts all the time, because they are also awesome, and (b) you can make them ahead of time if you want, although I don’t recommend it because they’re so tasty they’re likely to get gobbled up as snacks before you even get around to making the salad. I do sort of question calling them “curried” pecans when they actually have more ginger than curry, and just as much salt and cayenne as curry; mine didn’t have a really noticeable curry flavor, but they were so good just as they were that I don’t really feel the need to tinker with the spice mixture—I just renamed them in my version of the recipe instead.

We loved everything about this salad—the crunch of the apple, nuts, and onion against the tenderness of the spinach and the creaminess of the feta; the salty-savory-sweet balance (the dressing is seriously delicious—I’m normally pretty sparing with salad dressings because I hate a soggy salad, but I used every last drop of this one); the colors; the wonderful fallishness; everything. I made it twice in the space of two weeks, first with this chicken recipe and then again with this one; it went perfectly with both and I’m still not tired of it, so you can bet it will be a cold-weather standard on my menu from now on. It makes a generous amount, so that even though I’d still technically call it a “side dish” (because it’s not quite hearty enough for me to make a meal of on its own), it took center stage at the table, with our small plates of chicken looking like side dishes in comparison. Which, really, is the way I prefer it—lots of veggies, fruit, and cheese with a modest garnish of meat!

Spiced candied pecans:
3 ounces pecan halves
1 tablespoon butter, melted
1½ tablespoons sugar
⅛ teaspoon ground ginger
1 pinch curry powder
1 pinch kosher salt
1 pinch ground red (cayenne) pepper

Maple-cider vinaigrette:
2 tablespoons + 2 teaspoons cider vinegar
1 tablespoon pure maple syrup (I recommend Grade B)
1½ teaspoons Dijon mustard
⅛ teaspoon kosher salt
⅛ teaspoon freshly ground black pepper
⅓ cup olive oil

Salad:
5 to 6 ounces fresh baby spinach, thoroughly washed
1 small apple, thinly sliced (original recipe calls for Gala; I’m not sure what kind I used, since I tend to buy a big assortment of apples at the farmers’ market and then forget which one is which by the time I get them home, but I’d recommend leaning toward the tarter, firmer end of the spectrum)
½ small red onion, thinly sliced
2 ounces crumbled feta

1. To prepare the pecans, preheat the oven to 350 degrees. Toss pecans in melted butter. Stir together sugar and next four ingredients in a bowl; add pecans, tossing to coat. Spread in a single layer in a nonstick aluminum foil- or parchment-lined pan. Bake 10 minutes or until lightly browned and toasted. Cool in pan on a wire rack 20 minutes; separate pecans with a fork. (Pecans may be made up to 1 week ahead; store in an airtight container.)

2. Meanwhile, to prepare the vinaigrette, whisk together cider vinegar and next four ingredients. Gradually whisk in oil until well blended. (Vinaigrette may be made up to 3 days ahead; cover and chill until ready to serve.)

3. To prepare the salad, combine spinach and next three ingredients in a bowl. Drizzle with desired amount of vinaigrette; toss to coat. Sprinkle with pecans.

Serves: 4 as a large side dish or a light lunch
Time: 40 minutes
Leftover potential: Poor for the completed dish, but the pecans and the vinaigrette will each keep tightly sealed and refrigerated for several days, and the rest of the salad is easy to put together, so you can make some salad right away and the rest later.

Thursday, November 17, 2011

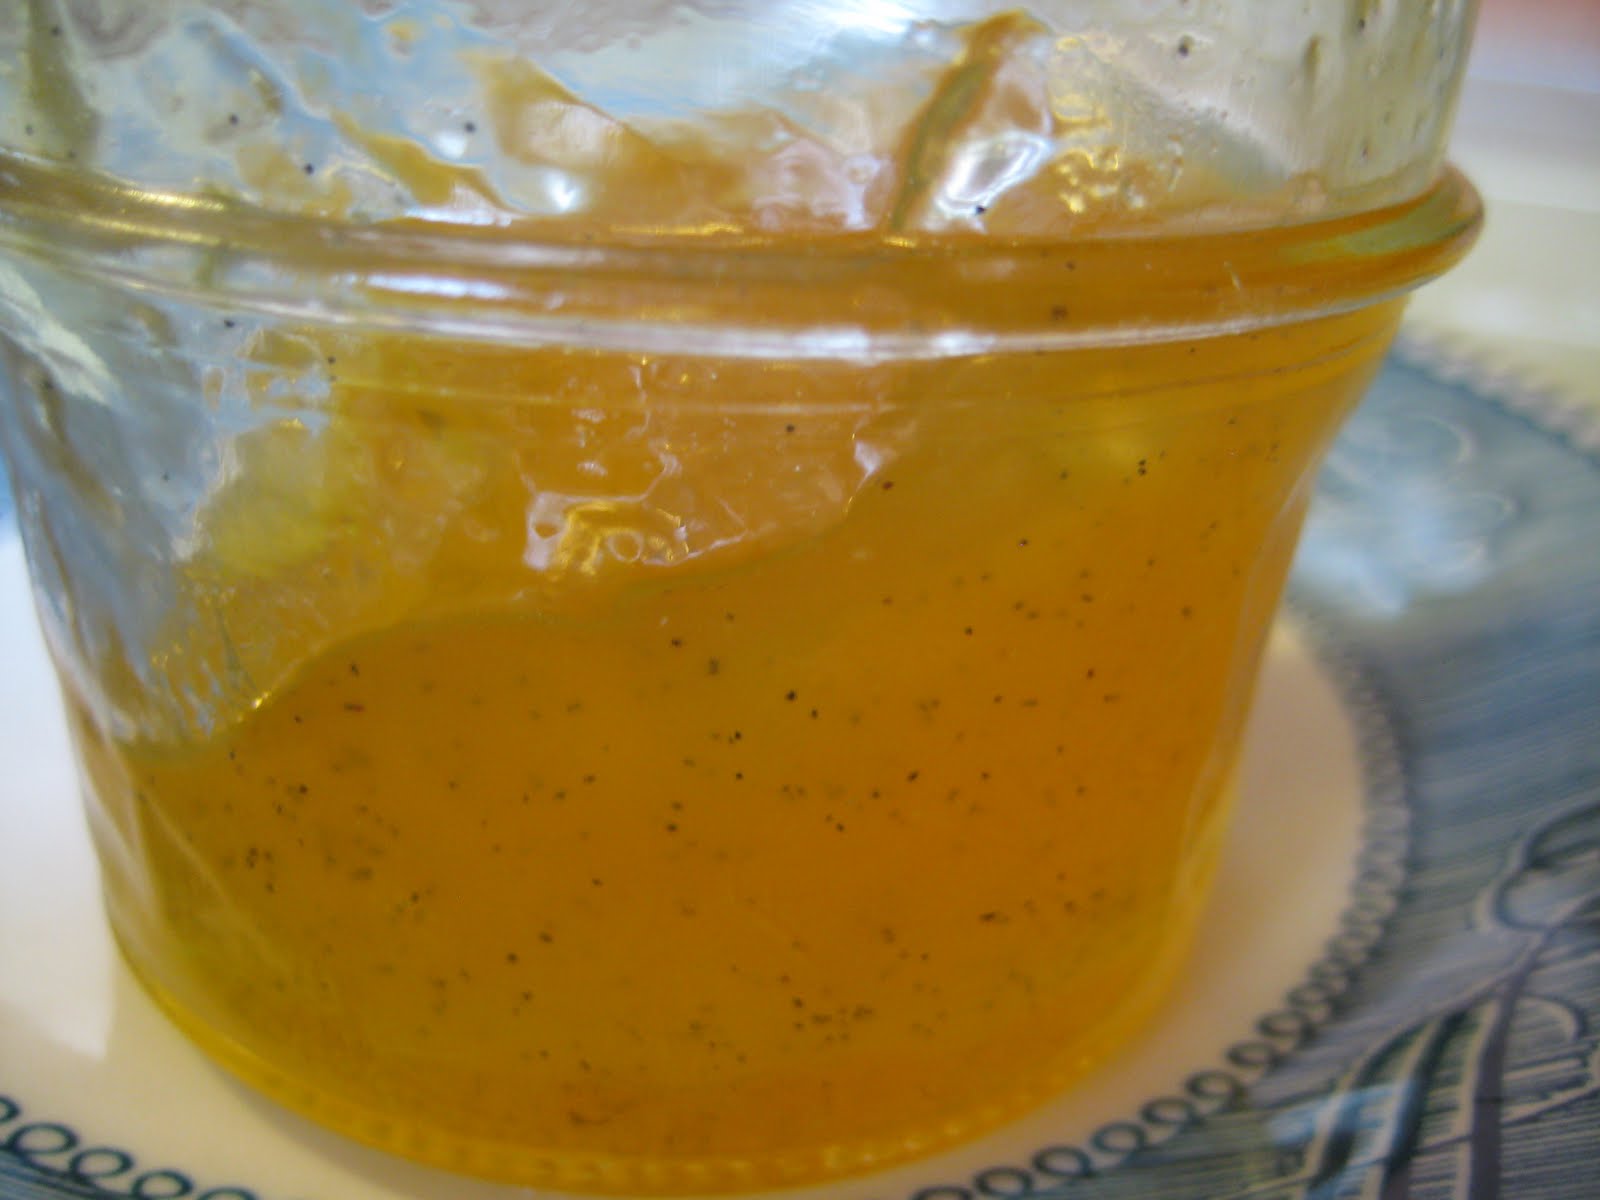
VANILLA ORANGE JELLY


As promised, here’s the recipe for the orange jelly I made months ago, which turns out to be the perfect topping for pumpkin spice pancakes.

Making jam requires, first and foremost, large quantities of fresh, preferably cheap fruit, which makes Southern California a pretty good place to live if you’re into home canning. Although I lament that I’ll never be able to make raspberry or blackberry jam unless I move away or become independently wealthy—and I have to pick my own blueberries and hoard the resulting paltry jars of jam like precious jewels—the fact that I can have heaps of fantastic strawberries (my very favorite) nearly all year around makes up for it. The one SoCal specialty I’d never managed to take advantage of, however, was citrus fruit. I can buy a 5-pound bag of perfect oranges at the farmers’ market for just a few dollars, but I loathe marmalade, so canning with oranges seemed off the table until I spotted this recipe, tantalizingly called “Creamsicle Jelly,” at Food in Jars. I’d never made jelly before; it had never even occurred to me. I mainly associate it with the grape stuff you (not I, never) might put on a peanut-butter sandwich. But of course, if you want to can with oranges and hate those chewy, bitter pieces of rind cluttering up your marmalade, jelly it must be. I don’t especially love orange-flavored things, but Creamsicles are an exception, so the genius idea of adding vanilla was too good to resist. (You’ll notice I retitled the recipe here, simply because, on reflection, “Creamsicle” sort of implies that there’s cream in the jelly, which is inaccurate and kind of gross. If you want the full Creamsicle experience, mix some of this into your morning yogurt—it’s great.)

I wanted this so bad that I finally broke down and bought a candy thermometer, something I’d resisted for years because I’m inexplicably terrified of anything involving melting sugar. (Which is too bad, considering that I adore caramel and toffee.) You’ll notice that the original recipe has a lot of troubleshooting addendums, because many commenters seemed to have problems getting it to set (or having it set too much). I made this so long ago that I don’t remember the details of how I went about it, except that I followed the instructions and they worked for me. I thought the jelly wasn’t going to set; when I took the jars after the canner and even 24 hours later, the contents still looked so runny that I figured I’d just tell everyone it was supposed to be orange-vanilla syrup, but I stuck the jars under my bed and the next time I pulled the box out, the jelly appeared to have set. The jar that’s in my fridge is just about the same consistency as most of my jams, not too thick and not too loose, perfectly spoonable/spreadable, and the flavor is delicious—quite sweet, but with deep, real orange flavor and the distinct aroma of vanilla. Considering that I can get my hands on as many good oranges as I want, pretty much whenever I want them, I’ll definitely be making this again.

4 cups freshly squeezed orange juice
4 cups sugar
2 vanilla beans, split and scraped
1 packet liquid pectin (half a box) (Ball brand is recommended)

1. Prepare jars and closures as in steps 1–2 here.

2. Combine orange juice, sugar, vanilla bean scrapings, and beans in a large pot (this one is a foamer). Bring to a boil over high heat and cook until volume is reduced by approximately one-third to one-half. Use a thermometer to track the temperature, so that you know when you’re getting to 220 degrees (the set point of jams and jellies). When it has reached 220 degrees and is able to maintain that temperature even after a good stir, add the pectin. (Note that the jelly may reach 220 degrees several times during cooking before it is actually time to add the pectin. It needs at least 30 minutes of boiling, if not more, in order to set up well.) Cook for an additional 2 to 3 minutes and remove from heat.

3. Remove the vanilla beans from the pot. Pour jam into prepared jars, wipe rims, apply lids, screw on bands, and process in a boiling-water canner for 10 minutes, as in steps 7–9 here. (Note that jelly may not appear set immediately after canning; mine became firmer over the course of several days.)

Yields: About 8 4-ounce jars
Time: Can’t remember; at least 3 hours
Leftover potential: Awesome! Sealed jars will keep for 1 year.

Tuesday, November 15, 2011

PUMPKIN SPICE PANCAKES


The joke is most definitely on me. I only made this recipe to use up leftover canned pumpkin from the pumpkin snickerdoodles, but I fell so hard in love with these pancakes that I’ve already purchased a reserve can of pumpkin in order make them again whenever the craving hits. The recipe is from Joy the Baker and it is perfect—the pancakes cook up moist and fluffy, with just the right amount of pumpkin and spice flavor, a barely perceptible enrichment of wheat flour (I used white whole wheat), and not too much sweetness. I loved the taste of them so much I could have eaten them with no accompaniment besides a little smear of butter, but I did find that they were even better when adorned with a thin layer of the orange vanilla jelly I made earlier this year (but apparently, now that I look, never posted about, an oversight that will shortly be remedied). If you’re more of a traditional pancake eater, I imagine maple syrup would be just fine on these, or whipped cream if you want to get really fancy. The only change I made was my habitual addition of cardamom; I used it instead of the ¼ teaspoon nutmeg, although I still threw in a pinch of nutmeg anyway, plus a pinch of allspice, to approximate my usual pumpkin pie spice mix.


I thought the banana oat bran pancake recipe was the only pancake recipe for me, but I was wrong—I’ll be alternating it with this one, at least in the fall and winter, from now one. I also thought I wasn’t a pumpkin person, but apparently, I was wrong about that too. At this rate, maybe someday I’ll figure out why everyone gets so excited about cranberries!


¾ cup all-purpose flour
½ cup whole wheat flour
2 tablespoons brown sugar
2 teaspoons baking powder
¼ teaspoon salt
¾ teaspoon ground cinnamon
¼ teaspoon ground cardamom
1 pinch ground ginger
1 pinch ground cloves
1 pinch ground nutmeg
1 pinch allspice
1 cup milk
½ cup canned pumpkin
1 egg
2 tablespoons vegetable oil or melted butter
A little butter for greasing the skillet

1. Whisk together flours, sugar, baking powder, salt, and spices in a large bowl.

2. In a separate bowl, whisk together milk, egg, pumpkin, and vegetable oil or melted butter.

3. Pour the wet ingredients into the dry ingredients and whisk until just combined. Let the batter sit for 10 minutes while you heat the skillet.

4. Over medium heat, melt a little butter on the skillet. Once the skillet is hot, spoon a heaping 2 tablespoons of batter per pancake into the skillet. When pancakes start to bubble slightly, carefully flip them over. Cook until browned and cooked through, remove to a plate, and repeat as needed with the remaining batter.

Serves: About 4 (I got 16 small pancakes)
Time: 30 minutes
Leftover potential: Good; if you have leftover pancakes, layer them between pieces of waxed paper in an airtight container and store them in the freezer. To reheat, take out the number of the pancakes you want, place them on a plate and heat them briefly in the microwave (I start with 30 seconds) to thaw the centers, then finish heating them in a dry skillet over medium heat just until they are thoroughly warmed and the exteriors are slightly crisp.

Friday, November 11, 2011

WARM SPINACH SALAD WITH SAUSAGE AND ROASTED VEGETABLES


I did a pretty good job of overcoming my slight resentment of main-dish salads this past summer; thanks to recipes like this, this, and this, we quite happily ate salad as an entrée almost once a week. As winter approaches, raw, cold meals become far less appealing, yet I don’t want to break this healthy Salad Night habit completely. I have a couple of warm salad recipes, but now I’m on the prowl for more. I have no idea what series of link-clickings led me to this one at For the Love of Cooking, but why even bother talking about that when we should be talking about how much this salad kicks ass? Yes, I just swore, albeit mildly, about a salad, on a blog that my mother reads. That’s how good it is. If I were talking to you about it in person, I might swear downright emphatically. WE $@*!ing LOVED THIS #&!% SALAD.

Really, this is quite similar to a recipe I already have, but served over spinach, with a balsamic Dijon vinaigrette and some cheese on top, additions I would have never thought to make. It manages to be simultaneously wholesome and hearty, with all the fresh and colorful appeal of a salad in a warm, filling, satisfying meal. The combination of vegetables is perfect; along with the expected onion, potatoes, and garlic, you get asparagus (which, sure, may not exactly be in season right now, but we all know how awesome it is when roasted), mushrooms (which I never think to roast but are great that way), and tomatoes (which I have a whole treatise on; see below). Although I usually roll my eyes when some online recipe commenter talks about how they added chicken to a perfectly good vegetarian dish to “make it a meal,” as though meals are somehow not complete without meat products, I gotta say that the savory, meaty sausage does really make this feel like a meal. The spinach wilts gently under all this caramelized, roasty goodness. The dressing adds moisture and a welcome zesty acidity, and the feta does its usual salty, creamy, fabulous thing. All that and it’s easy to throw together on a weeknight.

I made only minimal changes. I probably ended up using more vegetables than called for—I got greedy when picking out my mix of cute little potatoes, and I threw in the whole 8-ounce package of mushrooms and the entire bunch of asparagus because I didn’t want to get stuck with the orphaned vegetables. The original recipe called for 12 ounces of spinach, which, although it’s technically 4 servings according to the nutritional information on the package, is a tremendous quantity in its raw state; maybe my vegetables and sausage weren’t piping-hot enough to wilt the greens sufficiently when I put the salad together, but that amount of spinach wouldn’t have fit in any of my entrée bowls. I just eyeballed it, using one to two generous handfuls of spinach per serving, which probably came to more like 8 or even 6 ounces total.

I also used cherry tomatoes instead of the little on-the-vine ones used in the original recipe or the plum ones used in its Real Simple source. I’ve recently fallen in love with roasted cherry tomatoes (the maple syrup in the recipe I use sounds weird, but go with it! It adds a sweet smokiness without tasting anything like pancakes; I typically scarf them all straight off the baking sheet before I can manage to take a photo of them, which is why I haven’t posted the recipe yet), but of course the key to the ones I’m used to is letting them roast face-up, undisturbed, until they dry and wrinkle. Here, roasting the tomatoes with the other vegetables and tossing them periodically, they break down quite a bit, so their juices leak out and spread over the baking sheet, meaning that all the vegetables turned out much less crisp than I’d envisioned. I think this could be resolved by either (a) roasting the tomatoes ahead of time using my usual recipe (I’ve been meaning to try adding those to salads anyhow, if I can ever stop snacking on them) or (b) roasting the tomatoes at the same time as the other vegetables, but undisturbed on a second baking sheet, not to mention there’s always the option of (c) just using larger tomatoes as the original recipe does. I may give one of those methods a try in the near future just for kicks, but I don’t know if any changes are really necessary, because the recipe turned out so damn delicious just as I made it, and it’s certain to be a Salad Night staple for us throughout the winter.

UPDATE, 1/13: If the idea of out-of-season asparagus doesn't appeal, substitute a couple of handfuls of trimmed green beans, cut into 1-to-2-inch pieces. It's just as excellent.

1 cup cherry, grape, or plum tomatoes, halved
1 medium red onion, sliced into wedges
1 cup baby potatoes, halved, or quartered if larger (I used a mix of yellow, red, and purple)
1 cup mushrooms, quartered (I used cremini)
1 bunch (about 12 spears) asparagus, tough ends removed, remaining spears cut into 2-inch pieces
4 large cloves garlic, with skins left on
1 tablespoon olive oil
Coarse salt and freshly ground pepper to taste
4 Italian sausages (I used Trader Joe’s Garlic and Herb Chicken Sausage, which I highly recommend)
2 tablespoons balsamic vinegar
3 tablespoons olive oil
2 tablespoons water
2 tablespoons coarse-grain Dijon mustard
1 small clove garlic, minced
6 to 12 ounces fresh spinach
2 to 4 ounces feta cheese, crumbled

1. Preheat the oven to 400 degrees. Line a baking sheet with tin foil and coat with cooking spray. Place the tomatoes, onions, potatoes, mushrooms, and 4 whole unpeeled garlic cloves on the baking sheet. Drizzle with 1 tablespoon olive oil and season with salt and pepper to taste. Place in the oven and roast for 20 to 25 minutes, stirring occasionally. Add the asparagus and continue to roast for 10 minutes, or until the asparagus and potatoes are fork-tender.

2. While the vegetables are roasting, make the salad dressing by whisking the vinegar, 3 tablespoons olive oil, mustard, water, and 1 small minced garlic clove together in a small bowl until emulsified, then season with salt and pepper to taste.

3. Also while the vegetables are roasting, cook the sausages in a skillet over medium heat for 10 minutes or until done.

4. Once the veggies are out of the oven, carefully remove the skin from the garlic cloves and then slice the roasted garlic. Toss the warm vegetables (including the garlic) and sliced sausages with the spinach and dressing until evenly coated. Top with feta.

Serves: 4
Time: 1 hour
Leftover potential: Good, if not yet mixed together. Store all the elements (roasted vegetables and sausage, spinach, dressing, and cheese) separately, and when you want to eat them, reheat the vegetables and sausage and then add to the spinach, dressing, and cheese.

Thursday, November 10, 2011

PUMPKIN SNICKERDOODLES


After 34 years of total indifference (bordering on mild hostility) to the wave of pumpkin-flavored foodstuffs that sweeps the nation each autumn, I’m suddenly starting to catch on. It started with the pumpkin ice cream last year. I made it again this year, then caught myself jonesing for something else along the same lines. When I spotted this recipe at Annie’s Eats, in which a bit of pumpkin and extra spice is added to the traditional snickerdoodle formula, it seemed a good way to herald fall—and the arrival of My!New!Oven!—without going overboard into full-blown pumpkin mania. And as I’d hoped, the cookies were a perfect pumpkiny twist on an existing fave; the pumpkin adds a tinge of orange color and a tender, cakey texture (don’t expect the usual snickerdoodle crispness here), but its flavor remains subtle.

I replaced nutmeg with cardamom in the dough, because I flippin’ adore cardamom and it never seems to get fair play in baked goods outside of Scandinavia. In general, every time I see cinnamon in a recipe, I throw in a little cardamom too. I may not be a Pumpkin Person yet, but I’m officially Cardamom Crazy! I then rejiggered the coating mixture to approximate full-blown pumpkin pie spice, dialing down the cinnamon a bit to give cardamom a supporting role (natch), scaling back the ginger, and adding nutmeg, cloves, and allspice. I loved the results and will certainly make these again next October. In the meantime, I have half a can of pumpkin puree still to use up, so watch this space for more grudgingly trendy pumpkin recipes in the near future.

Cookies:
3¾ cups all-purpose flour
1½ teaspoons baking powder
½ teaspoon salt
½ teaspoon ground cinnamon
¼ teaspoon ground cardamom
1 cup (2 sticks) unsalted butter, at room temperature
1 cup granulated sugar
½ cup light brown sugar
¾ cup pumpkin puree
1 large egg
2 teaspoons vanilla extract

Coating:
½ cup granulated sugar
¾ teaspoon ground cinnamon
¼ teaspoon ground cardamom
⅛ teaspoon ground ginger
⅛ teaspoon ground nutmeg
⅛ teaspoon ground cloves
⅛ teaspoon allspice

1. In a medium bowl, combine the flour, baking powder, salt, ½ teaspoon cinnamon, and ¼ teaspoon cardamom. Whisk to blend and set aside.

2. In the bowl of an electric mixer, beat together the butter, brown sugar, and 1 cup granulated sugar on medium-high speed until light and fluffy, 2 to 3 minutes. Blend in the pumpkin puree. Beat in the egg and vanilla until incorporated. With the mixer on low speed add in the dry ingredients and mix just until incorporated. Cover and chill the dough for at least 1 hour.

3. Preheat the oven to 350 degrees. Line baking sheets with silicone baking mats or parchment paper.

4. Combine the sugar and spices for the coating in a bowl and mix to blend. Scoop up 1 heaping tablespoon of the dough and roll into a ball. Coat the dough ball in the sugar-spice mixture and place on the prepared baking sheet. Repeat with the remaining dough to fill the sheets, spacing the dough balls 2 to 3 inches apart. Dip the bottom of a flat, heavy-bottomed drinking glass in water, then in the sugar-spice mixture, and use the bottom to flatten the dough balls slightly. Recoat the bottom of the glass in the sugar-spice mixture as needed.

5. Bake the cookies for 10 to 12 minutes, or until just set and baked through. Let cool on the baking sheets for about 5 minutes, then transfer to a wire rack to cool completely. Store in an airtight container.

Yields: 3 to 4 dozen cookies
Time: 2 hours
Leftover potential: Good; cookies will dry out after three or four days at room temperature, but they freeze fairly well.