Showing posts with label Breads. Show all posts

Wednesday, May 02, 2012

GARLIC NAAN


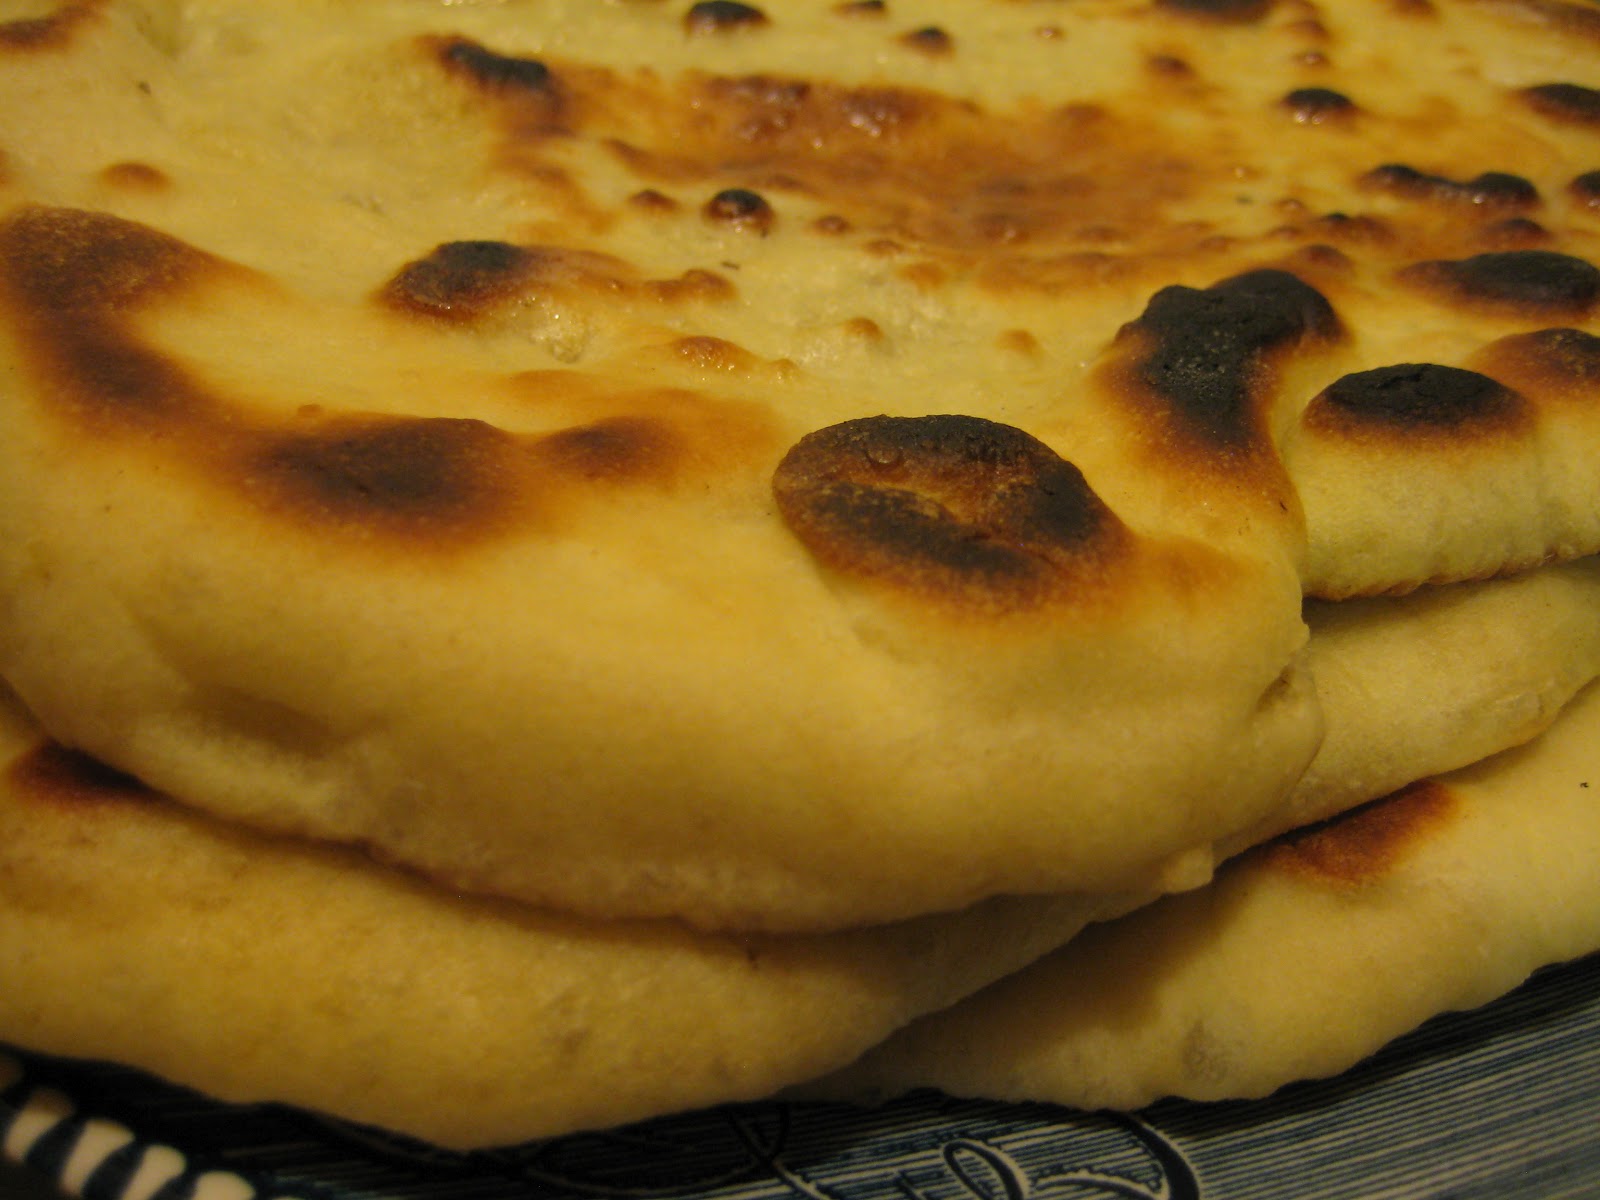
Of course I needed some naan to go with my chicken tikka masala. I hear Trader Joe’s makes a pretty decent frozen one, but I do enjoy baking bread from time to time, and it’s pretty convenient to do on my telecommuting days—knead the dough during my lunch break, let it rise while I work, punch it down right after work and let the second rise happen while I do miscellaneous pre-dinner tasks, then bake while I’m cooking. Posie Gets Cozy, the same site that turned me on to the tikka masala, mentioned an Allrecipes naan recipe as well, but it called for ¼ cup sugar, which seemed way too sweet, so I turned to trusty Food Blog Search instead. It turns out there are a dizzyingly diverse bunch of ways to make naan. It can be leavened with yeast, or just with baking soda; it can be cooked on a grill, on a stovetop, or in the oven; and so on. I quickly grew exhausted from combing through all the variations, so I settled semi-blindly upon this one from Use Real Butter, mainly because it had garlic, it used yeast (baking-soda breads, while simpler, never taste quite as good to me), it included yogurt (yum), it didn’t have weird-looking amounts of sugar or anything else, and it offered instructions for a several different cooking methods, plus lots of helpful photos for guidance.

This turned out to be a wise choice. The dough came together well (I used my KitchenAid mixer, and I think it’s the first time I’ve really gotten good results using the dough hook), was easy to work with, and baked up just as promised, with big bubbles, nice char marks, and a tender, springy-chewy texture. I used my cast-iron skillet on the stovetop and it did the trick just fine. I’d heard the cooking surface should be really hot, so I started at medium-high heat, but the first naan I cooked crossed the line too rapidly from alluringly blistered to fairly blackened, so I turned the stove down to medium to get nonburnt bread. However, I crammed that singed naan into my mouth while cooking the other seven breads, and it was insanely delicious. Maybe it was just that I was so hungry, but mostly likely the bread is best eaten right off the skillet; by the time we sat down to eat the other ones with dinner, they’d cooled to room temperature and even though they still tasted great, they just didn’t seem quite as incredible as that first one. So I’m going to recommend that you serve these as freshly cooked as you can, although the leftover ones are certainly beyond passable. (Or is this just a demonstration of Ramona Quimby’s principle that the first bite of the apple always tastes the best?)

The bread had a mild, not overpowering garlic flavor; I didn’t bother with adding chopped garlic to the top of the cooked naan, figuring that it would just fall off annoyingly into my tikka masala as I dipped it. I didn’t think I’d brush the breads with melted butter either, but I tried it with a few and it did give them a much more photogenic glossy finish and appealing moistness—as well as, of course, a nice buttery taste—so I think it’s worth it but not crucial (unless you want to sprinkle garlic, herbs, or anything else on top, in which case it will provide the necessary adhesion).

Even though I’m not quite sure I’d declare these as good as the restaurant naans I’ve eaten, it was a close enough approximation that I was beamingly pleased with myself. It was fun to make, too, especially watching each one bubble and puff on the skillet. I’ll definitely be making this again, not only with chicken tikka masala and any further Indian dishes I might now be emboldened to try, but with soups like curried lentil and curried coconut carrot.

2½ teaspoons dry yeast
2 tablespoons sugar
4½ to 5 cups all-purpose flour, plus more for dusting and rolling
2 teaspoons salt
1 teaspoon baking powder
2 cloves garlic, crushed and minced
3 tablespoons milk
2 tablespoons plain Greek yogurt
1 large egg, lightly beaten
2 tablespoons vegetable oil, plus a little more for oiling the bowl
Unsalted butter to taste
2 cloves garlic, minced, for sprinkling on top if desired

1. Place the sugar, yeast, and ¼ cup warm water (110 to 115 degrees Fahrenheit) in a small bowl, stir, and let sit 5 to 10 minutes until it becomes foamy.

2. Put the flour, salt, and baking powder in a food processor fitted with a dough blade or a mixer bowl fitted with the dough hook and blend. Pour the yeast mixture, garlic, milk, yogurt, egg, 2 tablespoons vegetable oil, and ¾ cup warm water into the bowl and knead until the dough forms a ball that is smooth and elastic (about 2–3 minutes in a processor, 5–8 minutes in a stand mixer, or 8–10 minutes by hand). The dough should be soft without being sticky; if it’s sticky, add more flour.

3. Put the dough in a large, lightly oiled bowl. Turn the dough around to coat it with oil on all sides, and then cover the bowl with plastic wrap or a kitchen towel and let it sit in a warm, draft-free place for 60 to 90 minutes.

4. Punch down the dough and cut it into 8 pieces. Roll them into balls and set on a floured baking sheet. Cover with a damp kitchen towel and let rise until doubled in size (about 40 to 60 minutes).

5. Roll the dough balls out on a floured work surface to make disks about 6 inches in diameter, then stretch it slightly to make the classic oblong/teardrop shape.

6. Heat a large skillet over medium or medium-high heat. Melt a little butter in the hot skillet. Brush the first naan with water and place it in the skillet water side down. Large bubbles should begin to puff up within a minute. When the bottom of the naan is browned, brush the top of the naan with water, flip it over, and let it cook for another minute or so, until that side is browned. Remove to a basket or plate and, if desired, brush with melted butter and sprinkle with more minced garlic. Repeat seven more times.

Yields: 8 naan
Time: About 2½ to 3 hours
Leftover potential: The naan seemed best when freshly made, but it was OK the next day (when stored in a tightly sealed plastic bag and warmed briefly in the microwave). I have two pieces in the freezer but haven’t tried defrosting them yet.

Monday, December 12, 2011

JALAPENO-CHEDDAR SKILLET CORNBREAD


It’s odd, but I don’t think I’d ever made cornbread before this. I’ve eaten some that I’ve liked over the years (mostly at barbecue/soul food restaurants), but generally I can take or leave it, and I mostly leave it. At its worst, it can be dry, crumbly, and bland. Everyone talks about how much better it is when cooked in a cast-iron skillet, though, so ever since I got a skillet of my own I’ve been thinking I might give it a try. A couple of months ago, I stumbled across the perfect-looking recipe at A Cozy Kitchen. Pouring the hot oil from the skillet into the batter seemed a little weird (and perilous—wear sturdy oven mitts!), but since the recipe was adapted from no less an authority than the Homesick Texan herself, I couldn’t argue. Aside from that little adventure, the bread was easy to make and turned out perfectly: crisp-crusted without and tender within, with the buttermilk and cheese warding off dryness and the jalapeno providing a nice kick. Maybe it was the skillet or maybe it was the recipe, but the bread had a bit more structural integrity than some I’ve seen; it held its shape well when sliced and wasn’t overly crumbly. I served it with chili, but it would have been just as satisfying on its own, with a little butter.

So consider me a cornbread convert! This will definitely be replacing tortilla chips as my chili accompaniment of choice, and I’m contemplating pairing it it with black bean soup soon. I didn’t have any bacon grease on hand, but I’d love to try that next time instead of canola oil; a little bit of porky smokiness would really put this over the top.


2 tablespoons vegetable oil or bacon drippings
2 cups cornmeal (yellow or white)
½ cup sifted all-purpose flour
1 teaspoon baking powder
1½ teaspoons salt
1 large egg, lightly beaten
2 cups buttermilk, shaken
2 jalapeƱos, diced
1¼ cup shredded cheddar cheese, divided

1. Preheat oven to 450 degrees. Put the oil or drippings in a 12-inch cast-iron skillet and place it in the oven for a few minutes until it’s sizzling.

2. Meanwhile, mix together dry ingredients in a large bowl and set aside. Whisk egg and buttermilk in a medium bowl. Mix the wet ingredients into the dry ingredients, then fold in jalapeƱos and 1 cup of shredded cheddar.

3. Take the cast-iron skillet out of the oven, pour hot oil/drippings into batter, and mix. Pour batter into skillet and top with remaining ¼ cup cheddar. Bake for 20 minutes, until brown on top and pulling away from the sides of the skillet.

4. Turn bread out of the skillet, slice into wedges or squares, and serve.

Serves: About 8
Time: 30 minutes
Leftover potential: Good; can be frozen.

Friday, April 08, 2011

SOFT YOGURT SANDWICH ROLLS


Apparently I need to remember to bake bread more often, because when I told A I would be making rolls for our BBQ pulled chicken sandwiches instead of buying them, he looked surprised and a little alarmed. (Probably, not unfairly, he was envisioning the fit I would throw if they didn’t turn out and we had to run to the store to buy emergency bread at the last minute.) But when I fell in love with those sandwiches last summer, part of the charm was the delicious rolls we’d found at the farmers’ market to accompany them. The sandwiches became a regular feature of our menu rotation, but it turned out that the rolls were not such a regular feature of that bakery’s offerings. After a few disappointing iterations of subpar grocery-store replacements, I became convinced that the only solution was to learn to make my own sandwich rolls. Luckily, I had bookmarked this recipe from Baking Bites several years ago.

As usual when I bake bread, the process was fraught with uncertainty, even though this recipe is very simple and not too labor-intensive. My dough seemed really sticky, even after I added all the flour to it—in retrospect, I probably could have added even a little more flour, but I was afraid of making the rolls too stiff and dry. Consequently, it was really hard to knead and then hard to shape. My rolls weren’t very neat-looking, and then I worried they were too close together on the baking sheet. But what do you know, they turned out beautifully anyway. Baking smoothed out all their little imperfections, and even though they grew together, they were easy enough to pull apart again. They tasted delicious (just your standard white bread, with a mild tang from the yogurt and sweetness from the honey) and the texture was absolutely perfect: delightfully moist, pillowy, tender enough to bite into easily but with a tantalizing bit of chew and enough integrity to hold their juicy contents without getting soggy and falling apart. These will be my go-to BBQ chicken vehicles from now on; I think they would also be great hamburger buns, if I ever get into making my own burgers, and I’m sure they would be lovely with cheese and some simple cold cuts on a summer picnic. I can vouch that they are very satisfying with butter and jam, as well.

3½ to 4½ cups all-purpose flour
1 tablespoon active dry yeast
3 tablespoons honey
1 cup warm water (100 to 110 degrees Fahrenheit)
1 cup plain nonfat yogurt (I used Greek-style)
1 tablespoon vegetable oil
1½ teaspoons salt

1. In a large mixing bowl, combine ½ cup flour, the yeast, the honey, and the warm water. Stir well and let sit for 10 minutes, until slightly foamy.

2. Stir in yogurt, vegetable oil, salt, and 2 cups of the remaining flour. Gradually stir in more flour until you have a soft dough that sticks together and pulls away from the sides of the bowl. (This can all be done in a stand mixer with the dough hook attached, as well.)

3. Turn out dough onto a lightly floured surface and knead, adding additional flour if necessary to prevent sticking, until dough is smooth and elastic, or about 5 minutes. Place in a lightly greased bowl, cover with plastic wrap, and let rise for 1 hour or until doubled in size.

4. Turn risen dough out of bowl and onto a lightly floured surface. Gently deflate, pressing into a rectangle. Divide dough into 10 even pieces with a board scraper or a pizza cutter. Shape each piece into a round roll. (To do this, take all the corners of one of the squarish pieces you just cut and pull them together, pinching them to create a seal. This will pull the rest of the dough tight across the top of your roll, giving you a smooth top.) Place on a baking sheet lined with parchment paper. Repeat with remaining dough. Once all rolls have been formed, press down firmly on each one to flatten. Cover with a clean dish towel and let rise for 25 minutes.

5. Meanwhile, preheat oven to 375 degrees.

6. Bake rolls for about 20 minutes, until deep golden on the top and the bottom. Cool on a wire rack and store in an airtight container.

Yields: 10 rolls
Time: About 2½ hours
Leftover potential: Good; will stay soft and moist for several days in an airtight container at room temperature, or can be frozen.

Monday, January 24, 2011

MULTIGRAIN ROLLS


Every time winter rolls around (Ha! See what I did there?), I resolve to bake more bread. It seems like such a cozy, domestically capable thing to do. Yet I only seem to manage it a few times per year. I’m not exactly afraid of it; although I’m not super-comfortable working with dough, it always seems to turn out fairly well. But the fact is that in daily life, we don’t actually eat very much bread, even though I adore it. Aside from grilled cheese, and BLTs in the summer, we rarely have sandwiches, and I’m so committed to eating cereal/granola/oatmeal each morning that I almost never get around to making toast (plus A doesn’t eat breakfast). The only time I consistently work bread into the menu is when we’re having soup. So what usually happens is that I make a huge batch of bumpy rolls and stick them in the freezer, and we eat a few every time we have soup until suddenly the weather turns hot and I don’t feel like baking anymore. Maybe I make biscuits a few times too, but that’s pretty much it.

What would really serve me better, baking-wise, would be to start making my own pizza dough, then find a good recipe for pita bread to wrap around my gyros and sandwich rolls on which to eat my BBQ chicken, then maybe develop a perfect sandwich bread. I do intend to do all those things, but first I indulged my dream of being a Bread Person and made these rolls from Annie’s Eats. I was craving something hearty and wholesome. I don’t like really dense hippie whole-grain breads, but I am a huge sucker for oats, honey, and seeds, so this seemed right up my alley. The oat bran-flax seed mixture at the beginning was a little weird (mine hardened into a cement-like sludge that I feared would weigh down my bread entirely, plus I almost forgot to put it into the dough until I was nearly done adding all the white flour), and I realized at the last minute that I didn’t have the right kind of yeast (luckily, I consulted Google and figured out I could substitute 1.25 times the amount of active dry for the instant, which worked just fine), and I’m still getting acquainted with the KitchenAid dough hook, and I wasn’t sure what size pans to use (my two 8-inch metal cake pans turned out to be perfect), but despite every apparent brush with disaster, the recipe was easy to follow (I liked that specific weights were given for the flour measurements, as well as the exact size the rolls should be—if you don’t have a digital kitchen scale, go get one! They’re invaluable, especially for spatially challenged people like me who have a hard time eyeballing what half a pound looks like or whether my eight equal portions are really equal). My dough rose like a champ and baked very obediently into fluffy, flavorful rolls that were delicious when dipped into carrot-fennel soup (recipe forthcoming), or eaten on their own with a little butter. Although they’re actually chock-full of fiber, they’re not heavy or dry or aggressively grainy, and I love the seed-and-salt topping. (In retrospect, this is a much more successful version of another oat-and-seed-roll recipe I tried almost exactly three years ago.) It was also nice that the recipe makes a modest quantity of rolls; we’ll finish them off with this week’s batch of soup, and I’ll have the space in my freezer to experiment with baking something else.

We’ll see if there’s a place in my life for two whole-wheat roll recipes (bumpy rolls are still nearest and dearest to my heart), but right now I’m pretty sure I’d make these again. Probably not soon enough, however, to use up the enormous bag of oat bran I had to buy especially for this purpose. This was my first experience with oat bran, and while it seems tasty, I’m not sure what else to do with it. Most of the recipes I’m seeing online are for muffins, which I don’t eat very often. I’m sure I could throw it into granola, but what else? If you have tips, send ’em my way!

½ cup oat bran
¼ cup flax seeds
½ cup boiling water
1 cup warm milk (105–110˚ F)
2¼ teaspoons instant (rapid rise) yeast or 2¾ teaspoons active dry yeast
¼ cup honey
2 large eggs
⅔ cup old-fashioned (not instant) oats
7 ounces (1¼ cups) whole wheat flour (I used white whole wheat)
1 teaspoon freshly ground black pepper
1 tablespoon salt
15 ounces (about 3 cups) all-purpose flour
Oil, for greasing the bowl
1 large egg yolk
1 tablespoon water
2 tablespoons mixed seeds (e.g., poppy, sesame, fennel, caraway—I used all four)
Coarse salt, for sprinkling

1. Combine the oat bran and flax seeds in a small bowl. Pour the boiling water into the bowl and mix to moisten. Let sit until the water is absorbed, about 5 minutes. Set aside to cool.

2. Meanwhile, in the bowl of an electric stand mixer, combine the milk, yeast, and honey; mix briefly to blend. Using the dough hook, with the mixer on low speed, mix in the 2 eggs, oats, wheat flour, pepper, 1 tablespoon salt, and oat bran mixture until combined.

3. Slowly add enough all-purpose flour, ½ cup at a time, to make a soft, slightly sticky dough. Continue to knead on medium-low speed, about 3 minutes.

4. Form the dough into a ball. Transfer the dough to a lightly oiled bowl, turning once to coat. Cover with plastic wrap or a clean kitchen towel and let rise in a warm place until doubled in bulk, about 1½ to 2 hours.

5. Brush baking dish(es) lightly with oil (I used two 8-inch round metal cake pans). On a lightly floured surface, turn the dough out and divide into 16 equal pieces, about 2½ ounces each. Form each portion into a ball and place the dough balls in the baking dish(es), spaced slightly apart so they have room to grow together. Cover and let rise until puffy and nearly doubled in bulk, about 30 minutes.

6. Preheat the oven to 375 degrees. In a small bowl, whisk together the egg yolk and 1 tablespoon water. Brush lightly over the rolls. Sprinkle rolls with the seed mixture and coarse salt. Bake until the tops are golden, about 26 minutes. Let cool 10 to 15 minutes before removing from the pan.

Yields: 16 rolls
Time: 3 hours 45 minutes
Leftover potential: Good; rolls keep well in the freezer

Thursday, March 18, 2010

WHOLE WHEAT APPLE MUFFINS


I’ve mentioned it before: I’m just not a muffin person. (This despite the fact that my first cat was named Muffin. Hey, what can I say? I was 10.) They’re cute and all, but so many of them are sweet enough to verge on dessert territory, which is usually not what I crave for breakfast or a snack (and when it’s time for dessert, I’ll take candy or cookies or pie or cake, thanks). But muffins are so popular with others and so crazy easy to make that I do end up baking them on occasion, usually when I have an ingredient to use up (cream cheese, zucchini, ripe bananas) or when I need to bring a treat somewhere to share. So when I was charged with bringing the refreshments for my department’s monthly meeting, which takes place at 9:00 a.m., muffins were the obvious choice. While watching the Academy Awards red carpet show, I made poppy-seed almond muffins so I could finally get a picture for the ol’ blog—and then noticed, while rereading that entry, that I referred to making those very muffins during the Oscars three years ago! Apparently, something about the Oscars says “muffin time” to me.

I also wanted a slightly more wholesome (or wholesome-seeming) muffin option, so I decided to try this recipe from the Smitten Kitchen (adapted from King Arthur Flour). Although they sound vaguely hippie-ish—and indeed, they’re blessedly far from the cupcakes-masquerading-as-muffins phenomenon I abhor—the butter, buttermilk (ordinarily, I might try yogurt, but when baking for others my shameless desire for approbation leads me to choose the full-fat option most of the time), and generous sprinkling of brown sugar make them not out of place in the “treat” category. The whole wheat flavor comes through, but the texture is spectacularly moist and tender, with an irresistible crunchy, caramelized top. (If I were actually making these for my own breakfast/snacking purposes, I might go a little easier on the brown sugar on top, but for showoff/sharing purposes, it added just the right amount of pizzazz.) I brought 17 of these to work and had only two left over, so I think they were well received. I’d certainly make them again, on the rare occasion when I want muffins.

The recipe was straightforward, and I followed it to the letter, except that I ran out of cinnamon about 2 teaspoons (a tablespoon is a lot!) and substituted cardamom for the remaining teaspoon. I used Fuji apples and chopped them a bit smaller in an effort to ensure that they cooked all the way through (a few of them remained crispish, though, which is not my favorite texture in baked goods but didn’t seem to bother anyone else).

1 cup (4 ounces) whole wheat flour
1 cup (4¼ ounces) all-purpose flour
1 teaspoon baking powder
1 teaspoon baking soda
¼ teaspoon salt
1 tablespoon cinnamon
½ cup (1 stick; 4 ounces) unsalted butter, at room temperature
½ cup (3½ ounces) granulated sugar
½cup dark brown sugar, packed, divided
1 large egg, lightly beaten
1 cup (8 ounces) buttermilk or yogurt
2 large apples, peeled, cored, and chopped

1. Preheat the oven to 450 degrees. Grease and flour muffin cups (or line them with paper liners) and set aside.

2. Mix together the flours, baking powder, baking soda, salt, and cinnamon, and set aside. In a separate bowl, cream the butter and add the granulated sugar and ¼ cup of the brown sugar. Beat until fluffy. Add the egg and mix well; stop once to scrape the sides and bottom of the bowl. Mix in the buttermilk gently. Stir in the dry ingredients and fold in the apple chunks.

3. Divide the batter evenly among the prepared muffin cups, sprinkling the remaining ¼ cup brown sugar on top. Bake for 10 minutes, turn the heat down to 400 degrees, and bake for an additional 5 to 10 minutes, or until a toothpick inserted into the center of a muffin comes out clean. Cool the muffins for 5 minutes in the tin, then turn them out onto a wire rack to cool completely.

Yields: 12–18
Time: 40 minutes
Leftover potential: High. These will remain moist in a sealed container at room temperature for several days, and they can be frozen for longer storage.

Thursday, December 17, 2009

CREAM BISCUITS

Holy cow, I made biscuits! Honest-to-goodness, delicious biscuits! And it was so incredibly easy!

OK, biscuits may not be the hardest thing in the world to make, but I’ve always avoided them for some reason, probably because I have an irrational fear of any recipe that involves cutting butter into flour (pie crust, etc.), plus I’ve made a heck of a lot of baking-soda breads that haven’t turned out well. But when I saw this recipe so highly praised at The Smitten Kitchen and realized that it used cream instead of butter, there went my feeble excuse for avoiding biscuit-making. Even with my questionable dough-handling abilities, I was pretty sure I could manage to stir melted butter and heavy cream into some dry ingredients, pat the dough out flat, and cut it into circles (not owning a biscuit cutter, of course, I just used the top of a drinking glass). I was skeptical the entire time, waiting for flat, dry lumps of sadness to emerge from the oven, so imagine my thrill when they came out light, flaky, and puffy, just like real biscuits! (“But they are real biscuits,” A had to keep reminding me.)

We served these with a cider-braised chicken dish (from the St. Paul Farmers Market Cookbook) that turned out a little disappointingly, but the biscuits so wildly exceeded my expectations that I didn’t even mind. Now that I know I can whip them up with no trouble on an average weeknight, the possibilities are endless! They’ll be great dipped into soups, or spread with homemade jam, but when I get back to cooking after New Year’s, my first order of business will be to try them with creamed chicken on top.

The biscuits are best straight from the oven, but I still found them pretty tasty the next day, after a brief zapping in the microwave. But if you don’t want to eat 10 biscuits right away, you can either freeze the leftover biscuits or—and this sounds like a brilliant idea I’ll certainly be trying soon—freeze the dough rounds to bake later.

3 tablespoons melted butter
2 cups all-purpose flour, plus more for dusting the surface
1 tablespoon baking powder
½ teaspoon salt
1½ cups heavy cream

1. Preheat the oven to 425 degrees. Line a baking sheet with parchment paper. Melt butter in a small pot or microwave dish, and set aside.

2. Sift 2 cups flour, the baking powder, and the salt into a large bowl. Fold in 1¼ cups cream. If the dough is not soft or easily handled, fold in the remaining ¼ cup cream, little by little. (I ended up using about 2 additional tablespoons.)

3. Turn dough onto a floured surface, mound it into a ball, and, using your hands, press it to a thickness of about ¾ inch. Cut into rounds, 2½ inches in diameter. Gather dough scraps, press them flat again, and continue to make rounds. Dip the top of each round in melted butter (or brush it generously with butter if that seems easier) and arrange biscuits on the baking sheet.

4. Bake until golden, 12 to 15 minutes. Serve immediately, or freeze for future use. (You can also freeze the uncooked dough rounds; they can be baked straight from the freezer, although a few extra minutes of baking time will be needed.)

Yield: About 10
Time: 30 minutes
Leftover potential: Good, if frozen

Tuesday, June 23, 2009

DILL, RED ONION, AND CHEDDAR DROP BISCUITS


This just goes to show that sometimes you should disregard advice, even when it’s your own. Over the years, I have periodically been suckered into making drop biscuits and other savory quickbreads, lured by the promise of freshly baked bread for dinner on an ordinary weeknight. But I’ve never met one that didn’t disappoint me; in the end, no matter what seasonings were involved, they just tasted dry and baking-powdery, not like real bread. Finally, about a year and a half ago, after another unsatisfying attempt, I wrote, “Remind me to stop trying non-sweet quickbreads. I just don’t like them that much.”

Luckily, I didn’t listen to myself, and when I saw this recipe at Everybody Likes Sandwiches, it looked so good I bookmarked it and made it despite my previous pronouncement. And it was so good! I don’t know whether the strong flavors of the onion, dill, and cheese just blocked out the usual baking-powdery taste or whether the recipe was just better constructed than others I’ve tried—or did my use of real buttermilk (rather than the more convenient milk + lemon juice substitute) have something to do with it? (I am so proud of myself—between making blueberry buttermilk cake [twice!], ranch dressing, and these biscuits, I have nearly used up an entire carton of buttermilk before its expiration date, for once.) All I know is that I made the recipe as written (though I substituted fresh dill for the dried originally called for), it was very easy, and the biscuits turned out just lovely, savory and moist. I snuck a tiny bite of one off the cooling rack, just to taste-test, and ended up eating the whole thing right there, standing over the counter, without butter or anything. Then I ate two more at dinner, dipped into carrot-potato soup, which they went perfectly with. I froze the remaining biscuits to eat with the leftover soup, but I imagine these would also make great snacks or breakfasts. I assume I’ll find out, because I can tell these little gems will be something I’ll turn to again and again. Not only will they be a great boon to my menu planning, because A is much more happy to eat soup if there's something to dip into it, but they are also infinitely adaptable with different herbs, cheeses, and other add-ins—though at present I see no need to deviate from the perfect marriage of cheddar, onion, and dill.

At last, quickbread victory is mine!

2 cups flour
2 teaspoons baking powder
½ teaspoon salt
¼ cup red onions, minced
2 tablespoons chopped fresh dill (or 1 tablespoon dried)
A hearty grind of black pepper
A large handful of grated cheddar cheese
2 tablespoons vegetable oil
1 cup buttermilk (my mixture looked a little dry, so I may have added just a splash more)

1. Preheat oven to 450 degrees.

2. In a large bowl, combine the flour, baking powder, salt, red onions, dill, black pepper, and cheese. Stir in the buttermilk and oil and mix lightly until combined.

3. Using a tablespoon, drop heaping blobs of dough on a parchment-covered or silicon-lined baking sheet. Bake for 12 to 14 minutes, or until lightly golden.

Yield: The original recipe says 6–9 biscuits; I got 10.
Time: 30 minutes
Leftover potential: OK. They’re best when fresh from the oven, but I stored one on the counter in a plastic bag and ate it the next day and it was still good (if anything, the flavors had deepened). Then I threw the rest in a freezer bag, froze them for about a week, and heated them up in the microwave; those were fine with soup, but not the same as the fresh ones.

Tuesday, October 28, 2008

COCONUT BANANA MUFFINS


Lately, at my office, we are awash in overripe bananas. The company provides fresh fruit for us throughout the week, but I think someone has been buying too many bananas, because every Friday, there are dozens of speckled brown ones left over, and everyone starts trying to persuade everyone else to take some home, make banana bread over the weekend, and bring it in on Monday morning (there aren’t too many cooks in my department, but a lot of enthusiastic eaters). I’ve never been a huge fan of bananas or banana bread, but I also can’t resist the siren song of free, perfectly good fruit in danger of going to waste. If my freezer wasn’t already insanely full, I’d take every last one of those poor orphaned bananas and save them for a rainy day. As it is, when last Friday rolled around and no one seemed to be stepping up to the banana-bread-making plate, I figured I’d better take a shot at it.

I got it into my head that what I really wanted was coconut banana bread, and I found this recipe at Baking Bites that seemed to fit the bill. Actually, I wanted coconut banana muffins, because I like muffins so much better than loaves of bread—they’re cute, they’re perfectly portioned and portable, and they stay fresh longer. Usually I try to follow a recipe exactly on the first try, particularly when I’m planning to feed it to other people, but I knew that quick-bread recipes usually translate pretty well to making muffins, as long as you decrease the baking time. I took an even bigger risk by deciding I didn’t want to fool with buying a can of coconut milk and then only using a little bit of it. The original blog post mentioned you could use plain milk, but the flavor would be less coconutty. Then I had a brainwave—I have coconut extract in the cupboard, so why not add a little of that to amp the flavor back up?

I’m relieved to say that my experimentation worked perfectly and the muffins were awesome. I made some plain ones, too, from the Baking Bites basic banana bread recipe, because I know there are weirdos who don’t like coconut, and they were certainly good, but the coconut ones were the clear favorite—the container I’d brought was cleaned out by the end of the day. (Luckily, I’d hoarded a few at home in the freezer for A and me.) The flavors were perfect together, and the coconut ensured an extra- tender texture. I will admit the muffins were on the verge of being too sweet for me—if I were to make these regularly (and I’ll hazard a guess that they will indeed replace the tasty-enough-but-slightly-fussy banana-nut muffins as my go-to banana-bread recipe), I would experiment with either reducing the sugar slightly or using unsweetened coconut (although the unsweetened coconut I’ve seen is always dry—would that detract from the moistness of the muffins?). Still, that’s a mild complaint; in all other respects, these are a slam dunk.

2½ cups all-purpose flour
2 teaspoons baking powder
½ teaspoon salt
½ teaspoon ground cinnamon
1 cup sugar
2 large eggs
1 cup mashed banana (2 medium-large bananas)
½ cup coconut milk (or ½ cup milk and ¼ teaspoon coconut extract)
¼ cup butter, melted
1 teaspoon vanilla extract
1 cup shredded coconut

1. Preheat oven to 350 degrees and lightly grease two muffin tins or line them with cupcake wrappers.

2. In a medium bowl, whisk together flour, baking powder, salt, and cinnamon.

3. In a large bowl, whisk together sugar and eggs until well combined, then whisk in the mashed banana, coconut milk (or plain milk and coconut extract), butter, and vanilla.

4. Pour dry ingredients into wet ingredients and stir until just combined, making sure no streaks of flour remain. Stir in shredded coconut.

5. Pour batter into muffin cups, filling them about two-thirds full. Bake for about 30 minutes, or until a toothpick inserted into the center comes out clean (or with only a few moist crumbs attached). Remove muffins from tins and cool on wire racks.

Yield: About 16
Time: 45 minutes
Leftover potential: High. Stored in the freezer, these will keep for weeks.

Friday, April 04, 2008

HOT CROSS BUNS


I know I’m too late for Easter, but didn’t Easter take everyone by surprise this year? According to my uncle the pastor, this year was the earliest that Easter will occur in our lifetimes—the next March 23 Easter will be in 2180—so if you were feeling harried about it, you had good reason. Just do yourself a favor and put these on your list to make next year. Or, heck, just make them now, because these spiced, raisiny, gently sweet buns really should be eaten more than once a year.

I must be in a nostalgic mood, because pre-Easter I suddenly became obsessed with the need to make hot cross buns, one of the few homemade foods I associate with the holiday besides ham and hard-boiled eggs (I’m mainly a fan of the Easter candies—oh, Cadbury eggs and mini-eggs, and Whoppers Robin Eggs, you complete me!), but one lodged mainly in my childhood—I’m not sure when I last ate one, but it seems at least 5 years ago. I’d thought I had my mom’s recipe tucked away somewhere, but when the day before Easter rolled around, I realized I was mistaken and scrambled online to see if any bloggers had a tried-and-true recipe to offer. It turns out hot cross buns aren’t quite as popular as I had imagined; they seem to be mainly a British (and Australian) phenomenon. Thanks to the awesome Food Blog Search, however, I managed to find a few options and at last settled on this one, from Emeril Lagasse via A Mingling of Tastes. This is where food blogs come in handy, because the original recipe is slightly insane. As most of the Food Network site commenters note, it calls for way too little flour in the dough (resulting in sticky goo that’s impossible to roll and manipulate as described) and way too much milk in the icing, and yields far more than the 12 rolls it claims to. Thanks to A Mingling of Tastes, I was amply forewarned about these problems (though I panicked and overcompensated with too much flour, probably 4½ cups, and my dough was a bit too stiff, and instead of getting 1 or even 1½ dozen, I got something like 30 rolls out of it, which I hastily had to pawn off on A’s and my coworkers before they got too stale). A Mingling of Tastes also suggested a heaping ½ teaspoon cardamom, which I happily embraced, because I adore cardamom and find it wildly underused; and adding ginger, allspice, and cinnamon to the mix, which I’m so glad I did. I also recalled reading that traditional hot cross bun recipes often involve candied citrus peel (yuck), and another recipe I’d seen on some other site had added orange zest instead, which sounded tasty, so I went for it and I’m so glad I did. Basically, despite the many weirdnesses of the recipe and my possible screw-ups (besides the extra flour thing, I got lazy and didn’t follow Emeril’s detailed instructions for rolling the dough into buns, and my frosting was a little runny, making my crosses more like squiggles), these hot cross buns were (sorry, mom) the best I’ve had—with the citrus and the spice, the flavor was just so delicious and they weren’t too sweet. The better to eat more Easter candy!

P.S. Also, I got to use my new silicon pastry brush, an early birthday gift, to brush on the beaten egg wash. It was so simple and easy to clean—I joyfully threw away my clumpy, oily, real-bristle one.

1 envelope (¼ ounce, or 2¼ teaspoons) dry yeast
¾ cup sugar
1½ cups warm milk (about 110 degrees F)
1 stick (½ cup) of butter, melted
1 egg
½ cup raisins
1 teaspoon salt
½ teaspoon ground cardamom
¼ teaspoon ground ginger
¼ teaspoon ground allspice
¼ teaspoon ground cinnamon
1 teaspoon orange zest
3½ to 4 cups all-purpose flour
1 teaspoon vegetable oil
1 large egg, beaten
1 cup powdered sugar
1–3 tablespoons milk

1. Combine the yeast, sugar, and milk in the bowl of an electric mixer fitted with a dough hook. Beat on low speed for 1 minute. Add the butter, egg, and raisins. Mix for 1 minute. Add the salt, spices, orange zest, and 3½ cups flour. Beat on low speed until all the flour is incorporated, about 1 minute. Then, beat at medium speed until the mixture forms a ball, leaves the sides of the bowl, and climbs up the dough hook. If the dough seems too wet and sticky, add up to another ½ cup of flour (or as needed).

2. Using your hands, form the dough into a smooth ball. Lightly oil a large bowl with the vegetable oil, place the dough in the bowl, and turn it to oil all sides. Cover with plastic wrap and set aside in a warm, draft-free place until it doubles in size, about 1 hour.

3. Remove the dough from the bowl and invert it onto a lightly floured surface. Pat the dough into a rectangle about ¾ inch thick. Roll up the dough, beginning with the long side and stopping after each full turn to press the edge of the roll firmly into the flat sheet of dough to seal. Tuck and roll so that any seams disappear into the dough. Cut the dough into 1-inch pieces and roll each piece into a smooth, round ball. (If you’re really lazy like me, you can just remove the dough from the bowl, pinch off 1-inch pieces, and roll them into balls.)

4. Line a baking sheet with parchment paper. Place the rolls on the baking sheet, ½ inch apart. With a pastry brush, spread the beaten egg evenly over the rolls. Cover rolls with plastic wrap and set aside in a warm, draft-free place until they double in size, about 1 hour.

5. While rolls are rising for the second time, preheat the oven to 350 degrees. When oven is hot, bake rolls until lightly brown, about 25 to 35 minutes. Remove from the oven and cool slightly on a rack.

6. In a mixing bowl, combine the powdered sugar and 1 tablespoon milk. Mix until smooth. Add additional milk as needed until icing reaches desired consistency (but remember, if you want to pipe it in a cross shape, it will need to be fairly thick—otherwise it’ll turn into more of a glaze). Ice rolls with frosting in the shape of a cross. Serve warm (leftover rolls can be reheated for 20 seconds in the microwave).

Yields: 1 to 2 dozen
Time: 3½ hours

Friday, February 22, 2008

CHEDDAR-CHIVE QUICKBREAD


Remind me to stop trying non-sweet quickbreads. I just don’t like them that much. Cornbread? Soda bread? Scones? Bah humbug.

After the delicious Dill Bread, I got cocky. I craved more savory, herby homemade breads, but I didn’t want to have to work so hard. So I got lured into this recipe, which promises plenty of cheese and ease. It has a fine pedigree from the inimitable Dorie Greenspan, the user reviews are glowing, and with no yeast, “It takes less than 10 minutes to put together, requires no special equipment, and really takes no special skill.” Bingo!

It certainly turned out a gorgeous loaf (it helps that I made it during the day and got to photograph my food during full sunlight, for once). And it didn’t taste bad or anything, but it didn’t taste how I expected—in fact, it didn’t really taste that strongly of chives or cheese. Everyone who tasted it (me, A, P) agreed that it seemed as though something were missing. I tried eating it with butter, even a sprinkling of salt, but the slightly flat flavor stubbornly remained. P described it as “eggy.” I wonder if maybe I should have used medium cheddar instead of sharp. A wanted a more flavorful herb. And to be fair, Greenspan suggests that you play around with the recipe however you like, using any hard cheese that suits your fancy, varying the herbs however you like, or including add-ins like ham or nuts or vegetables. I appreciate this versatility, and I’m sure I could keep trying this until I found a flavor I liked.

The texture of the bread was also unusual; Greenspan describes it as a “savory cake,” and indeed, it felt oddly like cake in the mouth. Again, this isn’t a bad thing, but it wasn’t what I expected. It had a little of the dry crumbliness I don’t like about cornbread.

I still have half a loaf left, and I’m looking forward to trying it lightly toasted, as Greenspan suggests—that might really make the difference for me, as I love toast far more than “raw” bread. And I really can’t blame this recipe for differing from my expectations. I’d still recommend it, since it was just as quick and easy and reliable as promised, and you can flavor it however you want. But it wasn’t what I was craving, and with so many other delicious-looking bread recipes out there clamoring for my attention, I probably won’t be making it again. I think what I’m looking for is a yeast bread, and I should resist being tempted by shortcuts.

Still, that photo is awfully appealing, if I do say so myself.

1¾ cups all-purpose flour
1 tablespoon baking powder
½ to 1 teaspoon salt (depending on what add-ins you’re using; I used the full 1 teaspoon for the basic cheddar-chive combo)
¼ teaspoon freshly ground pepper
3 large eggs, at room temperature
1/3 cup milk, at room temperature
1/3 cup extra-virgin olive oil
3 ounces coarsely grated cheddar or other cheese
2 ounces cheddar or other cheese, cut into very small cubes
½ cup minced chives or other herbs

1. Preheat the oven to 350 degrees and generously butter a loaf pan.

2. Put the flour, baking powder, salt, and pepper in a large mixing bowl and whisk to combine.

3. Put the eggs in another mixing bowl and whisk for 1 minute, until foamy and blended. Whisk in milk and olive oil.

4. Pour the wet ingredients over the dry ones and gently mix with a wooden spoon or sturdy rubber spatula until dough comes together. Because beating the dough makes it tougher, there’s no need to be too thorough or energetic—just mix until all the dry ingredients are moistened. Stir in the cheese, the herbs, and any other add-ins you’re using. Turn the dough into the buttered loaf pan and even the top with the back of the spatula or spoon.

5. Bake for 35 to 45 minutes, or until the bread is golden and a slender knife inserted into the center of the loaf comes out clean. Transfer the pan to a cooling rack, wait about 3 minutes, and then run a knife around the sides of the bread and turn the loaf over onto the rack. Invert to right-side up and cool to room temperature. The bread can be served slightly warm, but it’s better when fully cool, and best when given some time to “ripen”—wait a few hours or overnight to serve.

Serves: 8
Time: 1 hour

Friday, January 25, 2008

OATMEAL KNOTS


Sorry, this is a crazy photo. The season finale of Amazing Race was starting, and I’d inadvertently set my camera to some crazy manual-focus setting that made the foreground blurry and the background clear.

This recipe is from a recent issue of Cooking Light. It was a bit frustrating to make, because my dough turned out super-sticky, even after I added well over ½ cup of extra flour during the kneading process (which was really more like the “desperately peeling dough off the counter” process). I had to laugh bitterly at the “to prevent dough from sticking to hands” instruction in step 3—my dough was sticking to hands, bowl, counters, everything. Shaping it in step 5 was kind of a joke; as you can see, my “knots” look pretty much like smooth, round rolls. But just when I was on the verge of despair, I bit into a roll fresh from the oven and it tasted great. Sort of like my beloved Bumpy Rolls, but sweeter, and with the added wholesomeness of oatmeal and flax meal, plus sesame and poppy seeds, which I love. Although the original recipe didn’t call for it, I ground a little coarse salt on top of each roll, and I’m so glad I did—it contrasted nicely with the sweetness—that I’ve added it to the directions below.

Would I make these again, considering what a pain they were? I’d like to try at least once more, to see if I can make the dough more workable—I know something containing that much oatmeal and honey is bound to be a bit sticky, but mine seemed way goopier than what the recipe was expecting. I also think I’d skip the whole dividing-and-tying-into-knots step, which was mainly cosmetic, and make them into cloverleafs in a muffin tin, as with Bumpy Rolls. I’ll keep you posted.

Postscript, December 2009: Not worth it. I don't bake a lot of bread, so when I do, I want Bumpy Rolls. Maybe I can just throw some seeds on top of those sometime.

1 cup regular oats
½ cup honey
2 tablespoons butter
1½ tablespoons salt
2 cups boiling water
1 package dry yeast (about 2¼ teaspoons)
1/3 cup warm water (100 to 110 degrees Fahrenheit)
¼ cup flaxseed meal
3 cups whole wheat flour (about 14¼ ounces)
1½ cups all-purpose flour (about 6¾ ounces), divided
olive oil or cooking spray
1 large egg
1 tablespoon regular oats
1 tablespoon poppy seeds
1 tablespoon sesame seeds
coarse salt

1. Combine the first four ingredients in a large bowl and add 2 cups boiling water, stirring until well blended. Let cool to room temperature.

2. Dissolve yeast in 1/3 cup warm water in a small bowl; let stand 5 minutes. Add yeast mixture to oat mixture and stir well. Stir in flaxseed meal.

3. Measure flours by lightly spooning into dry measuring cups and leveling with a knife. Gradually add 3 cups whole wheat flour and 1 cup all-purpose flour to oat mixture, and stir until a soft dough forms. Turn dough out onto a lightly floured surface. Knead until smooth and elastic, about 8 minutes, adding enough of remaining all-purpose flour, 1 tablespoon at a time, to prevent dough from sticking to hands (dough should still feel tacky, however).

4. Place dough in a large bowl coated with olive oil or cooking spray, turning to coat. Cover and let rise in a warm place (about 85 degrees Fahrenheit), free from drafts, 1 hour or until doubled in size. (Press two fingers into the dough; if indentation remains, the dough has risen enough.) Punch the dough down and let rest for 5 minutes.

5. Divide dough in half, then cut each half into 12 equal portions. Working with one portion at a time (cover remaining dough to keep it from drying out), shape each portion into an 8-inch rope. Tie each rope into a single knot and tuck top end of rope under bottom edge of roll. Place rolls on baking sheets coated with olive oil or cooking spray. Cover with plastic wrap coated with olive oil or cooking spray (or use a damp disk towel), and let rise on a warm place for 30 minutes or until doubled in size.

6. Preheat oven to 400 degrees.

7. Combine egg with 1 teaspoon water in a small bowl, and brush egg wash over rolls. Combine 1 tablespoon oats, poppy seeds, and sesame seeds in a small bowl and sprinkle evenly over rolls. Sprinkle a little coarse salt over rolls. Bake at 400 degrees for 15 minutes, or until golden. Cool on wire racks.

Yield: 24 rolls
Time: 2½ to 3 hours

Monday, January 14, 2008

DILL BREAD


I made bread! And I used the KitchenAid dough hook! And even though I flubbed the dough texture a little bit as a result, it tastes delicious!

I am really craving savory, herby, grainy breads lately, and I hope to spend the winter months merrily baking them. At the top of my list was this alluring dill bread from The Joy of Cooking via The Smitten Kitchen (where you will notice a heck of a lot more bread-baking expertise than you see here). I’ve seen many a dill bread recipe that contains sour cream, but this one appealed to me with its slightly healthier use of cottage cheese as a moistening agent, as well as honey instead of boring old sugar, and wheat germ for extra ethos.

Making the bread in the mixer saved me a lot of mess and elbow grease, but I should have added more flour to compensate for the fact that I wasn’t kneading the bread with floury hands on a floured surface. Since the KitchenAid method was less hands-on, I didn’t immediately notice that my dough was too shaggy and sticky until I started transferring it to the oiled bowl for the first rise. Granted, at that point I could have added more flour and kneaded it again, in the machine or by hand, but I decided I didn’t care enough. Better too moist than too dry, right? That’s me, Bookcook, slapdash and lazy since 1977!

Actually, the bread turned out perfectly fine for a nonperfectionist like me. The dough was so hard to work with that the loaf was rough and misshapen, but the exterior texture was perfect, crusty and golden and salty (thanks to the genius melted butter/salt wash). The interior was almost like a cake or a quick bread, maybe a bit too much on the gummy side where it should have been crumby, but I secretly enjoy slightly-underdone baked goods (whereas bread that’s too firm or dense or dry makes me want to spit it out after a bit of halfhearted chewing). Anyway, minor textural issues are nothing compared to the awesome flavor, savory with herb and onion and the perfect sweet/salty balance. I bet this stuff makes killer grilled-cheese sandwiches, and I intend to find out very soon, if I don’t eat it all plain first. This bread needs no butter or other adornment. A definite keeper.


1 package (2¼ teaspoons) active dry yeast
½ cup warm (105 to 115 degrees) water
3 cups flour
½ cup finely chopped red onion
3 tablespoons chopped fresh dill
2 tablespoons honey
1 tablespoon toasted wheat germ
1 teaspoon salt
1 cup cottage cheese
1 large egg
1 tablespoon melted butter
½ teaspoon coarse salt

1. Combine yeast and water in a small bowl and let stand until yeast is dissolved, about 5 minutes.

2. Combine flour, onions, dill, honey, wheat germ, and 1 teaspoon salt in a large mixing bowl (or the bowl of a stand mixer). Add the yeast mixture, the cottage cheese, and the egg. Mix by hand (or if using a mixer, on low speed) until the dough comes together, adding more flour or warm water if needed to achieve proper consistency. Knead for about 10 minutes by hand (or using the dough hook of the stand mixer on low to medium speed) until the dough is smooth and elastic. Transfer to an oiled bowl and turn dough over once to coat it with the oil. Cover loosely with plastic wrap or a kitchen towel and let rise in a warm place (75 to 80 degrees) until doubled in volume, 1 to 1½ hours.

3. Grease a 9-by-5-inch (8-cup) loaf pan. Gently press the dough down, form it into a loaf, and place it seam side down in the pan. Cover with oiled plastic wrap or a kitchen towel and let rise in a warm place until doubled in volume, about 1 hour.

4. Meanwhile, preheat the oven to 350 degrees. Brush the top of the loaf with melted butter, then sprinkle with the coarse salt. Bake until the crust is deep brown and the bottom of the loaf sounds hollow when tapped, about 35 to 40 minutes (internal temperature of the loaf should be about 200 degrees). Remove the loaf from the pan, place it on a rack, and let it cool completely.

Yield: 1 9-by-5-inch loaf
Time: 3 to 3½ hours

Friday, August 24, 2007

ZUCCHINI MUFFINS


Now is the time of year when people begin to feel oppressed by zucchini. (According to Garrison Keillor, the people of Lake Wobegon lock their car doors in August so their neighbors don’t sneak zucchini into them; there’s a great passage in Lake Wobegon Days about being overwhelmed by vegetable bounty, but unfortunately the only line I remember is “At night they checked the bed for kohlrabi.”) (Also, check out Crazy Aunt Purl's hilarious photo essay about her own zucchini infestation.) I don’t have a vegetable garden, nor do I know anyone who does, so I’m not feeling the pain. I tried this recipe not out of desperation, but just because I love both zucchini and muffins. Somehow it had never occurred to me that zucchini bread—something, like all sweet quick breads, I can pretty much take or leave—could be turned into muffins, which are so much more tempting—easier to keep fresh, more portable, handily personal-sized, and eminently cuter than the loaf form. So when I saw this recipe at the Smitten Kitchen, I sat up and said, “Boy howdy!”

I hippied up the recipe a bit by substituting unsweetened applesauce for half of the oil, because I always have applesauce on hand for making granola, and just the thought of an entire cup of oil (the original amount the recipe called for) made me feel a bit queasy; also, apples and zucchini seem like a nice pairing. I didn’t use nuts, but you can. Aside from the fact that one panful managed to get a little too dark on the bottom, the muffins were plenty moist and tender, well spiced and vanillaish, and—though I’m no zucchini-bread connoisseur, mind you—darn tasty. Overall, they were a snap to make, maintained at least the illusion of healthiness (they have vegetables in them, after all), and were easy to stash in the freezer and take to work as a mid-morning snack. If this is how it’s going to be, I, for one, welcome our zucchini overlords.


3 eggs
½ cup olive or vegetable oil
½ cup unsweetened applesauce
1¾ cups sugar
2 cups grated zucchini (about 2 medium zucchini)
2 teaspoons vanilla extract
3 cups all-purpose flour
3 teaspoons cinnamon
1/8 teaspoon nutmeg
1 teaspoon baking soda
½ teaspoon baking powder
1 teaspoon salt
½ cup chopped walnuts or pecans (optional)

1. Preheat oven to 350 degrees.

2. Line 24 muffin cups with paper liners, or grease them well.

3. In a large bowl, beat the eggs with a whisk. Mix in oil, applesauce, and sugar, then zucchini and vanilla.

4. In another large bowl, combine flour, cinnamon, nutmeg, baking soda, baking powder, salt, and nuts (if using).

5. Stir the flour mixture into the egg mixture. Divide the batter between the prepared pans. Bake for 20–25 minutes, or until a tester inserted into the center comes out clean.

Yield: 2 dozen
Time: 40 minutes

Wednesday, April 18, 2007

NO-KNEAD BREAD


Sheesh, I’m behind with this posting stuff. I made this bread on Easter. Which turned out to be apt timing, since the recipe is indeed miraculous. The Web has been abuzz about it ever since it was written up in The New York Times in November, and now my mom’s raving about it too. The ingredients are minimal—just flour, a bizarrely tiny bit of yeast, salt, and water—and the process nontraditional, but boy howdy, does it work like a charm. Even for me, impatient nonbaker with substandard cookware that I am, it yielded beautiful, bakery-quality loaves of bread, moist and chewy within (with “a nice crumb,” as the foodies say) and crackly-crisp without. As they sat all golden and bubbly on their cooling racks, I kept staring at them in awe and disbelief. I made that!

The recipe requires a long span of time, but the actual work involved is minimal. I mixed up the ingredients on Saturday night and let the dough rest until early afternoon on Sunday, which worked perfectly: I had bread by dinnertime. Though a little twisty, the directions were essentially easy to follow, and my slight variations in technique didn’t seem to cause any problems. The original recipe calls for ¼ teaspoon instant yeast, but through Internet commentary I learned that 1/3 teaspoon regular yeast will work just as well, so that’s what I used. The original also asks you to set the dough on a well-floured cotton towel to rise, but both Internet commentary and common sense suggested to me that that’s just silly—setting wet, sticky dough on a cotton towel, no matter how well-floured, is just going to result in a messed-up towel, and is not going to be particularly convenient when your sticky dough clings to said towel as you’re trying to ease it into a 450-degree baking dish. I used plastic wrap instead, which proved really helpful as a vehicle for picking up the dough and flipping it into the dish.

My biggest concern was that I didn’t have anything approaching a 6- to 8-quart heavy covered oven-safe pot. All I had was a 2-quart Corelle baking dish with a Pyrex lid. But the magical bread didn’t let me down. I divided the dough in half at the end of Step 2, let both halves rise two hours, cooked them in succession, and voila, I got two perfect smallish loaves. You gotta try this!

3 cups all-purpose or bread flour, plus more for dusting
¼ teaspoon instant yeast or ⅓ teaspoon regular (active dry) yeast
1¼ teaspoons salt
Cornmeal or wheat bran as needed

1. In a large bowl, combine flour (measure by dipping, not spooning), yeast, and salt. Add 1⅝ cups water and stir until blended; dough will be shaggy and sticky. Cover bowl with plastic wrap. Let dough rest at least 12 hours, preferably about 18, at warm room temperature, about 70 degrees.

2. Dough is ready when its surface is dotted with bubbles. Lightly flour a work surface and place dough on it; sprinkle it with a little more flour and fold it over on itself once or twice. Cover loosely with plastic wrap and let rest about 15 minutes.

3. Using just enough flour to keep dough from sticking to work surface or to your fingers, gently and quickly shape dough into a ball. Place a piece of plastic wrap at the bottom of a large bowl, dust with flour, wheat bran, or cornmeal, and put dough seam side down on plastic wrap. Dust with more flour, bran or cornmeal. Cover bowl with a cotton towel and let rise for about 2 hours. When it is ready, dough will be more than double in size and will not readily spring back when poked with a finger.

4. At least a half-hour before dough is ready, heat oven to 450 degrees. Put a 6- to 8-quart heavy covered pot (cast iron, enamel, Pyrex or ceramic) in oven as it heats. When dough is ready, carefully remove pot from oven. Holding edges of plastic wrap, lift dough out of bowl and turn over into pot, seam side up; it may look like a mess, but that’s OK. Shake pan once or twice if dough is unevenly distributed; it will straighten out as it bakes. Cover with lid and bake 20-30 minutes, then remove lid and bake another 15 to 30 minutes, until loaf is beautifully browned. Cool on a rack.

Yield: one 1½-pound loaf
Time: 21 hours (only about 1 hour actual work)

Wednesday, March 07, 2007

POPPY-SEED ALMOND MUFFINS


I made these muffins two weeks ago (gack, I’m so tardy with these postings!), while watching the Oscars, as mentioned in the beef-and-curry pie saga below. I’m not a huge muffin fan; I mean, I never find myself thinking, “Gosh, I could really go for a muffin right now.” In general, sweet breads, especially at breakfasttime, are not my kettle o’ fish. (Neither are kettles of fish, for that matter.) I do really love miniature versions of larger foods, like cupcakes instead of cake and personal pan pizzas instead of, er, impersonal pan pizzas? So when I think about baking, muffins appeal more than loaves of bread. Mostly, though, I just love almond-flavored foods. My mom made these muffins while I was growing up and I adored them, though I never had any interest whatsoever in the no-doubt delicious blueberry, bran, or whatever-else muffins she baked. Now I make these from time to time and pretty much inhale them. Besides being delicious, they are so easy. And the perfect thing to bring when it’s your turn to supply the treats for a departmental meeting, take it from me. Just remember to buy almond extract, or you might have to run out to the store (no, two stores, when you realize Trader Joe’s has peppermint extract but no almond) and thus miss Jack Black and Will Ferrell and John C. Reilly singing a very funny Academy Awards song that everyone will be talking about the next day and you’ll feel left out and keep reminding yourself to find it on YouTube, but you’ll never actually get around to it. Hypothetically speaking, of course.

¾ cup sugar
½ cup margarine or butter
2 eggs
1 teaspoon almond extract
1 cup low-fat or nonfat plain yogurt
2 cups flour
3 teaspoons poppy seeds
½ teaspoon salt
½ teaspoon baking soda
Sliced almonds

1. Preheat oven to 350 degrees.

2. Cream together sugar, butter, eggs, and almond extract.

3. Add yogurt, flour, poppy seeds, salt, and baking soda and stir until just moistened.

4. Grease muffin tins and fill each cup about two-thirds full of batter. Sprinkle muffins with sliced almonds. Bake 15–20 minutes.

Variation: For poppy-seed lemon muffins, replace plain yogurt with lemon yogurt and almond extract with lemon extract.

Makes: 1 dozen
Time: 30 minutes

Friday, February 02, 2007

BANANA-NUT MUFFINS

I had 4 ounces of leftover cream cheese sitting in my refrigerator (after making Tortellini With Mushroom-Cheese Sauce a couple of weeks ago), and I needed something to go with the curried coconut vegetable soup I was planning to make for dinner, so on Sunday afternoon I figured I’d whip up a half-recipe of these muffins.

I got the recipe from P (along with a delicious sample of the finished product) a few months ago; she got it, I think, from AllRecipes.com. The first time I made it, the muffins tasted OK, but were flat and ugly and misshapen. This time, they were high and fluffy and golden and perfect. I don’t know what made the difference, but they turned out well enough now for me to recommend the recipe. Nothing fancy here, flavor-wise, just banana, pecans, and cinnamon (the quantity of cinnamon perpetually surprises me—a tablespoon seems like an awful lot—but it tastes good). The only novelty is that the cinnamon, nuts, and brown sugar are placed in a thin layer in the middle of the banana muffin, which is kind of visually cool, reminiscent of geologic formations. But the point is: yum.

Postscript, December 2009: I never made these again. I rarely make banana muffins anyway, and for those rare times when I do, I think I like these better.

½ cup unsalted butter
8 ounces cream cheese, softened
1¼ cup white sugar
2 eggs
1 cup mashed bananas (about 2)
1 teaspoon vanilla extract
2¼ cups all-purpose flour
1½ teaspoons baking powder
1½ teaspoons baking soda
¾ cup chopped pecans
2 tablespoons brown sugar
2 tablespoons ground cinnamon

1. Preheat oven to 350 degrees. Lightly butter 2 muffin tins.

2. In a small bowl, mix together chopped pecans, brown sugar, and cinnamon.

3. Cream butter and cream cheese together. Gradually add white sugar and continue beating until light and fluffy. Add one egg at a time, beating well after each addition. Stir in mashed bananas and vanilla. Add flour, baking soda, and baking powder. Mix until batter is just moist.

4. Fill muffin cups just one-third full. Sprinkle pecan mixture over batter and top with remaining batter.

5. Bake until tops of muffins are just golden and an inserted knife comes out clean, about 10–15 minutes.

Yield: 2 dozen
Time: 30 minutes

Friday, November 03, 2006

MOM’S FOCACCIA


Two mom recipes in one week! She’ll be so proud.

I am not a baker, but I was pleasantly surprised by how easy this bread was to make and how well it turned out—simple, rustic, tasting of rosemary and red onion, crisp outside and soft inside. I made it on Wednesday night, because I’d gotten home earlier than usual (thank you, optometrist appointment that allowed me to miss the last two hours of work). I’d planned to make Butternut Squash-Leek Soup, and soup is always nicer with something to dip into it, and I thought the flavors would go well together, so I decided to try my mom’s focaccia recipe. I always enjoyed it while growing up, though back then I was more of an onion-phobe and would occasionally get squeamish about the soft, slimy-seeming pieces of onion interrupting the soft sponginess of the bread. (You’ll notice I had a similar texture-based complaint about the presence of dried fruit in granola—apparently, I didn’t care for textural contrasts in my food at the time.) Now I like onions, so why not?

The kitchen got messy and the loaves were a little deformed, but that’s just my baking incompetence. Cut into wedges, the bread looked and tasted delicious, paired felicitously with the soup, and was a big hit with A. (He was neutral about the soup, but high-fived me for the bread.) In fact, we ended up eating an entire loaf (the smaller of the two, at least) between us during that one meal. I’d really like to try the focaccia as a base for a sandwich this weekend. That is, if there’s any left by then.


1 packet dry yeast (1 tablespoon)
1 teaspoon sugar
1 tablespoon salt
2 teaspoons olive oil
1 tablespoon fresh rosemary (or 2 tablespoons dried; of course, I recommend the fresh)
½ cup finely chopped red onion
4 to 4½ cups all-purpose flour

1. Stir together yeast, sugar, and ½ cup warm water in a large bowl, and let stand 5 minutes.

2. To the yeast mixture, add salt, 1 cup warm water, olive oil, rosemary, and onion. Gradually stir in flour.

3. Knead dough on a floured surface (if dough seems too sticky, add more flour). Place in an olive-oil-greased bowl, cover with a kitchen towel, and let rise until double, about 45 minutes.

4. Preheat oven to 350 degrees.

5. Divide the dough into two pieces. Shape each piece into a flat round, about ½ inch thick. Place on olive-oil-greased baking sheets and brush loaves generously with olive oil. Let stand for 15 minutes.

6. Bake at 350 on the bottom oven rack for 15 minutes, then move to the top rack and bake for 10-15 more minutes, until lightly browned.

Makes: 2 loaves
Time: 1 hour 45 minutes (mostly rising/baking time)

Friday, June 24, 2005

BEST GARLIC BREAD EVER

I never really got the hang of garlic bread. I don't serve many side dishes at all, especially bread, and on the rare occasions when I made garlic bread I just put on some butter and garlic powder the way everyone does, even though I abhor the artificial taste of garlic powder in nearly every other circumstance. The result was never bad, but never really exciting either. A couple of months ago, when I hosted a small dinner party for friends to watch the finale of The Amazing Race, I thought some garlic bread might round out the meal of pesto salmon, asparagus, and brownies I'd planned, but I knew my usual dull and haphazard method wouldn't cut it. So I hastened to Allrecipes.com, found the top-rated garlic bread recipe, made it, and loved it. There is butter, there is real garlic, there is nice seasoning, and there is the secret ingredient, olive oil, which makes the mixture nice and spreadable and helps the bread get toasty and crispy. I could eat an entire meal of this, but it wouldn't be that healthy, so I try to save it for special occasions. It is, however, also easy enough to whip up a half- or quarter-recipe on the spur of the moment to accompany a simple soup or salad supper. By the way, the original recipe suggested that after the garlic bread has been broiled, you could sprinkle some mozzarella cheese on top and put it back in the oven to melt and get golden brown, but that just seems too decadent. I'm afraid of how much I might love it.

1 large loaf Italian bread (ciabatta works well)
5 tablespoons butter, softened
2 tablespoons olive oil
3 cloves garlic, smashed and minced
1 teaspoon dried oregano
salt and pepper to taste

1. Preheat the broiler.

2. Slice the loaf of bread in half the long way (so you have two pieces with long, flat tops). You want the bread to be as wide and soft as possible; a porous, bubbly bread like ciabatta will accept the butter better than a dense bread. (The first time I didn't plan well enough and had to use some baguette I had in the freezer--it didn't have much surface area for the topping and got too hard under the broiler, although it still tasted just fine.)

3. Mash all the other ingredients together in a small bowl with a fork, until you have a nice spreadable mixture. Spread this across the flat tops of the bread and place the bread directly on the oven rack under the broiler (or you can put it on a baking sheet first). Broil, watching the bread the entire time (things always broil much faster than I expect and I'm always burning them), until they are light brown and crisp on top. (We all have our desired degrees of toastiness--I still like the bread to be soft beneath a crisp crust, and the buttered portion to still be a bit yellow, just brown around the edges.)

4. Slice the bread and serve it.

Serves: 4-8, maybe?
Time: 5-10 minutes

Monday, November 01, 2004

BUMPY ROLLS


That’s what I used to call them when I was a kid, because of their cloverleaf shape. My mom would make them often, and I’d eat a lot of them. As far as I’m concerned, the only way to eat a bumpy roll is to pull the three sections apart slightly (leaving them connected at the bottom), spread them with butter, and microwave them for 30 seconds or so until the roll is hot and tender and the butter is molten. I’m sure they would also be good with honey. They’re really the perfect basic wheat dinner roll, and fun to eat at that.


I’m not much of a baker, but I thought it would be fun to give breadmaking a shot yesterday. I wouldn’t say it was the easiest thing I’ve ever made, but I also think it would be much easier with practice, when one wasn’t so concerned about the potential to mess things up at every turn. I did have a good time—the chemistry of baking is always interesting (though yeast freaks me out somewhat—those little crumbs are alive), I do love the feeling of kneading dough, and the entire apartment still smells of fresh bread—I dare you to name a cozier smell than that. It was a perfect way to spend a Sunday afternoon, as I could do one of the recipe steps, go do laundry or cleaning or an errand while the dough rose, and then come back and do the next step. Despite my fears, the rolls turned out tasting nearly as good as mom’s (Me: “They’re not quite the same.” A: “Maybe you forgot to add love.”), though the first batch I put in the oven got a bit dark on the bottom. Excessively pleased with myself, I proceeded to eat about four of them, with chicken noodle soup on the side. A happily devoured a few as well, and I froze the remaining two dozen for later. Now I’m eagerly eyeing the bread recipes in my books—we’ll see what comes of that, if anything.


2 packets (2 tablespoons) active dry yeast
2 tablespoons brown sugar
2½ teaspoons salt
4 cups white flour
¼ cup instant nonfat dry milk or 1¼ cups milk
¼ cup honey
2 cups wheat flour
3 tablespoons soft shortening

1. In a large mixing bowl, combine the yeast with 1 cup warm water, 2 tablespoons brown sugar, ½ teaspoon salt, and ½ cup white flour. Beat this with a whisk until it's smooth, and then cover the bowl with a damp dishtowel and let it stand in a warm place for about 15 minutes (other recipes I consulted suggested the warm place should be about 80-85 degrees, so I put my bowl in the bathroom with the door shut and turned on the odd little heating unit on the wall; it seems a more conventional method is to put the bowl in the oven—which should be turned off—and put a pan of hot water on the lower rack).

2. When the 15 minutes are up, heat 1¼ cups milk almost to boiling in the microwave, let it cool until you can stick your finger into it comfortably, then add it to the bowl (you can use 1¼ cups warm water with ¼ cup instant nonfat dry milk, if you prefer). Add the honey, the remaining 2 teaspoons salt, the wheat flour, and the shortening, and then beat the mixture for 2 minutes with an electric mixer. Gradually stir in (by hand, with a wooden spoon) about 3½ cups white flour to make a very stiff dough. (This was probably the most laborious part of the process—I kept thinking the dough wouldn’t possibly take any more flour, but it always would, after I expended a lot of arm power stirring it up.) Next, spread a little flour on the counter, dump the dough out of the bowl, and knead it until it was smooth. Wash the bowl out, grease it lightly with shortening, place the kneaded dough inside, cover it with the damp dishtowel again, and let it rise until it has doubled in size, about 1 hour.

3. When the dough has risen, lightly grease muffin tins with shortening. (You’ll want three if possible, as this recipe makes about 36 rolls.) Uncover the dough, punch it down, and begin pulling off little bits with your fingers and rolling them into small balls. In each muffin slot, you want to place three balls of dough, each about one inch in diameter, touching one another at the edges like the leaves of a clover. Fill your pans, cover them with the damp dishtowel, and let the rolls rise until they have doubled in size, about 30 minutes. (Because I only have two muffin tins, I had some dough left, so I just kept that in the bowl, covered it, and let it rise again as well, figuring it couldn’t hurt--and it didn’t.)

4. Near the end of the 30 minutes, preheat the oven to 350 degrees. When the rolls have finished rising, put them in the oven for 15 minutes, until the tops are light brown. Remove them from the tins and cool them on wire racks. (At this point, if you have remaining dough as I did, wash out one of the muffin tins, regrease it, punch down the remaining dough, shape it into rolls, let it rise 30 minutes, and bake it as well.)

Makes: about 3 dozen rolls
Time: about 2½ hours, but only 30 minutes of that is actual work

Thursday, October 07, 2004

GREEN GARLIC BREAD


This one is for the garlic fans. What we’ve got here is basically a pesto baked on some bread, but you’ll notice the pesto contains 10 cloves of garlic. Even I quail slightly at this. You will wake up with garlic breath the next morning, but this stuff is worth it, glowingly green, zesty, and all nice and toasty-crusty on the bread. I have no idea where I got this recipe; I’ve had it for years. I don’t make it regularly (it’s a bit labor-intensive for a side dish; generally if I want to make garlic bread I just toast the bread in the oven and then rub a garlic clove over it) but last night I hit upon the bright idea of making it as a companion to the shockingly orange Creamy Carrot-Potato Soup. Although I had to use two blenders to make this happen, they went extremely well together, the spicy freshness of the pesto with the sweet, mellow, earthier soup. I very much recommend the pairing.

Note: I don’t know that I’ve really ever used a full loaf of bread for this recipe; maybe I spread the pesto too thick or something. Last night I used half a French baguette—but the baguette was about five inches wide, so there was a lot of surface area on which to spread stuff. Just eyeball it.

Also, if you use less garlic, no one will judge you. I've gotten away with as few as five cloves without sacrificing any deliciousness.

10 garlic cloves, peeled
¼ cup olive oil
2 tablespoons chopped fresh parsley
2 tablespoons chopped fresh basil
½ teaspoon dried thyme leaves
¼ teaspoon hot red pepper flakes
¼ cup grated Parmesan cheese
1 1-pound loaf of Italian bread or French baguette

1. Preheat the oven to 350 degrees. Dump all the ingredients (except the bread, of course) into the blender (or you can use a food processor, of course, if you’re fancy enough to have one). Puree this until it's fairly smooth.

2. Cut the bread loaf in half horizontally, i.e., from end to end (generally I cut it in half, or even in fourths, crosswise first to make this easier). Set the bread pieces, crust side down, cut sides up, on a large baking sheet and spread the cut sides with the pesto.

3. Bake until the pesto is crusty and just beginning to brown, 10-12 minutes. Cut the bread into thick slices and serve it warm.

Serves: 4-6
Time: 20 minutes