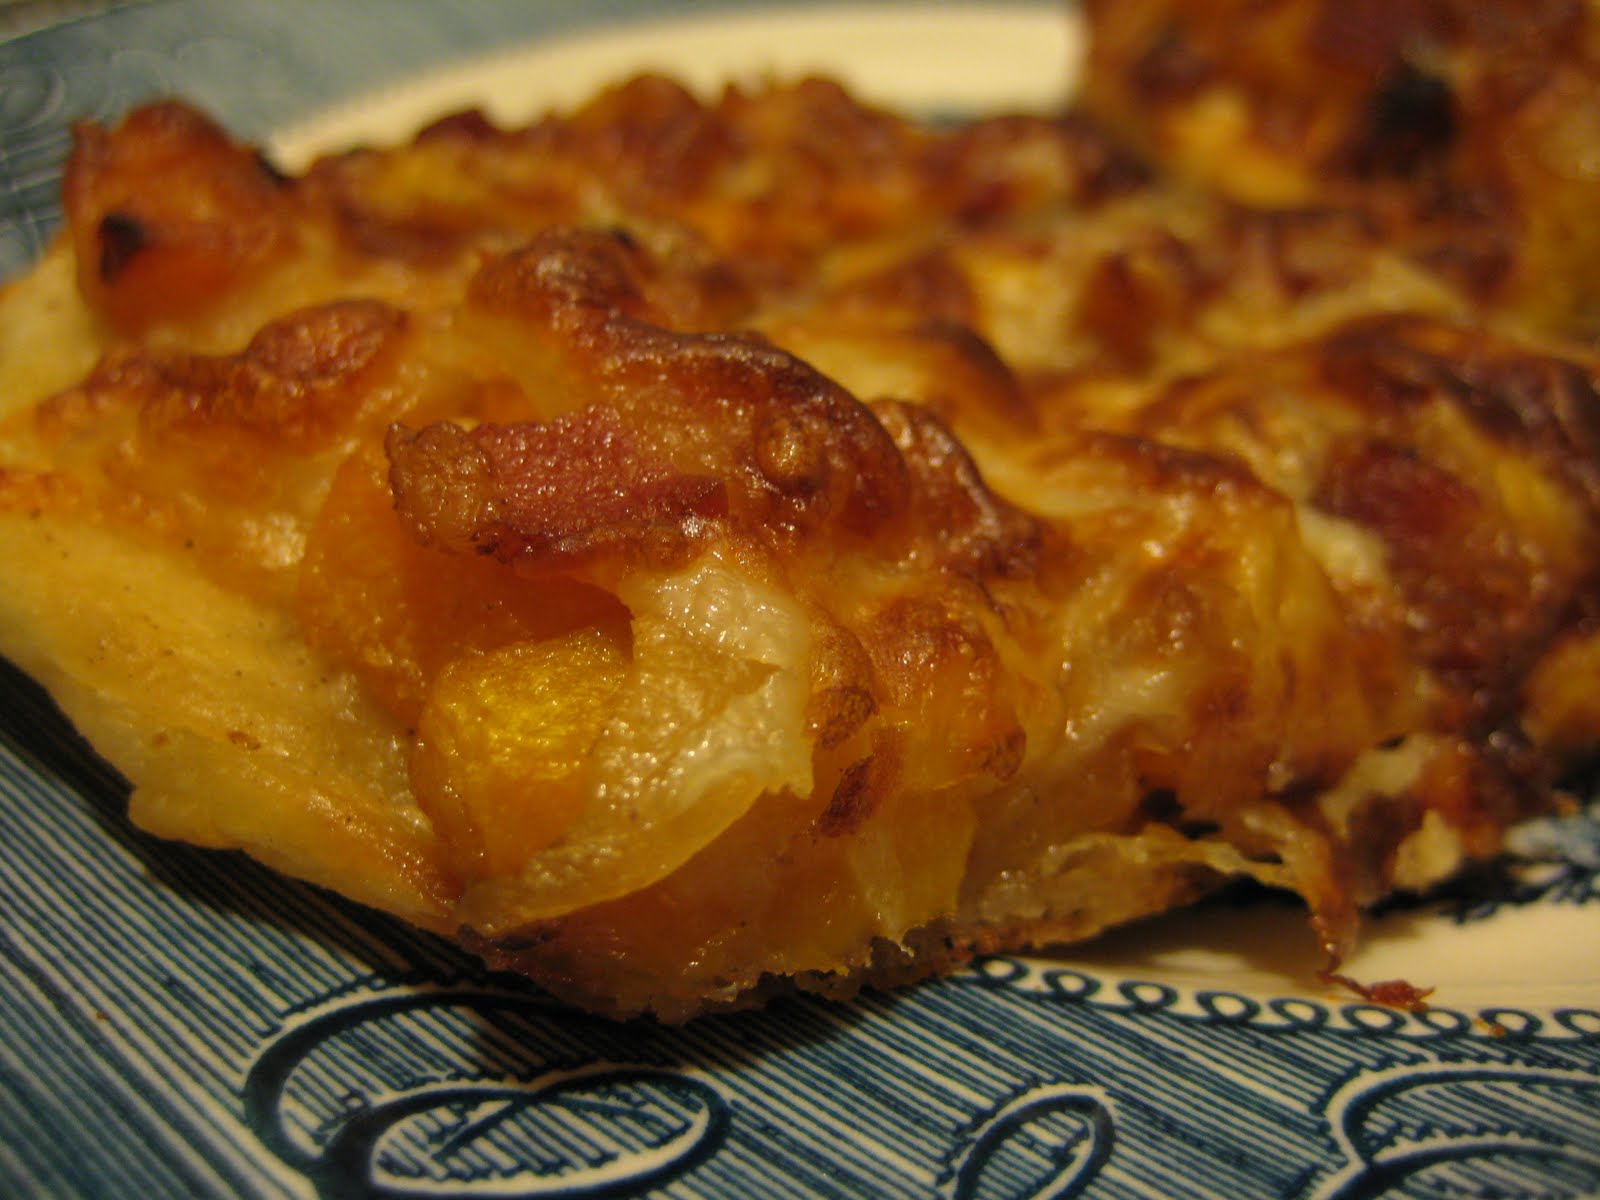
Showing posts with label Winter squash. Show all posts

Friday, November 07, 2014

PUMPKIN SPICE GRANOLA


This recipe is ideal for the time of year I always complain about, when the rest of the nation wraps up in wooly sweaters and sips hot cider while Southern California swelters into November. This year has been particularly brutal, leading me to spend long hours staring into my closet, wondering why I even bother owning long-sleeved clothing. Craving pumpkin-spice flavor while breaking a sweat at the thought of anything served above room temperature doesn’t leave much room for fall treats. One day, dreaming wistfully of steaming pumpkin baked oatmeal while it was plainly still granola weather, I thought, “Is there such a thing as pumpkin granola?”

I shouldn’t have even questioned it; I think the second rule of the Internet must be that there is a pumpkin variation of every possible foodstuff. (The first rule is something to do with cat videos.) I found a number of candidates but couldn’t settle on one; some looked too sweet, others didn’t contain much actual pumpkin. Then, the very day I was drawing up my grocery list, Budget Bytes published exactly what I was looking for. Well, almost exactly—I did swap in coconut oil for vegetable oil, maple syrup for honey, my own spice blend for pumpkin pie spice, and pecans for sunflower seeds. I left out the cranberries because I wasn’t in the mood for dried fruit, but might have added some pepitas if I had them, for a double hit of pumpkin power. However you choose to approach it, the result is an orange-hued, clustery granola with real pumpkin spice flavor that makes for a delicious autumnal breakfast treat. This was the first time I’d deviated from my go-to granola recipe in 10 years, but I’m glad I made room in my life for a seasonal alternative.

1 15-ounce can pumpkin puree
½ cup brown sugar
¼ cup coconut oil
2 tablespoons maple syrup (preferably Grade B)
1 teaspoon vanilla extract
¾ teaspoon ground cinnamon
½ teaspoon ground cardamom
¼ teaspoon ground ginger
¼ teaspoon ground nutmeg
⅛ teaspoon ground cloves
⅛ teaspoon ground allspice
½ teaspoon salt
6 cups old-fashioned rolled oats
½ cup chopped pecans (pepitas would also be good here)
½ cup dried cranberries, chopped (optional)
  1. Preheat the oven to 300 degrees.
  2. In a medium saucepan, combine the pumpkin, brown sugar, oil, maple syrup, vanilla, spices, and salt. Stir and cook over medium-low heat for 3 to 5 minutes, or until mixture is heated through and the sugar has dissolved.
  3. In a large bowl, combine the dry oats, pecans, and pumpkin mixture. Stir very well (mixing with your hands works best) until the oats are evenly coated with pumpkin and there are no dry oats left in the bottom of the bowl.
  4. Spread the oat mixture over two baking sheets covered with parchment paper. Bake the oats in the preheated oven for 45 to 60 minutes, or until they are mostly dry, stirring every 15 minutes.
  5. Once the oats are finished cooking, sprinkle in the chopped cranberries if desired, stir, then let cool completely. Once cool, store in an airtight container for up to a week.
Serves: About 8
Time: 1 hour 15 minutes
Leftover potential: Good.

Wednesday, March 12, 2014

WINTER PANZANELLA


Will I ever tire of kale salads? Probably not, especially if they contain apples and cheese and roasted squash. I love the fresh, grassy flavor of raw kale, and I love how sturdy and convenient the leftovers are. This recipe might seem similar to others I’ve made in the past, but it might even better, because it’s rounded out with croutons that give it enough heft to be a main course. Throw in an assertive maple-mustard-balsamic vinaigrette and the satisfyingly meaty flavor of smoked cheese, and who could resist?

I’m not sure where I stumbled across a link to this post at Five and Spice, but I was immediately taken with the idea of a wintery spin on the classic panzanella. The original recipe included roasted beets, but beets are one of the few vegetables I just can’t find a love for no matter how hard I try (they taste like dirt to me), so I skipped those and increased the squash quantity instead (I hate using only part of a squash anyway). I also increased the kale amount (to use a full bunch and because I adore it), decreased the bread (so all the croutons fit in my 12-inch skillet in an even layer) and replaced the smoked mozzarella with smoked Gouda (because I love Gouda but don’t remember to buy it often enough). All good moves, but I’m particularly proud of my two final touches: throwing the red onion in the oven with the squash instead of leaving it raw (because roasted onion is crazy delicious and raw can be overpowering), and adding dried thyme to the croutons (which I know from experience makes them extra irresistible).

The end result is an incredibly pleasing jumble of textures (crisp, crunchy, tender, creamy, chewy) and flavors (sweet, tart, smoky, salty, savory) that makes a great lunch or light dinner. It’s so good, I’m almost sad that winter is over and soon butternut squash will be out of season…. That is, until I remember that soon I’ll be able to eat my delicious summer kale salad.

1 small butternut squash, peeled, seeded, and cut into 1-inch cubes (about 3-4 cups)
1 medium red onion, cut into thin wedges (eighths or sixteenths)
6 tablespoons olive oil, divided
Coarse salt and freshly ground pepper to taste
6-8 ounces ciabatta or other good, crusty bread, cut into 1-inch cubes (about 4 cups)
¼ teaspoon dried thyme
2 tablespoons balsamic vinegar
1 teaspoon maple syrup (preferably Grade B)
1 teaspoon grainy Dijon mustard
1 small garlic clove, crushed and minced (about ¼ teaspoon)
1 bunch Tuscan kale, stemmed and thinly sliced (about 4 cups)
1 large, tart, crisp apple (I recommend Granny Smith), cored and cubed
About 4-6 ounces smoked Gouda, cut into ½-inch cubes (about ½-¾ cup)
  1. Preheat the oven to 425 degrees. Line a large baking sheet with parchment, place the cubed squash and onion wedges on it, and toss with 1 tablespoon olive oil, plus salt and pepper to taste. Spread the vegetables out in a single layer, put the baking sheet in the oven, and roast until tender and browned, about 20-30 minutes. Remove from the oven and let cool.
  2. Meanwhile, heat 1 tablespoon oil in a large skillet over medium heat. Add the bread cubes and toss well. Season with salt and pepper and the dried thyme. Toast, tossing frequently, until croutons are crisp and golden brown, about 10 minutes. Remove from heat and set aside.
  3. In a small bowl, whisk together the balsamic vinegar, maple syrup, mustard, garlic, ¼ teaspoon salt, and pepper to taste. Gradually whisk in ¼ cup oil, mixing until emulsified.
  4. Place the sliced kale in a large bowl and pour about half the dressing over it. Toss well to coat, massaging the dressing into the kale with your hands. Let the kale sit in the dressing for at least 15 minutes.
  5. Once the butternut squash and onions have cooled to about room temperature, add them to the bowl with the kale. Add a little more dressing and toss again. Add the cheese and apple cubes, finish with dressing to taste (you may not quite use it all), and toss thoroughly until well combined.
  6. About 15 minutes before serving, add the bread cubes and toss well. (But if you are saving some salad for later, store the bread cubes for those servings separately and don’t add them to the salad until shortly before you plan to eat it.)
Serves: 4
Time: 1 hour
Leftover potential: Great (store bread cubes separately from rest of salad).

Tuesday, February 05, 2013

PUMPKIN BAKED OATMEAL


When I was first getting to know A, one anecdote he told made a particularly vivid impression on me: When he was a little boy and going through an especially picky phase, he got to have pumpkin pie for breakfast. His pediatrician told his mother to give him whatever he would actually eat, and that at least pumpkin is high in vitamin A, protein, fiber, and other nutrients. To this day, when we visit his mom for Thanksgiving, there is often an extra pumpkin pie just for him to eat in the mornings.

In contrast, I’m an orthodox breakfast eater from a family of orthodox breakfast eaters. I’ve never had any kind of pie for breakfast, and as I’ve mentioned before, I eschewed pumpkin completely for the first 34 years of my life. Pumpkin pie still isn’t my favorite, but pumpkin ice cream, cookies, pancakes, pudding, and even gnocchi have won me over, so when I saw this recipe for pumpkin baked oatmeal at Budget Bytes, I was intrigued. Ever since I discovered baked oatmeal three years ago, it’s been my go-to warm breakfast food, but I’ve always stuck with the same recipe, with the only variation being that I occasionally use dried cranberries instead of raisins. Clearly, it was time to branch out.

This recipe is pretty similar to my usual except for the pumpkin, the spices, and the addition of baking powder, which makes the oatmeal just a bit fluffier. It called for 1½ cups milk, but then mentioned that you could use up to 2 cups, subbing in plain yogurt for some of that. I liked the idea of adding a bit more protein from Greek yogurt, so I used ½ cup of that plus 1½ cups milk. I think this may have been a bit too much liquid for me, in addition to all the pumpkin; the end result had a creamier consistency than I’m used to, although it’s also possible I didn’t cook it long enough (I did cook it for longer than the recipe says, because after the given baking time it was still runny and jiggly in the middle, but I probably still erred on the side of underdone). This wasn’t a huge problem, especially since baked oatmeal becomes just a bit drier with each day it spends in the fridge, but I’m wondering if next time I should reduce the liquid slightly. I’m also wondering if covering the baking dish is really necessary; this isn’t called for with my other recipe, and I think it increased the needed baking time for me. As long as the top doesn’t get overly browned, I might skip it. To provide some textural variation, I sprinkled chopped pecans atop the oatmeal right before I ate it each morning, and it was such a tasty addition that I’ll just throw them right in before baking next time.

Small consistency issues aside, this oatmeal is incredibly delicious. It really does taste reminiscent of pumpkin pie, but better, in my opinion, because it’s not so sweet and smooshy; the nutty, chewy oats help balance it out. It’s a cheerful shade of orange, and I love knowing it’s packed with even more good-for-you punch than my usual version. If you’re a devoted cereal eater like me, it’s not often you can claim to have had nearly a full serving of vegetables by 9:00 a.m. Whether the idea of pumpkin pie for breakfast sounds like a great idea to you or a crazy one, this happy medium is a tasty, wholesome breakfast treat. It’s going into my regular rotation; in fact, I might make another batch today!

Update, September 2013: Still a favorite, but I've made a few changes. I now include ½ cup of pecans before baking, and I bake it uncovered the whole time with no ill effects—but if you find the top browns before the interior is solidified, by all means cover it. I also leave out the yogurt and just use 2 cups milk; as much as I like the idea of extra protein, I think it was adding a tart undertone I didn’t care for. In addition, instead of premixing my pumpkin pie spice, I'll often get lazy and just dump spices directly into the pumpkin mixure--a heaping 1/2 teaspoon cinnamon, 1/4 teaspoon each cardamom and ginger, and 1/8 teaspoon each cloves and nutmeg. Can't really tell the difference!

15 ounces pumpkin puree (canned or fresh)
½ cup brown sugar
2 large eggs
1 teaspoon pumpkin pie spice*
½ teaspoon salt
¾ teaspoon baking powder
1 teaspoon vanilla extract
1½–2 cups milk
½–1 cup plain yogurt (optional; use as replacement for part of the milk, with no more than 2 cups liquid total; e.g., 1 cup milk + 1 cup yogurt, or 1½ cups milk + ½ cup yogurt)
2½ cups rolled oats (old-fashioned, not quick)
½ cup chopped pecans (optional)
Nonstick cooking spray or canola oil

*I made my own pumpkin pie spice by combining ¾ teaspoon ground cinnamon, ½ teaspoon ground ginger, and ⅛ teaspoon each of ground cloves, cardamom, and nutmeg in a small bowl. It yields a bit more than 1 teaspoon, but you can use the excess for something else.

1. Preheat the oven to 350 degrees. In a large bowl, whisk together the pumpkin, brown sugar, eggs, vanilla, pumpkin pie spice, salt, and baking powder until smooth. Whisk in the milk (and yogurt if using).

2. Mix the dry oats into the pumpkin mixture, and add the pecans, if using. Coat an 8-by-8-inch baking dish with nonstick spray or a small amount of oil. Pour in the pumpkin oat mixture, cover with foil, and bake for 45 minutes or until center is set, removing the foil after the first 30 minutes.

3. Divide into portions and serve topped with milk or yogurt, nuts, maple syrup, or whatever else you like (on a special occasion, I'm sure whipped cream would be fantastic).

Serves: 6–8 (original recipe says 8, but I like a hearty breakfast and split it into 6 instead)
Time: 1 hour
Leftover potential: Great; will last in a sealed container in the refrigerator for at least a week. I bake it, let it cool, divide it into portions, put them in separate covered bowls in the fridge, and heat one up in the microwave each morning, pouring milk over the top before eating; you could also just cover the original baking dish and scoop out a serving each morning. 

Wednesday, January 16, 2013

CHILI-LIME ROASTED SQUASH SALAD


I was in serious danger of getting tired of butternut squash. The squash = winter equation is so ingrained in me, and I have so many great squash recipes, from soup to pizza to pasta, that I end up buying one about every other week, but lately I’ve been less enamored of its mushy (sometimes mealy) sweetness. What I needed was to spice things up, literally. When I spotted this Everyday Food recipe at The Bitten Word, I was intrigued by its flavor profile. Instead of pairing squash with the usual suspects—fallish ingredients like sage, maple, cinnamon, apples and pears, or sausage—it went in the opposite direction, with the summery-seeming southwestern tastes of chili, lime, and cilantro. It turns out that the heat of the spice, the tang of the citrus, and the herby freshness were exactly what I needed to shake off the squash doldrums.

I followed the recipe exactly, except that I threw in a bit of smoky chipotle chili powder with the regular stuff (recommended), and since I’m not especially passionate about Romaine hearts and noticed that the photo on the Bitten Word showed different greens instead, I used a bagged baby spring mix from Trader Joe’s. The recipe is a bit vague about what temperature the squash should be when you serve it; I like warm salads when they involve spinach or arugula, but hate wilted lettuce, so I compromised and went with room temperature. Roasted squash is always best right out of the oven, when the exterior is still crisp and caramelized, but the leftovers the next day were decent despite the soggier squash; I heated it briefly in the microwave (less than 30 seconds) just to take the chill off it before I added it to the greens.

This is just a personal taste thing, but I think next time I might cube the squash instead of slicing it, then just toss it with the olive oil and chili powders instead of sprinkling the chili powder on top—that would distribute the seasoning more evenly, help the squash cook more quickly, and make the salad easier to eat. I loved the salty crunch of the pepitas as a foil for the tenderness of the squash, but the cheese (I used feta, since I had some on hand) didn’t do as much for me; its creaminess seemed to blend too much with the squash, and it didn’t add much beyond salt and color contrast. I can’t believe I’m saying this, since I’m usually more apt to add feta to recipes that don’t call for it, but I think next time I’d leave it off entirely. Maybe cotija, which seems a bit drier and firmer, might work better, but for me, I’d rather just eat a quesadilla on the side to round this out into a meal than include cheese in the salad.

Chili + lime + cilantro is one of my favorite flavor combinations, but I never would have thought to apply it to squash (even though of course it’s been done before; now I want to try this version). I’m so glad I found this fantastic salad to expand my horizons and rehab the poor old butternut.

1 butternut squash (about 2 pounds), peeled, halved, seeded, and cut crosswise into ½-inch slices
¼ cup extra-virgin olive oil, divided
1 teaspoon chili powder (I like to use ½ teaspoon regular and ½ teaspoon chipotle)
Salt and pepper
3 tablespoons lime juice (1–2 limes)
⅓ cup chopped fresh cilantro
¾ teaspoon honey
1 head Romaine lettuce, chopped, or about 5 ounces mixed spring greens
¼ cup toasted pepitas
¾ cup (3 ounces) crumbled Cotija or feta cheese (optional)

1. Preheat oven to 400 degrees.

2. On a rimmed baking sheet, toss squash with 1 tablespoon oil and arrange in a single layer. Sprinkle with chili powder and season with salt and pepper. Bake until soft and lightly golden, 20 to 25 minutes.

3. Whisk together lime juice, cilantro, honey, and remaining 3 tablespoons oil; season with salt and pepper.

4. Arrange lettuce on a platter or in serving bowls, then top with squash, pepitas, and cheese, if using; drizzle with dressing.

Serves: 4
Time: 40 minutes
Leftover potential: OK; store all components (roasted squash, dressing, greens, pepitas, and cheese) separately and assemble right before eating.

Friday, December 21, 2012

PAN-FRIED PUMPKIN RICOTTA GNOCCHI


Sorry I’ve been missing in action for the past month; I’m cooking as regularly as always, if perhaps less ambitiously, but work chaos and holiday tasks have kept me too distracted to sit down and marshal my thoughts about it. So now you get to read a whole series of posts about meals I made so long ago that I can’t remember anything about them, except that they were tasty. (There were some less tasty ones, but I’m skipping them in the interest of efficiency.) Hopefully I’ll be back on track soon, but in the meantime, let’s hop in the wayback machine to October/November, when we were all excited about pumpkin things. (Remember pumpkin? It’s what dominated the food blogs before peppermint took over.)

I love my lemon-ricotta gnocchi recipe so much that I’ve been meaning to explore other variations, and I’d had this Simply Recipes pumpkin one bookmarked for nearly a year, but when autumn finally rolled around and I got serious enough to read it more closely, it didn’t seem exactly like what I wanted—for instance, it had a greater proportion of flour than I’m used to, and it had you boil the gnocchi before pan-frying them. I started Googling around a bit for other options, thinking I could study up and then invent my own version based on the lemon-ricotta recipe. Well, surprise, surprise: Steamy Kitchen, the source of my beloved original, already had a pumpkin adaptation! Done and done.

I did make a few changes to hew even closer to the recipe I already know and love, ditching the delicious-sounding-but-too-futzy-and-indulgent-for-weeknight-dinner fried sage and brown-butter-balsamic-vinegar sauce. Instead I added sage to the gnocchi dough itself and garnished with a bit more (replacing the parsley of the lemon-ricotta version), and threw some red pepper flakes on top to provide some zip and counterbalance the pumpkin, both excellent choices. The result was a subtle twist on my old favorite—festively orange, a bit sweeter but not overwhelmingly squashy, pungent with sage. I’ll admit that the squash makes the texture a bit less light and fluffy, so if it were a contest between the two the lemon-ricotta would still come out ahead, but it’s nice to have a fall variation to celebrate the season. Next time I might contemplate adding a tiny bit of nutmeg and/or cinnamon, which could very well be disastrous but might amp up the pumpkin theme a bit more.

In point of fact, mine were actually butternut squash gnocchi. I believe I’ve read somewhere that most commercial canned pumpkin products are really made up of other winter squashes, so clearly the taste and texture differences are negligible. I had the butt end of a squash languishing uselessly around the kitchen, and although it seemed very inconvenient I screwed up my Dutch thriftiness, gritted my teeth, and made my own squash puree… which turned out to be incredibly easy. I did it a few days ahead, when I had the time, and it kept just fine in the fridge until I was ready to use it. I’m not saying I’ll abandon the canned pumpkin entirely, but this is a good way to use up leftover squash when you have it. (Directions for the puree are in the footnote below.)

I like to serve my lemon-ricotta gnocchi tossed with steamed or roasted asparagus to offset the fact that I’m basically eating fried cheese for dinner. I couldn’t come up with a fall/winter vegetable to throw into the pumpkin version, so I just served a kale salad on the side. It ended up being the perfect combination.

½ cup skim-milk ricotta
½ cup pumpkin or squash puree, canned or fresh*
½ cup freshly grated Parmesan cheese, plus extra for garnishing
1 large egg yolk
1 teaspoon lemon zest
1 teaspoon coarse kosher salt (or ½ teaspoon table salt)
1 tablespoon minced fresh sage, plus extra for garnishing
1 cup all-purpose flour (spooned in and leveled), plus more for dusting
2 tablespoons butter
1 tablespoon olive oil
¼ to ½ teaspoon red pepper flakes
Black pepper to taste

*To make your own puree, cut a small sugar pumpkin or other winter squash in half, scoop out and discard the seeds and strings, lay the halves face down on a foil-lined baking sheet, and bake at 350 degrees for 45 minutes to an hour, until soft. Allow to cool, then scoop out the flesh and mash it with a fork until smooth (use a food mill, food processor, or immersion blender if you want it super-smooth).

1. Combine ricotta, pumpkin, ½ cup Parmesan, egg yolk, 1 teaspoon lemon zest, salt, and 1 tablespoon sage in a large bowl. Mix well. Sprinkle half of the flour over the mixture and gently turn a few times with a spatula to incorporate it. Dump the mixture on a clean, lightly floured work surface. Sprinkle the remaining flour on top of the mixture and gently knead with your fingertips, just bringing the dough together until the flour is incorporated. (This should only take a minute or two; any longer and you will be overkneading.)

2. Divide the dough into four equal parts. Take each part and roll it into a long log, 1 inch in diameter. Cut each log into 1-inch-long pieces.

3. Heat a skillet over medium-high heat. Add the butter and olive oil. When butter is just lightly browned, add gnocchi in a single layer. Fry for 2 minutes, then flip them over. Sprinkle with red pepper flakes and fry for another 2 minutes. Taste one to see if it’s done—if you taste the flour, it needs to cook longer.

4. Serve with a sprinkling of Parmesan, sage, and black pepper.

Serves: 2–4
Time: 30 minutes
Leftover potential: I haven’t attempted it, but probably not very good. I’m going to go out on a limb and say that fried cheese is best served fresh from the pan.

Wednesday, November 07, 2012

PUMPKIN BUTTERSCOTCH OATMEAL COOKIES


I love trying new cookie recipes, because they rarely if ever turn out badly. In this case, how could adding pumpkin and spices (yes, I am firmly on board the pumpkin train after years of resistance, and that train is delicious) to the standard oatmeal scotchies recipe be anything but tasty? The pumpkin creates a nice amber color and tender cakiness, the spices help balance the intensely sweet, slightly artificial flavor (I say that in a loving way) of the butterscotch chips, and the whole thing is heartily fallish (if not very photogenic; I think mine are especially homely).

The major change I made to the original recipe was to make my own spice mixture, instead of using premixed pumpkin pie spice augmented by other spices. I went with a similar combination to the one I’ve used in all my other pumpkin recipes, but because I didn’t feel like doing endless math to match the exact amount, it made a little more than the recipe calls for, so you’ll have find some other use for the extra (I threw it into my refrigerator oatmeal the next day). I also increased the salt from ¼ teaspoon to ½ teaspoon, which seemed necessary to counteract the richness of the butterscotch chips (it’s also the amount used in the traditional oatmeal scotchies recipe, at least as published on the Quaker oatmeal package). I would maybe consider cutting back slightly on the butterscotch chips; 1½ cups (nearly but not quite an entire bag, according to my measurements) made for a very sweet result, and some of my cookies seemed more like clumps of chips loosely held together with a bit of dough. I found myself longing for more of the oatmeal-pumpkin portion, so I might try just 1 cup next time. Lastly, I think I could have made my cookies a little larger, because I got about 10 more than the original recipe did. But since when is having extra cookies really a problem?

1¼ cup cups all-purpose flour
1 teaspoon baking soda
½ teaspoon salt
¾ teaspoon cinnamon
½ teaspoon cardamom
⅛ teaspoon ground ginger
⅛ teaspoon ground cloves
⅛ teaspoon allspice
⅛ teaspoon ground nutmeg
½ teaspoon salt
½ cup (1 stick) unsalted butter, at room temperature
¾ cup granulated sugar
¾ cup packed brown sugar
1 large egg
1 teaspoon vanilla
1 cup pumpkin puree
3 cups old-fashioned rolled oats
1–1½ cups butterscotch chips

1. Preheat oven to 375 degrees. Line two baking sheets with parchment paper or a silicone baking mat and set aside.

2. In a medium bowl, whisk together flour, baking soda, and salt.

3. In a small bowl, whisk together cinnamon, cardamom, ginger, cloves, allspice, and nutmeg. Measure out 1¼ teaspoons of the spice mixture and add it to the bowl with the flour mixture, whisking well to combine. Save the rest of the spice mixture for another use.

4. In the bowl of a stand mixer using the paddle attachment (or just in a large bowl using a handheld electric mixer), beat butter, sugar, and brown sugar until smooth and creamy. Add egg and vanilla extract and mix again. Add pumpkin and mix until combined (mixture may appear curdled, but it’s fine).

5. Turn the mixer speed to low and slowly add in flour mixture, mixing until just combined. Stir in oats and butterscotch chips.

6. Drop dough by heaping tablespoons onto prepared baking sheets. Bake for 10 to 12 minutes or until the cookies are set and golden. Remove cookies from the oven and cool on the baking sheet for 2 minutes. Transfer to a wire rack and cool completely.

Yields: About 3 dozen cookies (original recipe said 2½ dozen; I got 40)
Time: 45 minutes
Leftover potential: Good; freezes well.

Wednesday, October 31, 2012

BUTTERNUT SQUASH, POTATO, AND QUINOA HASH


Usually when I alter a recipe, it’s to cut corners, but here’s a rare instance where I made something about 10 times more complex—and it was worth the extra effort!

When I saw this quinoa hash at a Cozy Kitchen, I was really intrigued by the idea. A still isn’t a quinoa fan, but he makes an exception for quinoa fritters, and I thought maybe a hash could replicate some of that crispy, toasty goodness he enjoys. I tend to have bad luck with hashes, though; apparently I just don’t have the knack for frying potatoes. By the time they’re cooked through, they’re overbrowned and sticking to the pan, and then they break apart and everything devolves into a starchy mess. I know this can be avoided by cooking the potatoes through first and then browning them, as in my corn hash recipe, where they’re microwaved. But since squash would also be involved, that made me think of roasting, so I decided to coat the vegetables with the spices (I used smoked paprika instead of regular, to play up the roasty flavor) and throw them into the oven, on separate baking sheets in case one cooked faster than the other. By this time the whole process was starting to seem ridiculously awkward, and I wasn’t even done complicating things yet.

The original recipe boiled the quinoa right in the skillet, but I’m not sure my cast-iron is that well-seasoned, so I opted to cook it as usual, in a separate pot. Then of course it seemed like a great idea to add bacon, so I browned that in the skillet and removed it, then cooked the shallot and garlic in the bacon fat. (I can take or leave big pieces of bacon, but anything fried in bacon fat? Sign me up.) Since I wanted my quinoa to be as toasted as possible, I tossed it in with the shallot mixture and let it fry as long as I could. It didn’t brown as much as I’d hoped—nowhere near as much as the fritters—probably because the pan was a bit crowded and it steamed more than frying, but it did take on a golden hue, a drier, chewier consistency, and a nice nutty taste. (If you’re not a fan of the texture of ordinary quinoa, I highly recommend trying it pan-fried.) Then I added back in the bacon and the roasted vegetables. The original recipe had just cooked eggs right on top of the hash, but since I’m addicted to poached eggs I made those separately and set them on top when I was ready to serve. And finally, for a bit more color, I served the whole thing atop a bed of arugula.

So basically, the original recipe was a true one-dish meal, with everything from the quinoa to the eggs cooked in the same skillet. I had to go and add a separate appliance (the oven) and million extra dishes and steps. I realize this sounds like a pain, and if you want to try the original instead of my version I completely understand, but I swear to you, my method didn’t end up being too hard, and it paid off big time. In fact, it was pretty much a masterpiece, if I do say so myself, joining the ranks of my favorite quinoa dishes ever. The tender, spiced roasted vegetables were delicious enough to eat on their own, but when combined with the peppery fresh greens, the smoky bacon, the nutty grain, and the creamy egg they were even better. I would happily eat this delicious, satisfying dish for breakfast, lunch, or dinner, and A enjoyed it enough to have leftovers the next day, which for him is really saying something where quinoa is concerned. I’m tremendously pleased that all my tinkerings ended up being improvements and not fussy time-wasters or grievous errors. Could it be that after so many years, I’m finally learning to improvise in the kitchen?

1 cup uncooked quinoa, rinsed well
2 cups water
1–1½ teaspoons salt, divided
¾ pound red potatoes, cubed
½–¾ pound butternut squash, peeled and cubed
1–2 tablespoons olive oil
1 teaspoon cumin
1 teaspoon smoked paprika
4 slices bacon, diced
1–2 shallots, minced
1 large garlic clove, minced
Freshly ground pepper to taste
¼ cup minced fresh chives
4 large eggs
About 4 cups arugula

1. Place the quinoa in a saucepan with water and ½ teaspoon salt, bring to a boil, reduce heat to medium-low, cover, and simmer for 15 to 20 minutes, until all liquid is absorbed. Remove from heat and spread quinoa in a thin layer on a large plate or a baking sheet to cool.

2. While the quinoa cooks and cools, preheat the oven to 400 degrees. Place the cubed potatoes in a large bowl and toss with ½–1 tablespoon olive oil, ½ teaspoon cumin, ½ teaspoon smoked paprika, and coarse salt to taste. Line a baking sheet with parchment and spread the potatoes on it in a single layer. To the empty bowl you just used, add the cubed squash and toss with ½–1 tablespoon olive oil, ½ teaspoon cumin, ½ teaspoon smoked paprika, and coarse salt to taste. Line a second baking sheet with parchment and spread the squash on it in a single layer. Place both baking sheets in the oven and roast, stirring occasionally, until vegetables are browned and crispy outside, tender within, about 20–30 minutes. Remove from oven and set aside.

3. When the vegetables are about halfway done roasting, heat a large skillet over medium heat. Add the bacon and cook until crisp. Remove from skillet with a slotted spoon, keeping the skillet on the heat.

4. Add shallot to the skillet and cook until translucent, about 5 minutes. Place the garlic atop the cooked shallot and cook until fragrant, about 1 minute. Add the quinoa to the skillet and fry, stirring occasionally, until quinoa is a bit browned, slightly dry, and smells toasted, about 15 minutes.

5. Add the potato, butternut squash, and bacon to the skillet and cook another 5–10 minutes until everything is warm. Season with salt and pepper to taste.

6. Meanwhile, poach eggs.

7. Place a handful of arugula in each of four shallow bowls or plates. Divide the hash among the dishes, placing it atop the arugula, and top each with a poached egg. Garnish each serving with 1 tablespoon chives.

Serves: 4
Time: 1½ hours
Leftover potential: Good; just don't poach the eggs or add the arugula until you're ready to serve.

Tuesday, October 23, 2012

CURRIED BUTTERNUT SQUASH AND CORN CHOWDER


I do feel like I’m reaching max capacity for pureed orange vegetable soups here (five carrot, four butternut squash), but I have no recipes of any kind of that combine butternut squash with corn, and the juxtaposition intrigued me when I spotted this recipe (originally from Everyday Food) at Ezra Pound Cake. It seemed like the perfect transition food between summer and fall—which is finally, finally starting to happen here in SoCal.

The soup comes together like most other pureed vegetable soups, with a quick sauté followed by a boil in broth and then a spin in the blender, and I’m afraid that at first it tasted like any old soup to me, too. Many such recipes I’ve tried are perfectly adequate but never quite rise above the sum of their parts, and despite the presence of curry, which I’d been excited about, this one threatened to underwhelm. When I tasted it at the end, it needed something, so I squeezed in some lime juice, which was exactly the ingredient that revived the curried coconut carrot soup I tried last fall (and now adore). It really helped, but as I ate, even though A kept commenting how good it was (which is rare for him, with soups), I had already decided I wouldn’t make this recipe again; it was fine, but so similar to other recipes I make regularly, it just wasn’t worth it.

Then I ate the leftovers the next day and really actively liked them, not just tolerated them. If there had been more, I would have eaten it the next day, too. I know soup often tastes better the next day as the flavors develop and meld, but this was a dramatic improvement—or maybe I’d just been cranky and palate-distorted the night before. Now I’ll certainly make this again. It’s easy, it’s wholesome, it has a beautiful bright mustard-yellow color, and I love the unique texture; the corn kernels don’t quite blend smoothly, reminding me of a yellow lentil dal (I didn’t want to bother with only blending half the soup, so I just stuck my immersion blender in the pot but only blended semi-thoroughly, to simulate the same effect).

Aside from adding lime juice, the only changes I made were to use fresh corn instead of frozen (amazingly, corn is still in season here) and homemade chicken broth instead of vegetable broth.

2 tablespoons olive oil
1½ pounds butternut squash, peeled, seeded, and cut into 1-inch chunks (about 5 cups)
1 medium onion, chopped
10 ounces fresh or frozen (thawed) corn kernels
1½ teaspoons curry powder
Kosher salt and ground pepper to taste
29 ounces (about 3⅔ cups) vegetable or chicken broth
½ cup heavy cream
Juice of 1 lime (optional)
¼ cup chopped fresh chives

1. In a large, heavy pot, heat oil over medium heat; add squash and onion. Cook until the onion is soft, about 6 minutes.

2. Add the corn and curry powder. Cook until you can really smell the curry, about 2 minutes. Season with salt and pepper.

3. Add the broth and simmer until the squash is tender, about 25 minutes.

4. Using an immersion blender, food processor, or countertop blender, blend half the soup until smooth. Return to pot and turn the heat down to medium-low.

5. Stir in the cream, along with the lime juice if desired, and let the soup get warm before serving (do not boil). Garnish with chives.

Serves: 4
Time: 1 hour
Leftover potential: Great; tastes even better the next day, and would also freeze well.

Friday, February 24, 2012

BAKED PASTA WITH SQUASH, KALE, AND BACON


That’s right, it’s squash and kale, together yet again! What can I say? I’m insatiable, and shockingly, I didn’t already have a recipe that utilized this great combo in pasta form. Add bacon and crème fraiche and I can’t say no. Amazingly, this indulgent-seeming concoction comes to us from Cooking Light. It’s heavy on the veggies and light on the pasta (despite my hatred of not using the full 1-pound package and having random pasta remnants left over in my cupboard, I did follow the directions to use just 12 ounces and it was plenty of food), strategically using small amounts of bacon and Gruyere to deliver big flavor. Of course, if you were to increase the bacon and Gruyere just a bit, you wouldn’t be the only one to do so, judging from the comments and my own experience.

I’m not going to lie: This thing is a hassle to make. You have to roast squash, sauté bacon and onions, boil pasta and kale, and make the sauce all in separate steps, then combine everything and stick it into the oven. Unless you live in a palace, you will use every square inch of stovetop and counter space and dirty a frightening number of dishes. I wouldn’t attempt this on a weeknight, and it won’t even be a regular go-to dish. But I guarantee you, it’s worth the trouble. None of the techniques are difficult and the result is exceedingly tasty, with a good balance of sweetness and salt and smokiness and spice. The sauce is rich and creamy, but thanks to the colorful assortment of vegetables, it doesn’t feel heavy. This is a great way to tempt the kale-phobic, or just to dress up your winter veggies as comfort food.

5 cups (½-inch) cubed, peeled butternut squash
1 tablespoon olive oil
2–4 slices bacon, diced
2 cups vertically sliced onion
1 teaspoon salt, divided
5 garlic cloves, minced
12 ounces uncooked penne or other tube-shaped pasta
4 cups chopped kale
2 cups low-sodium chicken broth, divided
2 tablespoons all-purpose flour
½ teaspoon crushed red pepper
1 cup crème fraîche
½–¾ cup shredded Gruyère cheese

1. Preheat oven to 400 degrees.

2. Combine squash and oil in a large bowl; toss well. Arrange squash mixture in a single layer on a baking sheet covered with parchment paper (or coated with cooking spray). Bake for 30 minutes or until squash is tender; remove squash from oven and set aside, but leave oven on.

3. Meanwhile, cook bacon in a large nonstick skillet over medium heat until crisp. Remove bacon from pan with a slotted spoon and drain on a paper towel-lined plate. Add onion to drippings in pan; cook 6 minutes, stirring occasionally. Add ½ teaspoon salt and garlic; cook 1 minute, stirring occasionally. Remove from heat and set aside.

4. Bring a large pot of salted water to a boil over high heat. Add pasta and cook until almost al dente. Add kale to pan during last 2 minutes of cooking. Drain pasta mixture.

5. Bring 1¾ cups broth to a boil in a small saucepan. Combine remaining ¼ cup broth and flour in a small bowl, stirring with a whisk. Add flour mixture, remaining ½ teaspoon salt, and red pepper to broth. Cook for 2 minutes or until slightly thickened. Remove from heat; stir in crème fraîche.

6. Add squash, pasta mixture, bacon, and sauce to the skillet with the onion mixture (or combine everything in a large bowl if the skillet isn’t big enough) and toss gently. Place pasta mixture in a 13 x 9-inch glass or ceramic baking dish coated with cooking spray; sprinkle evenly with cheese. Bake for 25 minutes or until bubbly and slightly browned.

Serves: 6 to 8
Time: 1½ hours
Leftover potential: High.

Friday, February 17, 2012

KALE SALAD WITH SQUASH, CHEDDAR, AND ALMONDS


As avid a kale fan as I am, can you believe that this was my first time trying it raw? I hadn’t been deliberately avoiding it, but now I’m regretting not trying it sooner, because I’m head over heels. This—from Northern Spy Food Co. in NYC via Food52—was a particularly excellent choice as an inaugural recipe, since it pairs kale with squash and lemon, the usual suspect, but also with aged cheddar and almonds, which are a bit more surprising. I was in it for the cheddar and kale and squash, in that order, and thought the almonds looked unnecessary, but I’m so glad I left them in because the combination of flavors and textures was really amazing. (The original recipe called for optional shaved Pecorino, as well, and I halfheartedly threw a few fragments of Parmesan on there, but it’s totally superfluous; the cheddar provides all the sharp creaminess this salad needs, and I won’t bother with the second cheese in the future.) If you’re suspicious of raw kale, this will be your gateway drug, and if you’re already an old hand at kale salads, this will probably shake up your usual routine.

As a bonus, the cheese and nuts add enough protein to make this light vitamin powerhouse feel quite filling. Unsure how much salad the recipe would yield or how much we’d like it, I served this alongside white beans with sausage and tomatoes, and while the two dishes complemented each other nicely, it was almost too much food. The salad portions were generous, and I think that with some fruit (pears spring to mind) and maybe some bread, this would make a lovely lunch or light dinner all on its own. I’d still serve it as a side again, but alongside a smaller main course, like soup, or a single piece of chicken.

Oh, and the leftovers are magical! Usually when I have salad leftovers I painstakingly store each component separately—greens in one container, toppings in another, dressing in a third, and so on—to prevent wilting and sogginess, until I have a teetering tower of Tupperware in the fridge. Kale is so hardy, though, that you can dress it one night and find it totally unchanged the next day. A ate his leftovers several days later and reported them still good. That makes this a perfect salad to take to work, without having to corral and tote a dozen little bowls in your lunchbag.

I couldn’t find Cabot clothbound cheddar, but I picked out some Old Quebec vintage cheddar at random from Whole Foods’ bewildering cheese selection, and it was plenty delicious. And although I’m usually not one for kitchen tips and tricks, I read somewhere that a pizza cutter is the perfect tool for trimming the ribs off of kale, and I must testify that I tried it and it works wonderfully, especially with the flat, narrow Tuscan leaves. (It also does a great job of slicing the leaves into ribbons once you’ve removed the ribs.) The more you know!

1 cup cubed butternut or other winter squash
4½ tablespoons extra-virgin olive oil, divided
Salt and freshly ground pepper to taste
1 large bunch Tuscan (aka lacinato or dinosaur) kale, ribs removed and discarded, leaves finely sliced, about 5 cups
½ cup almonds, cut roughly in half
½ cup crumbled or finely chopped Cabot clothbound cheddar (or any other good, aged cheddar)
2 tablespoons freshly squeezed lemon juice

1. Preheat oven to 425 degrees. Toss squash cubes ½ tablespoon olive oil, and season with salt and pepper to taste. Spread on a baking sheet (line with parchment for easier cleanup), leaving space between the cubes. Roast until tender and caramelized, about 40 minutes, tossing with a spatula every 10 to 15 minutes. Remove from oven and let cool slightly, leaving the oven on.

2. Toast the almonds on a baking sheet (I just used the same baking sheet, after removing the roasted squash) in the oven until they start to smell nutty, tossing once, about 10 minutes. Let cool.

3. In a large mixing bowl, toss the kale with the almonds, cheddar, and squash. Add lemon juice and olive oil, season to taste with salt and pepper, and toss well.

Serves: 4
Time: 1 hour
Leftover potential: Surprisingly good.

Friday, January 27, 2012

KALE AND BUTTERNUT SQUASH PIZZA


Butternut squash and kale are like the peanut butter and jelly of the winter-vegetable world; the sweetness of the squash complements the bitterness of the kale so perfectly that as soon as I see one in a recipe, I always look for the other. Plus their colors look great together! So I’m a bit surprised that it took me so long to put them both on a pizza. I have kale pizzas and I have squash pizzas, but never have the twain met until now. Apparently I’d been secretly craving it, though, because I realized that I’d bookmarked two nearly identical pizza recipes—one with sweet potatoes and the other with squash—in the span of a couple of weeks. A hasn’t been wild about the sweet potato pizzas I’ve made in the past, so this squash version from The Way the Cookie Crumbles won out.

There’s nothing too surprising here—the squash is roasted with red onions, a nice touch, while the kale gets sautéed with garlic, also nice, and then they both get cozy together under a blanket of cheese. The only change I made was, upon stumbling on an orphaned cheese remnant in the fridge and remembering how well a sharper cheese worked on my last squash pizza—to swap in Gruyere for half of the mozzarella. It definitely made a good pizza even better, so I’m memorializing it in my adaptation of the recipe below.

I don’t think I’ll ever get tired of trying new pizza-topping combinations. I’m making up for 20 years of being strictly a plain cheese pizza eater.

1 pound pizza dough
1½ tablespoons olive oil, divided
Salt and freshly ground black pepper to taste
1 medium butternut squash, peeled, seeded, and cut into bite-sized cubes (you could also use another kind of similarly textured winter squash, like acorn or delicata)
2 small red onions, cut into wedges
1 medium bunch kale, cut in thin ribbons
2 garlic cloves, sliced
1 cup shredded mozzarella cheese
1 cup shredded Gruyere or Asiago cheese

1. Preheat the oven to 400 degrees.

2. Transfer the squash and onions to a large baking sheet; season with a generous pinch of salt and pepper and coat with 1 tablespoon oil. Bake, stirring once halfway through, until softened and browned, about 30 minutes. Remove from oven and increase heat to 450 degrees.

3. Meanwhile, heat the remaining ½ tablespoon oil with the garlic in a large skillet. Add the kale and a pinch of salt; cook, stirring constantly, until wilted, about 2 minutes. Remove from the heat and set aside.

4. Roll out the dough and place it on a baking sheet coated with cornmeal or olive oil.

5. Top the dough with the roasted vegetables, kale, and cheese. Bake for 8 to 10 minutes, until the crust is browned around the edges.

Serves: 4
Time: 1 hour
Leftover potential: Good.

Friday, December 16, 2011

ROASTED SQUASH PIZZA WITH CARAMELIZED ONIONS AND BACON


Just when I think I’m running out of pizza-topping combinations to try, another one presents itself. As soon as I saw this recipe at Dinner With Julie, I knew it would be perfect, and perfect it was—an addictive, comforting blend of smoky, salty, sweet, and creamy.

My one misstep was in using a package of pre-cubed butternut squash from Trader Joe’s; normally I frown upon such things, but we’d missed that week’s farmers’ market due to our Thanksgiving trip to Minnesota. I could’ve picked up a whole squash at the grocery store, but I wanted to make things easier on myself post-vacation, and I figured TJ’s usually has pretty good produce, so… Live and learn, right? The squash was so slimy and soggy that it took forever to roast properly; it just kept steaming away in the oven without browning, and I had to bake it nearly twice as long just to get any color and crispness on it. Then, when I popped a piece into my mouth, I discovered it was nearly flavorless, so I desperately sprinkled a little brown sugar over the rest and threw it back into the oven until the sugar caramelized. That seemed to help the sweetness along and the pizza tasted great, but: never again.

On the plus side, I had been planning to just use mozzarella on this, but then I remembered I had some cheese odds and ends left over from making kale pizza a few weeks before, so I added those into the mix. I think the Asiago in particular really made this spectacular, balancing out the sweetness of the squash and onions with its pungent sharpness. And, of course, the bacon didn’t hurt either. I’ve had a run of just-OK pizza experiments lately, but this one was an unequivocal success, probably the best I’ve tried since July’s corn-feta-cilantro-lime awesomeness.

About 1 pound butternut or other winter squash, peeled, seeded, and cubed
1 tablespoon olive oil
Salt and pepper to taste
4 slices bacon, diced
1 large onion, halved and thinly sliced
1 pound pizza dough
Shredded cheese to taste (I used a mixture of mozzarella, Asiago, and Fontina, which I highly recommend)

1. Preheat oven to 400 degrees.

2. Place the cubed squash on a rimmed baking sheet, toss with olive oil and salt and pepper to taste, and roast for 20 to 30 minutes, stirring once, until soft and browned. Remove from oven and set aside, then increase the oven temperature to 450 degrees.

3. Meanwhile, cook the bacon in a skillet over medium heat until crisp. Remove with a slotted spoon and set aside on a paper-towel-lined plate to drain. Add the onion to the drippings in the skillet and sauté until tender and caramelized.

4. Roll out the pizza dough, place it on a baking sheet coated with cornmeal or olive oil, and scatter half the cheese over it. Add the squash, onions, and bacon, then top with the remaining cheese. Bake for 10 to 15 minutes, until bubbly and golden.

Serves: 4
Time: 75 minutes
Leftover potential: Good.

Friday, December 02, 2011

PUMPKIN PUDDING


After the cookies and the pancakes, I still had some pumpkin puree left, so of course I had to make pumpkin pudding, as part of my ongoing quest to make every kind of pudding in the world, ever. I found the recipe at Sugarcrafter, probably via Food Blog Search. It was as easy as any other pudding (in other words, surprisingly easy) and tasted about as you’d expect, like a lighter, creamier pumpkin pie filling. It didn’t rock my world, but I will certainly make it again, especially when I have extra pumpkin puree to use up.

It amuses me how many ways there are to make pudding; some recipes have you add the egg right away and stir continually (and then strain the pudding to make sure there are no cooked egg bits floating around), others have you add it midway through (which means tempering the egg mixture with some hot milk), and a few have you add it at the end (which means there’s always a small risk of raw-ish egg, since you’re just relying on the heat of the milk to cook it). Whichever way you do it doesn’t seem to have a great impact on the end result, so perhaps it’s just a matter of personal preference. I’m not too afraid of raw egg, and in this case I didn’t balk at straining the pudding since I knew I’d want to get rid of any stray stringy pumpkin pieces, but in general I’m of the add-it-midway-and-temper school, so I might do that next time I make this. Otherwise, I saw no need to tinker with the recipe, except that of course I once again shoved nutmeg to the background in favor of cardamom, because I don’t understand why the rest of the world refuses to use it.

And here ends my experimentation with pumpkin for this year…unless I buy another can, in which case this whole merry-go-round will start up again.

1¾ cups milk
1 egg
½ cup canned pumpkin
½ teaspoon ground cinnamon
¼ teaspoon ground cardamom
⅛ teaspoon ground nutmeg
⅛ teaspoon ground cloves
2 tablespoons cornstarch
¼ cup + 2 tablespoons brown sugar

1. In a medium bowl, whisk together the milk and egg.

2. In another bowl, combine the pumpkin and spices.

3. In a saucepan over medium heat, combine the cornstarch and sugar. Gradually whisk in the milk mixture, scraping the bottom and sides with a rubber spatula to break up lumps. Bring to a boil and cook until the mixture thickens and coats the spatula, stirring constantly. Remove from the heat.

4. Add the pumpkin mixture to the pudding, stirring to combine. Place the pan back over low heat and warm until heated through. Strain through a fine mesh strainer into a bowl to remove any lumps. Transfer the mixture to a clean bowl or bowls (if you don’t like pudding skin, place plastic wrap directly on the surface of the pudding so that a skin will not form). Refrigerate at least an hour before serving.

Serves: 4
Time: 30 minutes
Leftover potential: Good; lasts a few days in an airtight container in the refrigerator.

Tuesday, November 15, 2011

PUMPKIN SPICE PANCAKES


The joke is most definitely on me. I only made this recipe to use up leftover canned pumpkin from the pumpkin snickerdoodles, but I fell so hard in love with these pancakes that I’ve already purchased a reserve can of pumpkin in order make them again whenever the craving hits. The recipe is from Joy the Baker and it is perfect—the pancakes cook up moist and fluffy, with just the right amount of pumpkin and spice flavor, a barely perceptible enrichment of wheat flour (I used white whole wheat), and not too much sweetness. I loved the taste of them so much I could have eaten them with no accompaniment besides a little smear of butter, but I did find that they were even better when adorned with a thin layer of the orange vanilla jelly I made earlier this year (but apparently, now that I look, never posted about, an oversight that will shortly be remedied). If you’re more of a traditional pancake eater, I imagine maple syrup would be just fine on these, or whipped cream if you want to get really fancy. The only change I made was my habitual addition of cardamom; I used it instead of the ¼ teaspoon nutmeg, although I still threw in a pinch of nutmeg anyway, plus a pinch of allspice, to approximate my usual pumpkin pie spice mix.


I thought the banana oat bran pancake recipe was the only pancake recipe for me, but I was wrong—I’ll be alternating it with this one, at least in the fall and winter, from now one. I also thought I wasn’t a pumpkin person, but apparently, I was wrong about that too. At this rate, maybe someday I’ll figure out why everyone gets so excited about cranberries!


¾ cup all-purpose flour
½ cup whole wheat flour
2 tablespoons brown sugar
2 teaspoons baking powder
¼ teaspoon salt
¾ teaspoon ground cinnamon
¼ teaspoon ground cardamom
1 pinch ground ginger
1 pinch ground cloves
1 pinch ground nutmeg
1 pinch allspice
1 cup milk
½ cup canned pumpkin
1 egg
2 tablespoons vegetable oil or melted butter
A little butter for greasing the skillet

1. Whisk together flours, sugar, baking powder, salt, and spices in a large bowl.

2. In a separate bowl, whisk together milk, egg, pumpkin, and vegetable oil or melted butter.

3. Pour the wet ingredients into the dry ingredients and whisk until just combined. Let the batter sit for 10 minutes while you heat the skillet.

4. Over medium heat, melt a little butter on the skillet. Once the skillet is hot, spoon a heaping 2 tablespoons of batter per pancake into the skillet. When pancakes start to bubble slightly, carefully flip them over. Cook until browned and cooked through, remove to a plate, and repeat as needed with the remaining batter.

Serves: About 4 (I got 16 small pancakes)
Time: 30 minutes
Leftover potential: Good; if you have leftover pancakes, layer them between pieces of waxed paper in an airtight container and store them in the freezer. To reheat, take out the number of the pancakes you want, place them on a plate and heat them briefly in the microwave (I start with 30 seconds) to thaw the centers, then finish heating them in a dry skillet over medium heat just until they are thoroughly warmed and the exteriors are slightly crisp.

Thursday, November 10, 2011

PUMPKIN SNICKERDOODLES


After 34 years of total indifference (bordering on mild hostility) to the wave of pumpkin-flavored foodstuffs that sweeps the nation each autumn, I’m suddenly starting to catch on. It started with the pumpkin ice cream last year. I made it again this year, then caught myself jonesing for something else along the same lines. When I spotted this recipe at Annie’s Eats, in which a bit of pumpkin and extra spice is added to the traditional snickerdoodle formula, it seemed a good way to herald fall—and the arrival of My!New!Oven!—without going overboard into full-blown pumpkin mania. And as I’d hoped, the cookies were a perfect pumpkiny twist on an existing fave; the pumpkin adds a tinge of orange color and a tender, cakey texture (don’t expect the usual snickerdoodle crispness here), but its flavor remains subtle.

I replaced nutmeg with cardamom in the dough, because I flippin’ adore cardamom and it never seems to get fair play in baked goods outside of Scandinavia. In general, every time I see cinnamon in a recipe, I throw in a little cardamom too. I may not be a Pumpkin Person yet, but I’m officially Cardamom Crazy! I then rejiggered the coating mixture to approximate full-blown pumpkin pie spice, dialing down the cinnamon a bit to give cardamom a supporting role (natch), scaling back the ginger, and adding nutmeg, cloves, and allspice. I loved the results and will certainly make these again next October. In the meantime, I have half a can of pumpkin puree still to use up, so watch this space for more grudgingly trendy pumpkin recipes in the near future.

Cookies:
3¾ cups all-purpose flour
1½ teaspoons baking powder
½ teaspoon salt
½ teaspoon ground cinnamon
¼ teaspoon ground cardamom
1 cup (2 sticks) unsalted butter, at room temperature
1 cup granulated sugar
½ cup light brown sugar
¾ cup pumpkin puree
1 large egg
2 teaspoons vanilla extract

Coating:
½ cup granulated sugar
¾ teaspoon ground cinnamon
¼ teaspoon ground cardamom
⅛ teaspoon ground ginger
⅛ teaspoon ground nutmeg
⅛ teaspoon ground cloves
⅛ teaspoon allspice

1. In a medium bowl, combine the flour, baking powder, salt, ½ teaspoon cinnamon, and ¼ teaspoon cardamom. Whisk to blend and set aside.

2. In the bowl of an electric mixer, beat together the butter, brown sugar, and 1 cup granulated sugar on medium-high speed until light and fluffy, 2 to 3 minutes. Blend in the pumpkin puree. Beat in the egg and vanilla until incorporated. With the mixer on low speed add in the dry ingredients and mix just until incorporated. Cover and chill the dough for at least 1 hour.

3. Preheat the oven to 350 degrees. Line baking sheets with silicone baking mats or parchment paper.

4. Combine the sugar and spices for the coating in a bowl and mix to blend. Scoop up 1 heaping tablespoon of the dough and roll into a ball. Coat the dough ball in the sugar-spice mixture and place on the prepared baking sheet. Repeat with the remaining dough to fill the sheets, spacing the dough balls 2 to 3 inches apart. Dip the bottom of a flat, heavy-bottomed drinking glass in water, then in the sugar-spice mixture, and use the bottom to flatten the dough balls slightly. Recoat the bottom of the glass in the sugar-spice mixture as needed.

5. Bake the cookies for 10 to 12 minutes, or until just set and baked through. Let cool on the baking sheets for about 5 minutes, then transfer to a wire rack to cool completely. Store in an airtight container.

Yields: 3 to 4 dozen cookies
Time: 2 hours
Leftover potential: Good; cookies will dry out after three or four days at room temperature, but they freeze fairly well.

Tuesday, December 21, 2010

BUTTERNUT SQUASH, KALE, AND CHEDDAR BREAD PUDDING


Neglectful blogger returns! Sorry for the nearly two months of silence. The holiday travel-and-gift-making/buying season hit me like a hurricane and I fell back on easy favorite recipes in an effort to spare my own sanity. Now that normal life has finally resumed, I've got two new holiday recipes to share with you (both of which were big hits), plus a tasty new soup, not to mention the fact that I've still got to pick my favorite recipes from last year (a tough job with so many good candidates). But first, here's a tasty recipe (from Bon Appetit via Ezra Pound Cake) I tried way back in November. It's presented as a vegetarian Thanksgiving dish, but I think it's pretty great for January too: substantial, comforting, and savory (the sharp cheddar made me feel like I was eating mac and cheese, and the subtle dab of Dijon adds a nice zip), but also bright, veggie-laden, and not too heavy or indulgent-feeling. I divided the recipe in half to make it into a manageable everyday (or, considering it's a bit time-consuming, at least Sunday) main dish. Give it a shot, especially if your New Year's resolutions involve eating more vegetables or discovering the magic of kale. And rest assured that my New Year's resolutions involve posting on my food blog more regularly.

1 pound peeled, seeded butternut squash, cut into 1-inch cubes (about 3 cups)
2 tablespoons olive oil, divided
Kosher salt
Freshly ground black pepper
3–4 large eggs (because I needed an egg white anyway later in the week, I used 3 whole eggs and 1 egg yolk, which seemed to work perfectly)
1 cup + 2 tablespoons half-and-half
3 tablespoons dry white wine (or hard cider)
1 tablespoon chopped fresh thyme (or 1½ teaspoons dried)
1½ teaspoons chopped fresh sage (or ¾ teaspoons dried)
1½ teaspoons Dijon mustard
½ loaf day-old baguette (do not remove crust), cut into 1-inch cubes (about 4 cups)
½ cup chopped shallots (about 2 large)
1 clove garlic, finely chopped
¼ teaspoon crushed red pepper flakes
1 bunch kale (about ½ pound), ribs removed, kale coarsely chopped
4 ounces extra-sharp cheddar cheese, coarsely grated

1. Preheat oven to 400 degrees. Place squash and 1 tablespoon oil in a large bowl; sprinkle with salt and pepper, and toss to coat. Spread out squash cubes on a large rimmed baking sheet. Roast until squash is tender, stirring occasionally, about 25 minutes. Set aside.

2. Reduce oven temperature to 350 degrees.

3. Whisk eggs in large bowl. Continue whisking as you add half and half, wine, thyme, sage, mustard, ½ teaspoon kosher salt, and ½ teaspoon freshly ground black pepper. Add baguette cubes to the egg mixture, and gently fold them into the mixture to coat each side. Let the baguette pieces soak 30 minutes, stirring occasionally.

4. Meanwhile, heat 1 tablespoon oil in large pot over medium heat. Add shallots, garlic, and crushed red pepper flakes, and sauté until soft and fragrant, stirring frequently, about 5 minutes. Add kale; cover and cook 2 minutes. Uncover the pot, and stir until kale is wilted but still bright green, about 5 minutes (the kale will still be a little crunchy).

5. Generously butter an 8-by-8 or 9-by-9-inch baking dish. Using slotted spoon, transfer half of bread from egg mixture to the dish, spreading evenly. Spoon half of kale over the bread layer. Spoon half of squash over the kale layer, and sprinkle it with half of the cheese. Repeat with remaining bread, kale, squash, and cheese. Pour the remaining egg mixture over the bread pudding.

6. Cover bread pudding with foil, and bake for 20 minutes. Remove foil; bake uncovered until custard is set, about 20 minutes longer.

7. Preheat broiler; broil pudding until cheese browns slightly, about 2 minutes. Cool 5 minutes and serve.

Serves: 4
Time: 90 minutes to 2 hours

Thursday, November 11, 2010

ROASTED SQUASH SEEDS


I can’t believe that at the ripe old age of 33, I’m still learning mind-blowing new facts such as this: It’s possible to roast the seeds of any winter squash as you do with pumpkin seeds. Really! I weep to think of all the squash seeds I’ve thoughtlessly discarded over the years when I could have been crunching on a delicious salty snack instead.

When I was a kid, my mom would always roast the seeds from our Halloween pumpkins, and now I get a visceral sense of nostalgia every time I eat them. But I can probably count on one hand the number of times I’ve had them as an adult. I’ve never been a pumpkin eater, and we don’t really carve jack-o-lanterns—I’m not that artsy or good with knives, and they always seem to rot spectacularly on the patio before Halloween even arrives. The few times I’ve tried to roast pumpkin seeds, they haven’t tasted as good as mom’s. But as soon as I learned this amazing fact about squash seeds (from an offhand mention at Smitten Kitchen), I consulted Simply Recipes for instructions, roasted some butternut squash seeds, and bingo! Just as good as I remembered. The secret is brining the seeds in salt water; the salt permeates the whole seed instead of sticking to the outside or (as often as not) falling off on the pan or in your hand.

Unless you’ve got a number of squash, the yield is going to be fairly small. I’ve roasted butternut squash seeds twice now and have gotten between ¼ and ½ cup each time. But this recipe is easily scalable to any quantity, so even if you’ve just got one little squash you’re going to turn into soup or serve on pasta or pizza, save the seeds! A negligible amount of labor will soon turn them into a couple of handfuls of tasty munchies.

Winter squash, such as butternut, pumpkin, or acorn
Salt
Olive oil

1. Preheat oven to 400 degrees.

2. Cut open the squash and use a strong metal spoon to scoop out the insides. Separate the seeds from the stringy core. Rinse the seeds in a colander.

3. In a small saucepan, add the seeds to water, about 2 cups of water to every half cup of seeds. Add 1½ teaspoons of salt for every cup of water (more if you like your seeds saltier). Bring to a boil and let simmer for 10 minutes. Remove from heat and drain.

4, Spread about a tablespoon of olive oil over the bottom of a baking sheet. Spread the seeds out over the baking sheet, all in one layer. Bake on the top rack until the seeds begin to brown, 10–20 minutes. (For smaller seeds, such as butternut or acorn, go with 10 minutes and keep a close eye on them; they’re usually done when they begin popping.) When seeds are toasted to your satisfaction, remove from the oven and let the pan cool on a rack.

Serves: Variable
Time: 30–40 minutes
Leftover potential: OK. The seeds will lose their crispness if you store them in a sealed container, but you can keep them in an open bowl on the counter for a day or two.

Thursday, November 04, 2010

PUMPKIN ICE CREAM


Aw yeah.

Now, I’m not one of those people who goes gaga for pumpkin-flavored things every October. In fact, this was the first time in my life I’d ever bought canned pumpkin. I’ve never had a pumpkin spice latte and I don’t care for pumpkin pie. No doubt this is a relic of my squash-hating childhood, which I’m gradually growing out of. Sure, I appreciate the moisture that pumpkin lends to baked goods, but it still mostly seems like an excuse to foist a lot of spice-flavored desserts on me, and I have a limited tolerance for coffee cake and ginger snaps when chocolate or fruity or caramel/nut/butterscotch/vanilla (what would you call that category?) sweets are available. But a few years ago someone did turn me on to the Double Rainbow pumpkin ice cream Trader Joe’s carries every fall (or used to—I didn’t spot it this year), and A and I made short work of a pint. So now that I have my own ice cream maker and the sky’s the limit for flavors, it seemed natural to try to re-create that seasonal treat. For once, David Lebovitz’s A Perfect Scoop left me high and dry, and most of the pumpkin ice cream recipes I found online contained eggs, which we all know I’m too lazy to fuss with, but at long last I stumbled upon this recipe at Tasty Kitchen. It was one of the easiest ice creams I’ve ever made, rivals strawberry-sour cream for the downright creamiest (thanks to the pumpkin, it was thick and pillowy before I even poured it into the ice cream maker and became even fluffier after processing), and tasted incredibly delicious. It’s definitely going to become an October tradition at our house, and I may even have to make it one more time before Thanksgiving. If I’m not careful, I’m going to become one of those Pumpkin People.

It didn’t seem worth buying pumpkin pie spice for a one-off recipe like this, but luckily, DIY recipes are plentiful online. I went with this one from the Kitchn, but subbed cardamom, which I adore, for mace, which I didn’t have. I divided the recipe in half to achieve the called-for 1 tablespoon (actually, it’s 1 tablespoon plus ½ teaspoon, but close enough), but unfortunately I ran out of cinnamon, had to make a mad dash to the store, and returned so flustered I botched the math and put in twice as much as I was supposed to (1 tablespoon, eek!). The resulting ice cream definitely wasn’t inedible, but it did leave a slight burning sensation on the tongue. I think that’s the first time in my life I’ve experienced what too much cinnamon tastes like, and I don’t recommend it. Luckily, this is such an awesome ice cream that even that couldn’t put a damper on my glee every time I scooped myself a bowl.

1 can pumpkin (15 ounces)
2 cups heavy cream
1 cup granulated sugar
1 tablespoon pumpkin pie spice*
4 teaspoons vanilla extract
⅛ teaspoons salt

*Homemade pumpkin pie spice:
Mix the following together in a small bowl:
1½ teaspoons ground cinnamon
1 teaspoon ground ginger
¼ teaspoon ground cloves
¼ teaspoon ground allspice
¼ teaspoon ground cardamom
¼ teaspoon ground nutmeg

1. Combine all ingredients in a blender or food processor. Blend until smooth and combined.

2. Cover and refrigerate until well chilled, at least 1 hour.

3. Process in an ice cream maker according to manufacturer’s instructions.

Serves: 8
Time: 10 minutes, plus chilling and processing time
Leftover potential: Good.

Tuesday, October 27, 2009

BUTTERNUT SQUASH SOUP WITH PEAR, CIDER, AND VANILLA BEAN


I already have a satisfactory butternut squash soup recipe, as well as two dissatisfactory ones, so I wasn’t really in the market for another. It’s impossible, however, to read Molly Wizenberg’s A Homemade Life without wanting to make this recipe (originally featured on her blog, Orangette, and published at Seattlest)—at least, if you’re a sucker for vanilla the way I am. I’ve had it filed away all spring and summer, just waiting for squash, pear, and cider season to roll around, and I’m happy to say it was worth the long wait. This soup is more labor-intensive than my usual one, and less savory, as well as being considerably more expensive (at least until I find a source for discount vanilla beans), but it’s also rich, complex, unusual, and utterly delicious. I was wary that with all that fruit and squash and vanilla, its flavor might veer into the realm of overwhelmingly sweet, but as long as you make sure to salt it sufficiently, it escapes dessertiness. And if in doubt, pair it with something salty to balance everything out. The first time around, I dipped in slices of the best garlic bread ever, which created an amazing contrast between flavors; for the leftover soup, a grilled-cheese sandwich made from sharp aged cheddar and onion rye bread proved a worthy accompaniment.

I won’t be dumping my former favorite butternut squash soup for this one. But my simple, everyday standby is gaining a more sophisticated, decadent, special-occasion cousin, perfect for dinner parties, Sunday suppers, and feasts welcoming fall.

3 tablespoons olive oil
2 pounds butternut squash, peeled, seeded, and cut into 1-inch pieces (4 generous cups)
2 firm-ripe pears, peeled, cored, and cut into 1-inch pieces (about 2 cups)
1 medium yellow onion, peeled and coarsely chopped
1 cup apple cider
4 cups good-quality chicken broth
½ teaspoon salt
½ cup half-and-half
1 vanilla bean, about 7 inches long
Fresh chives, finely chopped

1. Heat the oil in a Dutch oven or stockpot over medium-low heat. Add the squash, pears, and onion, stir to coat with oil, and cook, uncovered, stirring occasionally, for 10 to 15 minutes, until the onion is soft and transparent and the pears are starting to fall apart.

2. Add the cider, and bring the mixture to a boil over medium-high heat. Add the broth, reduce the heat to medium-low, and simmer the mixture, partially covered, for about 30 minutes, until the squash is tender.

3. Working in batches, carefully puree the mixture in a food processor or blender, then return the soup to the pot (or keep it in the pot and use an immersion blender). Season soup with salt. Continue to cook over medium-low heat, uncovered, until it has reduced to about ½ to ⅓ of its original volume. Stir occasionally. The final consistency is up to you; when it reaches a thickness that seems right—not too thin, not too thick—it’s ready.

4. While the soup is reducing, put the half-and-half in a small saucepan. Cut the vanilla bean lengthwise into two long strips. Using the back of your knife, scrape the tiny black seeds out of the bean. Scoop the seeds and the bean halves into the pan with the half-and-half, and put the pan over low heat. Warm the half-and-half until it is steaming, but not boiling. Remove it from the heat, remove and discard the vanilla bean halves, and whisk to break up any clumps of seeds in the half-and-half. Set aside.

5. When the soup has reduced to its desired thickness, stir in the half-and-half, taking care to not leave any little black seeds behind in the saucepan. Taste, and adjust seasoning as necessary. Serve, garnished with chives.

Serves: 4–6
Time: 1½ hours
Leftover potential: High; soup always tastes better the next day.

Monday, October 19, 2009

ROASTED BUTTERNUT SQUASH SALAD WITH WARM CIDER VINAIGRETTE

Just a little over a month after discovering my new favorite salad, I’ve found its autumn counterpart in this showstopper from the Barefoot Contessa (via The Way the Cookie Crumbles, where I was tickled to see that the monkey peeler featured in the photos is the same one that’s sitting on the shelf over my stove). The arugula and toasted walnuts are still with us, but in this new version the boiled potatoes are replaced by maple-glazed roasted butternut squash, the green beans are now dried cranberries, and the dressing is still mustardy (yes, this Dijonphobe is finally learning to love what a little Grey Poupon can do to a salad dressing), but now based in a reduction of apple cider and cider vinegar for an orgy of fallishness. It’s warmer and bolder, but still light and fresh enough to be perfect for the uncertain Southern California autumn, when the temperature seems to rollercoaster between the 50s and the 90s at a moment’s notice, so that the wintry menu you planned on Friday might seem oppressively heavy and hot by the time Wednesday rolls around.

Again, the real magic lies in the contrast of flavors and textures: the peppery arugula, the caramelized squash, the tart cranberries, the earthy walnuts, the salty cheese, and the sweet-sour dressing. While it wasn’t as much of a revelation for me as the potato-green bean salad (and was certainly more labor-intensive), I’ll be happily making it again, and A adored it. I can’t think of a better way to enjoy the first squash of the season.

The recipe below reflects a few changes to the original, because I did think some of the proportions were a tad bonkers: specifically, the fact that it calls for so much olive oil (½ cup in the dressing, or two tablespoons per serving) and Parmesan (¾ cup or 3 tablespoons per serving). WTF, Ina? Why drown a healthy, colorful salad in unnecessary fat? Since I, too, like my dressings on the acidic side, I followed the lead of The Way the Cookie Crumbles and used only about ¼ cup of oil in the dressing, which was plenty (I still had more dressing than we needed). I should have reduced the salt in the dressing correspondingly, though; a whole teaspoon made it crazy salty (A liked it, but then that man would happily eat a salt lick sprinkled with bacon bits). Next time, ½ teaspoon. And it might sound incongruous, given what a die-hard cheese lover I am, but I can’t imagine this salad with so much cheese, so I cut back to about ¼ cup. Maybe it was the fact that the photos at The Way the Cookie Crumbles didn’t include the Parmesan, but I just kept forgetting that the cheese should be there at all. It did add a nice salty/savory quality, but a spoonful per bowl seemed plenty, and when I ate the leftovers, I didn’t bother with the cheese and didn’t miss it. So I’d even go so far as to classify it as optional.

A few other random thoughts:
  • When I pulled the maple syrup out of the fridge, I noticed that it had expired…in August 2008. Guess we need to eat more pancakes around here. Maybe it was my imagination, shocked by this discovery, but I thought it smelled a little weird, though I can’t imagine how exactly syrup would go bad. Anyway, it was OK for the squash glaze, but I threw the rest away.
  • I used fancy-schmancy hippie hand-pressed unpasteurized handmade cider from the farmers’ market for the dressing, but since you’re reducing it, any cider or apple juice would work just fine.
  • I’m not a cranberry lover, but I liked the effect of roasting them for a few minutes—they got addictively plump and chewy. Nice touch!
1½ pounds butternut squash, peeled, seeded, and cut into ¾-inch dice
6 tablespoons olive oil, divided
1 tablespoon pure maple syrup
1½ teaspoons kosher salt, divided
Freshly ground black pepper
3 tablespoons dried cranberries
½ cup walnut halves or pieces
¾ cup apple cider or apple juice
2 tablespoons cider vinegar
2 tablespoons minced shallots
2 teaspoons Dijon mustard
4 ounces baby arugula, washed and dried
¼ cup freshly grated Parmesan

1. Preheat the oven to 400 degrees.

2. Place the butternut squash on a baking sheet. Add 2 tablespoons olive oil, the maple syrup, 1 teaspoon salt, and pepper to taste, then toss to combine. Roast the squash for 15 minutes, turning once, until tender. Add the cranberries and walnuts to the pan and cook for 5 minutes more.

3. While the squash is roasting, combine the apple cider, vinegar, and shallots in a small saucepan and bring to a boil over medium-high heat. Cook for 6 to 8 minutes, until the cider is reduced to about ¼ cup. Off the heat, whisk in the mustard, ¼ cup olive oil, ½ teaspoon salt, and pepper.

4. Place the arugula in a large salad bowl and add the roasted squash mixture and the grated Parmesan. Spoon just enough vinaigrette over the salad to moisten and toss well. Season with salt and pepper (if necessary) and serve immediately.

Serves: 4
Time: 45 minutes
Leftover potential: Fair, actually, if all the ingredients are stored separately. I mixed up half the salad for dinner the first night, then stored the remaining arugula in a bag, the remaining squash mixture in a microwaveable container, and the remaining dressing in a small jar. When we wanted to eat the leftovers, I warmed up the squash mixture, then mixed it with the arugula and dressing (I skipped the cheese, but you could add it at this point) and it was just as good as it had been the first time around.