Showing posts with label Bacon. Show all posts

Tuesday, April 12, 2016

ROASTED POTATOES AND BRUSSELS SPROUTS WITH BACON


Another new vegetable addition to my palate’s palette. Brussels sprouts have, of course, been rehabbed from their bad rap and served at the cool-kid tables for years, but I was slow to pick up on the trend because they’re basically tiny cabbages, and up until last year I wasn’t a fan of the full-sized version either. But you can’t throw a stone anymore without hitting a gastropub, and you can’t throw a stone in a gastropub without hitting a bowl of roasted Brussels sprouts with bacon, usually the only green vegetable on the menu, so eventually I tried them and enjoyed them. I did roast them at home a few times, but apparently none of the recipes I tried were especially notable, because they never made it to the blog. This year I vowed I’d get better acquainted with Brussels sprouts.

I chose this recipe from The Kitchn because I knew the bacon would mollify A (as well as being a natural pairing for sprouts), mustard improves almost everything, and the addition of potatoes makes this an easy way to cover two-thirds of the protein + starch + veg meal formula (a template I don’t usually feel compelled to follow, but I needed something to serve with lemon garlic chicken and this seemed like a properly substantial side). It was effortless and excellent. I used a slightly higher sprouts-to-potato ratio because I like green things, but otherwise followed the recipe exactly. I do think I should have put the sprouts in earlier, because my bacon was a little too toasty by the end (and I say this as someone who likes it extra-crispy) and my sprouts not quite dark enough for my taste, but that’s easily remedied next time.

So: Brussels sprouts: yes. Not sure if I’m ready to level-up and try them in raw salad form, but roasted, I’m on board with.

1 tablespoon olive oil, divided
1 tablespoon whole-grain mustard
1 teaspoon coarse kosher salt
Freshly ground black pepper to taste
1¼ pounds small Yukon Gold potatoes, quartered
¼ pound (about 3 slices) thick-cut bacon, diced
¾ pound Brussels sprouts, trimmed and halved
  1. Preheat the oven to 425 degrees. In a large bowl, whisk together the ½ tablespoon olive oil, mustard, salt, and pepper to taste. Toss the potatoes and bacon in the bowl until evenly coated.
  2. Spread the potato mixture evenly on a large, heavy baking sheet. Roast for 25 to 40 minutes, or until potatoes are tender but not too browned, stirring every 10 minutes.
  3. Turn the oven up to 475 degrees. Toss the Brussels sprouts with the remaining ½ tablespoon of oil. Push the potatoes to one side of the pan, and arrange the Brussels sprouts on the other half of the pan, cut sides down.
  4. Continue roasting for about 15 more minutes, or until the sprouts are tender and browned, and the bacon is crisp. Salt to taste.
Serves: 4
Time: 70 minutes
Leftover potential: Good.

Wednesday, March 16, 2016

ASPARAGUS CARBONARA


Despite being a lifelong fan of Calvin Trillin, who has famously claimed that spaghetti carbonara should replace turkey as the national Thanksgiving dish, I had never made (or, I think, even eaten) carbonara before—initially because I was grossed out by undercooked egg yolks, and more recently because I was afraid I would love it insatiably and perilously. But when The Brewer and the Baker posted this recipe last spring, I no longer had good reason to resist. Here we have a two-to-one ratio of springy green vegetables to pasta, perhaps not enough to counteract the richness of the bacon, egg and cheese, but enough to feel like a reasonable one-dish weeknight meal—and, honestly, much more interesting and appealing to me than plain old carbonara.

This is one of those recipes that comes together so quickly, it behooves you to have everything prepped and ready to go before you start. I always thought making carbonara was tricky, but the technique doesn’t get any more advanced than tempering eggs, which basically means stirring a little hot liquid into them so they warm up slowly and don’t immediately cook and congeal. Beyond that, the only hard part is the timing—making sure your noodles and your sauce come together at exactly the right moment. The good news is that if you muck it up a little bit, as I did the first time—foolishly believing that I could simplify things by simply mixing the pasta with the sauce in the hot skillet—and your eggs scramble a little instead of turning into a smooth sauce, it will still taste pretty great. When I returned to this recipe a year later and actually followed the directions precisely, it was even better. Working quickly and confidently is the key…and practice makes perfect, so clearly I’m going to have to try the entire range of spinoff recipes: Roasted cauliflower, my new BFF! Roasted broccoli! Spinach and sweet potato! What vegetable wouldn’t taste amazing in a peppery, smoky-salty, cheesy, magically creamy-without-a-drop-of-cream sauce? (Beets, probably.)

8 ounces spaghetti or other long pasta
1 teaspoon olive oil
4 slices bacon, cut into cubes
¾ teaspoon freshly ground black pepper
1 to 1¼ pounds asparagus, trimmed and cut into 2-inch pieces
1 egg
1 egg yolk
2/3 cup grated Parmesan, plus more for garnish
Salt to taste
  1. Heat a large pot of salted water to a boil for cooking the pasta. (If your asparagus is very thick or you like it very tender, once the water boils you can blanch your asparagus in it for a few minutes to give it a head start on cooking, removing it with a slotted spoon to a colander before adding the pasta to the same pot.)
  2. Meanwhile, heat olive oil in a skillet over medium heat. Cook bacon pieces to a crisp and remove bacon with a slotted spoon to a large bowl.
  3. When the water boils, add the pasta and cook until al dente. Reserve ¾ cup of pasta water before draining.
  4. Add black pepper to bacon drippings in skillet and cook for two minutes. Add asparagus and cook about 5 minutes, until fork-tender, stirring occasionally.
  5. Whisk egg, yolk, 2/3 cup Parmesan, and ¼ cup very hot pasta water in the bowl with the bacon.
  6. Add drained pasta and the contents of the asparagus skillet to the bowl and toss, adding splashes of reserved pasta water to create a creamy sauce. Season with salt to taste and serve topped with extra Parmesan.
Serves: 4
Time: 30 minutes
Leftover potential: Good.

Thursday, February 12, 2015

KALE COBB SALAD


Meet our new favorite salad. I feel a little silly being like, “Hey guys, look what I just discovered!” when Cobb salad has been around since the 1930s, but the addition of kale makes it hip, right?

Having grown up with a horror of so many ingredients all mixed together, especially cold meat and eggs, I never really gained much familiarity with the classic salads of yore, and I certainly never saw a Cobb look remotely appealing until I paged to this recipe in Dinner: The Playbook (yes, again; and here is the original post at Dinner: A Love Story). It was so pretty, and I realized, Wait! I like avocado and bacon and tomatoes and cheese and eggs and chicken! I also love kale, and swapping it in for lettuce here isn’t just blind trend-following—it gives you a definitive green presence that stands up to the weight of all those hefty toppings and, better still, lasts for days without wilting so you can stash the leftovers all ready to go. We’ve already eaten this twice in one month, and it’s destined to become a year-round staple. I love the rainbow of wholesome ingredients and fact that it makes a perfectly easy, protein-packed work lunch that’s hearty without being heavy; A loves that it’s a satisfying meal with a variety of flavors and textures, especially bacon and blue cheese to help temper his kale skepticism.

I made a few slight modifications—omitted sugar from the vinaigrette, massaged the kale with half the dressing right away and let it marinate a bit (key, in my view, to a successful kale salad), and increased some of the toppings to make an even more substantial main dish—one egg and one slice of bacon per serving, and more tomatoes to amp up the color. And I went a bit easy on the cheese, because blue isn’t my favorite, although it definitely adds an important flavor contrast here. The original recipe says you can use feta instead, and the second time around I tried that and preferred it, with just a light dusting of blue for a hint of funk.

A came in just now to prod me to go to bed on time, but granted me a reprieve as soon as he saw what I was working on, saying, “The world needs to know about Cobb salad.” So there you have it! It may not be breaking news, but just in case you weren’t aware, Cobb salad—this one, at least—is delicious.


1 heaping teaspoon Dijon mustard
¼ cup red wine vinegar
A squeeze of lemon juice
Salt and pepper to taste
1/3 cup olive oil
1 large bunch Tuscan kale, stemmed and thinly sliced
2-4 hard-boiled eggs, peeled and chopped
1 to 1½ cups poached, grilled, or roasted chicken breast, shredded or cubed
3-4 slices bacon, cooked and crumbled
2-4 tablespoons thinly sliced scallions or minced chives
½ to 1 cup cherry or grape tomatoes, halved (or quartered if large)
1 avocado, diced
¼ to ½ cup crumbled blue or feta cheese
  1. In a small bowl, mix the mustard, vinegar, and lemon juice, then season generously with salt and pepper to taste. Gradually whisk in the olive oil until emulsified.
  2. Place the shredded kale in a large bowl and drizzle with about half of the vinaigrette. Mix thoroughly with your hands until the leaves are evenly coated, and let sit for at least 15 minutes while you assemble the remaining ingredients.
  3. Portion out the dressed kale equally into four salad bowls. Top each portion with a quarter of the eggs, chicken, bacon, scallions, tomato, avocado, and cheese, then drizzle with a quarter of the remaining dressing and toss gently. (If you prefer, you can just mix all the ingredients together in a very large serving bowl and go from there. Or you can place each component in a separate bowl and let everyone assemble their own, salad-bar style, especially if you have picky eaters on hand.)
Serves: 4
Time: 30 minutes (1 hour if you need to boil the eggs, cook the bacon and poach the chicken)
Leftover potential: Awesome. 

Wednesday, October 31, 2012

BUTTERNUT SQUASH, POTATO, AND QUINOA HASH


Usually when I alter a recipe, it’s to cut corners, but here’s a rare instance where I made something about 10 times more complex—and it was worth the extra effort!

When I saw this quinoa hash at a Cozy Kitchen, I was really intrigued by the idea. A still isn’t a quinoa fan, but he makes an exception for quinoa fritters, and I thought maybe a hash could replicate some of that crispy, toasty goodness he enjoys. I tend to have bad luck with hashes, though; apparently I just don’t have the knack for frying potatoes. By the time they’re cooked through, they’re overbrowned and sticking to the pan, and then they break apart and everything devolves into a starchy mess. I know this can be avoided by cooking the potatoes through first and then browning them, as in my corn hash recipe, where they’re microwaved. But since squash would also be involved, that made me think of roasting, so I decided to coat the vegetables with the spices (I used smoked paprika instead of regular, to play up the roasty flavor) and throw them into the oven, on separate baking sheets in case one cooked faster than the other. By this time the whole process was starting to seem ridiculously awkward, and I wasn’t even done complicating things yet.

The original recipe boiled the quinoa right in the skillet, but I’m not sure my cast-iron is that well-seasoned, so I opted to cook it as usual, in a separate pot. Then of course it seemed like a great idea to add bacon, so I browned that in the skillet and removed it, then cooked the shallot and garlic in the bacon fat. (I can take or leave big pieces of bacon, but anything fried in bacon fat? Sign me up.) Since I wanted my quinoa to be as toasted as possible, I tossed it in with the shallot mixture and let it fry as long as I could. It didn’t brown as much as I’d hoped—nowhere near as much as the fritters—probably because the pan was a bit crowded and it steamed more than frying, but it did take on a golden hue, a drier, chewier consistency, and a nice nutty taste. (If you’re not a fan of the texture of ordinary quinoa, I highly recommend trying it pan-fried.) Then I added back in the bacon and the roasted vegetables. The original recipe had just cooked eggs right on top of the hash, but since I’m addicted to poached eggs I made those separately and set them on top when I was ready to serve. And finally, for a bit more color, I served the whole thing atop a bed of arugula.

So basically, the original recipe was a true one-dish meal, with everything from the quinoa to the eggs cooked in the same skillet. I had to go and add a separate appliance (the oven) and million extra dishes and steps. I realize this sounds like a pain, and if you want to try the original instead of my version I completely understand, but I swear to you, my method didn’t end up being too hard, and it paid off big time. In fact, it was pretty much a masterpiece, if I do say so myself, joining the ranks of my favorite quinoa dishes ever. The tender, spiced roasted vegetables were delicious enough to eat on their own, but when combined with the peppery fresh greens, the smoky bacon, the nutty grain, and the creamy egg they were even better. I would happily eat this delicious, satisfying dish for breakfast, lunch, or dinner, and A enjoyed it enough to have leftovers the next day, which for him is really saying something where quinoa is concerned. I’m tremendously pleased that all my tinkerings ended up being improvements and not fussy time-wasters or grievous errors. Could it be that after so many years, I’m finally learning to improvise in the kitchen?

1 cup uncooked quinoa, rinsed well
2 cups water
1–1½ teaspoons salt, divided
¾ pound red potatoes, cubed
½–¾ pound butternut squash, peeled and cubed
1–2 tablespoons olive oil
1 teaspoon cumin
1 teaspoon smoked paprika
4 slices bacon, diced
1–2 shallots, minced
1 large garlic clove, minced
Freshly ground pepper to taste
¼ cup minced fresh chives
4 large eggs
About 4 cups arugula

1. Place the quinoa in a saucepan with water and ½ teaspoon salt, bring to a boil, reduce heat to medium-low, cover, and simmer for 15 to 20 minutes, until all liquid is absorbed. Remove from heat and spread quinoa in a thin layer on a large plate or a baking sheet to cool.

2. While the quinoa cooks and cools, preheat the oven to 400 degrees. Place the cubed potatoes in a large bowl and toss with ½–1 tablespoon olive oil, ½ teaspoon cumin, ½ teaspoon smoked paprika, and coarse salt to taste. Line a baking sheet with parchment and spread the potatoes on it in a single layer. To the empty bowl you just used, add the cubed squash and toss with ½–1 tablespoon olive oil, ½ teaspoon cumin, ½ teaspoon smoked paprika, and coarse salt to taste. Line a second baking sheet with parchment and spread the squash on it in a single layer. Place both baking sheets in the oven and roast, stirring occasionally, until vegetables are browned and crispy outside, tender within, about 20–30 minutes. Remove from oven and set aside.

3. When the vegetables are about halfway done roasting, heat a large skillet over medium heat. Add the bacon and cook until crisp. Remove from skillet with a slotted spoon, keeping the skillet on the heat.

4. Add shallot to the skillet and cook until translucent, about 5 minutes. Place the garlic atop the cooked shallot and cook until fragrant, about 1 minute. Add the quinoa to the skillet and fry, stirring occasionally, until quinoa is a bit browned, slightly dry, and smells toasted, about 15 minutes.

5. Add the potato, butternut squash, and bacon to the skillet and cook another 5–10 minutes until everything is warm. Season with salt and pepper to taste.

6. Meanwhile, poach eggs.

7. Place a handful of arugula in each of four shallow bowls or plates. Divide the hash among the dishes, placing it atop the arugula, and top each with a poached egg. Garnish each serving with 1 tablespoon chives.

Serves: 4
Time: 1½ hours
Leftover potential: Good; just don't poach the eggs or add the arugula until you're ready to serve.

Thursday, September 06, 2012

SWISS CHARD AND LEMON RICOTTA PASTA


Can you believe I have more than 450 recipes here (whoa), and not a single one uses Swiss chard? Honestly, I have nothing against the stuff, but ever since I discovered kale it’s been my go-to leafy green, leaving little room for experimentation with others. Then I saw this recipe on Food52 and it spoke to me. Specifically, it said, “Give chard a chance, you moron.” (Chard can be kind of a jerk. Fortunately, it’s pretty and it tastes good.) Also: “Look, I have bacon and lemon and cheese.” Sold!

Somehow I wasn’t really expecting this to taste like more than the sum of its parts, but boy was I wrong: This was a fantastically delicious and well balanced pasta dish. The only change I made was to double the recipe and add the lemon juice as well as the zest, both excellent decisions. In retrospect, I might have increased the cheese quantities just slightly (noted below), and I definitely wanted even more chard. Like all leafy greens, it seems like you’re buying a ton, but it cooks down so dramatically. I bought two large rainbow bunches, dutifully measured out six generous cups, and…that’s all I used. I easily could have added another two cups with the amount I had left over, and looking at the tiny flecks of green in the finished pasta, I wished I had. More greens are never a bad thing.

My vegetable bible, Jack Bishop’s Vegetables Every Day, says that the chard stems cook at a different rate than the leaves, so I didn’t include them even though the original recipe said “including the stems.” Do what you want! I included the thinner rib near the leaf, just not the really thick, celery-like lower stem. If you don’t use them for this, you can always cook them up separately another time. (Which I intend to do next time I make this. Which, by the way, will be really soon. As usual when I write glowingly about a recipe, I am now craving it.)

6–8 cups raw Swiss chard (2 large bunches), sliced (leaves and thinner ribs, but not the thickest part of the stems)
1 pound spaghetti
4 strips bacon, cut into ¼-inch slices
1 large shallot, minced
⅔–1 cup ricotta cheese
¼–½ cup grated Parmesan cheese, plus extra to taste
Zest and juice from 1 large lemon
½ teaspoon salt, plus extra to taste
¼ teaspoon dried red pepper flakes

1. Bring a large pot of well-salted water to a boil over high heat. Blanch the Swiss chard for 5 minutes. Scoop out the chard with a slotted spoon, transfer to a colander, and drain well, squeezing out as much of the water as possible. Chop again and set aside.

2. Keep the pot of water boiling, and add the spaghetti noodles. Cook until al dente. Remove 1 cup of cooking liquid, then drain the noodles.

3. Meanwhile, fry bacon in a large skillet over medium heat until just crispy. Add the shallot and sauté until soft. Add the Swiss chard and toss well to break up the chard clumps.

4. Combine the ricotta and Parmesan cheeses in a small bowl, and add the lemon zest and juice, ½ teaspoon salt, and red pepper flakes. Add to the Swiss chard mixture in the skillet and mix well.

5. Add cooked spaghetti to the skillet and mix well. Gradually add pasta water as needed to thin the sauce to desired consistency. Serve topped with additional grated Parmesan.

Serves: 6
Time: 1 hour
Leftover potential: Good.

Thursday, June 14, 2012

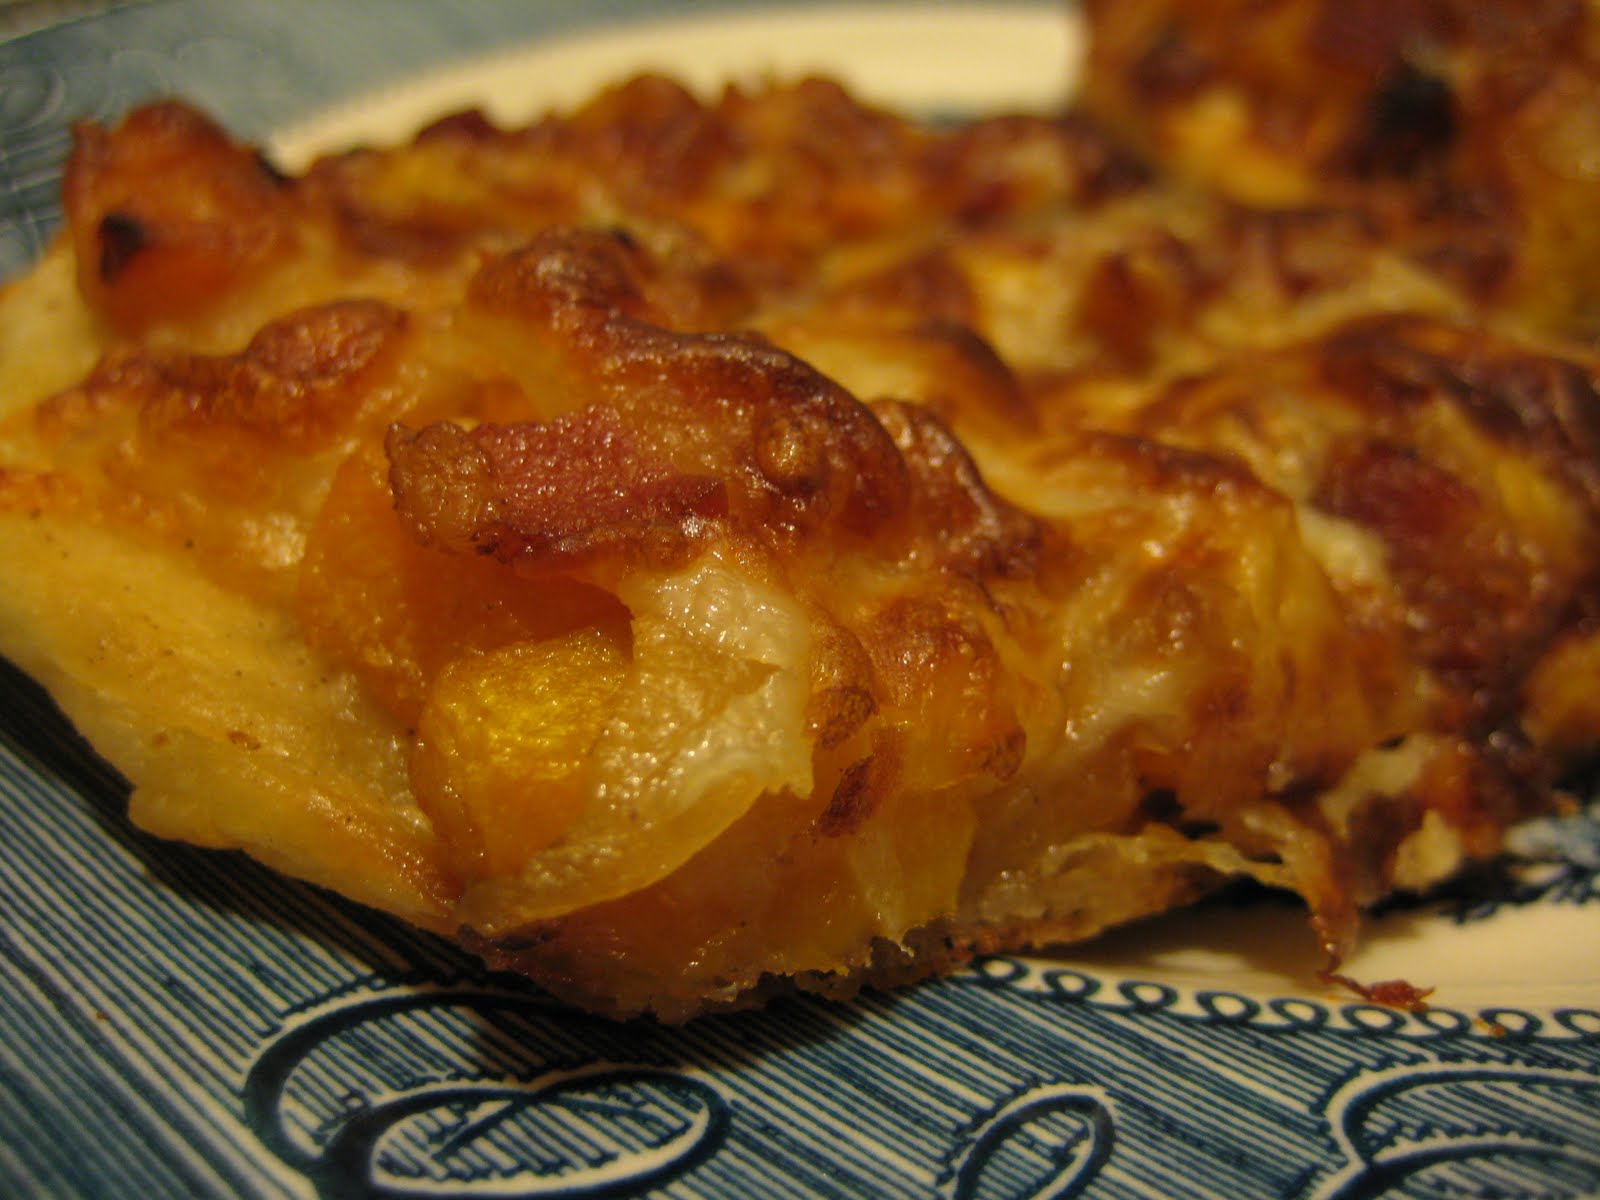
STRAWBERRY PIZZA


Strawberry pizza, what what what? And not some wimpy dessert pizza, either. I’ll put just about anything on a pizza, including apples and pears, so technically strawberries aren’t so much of a stretch. But strawberries with onions, bacon, chicken, and cheese? Not to mention a sauce of strawberry jam, balsamic vinegar, and Sriracha? I like all those things, and even some of them in pairs (strawberries + balsamic, bacon + anything), but let’s face it, as an assemblage it sounds bizarre. I was half-intrigued, half-weirded out when this recipe popped up in my feed reader. It was from Annie’s Eats, however, a site that’s never steered me wrong, and if Annie acknowledged that the combination seemed strange yet tasted wonderful, I figured I should trust her. Plus, whether it turns out well or poorly, unusual food always makes good blog fodder.

Luckily, this is one of those ingredient lists that makes complete sense when you taste it. I did still find the sauce a bit unnervingly sweet for an entrée, but it’s well balanced by the tartness of the vinegar, the spiciness of the Sriracha, the smokiness of the bacon, and the savoriness of the chicken, onion, and cheeses. Unfortunately, I’d thrown away my cilantro earlier in the week in a fit of carelessness (after using half the bunch for a different dish, I carefully thought through the remainder of my upcoming meals and concluded there was nothing else I needed it for, completely forgetting it was yet another element of this unpredictable pizza mélange), so I was forced to make do with a mixture of basil and mint. Both of those herbs seem to be more frequently paired with strawberries, so perhaps it’s understandable that the cilantro slipped my mind, but I think the cilantro might have worked better here—my replacements were OK, but the mint, in particular, struck me as too reminiscent of dessert. Other than that, everything was perfect, and the finished dish reminded me surprisingly strongly of BBQ chicken pizza. Despite his initial skepticism, A particularly liked it (I believe the word he used was “awesome”), so soon strawberry pizza will seem totally normal at our house. And, as a bonus, it’s a great way to use up my omnipresent stash of homemade jam!

¼ cup balsamic vinegar
½ cup good-quality strawberry jam
1 teaspoon Sriracha
1 pound pizza dough
1 cup shredded or diced cooked chicken
4 slices bacon, diced and cooked until crisp
½ cup thinly sliced yellow onion
4 ounces shredded mozzarella cheese
2 ounces freshly grated Parmesan cheese
2–3 tablespoons minced fresh cilantro
½ cup hulled strawberries, diced

1. Place the balsamic vinegar in a small saucepan over medium-high heat. Bring to a boil, reduce to a simmer, and let cook 4 to 5 minutes or until reduced by about half with a thick, syrupy texture. Remove from heat and pour into a small bowl. Add the strawberry jam and Sriracha, stir well, and set aside.

2. Preheat the oven to 450 degrees.

3. Roll out the pizza dough and place on a baking sheet or pizza stone. Spread the balsamic-strawberry mixture in a thin layer over the crust. Layer with the chicken, bacon, onion, cheeses, cilantro, and strawberries.

4. Bake pizza until the cheese is melted and bubbling and the crust is lightly browned, about 11 to 12 minutes. Remove from the oven and let cool slightly before slicing and serving.

Serves: 4
Time: 45 minutes
Leftover potential: Good.

Wednesday, April 18, 2012

WHITE BEAN AND SPINACH SALAD WITH WARM BACON VINAIGRETTE


And here’s yet another spinach salad with bacon that I’ve plopped an egg atop. But this one has white beans! Despite its marked similarity to many of the other new salads I’ve been discovering ever since I learned to poach an egg, I still became entranced when I spotted it at Thursday Night Smackdown, where the writing is always entertaining and insightful but the recipes are normally too complicated for my lazy ass. This one is simplicity itself—basically just canned beans on a bed of raw spinach—but the huge flavors of the vinaigrette, with its generous hits of bacon and garlic mixed with shallots, mustard, and vinegar, make the humble ingredients seem fancy.

I doubled the recipe so I could have leftovers (see note below), added the egg, and nixed the canned beans in favor of the dried yellow eye beans I’d bought on a whim at the farmers’ market. Normally I prefer dry beans to canned, but these cooked up bigger and starchier than I’d expected, and although they were still plenty delicious, I think the canned beans might actually have a better texture here and soak up more of the vinaigrette flavors, so I’m going to try canned next time. Other than that, this salad was an easy-but-sophisticated-feeling one-dish dinner—but then, it’s hard to go wrong with that much bacon. If you want to cut back on the bacon or the garlic, I’d understand.

8 strips thick-cut bacon, diced
2 large shallots, minced
12 medium cloves garlic, minced
¼ cup sherry or apple cider vinegar
2 teaspoons Dijon mustard
2 15-ounce cans cannellini beans, drained and rinsed, or 1 pound dried white beans, cooked and drained
½ cup chopped flat-leaf parsley
½ teaspoon freshly ground black pepper
9–12 ounces baby spinach
4 eggs (optional)

1. Heat a skillet over medium heat. Add the bacon and cook, stirring occasionally, until the fat has rendered out and the bacon is crisp. Use a slotted spoon to remove the bacon from the pan to a plate lined with paper towels, keeping the fat in the pan, and turn the heat down to medium-low.

2. Add the shallots to the pan of bacon drippings and sauté for 3 to 4 minutes. Add the garlic and cook for 30 seconds more.

3. Whisk the mustard into the vinegar, then pour the mixture into the skillet and stir to combine. Mix in the beans and pepper and cook for a few minutes to heat through. Toss in the parsley and bacon.

4. Put the spinach in a large bowl; dump the bean mixture over the top. Toss everything together, then let it sit for a few minutes. If desired, poach the eggs and place one atop each serving of salad.

Serves: 4
Time: 30 minutes
Leftover potential: Good, if the bean mixture is stored separately from the spinach. If you want to eat two servings right away and two servings later, as we did, only combine half the bean mixture with half the spinach in Step 4. Store the leftover bean mixture separately from the leftover spinach. When you’re ready to eat them, heat up the bean mixture and then combine it with the spinach. The leftovers would probably still work OK if they’re all combined ahead of time, as long as you don’t mind wiltier spinach. But obviously, if you’re planning on topping this with a poached egg, don’t poach the egg until you’re ready to eat the leftovers.

Tuesday, March 27, 2012

SPINACH SALAD WITH MUSHROOMS, BACON, AND POACHED EGG


Yes, another salad with an egg on it. Yes, another warm bacon vinaigrette. I am nothing if not predictable. Don’t dismiss this as a repeat, though, because it’s not, and it’s incredibly delicious to boot.

I’m not sure what exactly inspired me to go Googling spinach-mushroom-bacon-egg salads, except for the irrefutable logic that if spinach + mushroom = good, and spinach + bacon = good, and bacon + egg = good, then spinach + mushroom + bacon + egg = quadruply good. I stumbled across rough versions of what I was hankering for at Beyond the Peel and The Pioneer Woman Cooks. The first recipe seemed like it might be a little too simple (no real dressing, just vinegar); the second one had some mouthwatering additions (onion, Dijon) but was fussier. I thought I’d try the second one, except with poached eggs instead of hard-boiled (and no sugar—I hate it in dressings), but in the end I basically followed the first one, adding onion and mustard. It was Saturday night and I was feeling too lazy to make a separate dressing, so I just stirred the vinegar and Dijon in with everything else that had been sautéing in the bacon drippings, and what do you know? It was just fine. Better than fine, really. I loved it, and A mentioned to me several times how good it was. Without the egg, it would probably make a nice side dish; with one egg, it could grace your brunch table; with two eggs, it’s a light but gratifying spring evening meal.

4 strips bacon, diced
½ small red onion, thinly sliced
4 ounces cremini mushrooms, sliced
3 ounces baby spinach
1–2 tablespoons balsamic vinegar
½ teaspoon Dijon mustard
Salt and freshly ground black pepper to taste
2–4 eggs
Asiago, Parmesan, or Pecorino Romano cheese to taste, shaved or shredded (optional)

1. Heat a skillet over medium heat. Once the pan is hot, add the bacon and fry until crisp. Remove the bacon with a slotted spoon and set it aside on a paper towel to drain.

2. To the bacon fat in the skillet, add the onions and mushrooms. Saute for about 10 minutes, or until onions are tender and mushrooms are golden.

3. Add vinegar and mustard to the mushroom-onion mixture and stir well. Season with salt and pepper to taste. Remove the skillet from the heat and stir in the bacon.

4. Meanwhile, poach eggs. (I use this method.)

5. Place 1½ cups of spinach on each plate. Top with the mushroom-onion-bacon mixture and then with the poached eggs. Season with salt and pepper and garnish with cheese if desired.

Serves: 2
Time: 30 minutes
Leftover potential: Unknown. You could probably store the mushroom-onion-bacon mixture separately in the fridge, reheat it, and then put it on some spinach when you’re ready to eat it, but you’d have to wait to poach your eggs until then.

Tuesday, February 28, 2012

WARM LENTIL SALAD WITH POACHED EGG


For once, I won’t be starting a post about lentils by talking about how I don’t really like them, because I wholeheartedly loved these. Come to think of it, I don’t think I’ve ever really eaten lentils outside of soup, and maybe the lentil-y flavor is less strong when the cooking water is drained away? Or maybe I’ve been converted to lentil love, the way I’ve slowly been won over by beans. Or maybe it doesn’t matter, because this recipe is just that awesome.

As soon as I spotted it at Dinner With Julie (how, I don’t know, because it’s two years old—I guess it was destiny, leading me through a random series of links?), I knew I had to make it right away. I’m not sure if it was the poached eggs that lured me in (probably; I’ve been craving them lately) or the bacon, but it seemed like just the kind of food I want more of right now: light and healthy and simple, but also warm and hearty and comforting. After years of resistance to main-dish salads, I’ve finally been won over by them, now that I understand that “salad” doesn’t always have to mean “lettuce laden with many toppings,” a la your average TGI- Friday’s-style chain restaurant. I’m not even sure what really makes this a salad and not just an entrée, seeing as it’s warm, has more lentils than greens, and doesn’t have a dressing. But who cares? It tastes wonderful. I ate it three days in a row last week, and I would happily make it again right now if I had the ingredients handy.

Also: WILL YOU LOOK AT THAT POACHED EGG. I’m so proud! I guess the third time’s the charm, because after having limited success with the whirlpool method (requires too much coordination) and the shallow-water-with-canning-ring method (results not fluffy enough), I finally found a nearly foolproof egg-poaching recipe thanks to NPR. It’s a bit fussier, since it involves a fairly deep pot of water, draining the eggs in a mesh strainer for a few minutes to get rid of the thinner whites that otherwise tend to stray, adding vinegar to the water (I know this is controversial because some people claim they can taste the vinegar in the egg, but I couldn’t, and it really does help get the whites more compact), and adding enough salt that the egg bobs to the surface when cooked instead of getting stuck to the bottom of the pot, but it was just the trick I needed to produce the handsome, puffy, perfectly cooked poached eggs of my dreams. It’s not magic, mind you. You still have to exercise the right combination of care and confidence when dropping the eggs into the water, and I have yet to perfect my technique completely. While I turned out two flawless specimens on the first go-round, during each of three subsequent attempts over the course of the week I choked, dropped the egg too fast or too slow or from too great a height, and produced some homelier (but still tasty!) blobs. Luckily, I think practice will eventually make perfect, and I have no aversion to practice if it means I get to eat more lentil salad along the way.

With one egg on top, this salad will make a generous side dish to a modest portion of meat (pork would be nice) or some other entrée, but with two eggs per serving, it makes the perfect main dish for lunch or a light dinner, which is how we ate it. I liked Julie’s adaptation (the original recipe is from dearly departed Gourmet) of mixing the spinach into the lentils to wilt rather than scattering the raw leaves on top (which sounds odd to me), but I think it needs more spinach than just 1 cup. I threw a bit extra into the mix, but since it cooks down so small, I ended up increasing the spinach further—and making the dish more traditionally salad-like—by serving the leftover portions on a bed of raw leaves, which I liked. The more greens the merrier, I always say. I did run out of red wine vinegar after just 1 tablespoon, so I supplemented with balsamic; I worried this would be a weird taste combo, but then I couldn’t taste either vinegar in the finished dish, although I’m sure they added a little something. My only other change was to use thyme instead of tarragon, because I hate tarragon (I think I got this idea from the Epicurious comments). I nearly forgot the thyme entirely, but I’m so glad I didn’t because it really took the flavors up a notch. Oh, and although the original recipe said to saute them for just 5 minutes, I did think my carrots were a tad crunchier than I’d have liked, so I’ll cook them longer next time.

Finally, I just have to give props to the way Julie begins her post about this salad: “Have you ever panicked that there is just so much food and so little time?... THERE IS JUST SO MUCH TO EAT AND ONLY SO MANY DAYS IN A WEEK AND HOURS IN A DAY! AND MONTHS IN A YEAR! EVERY DAY I HAVE TO DECIDE! I’M NOT GOING TO HAVE TIME TO EAT IT ALL! THE MATH JUST DOESN’T ADD UP!” Oh, yes. Constantly. And every time I discover a favorite recipe like this one, that feeling only gets worse. But I suppose it’s a good problem to have, right?

¾ cup dried lentils (I used French green lentils)
4 slices bacon, chopped
2 leeks (white and pale green parts only), finely chopped
2 celery ribs, finely chopped
1 carrot, finely chopped
2 tablespoons red wine vinegar, or to taste
1–2 cups baby spinach
1 tablespoon fresh thyme leaves
Salt and pepper to taste
4–8 large eggs

1. In a small saucepan, cover lentils with about twice as much water, bring to a simmer, and cook uncovered for about 30 minutes, or until just tender. (You can do this ahead of time and keep them in the fridge until you’re ready for them.)

2. While the lentils are simmering, cook the bacon until crisp in a large, heavy skillet over medium heat; transfer with a slotted spoon to a plate, leaving the drippings in the skillet. Add the leeks, celery, and carrot and cook, stirring often, for about 5–10 minutes or until tender. Add vinegar and cook until it’s mostly evaporated. Drain the lentils well and add them to the skillet along with the spinach and thyme; cook, stirring, until heated through and the spinach wilts. Season with salt and pepper and stir in the bacon.

3. Meanwhile, poach your eggs. Divide the warm lentil salad among 4 plates and top each with one or two eggs.

Serves: 4
Time: 45 minutes
Leftover potential: Good for the salad, but don’t try to keep the poached eggs; just poach enough for whatever you’re going to eat right away, then poach more right before reheating the leftovers.

Friday, February 24, 2012

BAKED PASTA WITH SQUASH, KALE, AND BACON


That’s right, it’s squash and kale, together yet again! What can I say? I’m insatiable, and shockingly, I didn’t already have a recipe that utilized this great combo in pasta form. Add bacon and crème fraiche and I can’t say no. Amazingly, this indulgent-seeming concoction comes to us from Cooking Light. It’s heavy on the veggies and light on the pasta (despite my hatred of not using the full 1-pound package and having random pasta remnants left over in my cupboard, I did follow the directions to use just 12 ounces and it was plenty of food), strategically using small amounts of bacon and Gruyere to deliver big flavor. Of course, if you were to increase the bacon and Gruyere just a bit, you wouldn’t be the only one to do so, judging from the comments and my own experience.

I’m not going to lie: This thing is a hassle to make. You have to roast squash, sauté bacon and onions, boil pasta and kale, and make the sauce all in separate steps, then combine everything and stick it into the oven. Unless you live in a palace, you will use every square inch of stovetop and counter space and dirty a frightening number of dishes. I wouldn’t attempt this on a weeknight, and it won’t even be a regular go-to dish. But I guarantee you, it’s worth the trouble. None of the techniques are difficult and the result is exceedingly tasty, with a good balance of sweetness and salt and smokiness and spice. The sauce is rich and creamy, but thanks to the colorful assortment of vegetables, it doesn’t feel heavy. This is a great way to tempt the kale-phobic, or just to dress up your winter veggies as comfort food.

5 cups (½-inch) cubed, peeled butternut squash
1 tablespoon olive oil
2–4 slices bacon, diced
2 cups vertically sliced onion
1 teaspoon salt, divided
5 garlic cloves, minced
12 ounces uncooked penne or other tube-shaped pasta
4 cups chopped kale
2 cups low-sodium chicken broth, divided
2 tablespoons all-purpose flour
½ teaspoon crushed red pepper
1 cup crème fraîche
½–¾ cup shredded Gruyère cheese

1. Preheat oven to 400 degrees.

2. Combine squash and oil in a large bowl; toss well. Arrange squash mixture in a single layer on a baking sheet covered with parchment paper (or coated with cooking spray). Bake for 30 minutes or until squash is tender; remove squash from oven and set aside, but leave oven on.

3. Meanwhile, cook bacon in a large nonstick skillet over medium heat until crisp. Remove bacon from pan with a slotted spoon and drain on a paper towel-lined plate. Add onion to drippings in pan; cook 6 minutes, stirring occasionally. Add ½ teaspoon salt and garlic; cook 1 minute, stirring occasionally. Remove from heat and set aside.

4. Bring a large pot of salted water to a boil over high heat. Add pasta and cook until almost al dente. Add kale to pan during last 2 minutes of cooking. Drain pasta mixture.

5. Bring 1¾ cups broth to a boil in a small saucepan. Combine remaining ¼ cup broth and flour in a small bowl, stirring with a whisk. Add flour mixture, remaining ½ teaspoon salt, and red pepper to broth. Cook for 2 minutes or until slightly thickened. Remove from heat; stir in crème fraîche.

6. Add squash, pasta mixture, bacon, and sauce to the skillet with the onion mixture (or combine everything in a large bowl if the skillet isn’t big enough) and toss gently. Place pasta mixture in a 13 x 9-inch glass or ceramic baking dish coated with cooking spray; sprinkle evenly with cheese. Bake for 25 minutes or until bubbly and slightly browned.

Serves: 6 to 8
Time: 1½ hours
Leftover potential: High.

Friday, December 16, 2011

ROASTED SQUASH PIZZA WITH CARAMELIZED ONIONS AND BACON


Just when I think I’m running out of pizza-topping combinations to try, another one presents itself. As soon as I saw this recipe at Dinner With Julie, I knew it would be perfect, and perfect it was—an addictive, comforting blend of smoky, salty, sweet, and creamy.

My one misstep was in using a package of pre-cubed butternut squash from Trader Joe’s; normally I frown upon such things, but we’d missed that week’s farmers’ market due to our Thanksgiving trip to Minnesota. I could’ve picked up a whole squash at the grocery store, but I wanted to make things easier on myself post-vacation, and I figured TJ’s usually has pretty good produce, so… Live and learn, right? The squash was so slimy and soggy that it took forever to roast properly; it just kept steaming away in the oven without browning, and I had to bake it nearly twice as long just to get any color and crispness on it. Then, when I popped a piece into my mouth, I discovered it was nearly flavorless, so I desperately sprinkled a little brown sugar over the rest and threw it back into the oven until the sugar caramelized. That seemed to help the sweetness along and the pizza tasted great, but: never again.

On the plus side, I had been planning to just use mozzarella on this, but then I remembered I had some cheese odds and ends left over from making kale pizza a few weeks before, so I added those into the mix. I think the Asiago in particular really made this spectacular, balancing out the sweetness of the squash and onions with its pungent sharpness. And, of course, the bacon didn’t hurt either. I’ve had a run of just-OK pizza experiments lately, but this one was an unequivocal success, probably the best I’ve tried since July’s corn-feta-cilantro-lime awesomeness.

About 1 pound butternut or other winter squash, peeled, seeded, and cubed
1 tablespoon olive oil
Salt and pepper to taste
4 slices bacon, diced
1 large onion, halved and thinly sliced
1 pound pizza dough
Shredded cheese to taste (I used a mixture of mozzarella, Asiago, and Fontina, which I highly recommend)

1. Preheat oven to 400 degrees.

2. Place the cubed squash on a rimmed baking sheet, toss with olive oil and salt and pepper to taste, and roast for 20 to 30 minutes, stirring once, until soft and browned. Remove from oven and set aside, then increase the oven temperature to 450 degrees.

3. Meanwhile, cook the bacon in a skillet over medium heat until crisp. Remove with a slotted spoon and set aside on a paper-towel-lined plate to drain. Add the onion to the drippings in the skillet and sauté until tender and caramelized.

4. Roll out the pizza dough, place it on a baking sheet coated with cornmeal or olive oil, and scatter half the cheese over it. Add the squash, onions, and bacon, then top with the remaining cheese. Bake for 10 to 15 minutes, until bubbly and golden.

Serves: 4
Time: 75 minutes
Leftover potential: Good.

Monday, September 12, 2011

SWEET CORN HASH


Shortly after making chilled avocado soup with a corn-bacon-jalapeno-onion-cilantro topping so delicious I could have just as happily eaten it sans soup, I stumbled across a recipe that’s pretty much exactly that. This iteration—from The Way the Cookie Crumbles, based on a version by Joy the Baker, who is the source of the avocado soup recipe, so we have truly come full circle here—is rounded out into a hearty breakfast (or, in my case, a cozy Saturday night supper) with the addition of potatoes and eggs. I punched up the color and vitamins by serving the whole thing over a bed of greens (spinach because I had an orphaned half-bag in the fridge, although I would have used arugula otherwise), which added a nice freshness and texture—the greens achieve a pleasant state of semi-wiltiness, with the egg yolk coating them like a dressing. The original recipe didn’t call for jalapeno, but Bridget mentioned adding roasted green chile, and since jalapeno had been so tasty in the soup topping, I figured it would be good here, too (spoiler: it was). And, in a further effort to replicate the magic of the soup topping, I subbed cilantro for parsley again and was well pleased.

My one misstep was to distrust the idea of cooking potatoes in the microwave (I know it’s perfectly possible, but I’ve never done it and our microwave is rather temperamental, so I wimped out). The original Joy the Baker recipe calls for them to be roasted, but my oven’s still defunct (GRRR), so I boiled them instead. This of course (a) took more time than microwaving and (b) made them quite soft and damp, which in turn made them take forever to get browned and crispy in the skillet, and they broke down quite a bit in the process. I don’t know why I didn’t just start frying the potatoes from a raw state, which is what hash recipes usually direct you to do, except that sometimes it’s hard to get the potatoes tender that way before they’re too well browned on the outside, and if there’s one thing I hate, it’s a crunchy potato. (This is, in my view, the downfall of 70 percent of restaurant breakfast potato preparations.) In retrospect, I should have just tried the microwave method. Next time! For there will certainly be a next time; this is my favorite version of hash I’ve ever made. I loved the way the sweetness of the corn balanced out the smoky fried flavors, with a hint of spice from the pepper and brightness from the cilantro. Also, I’m late to the party with this—it took me a long time to learn to tolerate runny yolks—but I’m becoming obsessed with topping things with eggs. Note to self: Eat more eggs; you like them. Also: learn to poach.

4 slices bacon, chopped
4 medium red potatoes, cubed
1 onion, chopped
1 medium jalapeno, seeded and chopped
4 ears corn, kernels removed
¼ cup cilantro, minced
Salt and freshly ground black pepper to taste
4 eggs
4 large handfuls spinach or arugula (optional)

1. In a large nonstick skillet (preferably cast iron) over medium heat, cook the bacon until almost crisp.

2. While the bacon cooks, put the potatoes in a medium microwave-safe bowl; spoon a couple teaspoons of rendered bacon fat from the skillet into the bowl; stir. Cover the potatoes loosely and microwave on high for 3 minutes, stirring twice.

3. Add the onions, jalapeno, and potatoes to the skillet with the bacon; cook, stirring occasionally, until browned, about 8 minutes. Stir in the corn and most of the cilantro.

4. Lower the heat to medium-low. Using the back of a spoon, create 4 wells in the hash. Break one egg into each well; season with salt and pepper. Cover the pan and cook, without stirring, until the white is set, about 8 minutes. Garnish with the remaining cilantro; serve immediately, over spinach or arugula if desired.

Serves: 4
Time: 1 hour
Leftover potential: OK, except the eggs will not keep or reheat well. If you’re planning to save some as leftovers, fry the eggs separately for the servings you’re going to eat right away (as shown in the photo above), then fry additional eggs as needed when it’s time to eat the leftovers. Alternately, you can break the eggs into the cooking pan but break the yolks of the ones you want to save for leftovers, so that they cook thoroughly and harden (they will be slightly tough in the leftovers, but edible—more of a scrambled consistency).

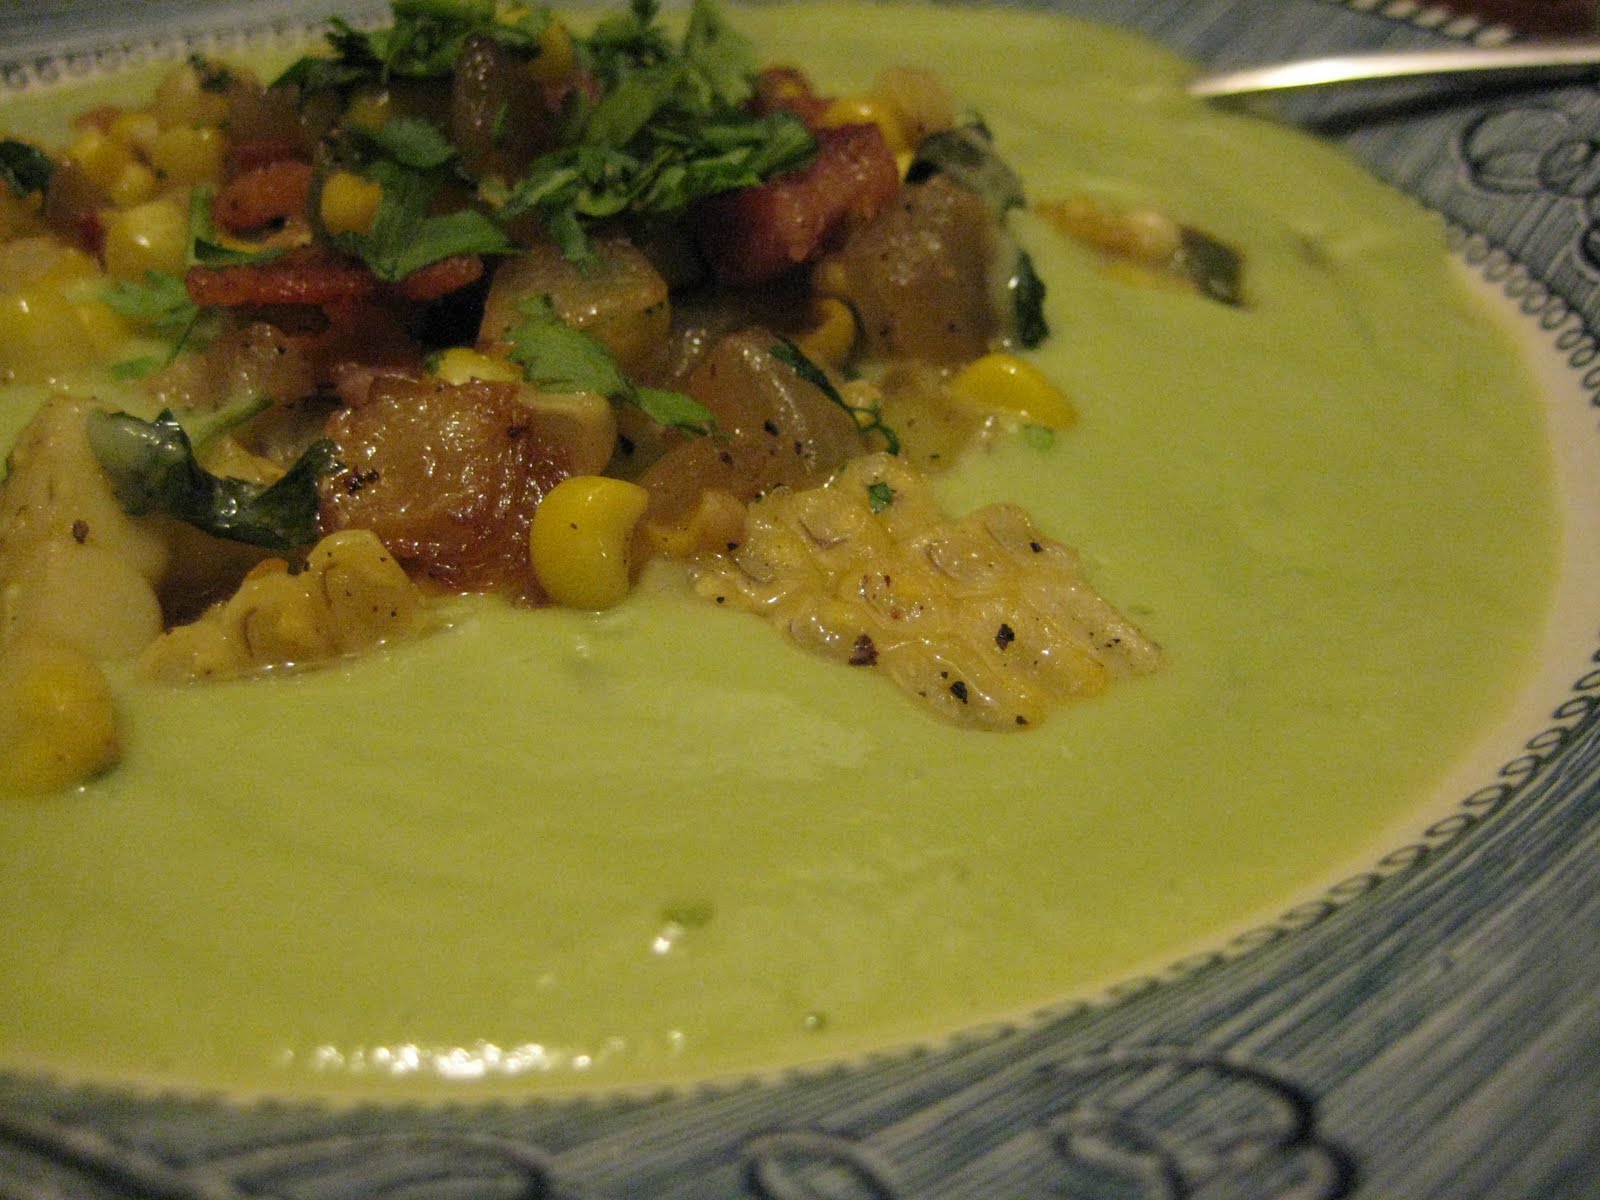
CHILLED AVOCADO SOUP WITH CORN AND BACON


In general, ice cream and popsicles aside, I don’t like cold food. Even in the hottest weather, I prefer my salads at room temperature. And the less said about cold pizza, the better. (Ugh, I can’t get over the congealed melted cheese.) Obviously, then, I have never really warmed (ha) to chilled soups. Most of the gazpachos I’ve encountered have just made me feel like I’m eating a big bowl of salsa. Given that logic, when I spotted this cold avocado soup at Joy the Baker I should have assumed it would taste like eating a big bowl of pureed guacamole, but instead I thought, “Ooh, pretty!” and “Ah, corn and bacon!” Maybe it’s just that I really like guacamole, or maybe the warm topping made it seem less like sauce disguised as a meal to me, but I bookmarked it instantly and made it soon afterward, in the throes of a 100-plus-degree heat wave.

This soup is good, with a wonderful velvety texture. The dominant flavors are, of course, avocado and lime (which I was even more generous with), but the savory broth (the recipe called for vegetable, but I used homemade chicken stock because I like its flavor so much) and the dollop of dairy (the recipe suggested sour cream, crème fraiche, or milk, but I knew plain yogurt—specifically, Trader Joe’s nonfat European-style yogurt, which is thin but not watery and my go-to for stirring into soups and sauces—would be the perfect choice for me) save it from guacamole-dom. I took a taste after blending it up and liked it pretty well but wasn’t sure I could eat a whole bowl of it. But the topping—oh, the topping!

The original recipe called for “cooked bacon,” as though you would just happen to have some sitting around, and then had you sauté the vegetables in olive oil. LOGIC FAIL! The best part of bacon is the grease, specifically the heavenly, transformative things it does to whatever you happen to cook in it. So I fried up some bacon, removed it from the skillet, and then cooked the onion, corn, and jalapeno in it, which was absolutely the correct choice. My second gripe with the original recipe was that it called for parsley when, to me, cilantro is made for moments like this—big handfuls of it, too. I mean, with avocado, jalapeno, and corn, we’re clearly already rocking this soup southwestern-style, am I right? When the topping mixture was all softened and browned and generously seasoned, I took a taste and had to stop myself from eating the entire skilletful with a spoon while standing over the stove. Stirred into the soup, it elevated it from “Hmm” to “Hell yes!”, its smoky heat providing much-needed textural, temperature, and flavor contrasts to the cold green creaminess. Instead of feeling like I was eating a beverage or condiment in a bowl, I thoroughly enjoyed this as a refreshing, satisfying summer meal.

Sauteeing the topping in bacon fat and swapping in cilantro really made this dish extra awesome, but then I made a major misstep in packaging up the leftovers: Not realizing how much I was going to enjoy the interplay between the warm topping and the cold soup, I premixed all my topping and soup portions before putting them in the fridge (perhaps I was a bit distracted by the complicated serving instructions in the original recipe, which asked me to put the topping in the bowls and then add the soup around it; for me, that just ended up burying the topping). When I went to eat the leftovers, I realized this meant I either had to heat the whole thing up (Cooked avocado soup? No thanks) or eat it all cold. It turned out I didn’t enjoy the topping nearly as well cold—especially the soggy-chewy-greasy texture of the bacon—and it was clear I should have stored the two components separately, so I could microwave the topping and then add it to the chilled soup. If I’d done that, this recipe would have been downright perfect. Oh, well; live and learn. I’m almost hoping for another heat wave this month (not unlikely, given Southern California’s traditionally hot Septembers) so I have an excuse to eat this one more time before autumn sets in.

2 ripe avocados
1 cup vegetable or chicken broth
1–2 tablespoons lime juice
2 tablespoons plain yogurt (or sour cream, creme fraiche, or milk)
¾ teaspoon salt, plus extra to taste
1¼ to 1½ cups water
1 tablespoon olive oil
1 small yellow onion, diced
2 ears fresh corn, sliced from the cob
1 small jalapeno pepper, de-seeded and diced
4 slices diced bacon
1 handful cilantro, chopped
Freshly cracked pepper to taste

1. To make the soup, place avocado flesh in a blender along with broth, lime juice, yogurt (or sour cream, crème fraiche, or milk), and ¾ teaspoon salt. Blend until the avocados are creamy. Remove the center from your blender lid, and while blending, slowly add 1¼ cups water. Soup will be done when smooth, with your desired consistency—feel free to add another ½ cup water if you prefer a thinner soup. Taste and add salt and pepper as necessary. Place in a covered container in the fridge (I just left it in the blender pitcher) while you make the topping.

2. To make the topping, cook bacon in a skillet over medium heat until crisp. Remove bacon with a slotted spoon and set on a paper-towel-lined plate to drain. Add onion to the bacon fat in the skillet and cook until translucent and browned, about 5 minutes. Add corn and jalapeno and cook for 3 minutes more. Add bacon and cilantro. Cook until everything is warmed and just browned. Season with salt and pepper to taste.

3. Divide the cold soup into four bowls and top each with one-quarter of the warm topping mixture (unless you’re planning on keeping some of the soup as leftovers—see my note below). Garnish with additional cilantro, if desired.

Serves: 4
Time: 40 minutes
Leftover potential: Soup will last for about three days in an airtight container in the fridge. I recommend storing the topping mixture in a separate container, so you can reheat it before adding it to the cold soup.

Tuesday, October 26, 2010

LOADED POTATO SOUP


I can take or leave a baked potato. Certainly I’ve never been attracted by the classic version with all the fixin’s; as a child I had a distinct aversion to toppings, and I still dislike big dollops of sour cream. But apparently I’m attracted to soups topped with bacon, cheddar, and green onions, because when I saw this recipe in the October issue of Cooking Light, I immediately flagged it. (Later I realized that my pictures of it look almost exactly like the photos of CL’s identically garnished summer squash and corn chowder from last month. I am nothing if not consistent!) I thought the soup looked like a basic, quick, comforting, A-friendly weeknight meal, nothing more, but I was surprised by how good it actually was—so flavorful for such a simple ingredient list, and if I may say so, way better than a dry and flaky baked potato.

I used to be a diehard faithful recipe-follower, but so often lately I find myself rebelling against the dictates of CL. I know the magazine has strict parameters for healthiness and, in many sections, speed, and I support both of those concepts in theory, but not when they run counter to good sense. I guess it means that I’ve grown as a cook, that I’ve seen enough recipes to look at one and instantly see how I’d adapt it to my style. So: no prechopped onions for me, and no microwaving the bacon—why let all that delicious bacony goodness go to waste? Instead I crisped up the bacon (I used one slice extra, because A is a relentless bacon lobbyist and I am weak) in the pan, removed it, and then cooked the onion in the bacon fat—for much longer than CL’s oddly precise “3 minutes,” too, because there is nothing like tender, caramelized onion with potatoes, and besides, I was still getting the other ingredients ready before I could proceed. This ended up adding so much flavor to the soup that I think it’s well worth the small amount of extra time. My adaptation for the potatoes was less successful. Our microwave is old and temperamental, and cooking anything in it for longer than five minutes usually makes it overheat and temporarily burn out. Luckily, I rarely have cause to microwave anything that long—the only times I’ve made it burn out are times when I’m desperately zapping frozen chicken broth that I forgot to defrost in the refrigerator ahead of time), but CL wanted me to do the potatoes for 13 minutes. Instead, I peeled them and then boiled them—a rookie mistake. They were so moist that when I added them to the pot and (instead of “mashing them into the soup,” which sounded like a lumpy pain) pulsed them briefly with my immersion blender (second rookie mistake), they merged with the white sauce and the sour cream (which I may claim to dislike, but I gotta say, it added a wonderful zing to the soup) to create a super-thick mixture that hovered on the verge between “incredibly rich and creamy” and “rather paste-like.” It still tasted great, and A (who normally fears creamy things) said he liked it the way it was, and I could have thinned it with more chicken broth if I’d had any, but it would have been better if I’d just baked the potatoes in the oven. With that caveat, I’d definitely make this again. Even with my stubbornly less convenient changes, it was a fast, easy, and satisfying weeknight meal. (We had roasted broccoli on the side, highly recommended to complete the loaded-baked-potato theme.)

Oh, and I increased the other topping quantities a bit, too. I can never resist cheese, and maybe I’m not chopping my green onions finely enough, but the 1 teaspoon CL wanted me to put on each serving equaled about silly little four pieces, so I upped it to 1 tablespoon per bowl. Childhood plain-potato me would be shocked!

4 6-ounce red potatoes
½ cup chopped onion
1¼ cups low-sodium chicken broth
3 tablespoons all-purpose flour
2 cups 1% milk, divided
¼ cup reduced-fat sour cream
½ teaspoon salt
¼ teaspoon freshly ground black pepper
4 slices bacon, diced
½ cup shredded cheddar cheese
¼ cup thinly sliced green onions

1. Pierce potatoes with a fork. Microwave on high 13 minutes or until tender (or bake in the oven at 350 degrees until tender--30 minutes, maybe?). Cut in half; cool slightly.

2. While potatoes cook, cook bacon in a saucepan over medium-high heat. Remove with a slotted spoon to a paper-towel lined plate and set aside. To the bacon fat in the saucepan, add onion and sauté until softened. Add broth. Combine flour and ½ cup milk; add to pan with remaining 1½ cups milk. Bring to a boil; stir often. Cook 1 minute. Remove from heat; stir in sour cream, salt, and pepper.

4. Peel potatoes and discard skins. Coarsely mash potatoes into soup. Ladle soup into bowls and top each serving with cheese, green onions, and bacon.

Serves: 4
Time: 40 to 80 minutes, depending on how you cook the potatoes
Leftover potential: High; even tastier the next day.

Friday, September 10, 2010

SUMMER SQUASH AND CORN CHOWDER


This is a perfect end-of-summer soup, sweet and light and loaded with lots of fresh garden veggies, yet with the savory, comforting quality of a creamy chowder. The weather turned autumnal suddenly (and probably only temporarily, considering September and October are usually our hottest months) here in L.A., and we ended up eating this on a perfect Soup Day, chilly and overcast, but it would have been just as welcome on a warm summer night with a nice tomato salad (or bruschetta, the original serving suggestion, which I skipped only because I am lazy and was undergoing dental work earlier in the day, hence why soup made it into the meal plan to begin with).

I have a couple of other good corn chowder recipes in my arsenal already, so when I spotted this one in the gem-packed August issue of Cooking Light, I questioned whether I really needed to try another. But what sets this one apart is the lack of potatoes—the base is just corn pureed with milk, which adds body without heaviness. Also, the inclusion of yellow summer squash, a vegetable often overlooked in favor of its cousin zucchini; you see a lot of mixed yellow-and-green-squash combos, but rarely a recipe for just yellow squash on its own. Also, cheddar cheese, my first and truest cheesy love and a natural compatriot of corn and bacon.

First of all, I do think Cooking Light is crazy for publishing a corn soup recipe IN AUGUST that calls for frozen corn. Sure, corn is one of the more decent-quality frozen vegetables and it’s fine to allow the option for using frozen corn if fresh is unavailable, but if you’re building an entire recipe around two seasonal vegetables, why would you completely ignore the possibility of fresh corn? I can only guess it’s because the Dinner Tonight section, in which this recipe ran, is geared toward quick recipes, and cutting the kernels off fresh corn would have put this over the 30-minute mark (although of course these promised timeframes exist only in the test kitchens anyway—I think I’m pretty dang efficient as a cook and it always takes me longer than the advertised 30 minutes anyway). Which is sad, because fresh corn is one of the great delights of this world and really makes this dish awesome (not that you shouldn’t try it if you don’t have fresh corn; I’m sure it’s perfectly tasty when made with frozen as well).

Secondly, some of the CL online commenters are even wackier than the magazine itself. While this recipe scored a deserved four out of five stars and has mainly glowing reviews, there were a few heated negative ones that gave me pause when I was weighing the decision to make the soup. Now I can confidently say that those complaints are due to user error, personal tastes, or just plain nuttiness. Among my faves: “I don’t really get this dish. It’s a bunch of vegetables sautéed, then served in warm milk” (apparently this reviewer missed the step of pureeing the corn and milk into a thick base entirely), “I did not get four full servings” (we ended up with four-plus, and I measure ingredients almost as obsessively as CL does), and “the squash had a very prominent flavor” (er, there’s a pound of it in there and it’s mentioned in the recipe title). Not to mention the person who rated it one star with the review “Good recipe! ..wow what a great taste of summer” and the person who rated it two stars with a review admitting they hadn’t made it yet and asking if anyone had tried adding crabmeat to it. (Oh, I could do you a whole separate rant on recipe reviewers who are always saying they threw in some chicken or shrimp “just to make it a full meal.” I’m a happy omnivore, but I don’t get the “it’s not a full meal without meat in there somewhere” contingent. We had big bowls of this soup with small bowls of peaches on the side. It was definitely a full meal.)

But anyway, this was an easy and surprisingly flavorful soup, and we both enjoyed it (that’s a big compliment coming from A, who is not much of a soup lover). I’ll admit I used a bit more bacon and cheese than the parsimonious CL, which I’m sure did not hurt the deliciousness factor, but it was the corn and squash that really shone through (with the celery, which I do not ordinarily like in soup, playing a surprisingly important supporting role in balancing out the sweetness with a bitter tang). I also really enjoyed that it only made four servings. Sometimes it’s nice to make a big pot of soup and enjoy it for weeks (or months, if you freeze some), but summer is about fleeting pleasures, and corn soup is one of those.

2–4 slices bacon, diced
¾ cup sliced green onions, divided
¼ cup chopped celery
1 pound yellow summer squash, chopped
1 pound fresh (from 3–4 large ears) or frozen (thawed) corn kernels, divided
2¼ cups 1% milk, divided
1 teaspoon chopped fresh thyme
½ teaspoon salt, plus extra to taste
¼ teaspoon freshly ground black pepper, plus extra to taste
¼–½ cup shredded cheddar cheese

1. Cook bacon in a large Dutch oven over medium-high heat until crisp. Remove bacon from pan with a slotted spoon and drain on paper towels. Add ½ cup onions, celery, and squash to drippings in pan; sauté 8 minutes or until vegetables are tender.

2. Reserve 1 cup corn; set aside. Place the remaining corn and 1 cup milk in a blender; process until smooth. Add remaining 1¼ cups milk, thyme, ½ teaspoon salt, and pepper to blender; process just until combined.

3. Add pureed mixture and reserved 1 cup corn to pan. Reduce heat to medium; cook 5 minutes or until thoroughly heated, stirring constantly. Season with salt and pepper to taste. Divide soup evenly between 4 bowls; top each serving with some bacon, remaining onions, and cheese.

Serves: 4
Time: 40 minutes
Leftover potential: Good

Tuesday, May 18, 2010

QUINOA PILAF WITH SWEET POTATOES, KALE, AND BACON


I was going through simultaneous sweet potato and kale phases a few months ago, and I’m currently possessed by a quinoa mania, so when I saw this recipe at Serious Eats, trying it was a no-brainer. It seems better suited for fall or winter than spring, but kale and sweet potatoes are still available at the farmer’s market, so it’s not completely unseasonal. And, as you might expect when bacon and vegetables and quinoa are involved, it was quite tasty.

Since I love roasted kale, I was initially excited to see that both the kale and the sweet potatoes are roasted for this recipe, but now I have some doubts about whether roasting is really the right treatment for kale in this format. First of all, at least in my oven, 475 degrees is pretty high heat for kale; some of mine burned before the sweet potatoes had even gotten golden. If I were to roast the kale again, I’d do it at a lower temperature, then remove it, raise the heat, and roast the sweet potatoes—but that’s a lot more inconvenient for a weeknight meal. And then I felt a little sad stirring that crisp, snackable kale into the warm quinoa, where it just got soft again. It seemed to make the whole pilaf a little on the dry side, and it tasted a bit bitter. Maybe I just overdid my kale, but I do wonder if just wilting the kale in a skillet might be a better option. When fall rolls around, I’ll try it both ways and let you know. But minor kale-roasting quibbles aside, this is a delicious, wholesome, and colorful, and substantial quinoa concoction.

2–4 slices of bacon, diced
1 small onion, cut in half and sliced thin
1 cup quinoa
1½ cups water
1 teaspoon salt, divided
1 large sweet potato (about 10 ounces), cut into ¼-inch cubes
1 bunch kale (about 8 ounces), chopped coarsely
2 tablespoons olive oil
4 scallions, green parts only, sliced thin

1. Preheat the oven to 475 degrees.

2. In a medium saucepan with a tight-fitting lid (I used my Dutch oven), cook the bacon over medium heat until the bacon is crisp and the fat is rendered, about 10 minutes. Reserve the bacon bits.

3. Drop the onions into the hot bacon fat and sauté, stirring occasionally, until they soften, about 5 minutes. Add the quinoa and toss until coated with the fat and slightly toasted, about 2 minutes more. Add the water and ½ teaspoon of the salt, bring to a boil, stir once, cover, reduce to low, and let cook undisturbed until the water is absorbed and the quinoa is tender, about 15 minutes.

4. While the quinoa is cooking, toss the sweet potatoes and kale with the olive oil and salt and spread in a single layer on a baking sheet. Bake until the potatoes and kale begin to brown in places and the potatoes are tender, about 15 minutes.

5. When the quinoa is cooked, stir in the potatoes, kale, bacon, and scallions.

Serves: 4
Time: 1 hour
Leftover potential: Good.

Friday, April 16, 2010

GREEN BEANS WITH WARM BACON VINAIGRETTE


It will surprise exactly no one that the combination of green beans and bacon turns out to be excellent. I tore this recipe out of the November issue of Cooking Light and by now it’s racked up a perfect five-star rating on the Web site. It was intended as a Thanksgiving recipe, but I see no need to wait for a special occasion; this is a great way to jazz up an ordinary weeknight meal (we had it with zucchini fritters). The flavors go together beautifully: Like my favorite salad, it has green beans and walnuts and a walnut oil/white-wine-vinegar dressing; like these two also-tasty recent discoveries, it uses bacon grease to excellent effect; and like so many of my most reliable side dishes, it involves shallots. What’s not to love? A and I both devoured it happily, and it’s definitely going into our regular rotation.

Other than halving the quantities (it originally served 8), using plain ol' farmers' market green beans instead of haricots verts, and swapping in white wine vinegar for the champagne vinegar, which I never have on hand, I followed the recipe as written. I do recommend walnut oil (I’ve become a convert), but olive oil will do just fine if you don’t want to make the investment.

1 pound green beans, trimmed
2 slices bacon, chopped
⅓ cup thinly sliced shallots (about 1 medium)
2 teaspoons walnut oil
1 teaspoon champagne or white wine vinegar
½ teaspoon kosher salt
2 tablespoons chopped walnuts, toasted
1 tablespoon chopped fresh flat-leaf parsley

1. Cook beans in boiling salted water for 7 minutes or until crisp-tender. Drain and rinse with cold water to stop cooking.

2. Cook bacon in a large nonstick skillet over medium heat until crisp; remove with a slotted spoon. Add shallots to drippings in pan; cook 5 minutes or until tender. Combine shallots and bacon in a large bowl. Add beans to pan; cook 3 minutes or until thoroughly heated. Add beans, oil, vinegar, and salt to bacon mixture; toss to combine. Sprinkle with walnuts and parsley.

Serves: 4
Time: 30 minutes
Leftover potential: Meh; they were perfectly edible the next day, but not nearly as good.

Friday, February 19, 2010

SWEET POTATO AND SPINACH SALAD WITH WARM BACON VINAIGRETTE


Yes, another salad with bacon and another mustard vinaigrette. I just can’t help myself! This one has a convoluted story: Along with kale and fennel, I’ve been craving sweet potatoes lately. In my analog recipe stash, I had a photocopied recipe from some forgotten cookbook for a warm side dish of sweet potatoes with spinach and bacon, which suddenly started sounding irresistible to me. So I went online to see if anyone else had made the recipe and what they thought of it. It turns out that you get a lot of results if you Google “sweet potatoes spinach bacon”—but most of them are salads. Apparently, sweet potato, spinach and bacon salad is, like, an established thing? I clicked on a few recipes and soon realized that they sounded better than the original recipe I’d been searching for. First I found this Mark Bittman recipe at Serious Eats, but I wasn’t sure the ginger, cumin, and orange flavors were what I wanted. Then I found this Rachel Ray recipe (yep, I fell into the Rachel Ray vortex again). It sounded delicious, except for the fact that the sweet potatoes were boiled, which, bleah. Why boil a sweet potato when you can roast it? So I stole the roasting method from the Bittman recipe, halved the Rachel Ray recipe, and went to work. We were both extremely pleased with the result. This is a big, bold salad bursting with a wide variety of flavors, textures, and fresh, colorful vegetables. I could have just eaten the salt-and-peppery roasted sweet potato chunks on their own, but on a bed of crisp spinach (mine didn't really wilt; I think my dressing had cooled a bit, but I didn't mind), dressed in a tart-sweet dressing and spangled with bacon, they were amazing. Even non-sweet-potato-lovers (A is one) will love this.

2 medium-large sweet potatoes, peeled and cut into bite-sized pieces
2 tablespoons extra-virgin olive oil, divided
Salt and freshly ground black pepper to taste
2 slices bacon, diced
1 small red onion, finely chopped
1 clove garlic, minced
2 teaspoons Dijon mustard
1 tablespoon red wine vinegar
2–3 cups baby spinach

1. Heat the oven to 400 degrees. Put the sweet potatoes on a baking sheet, drizzle with 1 tablespoon of the oil, sprinkle with salt and pepper, and toss to coat. Roast, turning occasionally, until crisp and brown outside and just tender inside, 20–30 minutes. Remove from oven and keep them on the pan until ready to use.

2. While the potatoes are cooking, place a large skillet over medium-high heat, add the bacon, and cook until crisp.

3. Remove the bacon from the pan and add the onion, garlic, some salt, and tons of black pepper to the bacon drippings. Cook until the onions are tender, about 5 minutes.

4. Remove pan from the heat and add the mustard, vinegar, and remaining 1 tablespoon oil, whisking vigorously to incorporate the dressing.

5. Place the spinach in a large bowl, add the sweet potatoes, pour the dressing on top, and toss well to coat the potatoes and lightly wilt the spinach. Crumble the bacon over everything. Serve warm or at room temperature.

Serves: 2 as a main dish or 4 as a side dish
Time: 45 minutes
Leftover potential: We didn't try, but probably not great.

Tuesday, February 09, 2010

LENTIL STEW WITH SAUSAGE


Every now and then (about twice per winter, on the darkest and wettest of days) I get a hankering for lentils. Luckily, I have a good recipe for an easy lentil soup. Unluckily (or less luckily, anyway), A doesn’t really like lentils. And although he’s quite the champ about trying everything I make, eating one serving without complaint even if he doesn’t care for it, comforting me if I'm disappointed in the product of my labors, and enduring my barrage of requests for reassurance (“Do you like it? It’s good, right? You’d have it again?”—being the companion of a food blogger is a burden sometimes, I imagine), I can always tell whether he really likes something based on how much he eats the leftovers. And the last time I made lentil soup, I had to slog my way solo through all four remaining bowls, which dampened my enthusiasm for it a bit.

So when I saw this bacon- and sausage-studded lentil stew at Simply Recipes, I thought (a) “That looks delicious!” and (b) “That might be a good way to get A to enjoy lentil soup!” (If you haven't noticed by now, "bacon" is pretty much the magic word where A is concerned.) Besides the addition of meat, the recipe isn’t too different from my old one, only without the tomatoes and with some additional seasonings. I went easy on the cumin, not wanting my soup to taste like tacos, but in the end it wasn’t too assertive and paired well with the flavor of the lentils. And I downright loved the hit of vinegar stirred in just before serving—I didn’t have sherry vinegar, and while the recipe suggested cider vinegar as a substitute, I went with balsamic, one my secret ingredients for pizza sauce, and was not sorry.

But alas, all this deliciousness did not win A over to the lentil-eating team. He didn’t hate the soup, but he ended up picking out all of the meat and leaving about a quarter of a bowlful of lentils behind, and once again I was left with all the leftovers (and there were a lot of them; the recipe claimed to serve 4-5, but I got 7 bowlsful out of it). The difference was that this time, I devoured them eagerly. Paired with brown bread, this was a perfect soup for our recent rainy winter days, zesty and hearty, and the extra herbs and spices and the smoky undertones from the meat made this a marked improvement over my older, simpler recipe (which is still quite worthy and delicious, I hasten to add, particularly if you want something cheap and vegetarian). So it was a qualified success.

I found the recipe to be straightforward and self-explanatory. It takes a bit of time, but most of that is hands-off simmering time. For the sausage, I used spicy chicken andouille from Trader Joe's, which is not only delicious but also precooked, enabling me to skip the sausage-browning step of the recipe. I liked the heat and peppery smokiness they added to the soup, but really, you can use just about any type of sausage you enjoy here.

⅓ pound of bacon (about 5 thick slices), diced
1 medium-large yellow or white onion, chopped (about 1¼ cups)
2–3 large carrots, diced (⅔ cup)
2–3 large ribs celery, diced (⅔ cup)
½–1 teaspoon ground cumin
2 cloves garlic, minced (about 2 teaspoons)
1 pound brown or green dry lentils, rinsed and picked over to remove any debris
3 cups water
3 cups chicken stock
½ teaspoon dried thyme
1 bay leaf
½ pound Italian sausage (mild, sweet, or spicy, your choice) or smoked sausage, in links (about 2–3 links)
1 teaspoon sherry vinegar (can sub cider vinegar or balsamic vinegar)
¼ cup chopped fresh parsley, with a little extra for garnish
Salt and pepper to taste

1. Heat a large, thick-bottomed pot (6 to 8 quarts) on medium heat. Add the bacon and cook until much of the fat has rendered and the bacon is browned and cooked through, about 10 minutes. Use a slotted spoon to remove bacon from pan to a paper-towel-lined dish and set aside. Remove (and discard or reserve for another use) all but 2 tablespoons of bacon fat from the pot.

2. Heat the remaining fat on medium high and add the carrots, onions, celery, and cumin. Cook until softened, about 5–7 minutes, stirring frequently and scraping up the browned bits at the bottom of the pan. Add the garlic and cook a minute more, until fragrant.

3. Add back in the cooked bacon, rinsed lentils, stock, water, thyme, and bay leaf. At this point, add a teaspoon of salt and some pepper. You will season more to taste later. Bring to a boil and reduce the heat to a simmer. Cook partially covered until lentils are tender, about 40 minutes.

4. While the lentils are cooking, heat a frying pan on medium heat. Add the Italian sausage links. Gently cook, browning on all sides, until just cooked through. Remove from pan and let cool enough to handle. (All this can be skipped if your sausages are precooked.) Slice sausage and add to stew for the last 10 minutes of cooking.

5. Add vinegar and parsley to stew. Season with salt and freshly ground black pepper to taste.

Serves: 6–8
Time: 1 hour 15 minutes
Leftover potential: High