Showing posts with label Corn. Show all posts

Saturday, July 05, 2014

SALMON SALAD


I never thought I’d be interested in something called “salmon salad.” Let’s face it, it sounds weird—even though it’s basically just a modified Nicoise with salmon instead of tuna. But cold cooked fish is not my thing, and recently I’ve decided to face the fact that salmon isn’t my thing either, no matter how it’s cooked (raw is a different story; I could eat salmon sushi all day long). Yet the photo in Dinner: A Love Story still drew me in, with its rainbow of purple potatoes, green beans and cucumbers and herbs, yellow corn, red tomatoes, and the lovely pink salmon. Those are all my favorite summer vegetables, and I love lemony-mustardy vinaigrettes like this one—would all that be enough to make chilled salmon palatable?

Short answer: Yes, for me. A was not a fan of this one, but I kind of love it. It turns out that tearing it into little bits and mixing it with lots of other things mitigates most of the textural issues I have with cooked salmon. This salad is a great way to get me to eat fish AND make it portable—the leftovers keep well for several days and can be consumed at work without inflicting any of the dreaded fish-reheating smell (the scourge of so many office kitchens) on your colleagues. I still prefer white fish overall, but this beautifully refreshing summer salad is my new favorite way to work the occasional smattering of salmon into my diet.

My only notable changes to the original recipe were to add dill, which is just so perfect with salmon (and green beans, and potatoes, and cucumber…), and to omit the sugar from the vinaigrette. I made it as written the first time, but I should have remembered that I never add sugar to my dressings—not surprisingly, it tasted too sweet to me. I prefer things acidic, and the starchy potatoes and dense salmon can definitely stand up to tart flavors. I’ve marked the sugar as optional here; I’d recommend tasting the dressing without it first, and then adding it in ½ teaspoon increments to take the sour edge off if needed.

¼ cup red wine vinegar
2 teaspoons Dijon mustard
1 teaspoon sugar (optional)
About 1 teaspoon fresh lemon or lime juice, to taste
½ cup olive oil
Salt and pepper to taste
1 pound salmon fillet
1 large handful (about 1 cup) small red, purple or yellow potatoes, halved or quartered depending on size
2 ears corn
1 large handful (about 1 cup) thin green beans, trimmed and chopped into 1-inch pieces
1 cup cherry or grape tomatoes, halved
1 medium Persian cucumber, seeded and chopped
4 scallions (white and light green parts), chopped
2 tablespoons chopped fresh cilantro (parsley would also be good here if you don’t have cilantro)
2 tablespoons chopped fresh dill
  1. Preheat the oven to 400 degrees.
  2. To make the vinaigrette, in a small bowl whisk together the vinegar, mustard, sugar (if desired), lemon/lime juice, oil, and salt and pepper to taste. Set aside.
  3. To make the salmon, sprinkle the fish with salt and pepper. Roast in a foil-lined baking dish for 15 minutes. Set aside and let cool.
  4. Meanwhile, bring a medium pot of salted water to a boil. Add the potatoes and cook until a knife slices through them with no resistance, about 10-12 minutes. Using a slotted spoon, remove the potatoes to a colander and let cool.
  5. Add the corn to the same pot of water. Boil for 4 minutes. Remove to a cutting board and allow to cool.
  6. Add beans to the same pot of water and cook for 3 minutes. Remove with a slotted spoon and let cool in a colander.
  7. Place the tomatoes, cucumber, scallions, cilantro, and dill in a large bowl. When potatoes and green beans are room temperature, add them to the mixture. Cut the kernels off the corn cobs and add those to the bowl. Gently flake the salmon apart into bite-sized chunks and add it to the salad. Pour on the vinaigrette and toss gently.
Serves: 4
Time: 45 minutes
Leftover potential: Good.

Monday, February 25, 2013

SWEET POTATO AND CORN FRITTERS


I love a good fritter, and after making chili-lime roasted squash salad recently, I’ve been intrigued by the combination of spicy southwestern flavors with sweet orange root vegetables, so when I saw this recipe at Budget Bytes, I…bit.

I halved the recipe because it promised to make a ton, and leftover fritters are never quite as good. Since it’s difficult to halve an egg, I took the suggestion from the original recipe to increase the breadcrumbs a bit, but maybe I needed to increase them more or maybe I had a bit too much sweet potato, because they turned out slightly damper than I think they were intended to. No big deal; I just had to dollop them into the pan rather than forming them into patties first, they were a little more difficult to flip, and they didn’t get quite as crisp as I’d hoped. The flavor, however, was spot on. Taking inspiration from the chili-lime squash, I added some chipotle chili powder, and the smokiness was a perfect foil for the sweetness of the potato and corn. And ironically, we still had some leftovers, and when I heated them up in a dry skillet the next day, that second frying dried them out a bit and achieved the crispy texture I’d been hoping for the first time around.

I served black bean salsa on the side because I thought it would be a great combo (which it was), but the fritters were much more filling than I expected, so really, a small green salad is probably all you need to accompany these. 

A isn’t a huge sweet potato fan (except in fry format), and he doesn’t usually like yogurt, but we both enjoyed these bold, colorful, and hearty patties with their creamy, garlicky sauce (to which I might add a bit of lime juice next time, to liven things up even further) as a fun and different addition to our fritter rotation.

1½ pounds sweet potatoes
½ cup frozen corn kernels
1 green onion, sliced
2 large handfuls (or to taste) chopped fresh cilantro, divided
⅛ teaspoon cayenne pepper
½ teaspoon cumin
¼ teaspoon chipotle chili powder
½ teaspoon salt
3 tablespoons yellow cornmeal
¾ cup panko
1 egg
¼ cup olive oil
½ cup plain Greek yogurt
1 small clove garlic, minced

1. Preheat the oven to 400 degrees. Scrub the potatoes, prick them all over with a fork, and place them on a rimmed baking sheet lined with foil. Bake until tender, about 45 minutes. Remove potatoes from oven and let cool until they can be handled, then cut them open and scoop the flesh into a large bowl, discarding the skin.

2. Add the green onions, 1 handful cilantro, frozen corn kernels, salt, cumin, chili powder, and cayenne pepper to the bowl with the cooked sweet potatoes. Stir until well combined.

3. Add the cornmeal, panko, and egg to the bowl. Stir until evenly combined. Cover the bowl and refrigerate for 30 minutes to allow the breadcrumbs to absorb moisture.

4. While the sweet potato mixture is refrigerating, mix up the garlic yogurt sauce. In a small bowl, combine the yogurt, garlic, and a handful of chopped cilantro leaves. Stir until combined and then refrigerate until ready to serve.

5. After the sweet potato mixture has refrigerated, heat a large skillet over medium heat. Add 2 tablespoons oil and heat until the surface appears wavy. Shape the sweet potato mixture into small patties (about 2 to 3 tablespoons each) and cook about 4 at a time in the hot oil. Cook until golden brown on each side, about 5 minutes per side. After cooking, drain on a paper towel-covered plate and then transfer to a cooling rack. Add 2 more tablespoons oil to the skillet and repeat with remaining sweet potato mixture.

6. Serve warm with the garlic yogurt sauce.

Serves: 2–3
Time: 2 hours
Leftover potential: OK. Leftover fritters can be revived by heating in a dry skillet on the stovetop over medium heat until warmed through and crisp on both sides. (If you want, you can heat them for 30 seconds or so in the microwave first to ensure that the centers are warm.)

Tuesday, October 23, 2012

CURRIED BUTTERNUT SQUASH AND CORN CHOWDER


I do feel like I’m reaching max capacity for pureed orange vegetable soups here (five carrot, four butternut squash), but I have no recipes of any kind of that combine butternut squash with corn, and the juxtaposition intrigued me when I spotted this recipe (originally from Everyday Food) at Ezra Pound Cake. It seemed like the perfect transition food between summer and fall—which is finally, finally starting to happen here in SoCal.

The soup comes together like most other pureed vegetable soups, with a quick sauté followed by a boil in broth and then a spin in the blender, and I’m afraid that at first it tasted like any old soup to me, too. Many such recipes I’ve tried are perfectly adequate but never quite rise above the sum of their parts, and despite the presence of curry, which I’d been excited about, this one threatened to underwhelm. When I tasted it at the end, it needed something, so I squeezed in some lime juice, which was exactly the ingredient that revived the curried coconut carrot soup I tried last fall (and now adore). It really helped, but as I ate, even though A kept commenting how good it was (which is rare for him, with soups), I had already decided I wouldn’t make this recipe again; it was fine, but so similar to other recipes I make regularly, it just wasn’t worth it.

Then I ate the leftovers the next day and really actively liked them, not just tolerated them. If there had been more, I would have eaten it the next day, too. I know soup often tastes better the next day as the flavors develop and meld, but this was a dramatic improvement—or maybe I’d just been cranky and palate-distorted the night before. Now I’ll certainly make this again. It’s easy, it’s wholesome, it has a beautiful bright mustard-yellow color, and I love the unique texture; the corn kernels don’t quite blend smoothly, reminding me of a yellow lentil dal (I didn’t want to bother with only blending half the soup, so I just stuck my immersion blender in the pot but only blended semi-thoroughly, to simulate the same effect).

Aside from adding lime juice, the only changes I made were to use fresh corn instead of frozen (amazingly, corn is still in season here) and homemade chicken broth instead of vegetable broth.

2 tablespoons olive oil
1½ pounds butternut squash, peeled, seeded, and cut into 1-inch chunks (about 5 cups)
1 medium onion, chopped
10 ounces fresh or frozen (thawed) corn kernels
1½ teaspoons curry powder
Kosher salt and ground pepper to taste
29 ounces (about 3⅔ cups) vegetable or chicken broth
½ cup heavy cream
Juice of 1 lime (optional)
¼ cup chopped fresh chives

1. In a large, heavy pot, heat oil over medium heat; add squash and onion. Cook until the onion is soft, about 6 minutes.

2. Add the corn and curry powder. Cook until you can really smell the curry, about 2 minutes. Season with salt and pepper.

3. Add the broth and simmer until the squash is tender, about 25 minutes.

4. Using an immersion blender, food processor, or countertop blender, blend half the soup until smooth. Return to pot and turn the heat down to medium-low.

5. Stir in the cream, along with the lime juice if desired, and let the soup get warm before serving (do not boil). Garnish with chives.

Serves: 4
Time: 1 hour
Leftover potential: Great; tastes even better the next day, and would also freeze well.

Friday, August 31, 2012

ZUCCHINI RIBBON SALAD WITH CORN AND AVOCADO


Here would be a perfect place to employ the oft-overused (I include myself in this accusation) foodie phrase “summer in a bowl.” Summer squash, corn, avocado, cilantro, and lime all in one place is about as summery as you can get, at least without a tomato in sight. The recipe is from Two Peas and Their Pod, and while it didn’t rock my socks off quite as much as I’d hoped based on the gorgeous photos, there’s nothing not to like here. The well-matched, fresh, simple ingredients are elevated by the elegant presentation—ribbons are purty, and the white-yellow-green palette shot through with threads of purple is something I could gaze on all day long…assuming I didn’t get hungry at any point. It tastes just like the sum of its parts, but with parts like these, that’s not so bad. I especially liked the generous proportion of avocado.

I made no changes, except to use feta instead of queso fresco, because I already had it on hand. See my notes below regarding the leftovers; they’ll keep better if you leave the avocado out until you’re ready to eat.

2 tablespoons olive oil
2 tablespoons freshly squeezed lime juice
Salt and pepper to taste
2 medium zucchini
2 medium yellow squash
2 ears cooked sweet corn
¼ cup chopped fresh cilantro
½ red onion, sliced
2 medium ripe avocados, peeled, pitted, and sliced
½ cup queso fresco or feta cheese

1. In a large bowl, whisk the olive oil and lime juice together. Season with salt and pepper to taste.

2. Trim the ends of the zucchini and yellow squash. With a vegetable peeler, shave lengthwise into long, wide, thin strips. When you get to the center of the squash, turn the squash over and slice from the other side until you get to the center again.

3. Put the zucchini and yellow squash ribbons in a large bowl. Cut the sweet corn kernels off the cob, cutting close to the cob. Discard cobs. Add sweet corn, cilantro, red onion, and avocado slices to the squash ribbons. Pour olive oil and lime dressing over salad and toss until coated.

4. Crumble queso fresco over the top of the salad and season with salt and pepper, to taste.

Serves: 4
Time: 20 minutes
Leftover potential: Surprisingly good for a day or two, but if you plan on having leftovers, I recommend not adding the avocado in Step 3. If you plan on eating two servings now and two servings later, slice the first avocado and serve it atop the servings you intend to eat now, waiting to slice up the second avocado until you’re ready to eat the leftovers. I did the same with the cheese, adding it only to the servings only right before I ate them, but that’s less crucial.

Monday, July 16, 2012

KALE, PEACH, CORN, AND FETA SALAD


Yep, this is totally my Summer of Putting Fruit Everywhere. Strawberries on pizza! Blueberries in corn salad! And now, peaches in kale salad. I’ve gone mad, MAD, I tell you!

I always think of kale as a winter vegetable, but it’s still sporadically available at the farmers’ market, and now that I’ve discovered how much I love it in salad form, I’d been thinking I should look for a summery treatment for it. Then I discovered this recipe from Mostly Foodstuffs. What’s more summery than cilantro, lime, corn, and peaches? And is there anything I love on a salad more than feta? This salad and I were destined for each other.

I followed the recipe exactly, except that I used red wine vinegar instead of sherry vinegar, both because I didn’t have sherry vinegar and because red wine vinegar appeared in the original recipe from Last Night’s Dinner. (The original also used lemon instead of lime juice, which I considered, but lime and cilantro are just so right together. However, I’m sure lemon is dandy too, and I’d definitely try it in a pinch.) I also left out the honey, because I don’t typically require sweetness in my dressings and because the original didn’t call for it. And although the recipe doesn’t ask you to, I did cook my corn, because I made the salad midweek but corn is always best the day that you buy it, so if I’m not using it right away I blanch it, cut it off the cob, and store it in a sealed container in the fridge. It’s easier to get off the cob that way, anyway—the kernels only fly about half as far across the counter once cooked. But if I were making this salad right after I’d bought the corn, I’d just use it raw.

My bunch of kale must have been on the small side because I ended up with too much dressing, which wasn’t a huge problem—kale can stand up to levels of flavor and moisture that would wilt more delicate greens—but did overpower the taste somewhat. I ended up having to serve the salad using a slotted spoon to drain away some of the excess dressing, so I’m going to suggest that you make the dressing in a smaller bowl and then pour it gradually over the kale, rather than adding the kale to the dressing. I’m looking out for you! Because really, I’d hate for anything to get in the way of you enjoying this fantastic salad. The tart dressing, bitter greens, salty cheese, and sweet corn and fruit made for an incredibly complex interplay of flavors, and the texture contrasts were no less thrilling—soft and juicy peaches, crisp corn, chewy kale, creamy cheese. Not to mention that it’s totally beautiful. I love discovering new combinations like this, but I know I’ll still love this one long after the novelty wears off.

¼ cup olive oil
Juice of 1 lime (can use a lemon instead)
2 tablespoons red wine vinegar
Salt and pepper to taste
A dollop of honey (optional)
½ small red onion, sliced into thin half-moons
1 bunch kale (I like Tuscan), ribs removed, leaves torn into small pieces
About ½ bunch cilantro, coarsely chopped
2 ears of corn, kernels cut off the cob (you can cook the corn or not, whatever you like)
3 peaches, cut into slim wedges
About ¼ cup feta, crumbled

1. In a medium bowl, whisk together the olive oil, lime juice, vinegar, and salt and pepper to taste. Add a bit of honey if the dressing seems too tart. Add the onion, and let it sit for a few minutes to mellow.

2. In a large bowl, combine the kale and cilantro. Use a slotted spoon to scoop the onion slices out of the dressing and add them to the salad. Gradually add the dressing to the salad and toss to coat the kale well (kale usually takes more dressing than I expect, so taste as you go, but you may not use all the dressing). Let the mixture sit for 15 minutes to an hour so the kale can soften. Scatter the corn, peaches, and feta over the top.

Serves: 4
Time: 30 to 60 minutes
Leftover potential: Good; the kale will keep for days in the dressing without wilting, although you may want to leave the peaches out of the salad until you’re ready to eat it, just so they don’t get brown and mushy.

Monday, July 09, 2012

BLUEBERRY CORN SALAD


(I made the mistake of trying to use my new purple Fiestaware bowl for this photo, to match the berries. Huge mistake! It just looks sad and murky. Back to the white dishes after this.)

 I accidentally picked 9 pounds of blueberries singlehandedly this year, an all-time record—in previous outings, the most we’d ever brought home was 8 pounds between the two of us. Then, just to top it off, I picked 2 pounds of raspberries, a new addition to the farm’s offerings. I guess I panicked because A had to stay home sick, leaving me as the sole provider for all our berry-eating needs, plus the friend who accompanied me was such a champion picker (she gathered about twice as much as I did, in less time) that I lost all perspective regarding my own haul and dramatically overcompensated. Whatever, no problemo, we love berries… Except it turned out that A was too sick to eat anything but applesauce and saltines and chicken soup for the next week (he recovered eventually, thank goodness), and then he departed on a weeklong trip to Indiana, so I had to figure out how to cope with the massive quantities of fruit going gradually overripe in the fridge. I ate berries by the handful, and over yogurt and granola. I made berry buttermilk cake twice, once with raspberries and once with blueberries. I made frozen yogurt. I made jam. I made muffins (and put them in the freezer so that A wouldn’t miss out on the berries entirely). I made fruit salad. But the best thing that I made was a new discovery, this salad.

I didn’t even have to go looking for this recipe; it popped up in my feed reader via Two Peas & Their Pod a week or so before my great berry-picking expedition. It looked so pretty that I instantly bookmarked it, even though it sounded a little weird. Blueberries and corn isn’t that strange a combination if you think about it—blueberry corn muffins, right?—but blueberries and cucumber seems odder. Blueberries and cucumber and jalapeno and onion and cilantro seems odder still. But I’m sure I don’t even have to tell you that they are in fact incredibly delicious together. I was so grateful to have something to do with my blueberries that represented an actual savory meal, not breakfast or dessert. The sweetness of the berries was matched by the corn and the honey in the dressing, but the other ingredients balanced that out perfectly. The mild heat from the pepper and the cool crunch of the cucumber were especially welcome. I had no trouble polishing off all this salad singlehandedly, eating it as a main dish (occasionally with a quesadilla on the side) for four days in a row—especially easy compared to all the work it too me to pick all those berries in the first place.

The original Better Homes and Gardens recipe called for 6 ears of corn, which seemed like a lot to me; since I knew I wouldn’t be sharing it with a crowd (or, actually, anyone), I only used 4 ears, keeping all the other quantities the same. The proportions seemed perfect to me that way, so I’ll keep doing it in the future, unless maybe I’m making it to bring to a potluck or something. It would be the perfect thing to brighten a summer BBQ table, fresh and colorful and unique and surprising; plus, it keeps extremely well (and actually gets better after marinating), so you can make it a day in advance. Whatever the situation, I know this will become one of my summer standbys. All the blueberries I picked may be gone, but supermarket berries will work just fine—as long as the corn is in season, that is!

4 large ears fresh sweet corn, husked
1 cup fresh blueberries
1 cucumber, sliced (I used two medium Persian cucumbers)
¼ cup finely chopped red onion
¼–½ cup chopped fresh cilantro
1 jalapeno pepper, seeded and finely chopped
2 tablespoons lime juice
2 tablespoons olive oil
1 tablespoon honey
½ teaspoon ground cumin
½ teaspoon salt
¼ teaspoon black pepper

1. In a large pot, bring water to boiling. Add corn. Cook for 5 minutes, or until tender. When cool enough to handle, cut kernels from the cobs. Discard cobs.

2. In a large serving bowl, combine corn, blueberries, cucumber, red onion, cilantro, and jalapeno. To make the dressing, whisk together lime juice, oil, honey, cumin, salt, and pepper. Pour dressing over salad and stir until combined. Cover and refrigerate until ready to serve.

Serves: 4–6
Time: 30 minutes
Leftover potential: Good; keeps well in the fridge for at least five days.

Monday, June 11, 2012

ENFRIJOLADAS


I used to hate corn tortillas. I can only attribute this to having grown up in the Midwest, because ever since I moved to Southern California, I’ve gradually grown to love them, which I assume is I because I’ve finally been exposed to fresh, handmade, tender tortillas instead of the dry, mealy ones of my memories. (I don’t mean to malign the Midwest; Minnesota actually has a large Mexican population and you can get excellent tortillas there now, but if they existed in the 1980s and 1990s, I didn’t encounter them or was too picky to try them.) I still don’t really bother with average mass-produced corn tortillas, but every now and then I make a pilgrimage to my favorite Mexican grocery for a warm stack of their housemade ones. The only problem is that the smallest package of these still contains dozens of tortillas (I’ve never counted, but I’d say at least 48), and with no preservatives in them, they only stay moist, soft, and taco-worthy for a few days. Granted, this heap of tortillas sets me back less than $2, but I hate to see them go to waste. The less-fresh ones are great for making quesadillas or tostadas or baking into chips to dip in salsa, and of course they’re delicious in soup, but even after all that I can still find myself with leftovers, so I’ve been on the lookout for other ideas.

When I spotted a recipe for enfrijoladas—basically, enchiladas made with a bean sauce instead of tomato sauce—at Tasty Kitchen, it seemed like the perfect solution. But at second glance, I was a bit put off by the fact that the sauce was made out of canned refried beans, thinned with broth. (Nothing especially wrong with canned refried beans, mind you, but I’m a recent convert to bean-loving, and in my bean-hating days, refried beans grossed me out the most.) Wouldn’t it make more sense to puree freshly cooked dry beans, or even canned beans, in their liquid? I hit the Internet to find out, and after a lot of searching I found what I was looking for at Pati’s Mexican Table: a series of recipes for frijolas de olla (cooked beans), pureed beans, frijoles colados (refried pureed beans), and finally enfrijoladas. Pati’s enfrijoladas were simpler and more authentic, with no cheese filling, no baking, and no toppings beyond queso fresco, avocado, and crema—lovely, I’m sure, but I liked the idea of filling and baking them and making some sort of salsa-like toppings, so I combined Pati’s many recipes for the bean mixture with the Tasty Kitchen method, then improvised my own topping out of various fresh southwesternish vegetables.

I feel a bit sheepish posting this here because I don’t think I’ve perfected it yet, but if I don’t get it written down I’m afraid I’ll forget it entirely. And my enfrijoladas were very good, even though I think my bean mixture was still a bit too thick overall and I probably used a bit too much of it (after the first few tortillas tore I thinned it further, but the end result was still on the clumpy, casserole-ish side, with the enfrijoladas completely breaking down when I tried to get them out of the pan). Luckily, they were so delicious that I didn’t really care what they looked like, and the colorful topping helped to mask my aesthetic sins. This may seem like a lot of work to go through for what is basically an inside-out bean and cheese enchilada, but none of the steps were especially hard and I think the end result was worth it.

You could basically put whatever you want inside these; plain cheese was sufficient for me, but to ease A’s suspicions about such a bean-heavy dish, I threw in a little cooked chicken from my stash in the freezer, and it did add some texture. You could also put whatever you want on top, but I must say I was very pleased with my version.

P.S. I really recommend refrying your beans in bacon fat. It adds a wonderful smoky flavor that makes all the difference, in my opinion.

1 pound dry pinto or black beans
1 large yellow or white onion, peeled and halved
1 tablespoon kosher or sea salt, plus more to taste
2–3 tablespoons canola oil or bacon fat
12–16 corn tortillas (you may want to have extras on hand in case some of them tear)
2 to 3 cups grated pepper Jack cheese
1 to 2 cups cooked cubed or shredded chicken (optional)
1 pint cherry tomatoes, halved
Cooked kernels from 1 ear of corn
2–4 green onions, sliced
Chopped cilantro to taste
Several radishes, sliced (optional)
1 ripe avocado, peeled and diced
Juice of 1 large lime

1. Rinse the beans in cold water and drain. Place them in a large, heavy pot and cover with about 10 cups of water, or enough water to come up to at least 3 inches above the top of the beans. Add half of the onion (just the entire piece, no need to cut it up). Bring to a boil over high heat. Reduce heat to medium-low and let simmer, partially covered, for about 1½ hours, or cover pot entirely and transfer to a preheated 250-degree oven for 75 to 90 minutes. When the beans are tender, add 1 tablespoon salt. Let them continue simmering for about another 15 minutes, or until the beans are so soft that they come apart if you hold one between your fingers. If the beans are not yet soft and the pot is drying out, add more water. When the beans are cooked, remove the onion with a slotted spoon and discard.

2. Drain the beans, reserving the liquid. Place the beans and 2 cups of the cooking liquid in a blender or food processor and puree until smooth.

3. Heat a large sauté pan over medium heat. Add the oil or bacon fat and heat until hot but not smoking, about 1 to 2 minutes. Dice the other half of the onion, add it to the pan, and sauté for 3 to 4 minutes, until it is softened and translucent, and has started to slightly brown along the edges. Add the pureed beans a cupful at a time over the sautéed onion, and let the mixture season for 3 to 4 minutes.

4. Reduce heat to low. Gradually add more bean cooking liquid (you can also use chicken or vegetable broth) to thin the bean mixture to a soupy/saucelike consistency. For me, this was at least 2 cups, and I probably could have used more, but your mileage may vary—just experiment until you find the right consistency. If the sauce is too thick, the tortillas will tear when you dunk them in and try to lift them out again; if that happens, just add more liquid and try again with a new tortilla. (The torn bean-soaked tortillas make a good snack for the cook.) Season sauce with salt to taste. I also stirred in a little bit of salsa for additional flavor; I might do more of that next time.

5. Preheat the oven to 350 degrees.

6. Heat your tortillas in the microwave until soft and pliable (or heat them briefly on a hot skillet on the stove). One by one, dip them into the bean mixture so that the tortilla is coated on both sides. Lay the tortilla in a 13-by-9-inch glass baking dish. Sprinkle a couple of tablespoons of grated cheese on one half of the tortilla and top with a little chicken, if desired. Fold the tortilla in half to cover the filling. Repeat with remaining tortillas until dish is full. Pour some of the remaining bean sauce over the tortillas in the baking dish (just do this to your taste; you don’t want to drown them, so you might not use it all—I probably could have used a little less). Sprinkle with remaining grated cheese, to taste.

7. Bake for about 10 or 15 minutes, or until the cheese has melted.

8. Meanwhile, mix together tomatoes, corn, green onions, cilantro, radishes (if desired), and avocado in a medium bowl. Add the lime juice and salt to taste, and toss well.

9. Serve the enfrijoladas topped with the tomato mixture.

Serves: 4–8
Time: 3 hours
Leftover potential: Good, but store topping separately.

Tuesday, May 22, 2012

AGUADITO


If you’re one of those poor afflicted people who think cilantro tastes like soap (I’m so glad I didn’t inherit that gene from my dad), I’m telling you right now that you can go ahead and skip this recipe. This version of the traditional Peruvian chicken soup has a pungent puree of cilantro, Serrano pepper, and garlic stirred right into the broth, lending it a bright green color and wonderfully fresh flavor, especially when finished with plenty of lime juice. It’s basically cilantro soup, and I love it.

I only made a few changes to the original recipe from A Cozy Kitchen. I don’t really like rice, so I swapped in quinoa instead, figuring it has a similar cooking time, and hey, it’s Peruvian too. I like the subtle texture quinoa adds to soups, and this one was no exception. I also pulled the chicken off the bone before serving, because it seemed incredibly awkward to have to deal with a whole piece of chicken while I was trying to slurp down my soup. Next time I might just skip using bone-in pieces entirely; it does certainly maximize the chicken taste, but it also adds a lot of grease—my finished soup was a bit oilier than I like, although granted, I didn’t help things by using entirely dark meat—and I didn’t enjoy the splattery step of browning the chicken in hot oil. My homemade chicken stock is already really flavorful (and no matter how much I try to skim it after it’s cooled, it still probably has more fat than the storebought stuff), and when I’ve used whole pieces of chicken to make it (rather than just a leftover carcass), I pull the meat off the bones afterwards and stash it in my freezer, so I could easily dump that reserved shredded chicken into the soup instead of dealing with whole pieces (another option would be to use meat from a roasted or rotisserie chicken). I think that would simplify the process and keep the fat in check without sacrificing much depth of flavor.

Regardless of how you make it, this soup would be a great way to brighten up the cold winter months (especially when you’re sick—it has the same comforting, restorative quality that homemade chicken noodle soup does, but with a welcome extra zestiness), but with its cilantro, corn, and lime, it also bridges the gap from spring to summer admirably.

¾ cup cilantro leaves, plus extra for garnish
1 Serrano pepper, halved and de-seeded
4 garlic cloves, divided
4¼ cups chicken broth, divided
2 tablespoons olive oil
1 to 1½ pounds skin-on, bone-in chicken (I used drumsticks)
1 small yellow onion, diced
1 small red bell pepper, diced
½ teaspoon ground cumin
¼ cup quinoa or white rice
1 ear of corn
Salt to taste
1 large lime

1. Add cilantro leaves, serrano pepper, 2 garlic cloves (peeled but whole), and ¼ cup chicken broth to a blender (or an immersion blender cup). Blend until mixture is thoroughly combined. Set aside.

2. In a large, heavy pot, heat olive oil over medium-high heat. When it’s hot, carefully add chicken, skin side down. Cook for 4 to 5 minutes, until skin is crisp and slightly browned. Flip over and cook for an additional 5 minutes. Remove chicken from pot and set aside.

3. To the pot with the chicken drippings, add onion and cook until translucent, about 5 minutes. Add bell peppers and cumin and cook for 1 to 2 more minutes. Mince the other two garlic cloves, place them atop the mixture in the pot, and cook until fragrant.

4. Add the quinoa/rice and the cilantro mixture to the pot and stir, being sure to completely coat the quinoa/rice. Gently add the chicken back to the pot and cover with the remaining 4 cups of chicken broth. (The broth should just cover the chicken; if it doesn’t, add a little more broth, or a bit of water). Cook for 20 to 30 minutes, until quinoa/rice is fully cooked.

5. If desired, remove the chicken from the soup, tear the meat from the bones, shred the meat, and return it to the soup, discarding the bones and skin. (I find it much easier to eat this way.)

6. Cut kernels from corn cob and mix them into the soup a few minutes before you take it off the stove. When you’re ready to serve, add salt to taste. (This will depend on how salty your chicken broth was; mine was homemade and salt-free, so I started with 1 teaspoon of kosher salt.)

7. Squeeze the lime into the soup and garnish with cilantro to taste.

Serves: 4–5
Time: 1 hour
Leftover potential: Good.

Monday, December 12, 2011

JALAPENO-CHEDDAR SKILLET CORNBREAD


It’s odd, but I don’t think I’d ever made cornbread before this. I’ve eaten some that I’ve liked over the years (mostly at barbecue/soul food restaurants), but generally I can take or leave it, and I mostly leave it. At its worst, it can be dry, crumbly, and bland. Everyone talks about how much better it is when cooked in a cast-iron skillet, though, so ever since I got a skillet of my own I’ve been thinking I might give it a try. A couple of months ago, I stumbled across the perfect-looking recipe at A Cozy Kitchen. Pouring the hot oil from the skillet into the batter seemed a little weird (and perilous—wear sturdy oven mitts!), but since the recipe was adapted from no less an authority than the Homesick Texan herself, I couldn’t argue. Aside from that little adventure, the bread was easy to make and turned out perfectly: crisp-crusted without and tender within, with the buttermilk and cheese warding off dryness and the jalapeno providing a nice kick. Maybe it was the skillet or maybe it was the recipe, but the bread had a bit more structural integrity than some I’ve seen; it held its shape well when sliced and wasn’t overly crumbly. I served it with chili, but it would have been just as satisfying on its own, with a little butter.

So consider me a cornbread convert! This will definitely be replacing tortilla chips as my chili accompaniment of choice, and I’m contemplating pairing it it with black bean soup soon. I didn’t have any bacon grease on hand, but I’d love to try that next time instead of canola oil; a little bit of porky smokiness would really put this over the top.


2 tablespoons vegetable oil or bacon drippings
2 cups cornmeal (yellow or white)
½ cup sifted all-purpose flour
1 teaspoon baking powder
1½ teaspoons salt
1 large egg, lightly beaten
2 cups buttermilk, shaken
2 jalapeños, diced
1¼ cup shredded cheddar cheese, divided

1. Preheat oven to 450 degrees. Put the oil or drippings in a 12-inch cast-iron skillet and place it in the oven for a few minutes until it’s sizzling.

2. Meanwhile, mix together dry ingredients in a large bowl and set aside. Whisk egg and buttermilk in a medium bowl. Mix the wet ingredients into the dry ingredients, then fold in jalapeños and 1 cup of shredded cheddar.

3. Take the cast-iron skillet out of the oven, pour hot oil/drippings into batter, and mix. Pour batter into skillet and top with remaining ¼ cup cheddar. Bake for 20 minutes, until brown on top and pulling away from the sides of the skillet.

4. Turn bread out of the skillet, slice into wedges or squares, and serve.

Serves: About 8
Time: 30 minutes
Leftover potential: Good; can be frozen.

Monday, September 12, 2011

SWEET CORN HASH


Shortly after making chilled avocado soup with a corn-bacon-jalapeno-onion-cilantro topping so delicious I could have just as happily eaten it sans soup, I stumbled across a recipe that’s pretty much exactly that. This iteration—from The Way the Cookie Crumbles, based on a version by Joy the Baker, who is the source of the avocado soup recipe, so we have truly come full circle here—is rounded out into a hearty breakfast (or, in my case, a cozy Saturday night supper) with the addition of potatoes and eggs. I punched up the color and vitamins by serving the whole thing over a bed of greens (spinach because I had an orphaned half-bag in the fridge, although I would have used arugula otherwise), which added a nice freshness and texture—the greens achieve a pleasant state of semi-wiltiness, with the egg yolk coating them like a dressing. The original recipe didn’t call for jalapeno, but Bridget mentioned adding roasted green chile, and since jalapeno had been so tasty in the soup topping, I figured it would be good here, too (spoiler: it was). And, in a further effort to replicate the magic of the soup topping, I subbed cilantro for parsley again and was well pleased.

My one misstep was to distrust the idea of cooking potatoes in the microwave (I know it’s perfectly possible, but I’ve never done it and our microwave is rather temperamental, so I wimped out). The original Joy the Baker recipe calls for them to be roasted, but my oven’s still defunct (GRRR), so I boiled them instead. This of course (a) took more time than microwaving and (b) made them quite soft and damp, which in turn made them take forever to get browned and crispy in the skillet, and they broke down quite a bit in the process. I don’t know why I didn’t just start frying the potatoes from a raw state, which is what hash recipes usually direct you to do, except that sometimes it’s hard to get the potatoes tender that way before they’re too well browned on the outside, and if there’s one thing I hate, it’s a crunchy potato. (This is, in my view, the downfall of 70 percent of restaurant breakfast potato preparations.) In retrospect, I should have just tried the microwave method. Next time! For there will certainly be a next time; this is my favorite version of hash I’ve ever made. I loved the way the sweetness of the corn balanced out the smoky fried flavors, with a hint of spice from the pepper and brightness from the cilantro. Also, I’m late to the party with this—it took me a long time to learn to tolerate runny yolks—but I’m becoming obsessed with topping things with eggs. Note to self: Eat more eggs; you like them. Also: learn to poach.

4 slices bacon, chopped
4 medium red potatoes, cubed
1 onion, chopped
1 medium jalapeno, seeded and chopped
4 ears corn, kernels removed
¼ cup cilantro, minced
Salt and freshly ground black pepper to taste
4 eggs
4 large handfuls spinach or arugula (optional)

1. In a large nonstick skillet (preferably cast iron) over medium heat, cook the bacon until almost crisp.

2. While the bacon cooks, put the potatoes in a medium microwave-safe bowl; spoon a couple teaspoons of rendered bacon fat from the skillet into the bowl; stir. Cover the potatoes loosely and microwave on high for 3 minutes, stirring twice.

3. Add the onions, jalapeno, and potatoes to the skillet with the bacon; cook, stirring occasionally, until browned, about 8 minutes. Stir in the corn and most of the cilantro.

4. Lower the heat to medium-low. Using the back of a spoon, create 4 wells in the hash. Break one egg into each well; season with salt and pepper. Cover the pan and cook, without stirring, until the white is set, about 8 minutes. Garnish with the remaining cilantro; serve immediately, over spinach or arugula if desired.

Serves: 4
Time: 1 hour
Leftover potential: OK, except the eggs will not keep or reheat well. If you’re planning to save some as leftovers, fry the eggs separately for the servings you’re going to eat right away (as shown in the photo above), then fry additional eggs as needed when it’s time to eat the leftovers. Alternately, you can break the eggs into the cooking pan but break the yolks of the ones you want to save for leftovers, so that they cook thoroughly and harden (they will be slightly tough in the leftovers, but edible—more of a scrambled consistency).

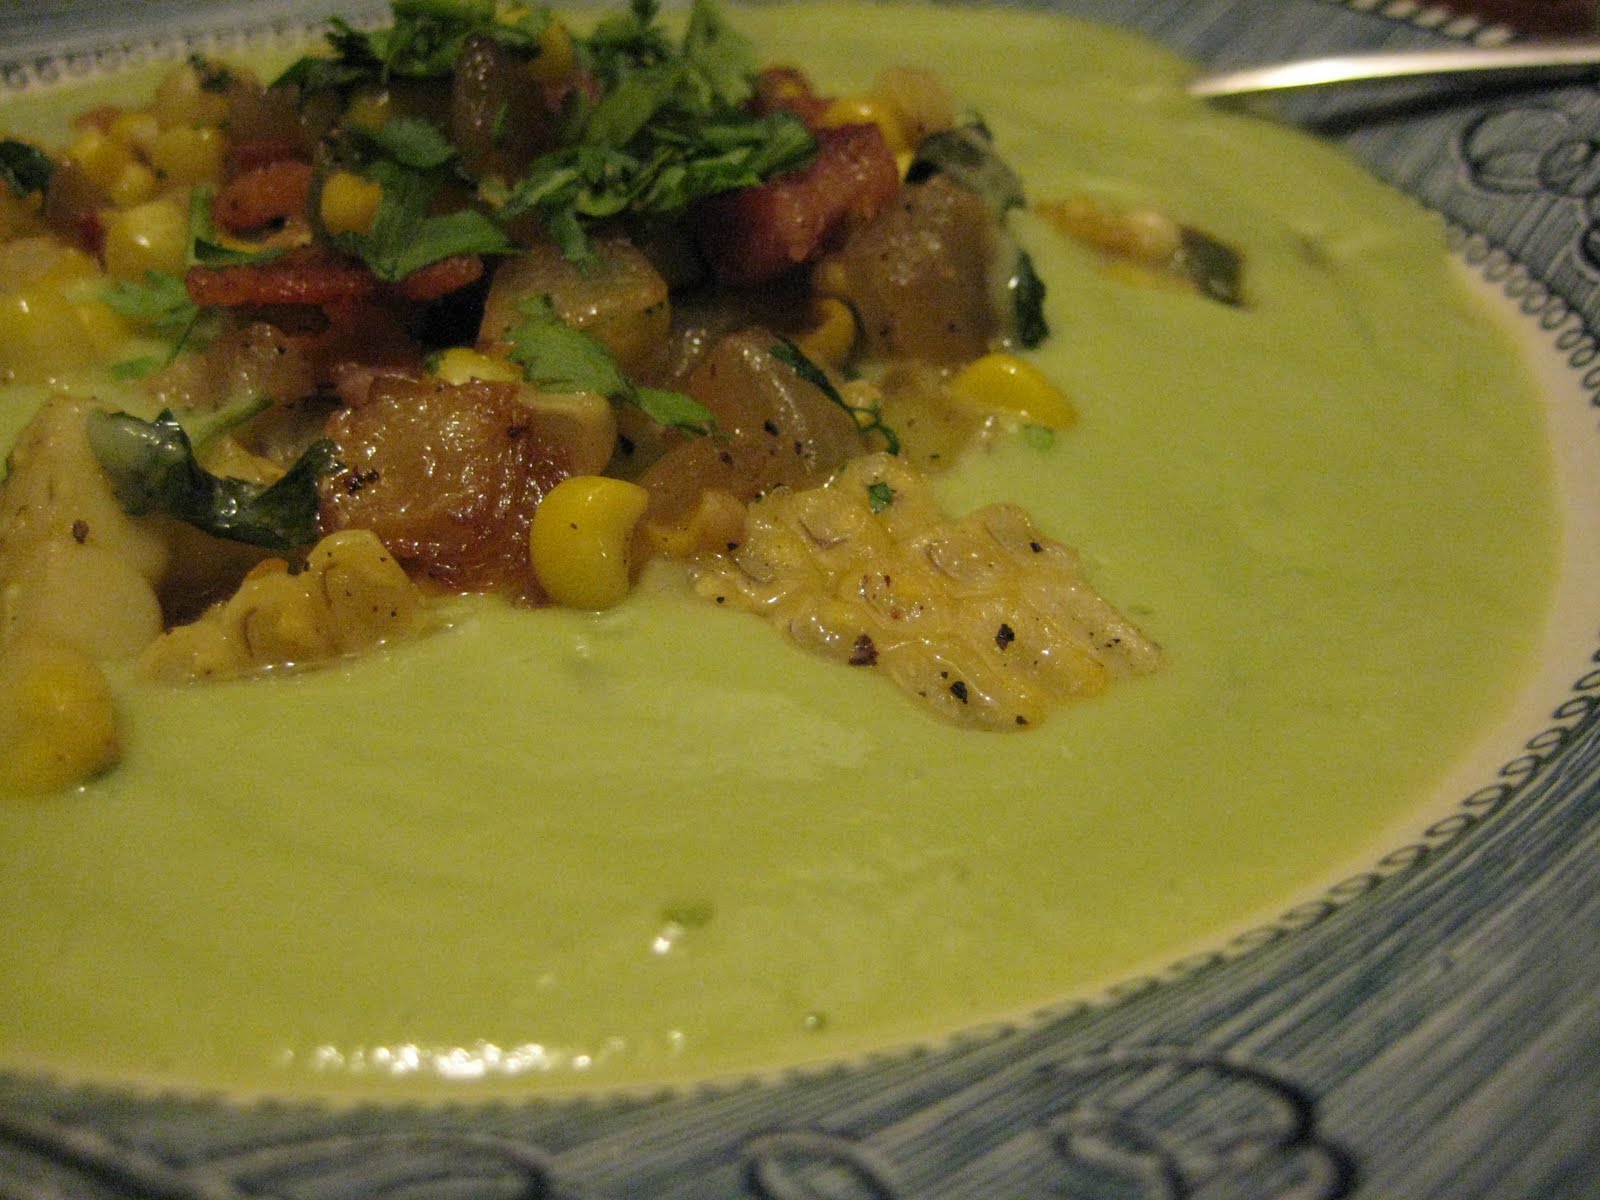
CHILLED AVOCADO SOUP WITH CORN AND BACON


In general, ice cream and popsicles aside, I don’t like cold food. Even in the hottest weather, I prefer my salads at room temperature. And the less said about cold pizza, the better. (Ugh, I can’t get over the congealed melted cheese.) Obviously, then, I have never really warmed (ha) to chilled soups. Most of the gazpachos I’ve encountered have just made me feel like I’m eating a big bowl of salsa. Given that logic, when I spotted this cold avocado soup at Joy the Baker I should have assumed it would taste like eating a big bowl of pureed guacamole, but instead I thought, “Ooh, pretty!” and “Ah, corn and bacon!” Maybe it’s just that I really like guacamole, or maybe the warm topping made it seem less like sauce disguised as a meal to me, but I bookmarked it instantly and made it soon afterward, in the throes of a 100-plus-degree heat wave.

This soup is good, with a wonderful velvety texture. The dominant flavors are, of course, avocado and lime (which I was even more generous with), but the savory broth (the recipe called for vegetable, but I used homemade chicken stock because I like its flavor so much) and the dollop of dairy (the recipe suggested sour cream, crème fraiche, or milk, but I knew plain yogurt—specifically, Trader Joe’s nonfat European-style yogurt, which is thin but not watery and my go-to for stirring into soups and sauces—would be the perfect choice for me) save it from guacamole-dom. I took a taste after blending it up and liked it pretty well but wasn’t sure I could eat a whole bowl of it. But the topping—oh, the topping!

The original recipe called for “cooked bacon,” as though you would just happen to have some sitting around, and then had you sauté the vegetables in olive oil. LOGIC FAIL! The best part of bacon is the grease, specifically the heavenly, transformative things it does to whatever you happen to cook in it. So I fried up some bacon, removed it from the skillet, and then cooked the onion, corn, and jalapeno in it, which was absolutely the correct choice. My second gripe with the original recipe was that it called for parsley when, to me, cilantro is made for moments like this—big handfuls of it, too. I mean, with avocado, jalapeno, and corn, we’re clearly already rocking this soup southwestern-style, am I right? When the topping mixture was all softened and browned and generously seasoned, I took a taste and had to stop myself from eating the entire skilletful with a spoon while standing over the stove. Stirred into the soup, it elevated it from “Hmm” to “Hell yes!”, its smoky heat providing much-needed textural, temperature, and flavor contrasts to the cold green creaminess. Instead of feeling like I was eating a beverage or condiment in a bowl, I thoroughly enjoyed this as a refreshing, satisfying summer meal.

Sauteeing the topping in bacon fat and swapping in cilantro really made this dish extra awesome, but then I made a major misstep in packaging up the leftovers: Not realizing how much I was going to enjoy the interplay between the warm topping and the cold soup, I premixed all my topping and soup portions before putting them in the fridge (perhaps I was a bit distracted by the complicated serving instructions in the original recipe, which asked me to put the topping in the bowls and then add the soup around it; for me, that just ended up burying the topping). When I went to eat the leftovers, I realized this meant I either had to heat the whole thing up (Cooked avocado soup? No thanks) or eat it all cold. It turned out I didn’t enjoy the topping nearly as well cold—especially the soggy-chewy-greasy texture of the bacon—and it was clear I should have stored the two components separately, so I could microwave the topping and then add it to the chilled soup. If I’d done that, this recipe would have been downright perfect. Oh, well; live and learn. I’m almost hoping for another heat wave this month (not unlikely, given Southern California’s traditionally hot Septembers) so I have an excuse to eat this one more time before autumn sets in.

2 ripe avocados
1 cup vegetable or chicken broth
1–2 tablespoons lime juice
2 tablespoons plain yogurt (or sour cream, creme fraiche, or milk)
¾ teaspoon salt, plus extra to taste
1¼ to 1½ cups water
1 tablespoon olive oil
1 small yellow onion, diced
2 ears fresh corn, sliced from the cob
1 small jalapeno pepper, de-seeded and diced
4 slices diced bacon
1 handful cilantro, chopped
Freshly cracked pepper to taste

1. To make the soup, place avocado flesh in a blender along with broth, lime juice, yogurt (or sour cream, crème fraiche, or milk), and ¾ teaspoon salt. Blend until the avocados are creamy. Remove the center from your blender lid, and while blending, slowly add 1¼ cups water. Soup will be done when smooth, with your desired consistency—feel free to add another ½ cup water if you prefer a thinner soup. Taste and add salt and pepper as necessary. Place in a covered container in the fridge (I just left it in the blender pitcher) while you make the topping.

2. To make the topping, cook bacon in a skillet over medium heat until crisp. Remove bacon with a slotted spoon and set on a paper-towel-lined plate to drain. Add onion to the bacon fat in the skillet and cook until translucent and browned, about 5 minutes. Add corn and jalapeno and cook for 3 minutes more. Add bacon and cilantro. Cook until everything is warmed and just browned. Season with salt and pepper to taste.

3. Divide the cold soup into four bowls and top each with one-quarter of the warm topping mixture (unless you’re planning on keeping some of the soup as leftovers—see my note below). Garnish with additional cilantro, if desired.

Serves: 4
Time: 40 minutes
Leftover potential: Soup will last for about three days in an airtight container in the fridge. I recommend storing the topping mixture in a separate container, so you can reheat it before adding it to the cold soup.

Monday, July 25, 2011

SUMMER CORN CAKES WITH TOMATO AND AVOCADO SALSA


Few things say “summer” to me more clearly than the combination of corn and tomatoes, unless perhaps it’s the incredible medley of avocado, cilantro, and lime, so even though I already have a very good corn cake recipe in my archives, I bookmarked this one (originally by Sara Foster) at Ezra Pound Cake the instant I saw the photo. Sure, I could just throw some salsa on top of my usual corn cakes and call it a day, but these corn cakes looked totally different than mine—thick like crab cakes, with lots more leavening and the added flavors of cornmeal, buttermilk, basil, and red onion. Could there be room in my life for two different corn cake recipes? But of course!

Despite our large appetite for all things fritter-like (we routinely eat them as entrees, especially in the summer), these corn cakes looked so hearty in the picture that I halved the recipe, which claimed to serve six to eight people. This resulted in the rather awkward requirement of 1½ ears of corn, but I used two smallish ears and it was just fine (I imagine one large ear would also be OK). I decided to stick with the full recipe for the salsa, mostly because I didn’t want half an avocado floating around in my fridge, but also because I figured extra salsa never goes amiss. This was a wise decision; the corn cakes are sturdy and stand up well to toppings, so feel free to pile on the salsa to your heart’s content. In fact, because the corn cakes have the drier texture of cornbread rather than the pancake-like texture of my usual recipe, the salsa provides an important contrast. The salsa has a fair amount of liquid in it, most of which I’d left behind in a bowl, spooning on the chunkier parts with a slotted spoon because I was afraid of making the corn cakes soggy, but their crispy surfaces turned out to be largely impermeable (at least in the short time it took to go from plate to mouth), so I needn’t have been so shy—the juiciness would have been quite welcome.

Following the recipe’s instructions to use heaping tablespoons of batter, I got slightly smaller cakes than I’d expected; they puffed up tall but didn’t spread much, turning out like cute sliders where Ezra Pound Cake’s photo had made them look like burgers. At this appetizer-like size, the recipe yielded eight cakes, which made for a perfect four per serving: generous enough to be satisfying, but still a light summery meal (we had something else on the side that I can’t quite recall—grilled chicken thighs, maybe?). I would definitely make these again.

For the salsa:
1 large tomato, cored and chopped
1 scallion, trimmed and minced
1 small jalapeno pepper, cored, seeded, and diced
1 tablespoon chopped fresh basil
1 tablespoon chopped fresh cilantro
1 garlic clove, minced
Juice of ½ lime
1½ teaspoons extra-virgin olive oil
1½ teaspoons white wine vinegar
Sea salt and freshly ground pepper to taste
1 ripe avocado, peeled, pitted, and diced

For the corn cakes:
1 large ear or 2 small ears corn, shucked
½ cup all-purpose flour
¼ cup cornmeal
2 tablespoons diced red onion
2 tablespoons thinly sliced fresh basil
½ teaspoon baking powder
¼ teaspoon baking soda
Sea salt and freshly ground black pepper to taste
1 large egg, lightly beaten
1 tablespoon well-shaken buttermilk
1 tablespoon unsalted butter, melted
2 tablespoons olive oil

1. Place all of the salsa ingredients except the avocado in a bowl, and stir to mix. Refrigerate in an airtight container until ready to serve, for up to 2 days. Just before serving, add the avocado and mix gently.

2. Cut the corn from the cobs into a large bowl, and scrape the stripped cobs with the back of the knife (or a spoon) to release the juices into the bowl.

3. Place 1 cup of the corn kernels into a food processor and pulse several times, until the corn is slightly pureed but still chunky. Scrape into the bowl with the remaining corn kernels.

4. Add flour, cornmeal, onion, basil, baking powder, baking soda, salt, and pepper to the corn. Stir to mix.

5. Add the egg, buttermilk, and butter, and stir just to combine. (Do not overmix.)

6. Place a large skillet over medium heat. Add 2 tablespoons olive oil, and heat until sizzling hot.

7. One heaping tablespoon at a time, scoop the batter into the skillet. Cooking in batches of 4 to avoid overcrowding, fry the cakes for about 2 minutes per side, until golden brown. (I got 8 small corn cakes.)

8. Remove corn cakes from pan, set them briefly on a paper towel to blot away any extra oil, and set on a cooling rack (or on a parchment-lined baking sheet in a warm oven if you want to keep them hot) until ready to eat. Serve warm, topped with a heap of salsa.

Serves: 2 as a main dish, 4 as a side
Time: 45 minutes
Leftover potential: For the corn cakes, unknown. Extra salsa will keep in the fridge for a few days and can be eaten with tortilla chips, used on tacos, or mixed with black beans for an easy salad.

Friday, July 01, 2011

CORN, ZUCCHINI, AND FETA PIZZA WITH CILANTRO-LIME PESTO


I remember back when I was studying abroad in England, I thought it was hilarious that corn is a common pizza-topping option there (like, you can get it at Pizza Hut). Those Old Worlders and their lack of understanding of New-World foods! I was vegetarian at the time, so I was grateful for any extra vegetable choices that weren’t green peppers (ew) or olives (hate), but I gotta say, corn doesn’t do much in that context, its delicate flavor and crunch overwhelmed by tomato sauce and cheese (and of course it’s canned corn anyway). Now I’ll put just about anything on a pizza that isn't nailed down, and it feels only fitting that I’ve come full circle and made a pizza where corn is the main feature. Of course, there’s a world of difference between that poor, sad British corn and this fresh, snappy treatment, where it’s paired with its good buddies cilantro and lime (anyone who's ever eaten elote knows what a great idea that is) and its summer compatriot zucchini, and topped with tangy, creamy, salty feta.

Do I even need to tell you that this was fantastic?

OK, fine. THIS WAS FANTASTIC.

I’m extra pleased with it because I made it up myself…well, I combined two similar recipes into one, but that’s about as creative as I get with kitchen improvisation. I don’t remember what Internet rabbit hole I’d fallen down when I stumbled across this recipe at food52, but seeing the words “corn,” “feta,” “cilantro,” “lime,” and “pizza” all together pretty much blew my mind and I bookmarked it immediately. I was so obsessed that I couldn’t stop thinking about it and exactly how awesome it was going to taste. The author mentioned having based the recipe on a pizza she’d tasted at the Cheeseboard Collective in Berkeley, so I did some Googling just to see if anyone else had given this a try (because when I can’t eat something right away, the next best thing is reading other people’s descriptions of it). Lo and behold, I found lots of mentions of a corn, cilantro, and lime pizza from the Cheeseboard Collective, the recipe for which had even been published in the Cheeseboard Collective cookbook—but that pizza looked different, with zucchini, onion, and mozzarella added (even better as far as I’m concerned), and no cilantro-lime pesto, just a paltry sprinkle of cilantro and squeeze of lime over the finished pizza (boo).

Obviously, I was going to have to McGyver my own ideal version. I took the cilantro-lime pesto from the first recipe and added it to the second recipe, omitting the garlic oil from that one and simplifying the directions somewhat. The quantities are approximate—with pizza, you just add toppings until it looks right—and I made a few additional changes because I was cooking the pizzas in cast-iron skillets on the stovetop using the newly discovered method I’ve perfected over the past two months of oven-brokenness…which, remind me to write that down sometime, because it’s pretty nifty, so nifty that I might keep using it occasionally even after my oven is fixed. Anyway, since the toppings don’t get cooked as much on stovetop pizza as they do on oven-baked, I gave the onion and zucchini a quick sauté in some olive oil before putting them on the pizza, and I gotta say, I liked the results so much (I’m not crazy about crunchy onions unless in salads or on certain sandwiches) that I might do it every time, even though it means dirtying an extra pan. My corn was also pre-cooked, because it’s way easier to cut the kernels off the cob that way—they don’t fly all over the kitchen as much as they do when it’s raw, and anyway I was boiling some other ears of corn earlier in the week, so why not throw that one in the pot too? You could go either way, depending on what’s more convenient for you.

2 medium cloves garlic
1 bunch cilantro (about 1 tightly packed cup), plus a bit extra to taste if desired
Juice of ½ lime, plus a lime wedge to squeeze over the finished pizza if desired
¼ teaspoon kosher salt, plus extra to taste
2 tablespoons olive oil, plus a little extra if you want to sauté your toppings
1 ear of corn (raw or briefly boiled), kernels removed
1 pinch of black pepper
¼ teaspoon red pepper flakes
6–8 ounces mozzarella cheese, shredded
½ yellow onion, thinly sliced
1 medium-large zucchini, thinly sliced
4 ounces feta cheese, crumbled
1 pound pizza dough

1. Preheat oven to 450 degrees.

2. Make the pesto by adding the garlic, 1 cup cilantro, juice of ½ lime, ¼ teaspoon salt, and olive oil to a food processor or blender and processing until smooth.

3. In a small bowl, toss the corn kernels with the black pepper, red pepper flakes, and a pinch of salt.

4. Optional: In a skillet, sauté the onion and zucchini in a little olive oil over medium heat until just tender.

5. Roll out the pizza dough on a baking sheet dusted with cornmeal. Spread the pesto over the pizza. Add half of the mozzarella, all of the onion and zucchini, the remaining mozzarella, and then the corn and feta.

6. Bake pizza for 12–15 minutes, or until crust is golden brown and cheese is melted. Remove from oven, and garnish with extra cilantro and a squeeze of lime if desired.

Serves: 4
Time: 45 minutes
Leftover potential: Good; reheat in the oven or in a skillet on the stovetop for optimal crispiness.

Friday, March 18, 2011

QUINOA AND BLACK BEAN SALAD


Grains like quinoa are such a great way to down a big bowl of vegetably goodness without feeling like you’re making a meal entirely out of leaves. (Yes, I still have a slight aversion to main-dish green salads. I REQUIRE CARBS, PEOPLE.) This recipe, which I spied at Tasty Kitchen, is essentially a quinoa-based version of the Southwestern salad I first enjoyed (despite its leafiness) late last summer: cilantro-lime dressing, black beans, corn, peppers, green onions…yum. To make it even more like that salad, I had to add avocado, because I am a spoiled Californian who can get them at the farmers’ market. I also added some feta, because I had some sitting in the fridge that needed to be used, and also because feta has been a delicious addition to every other quinoa salad I’ve made so far (I imagine cotija would also work well, perhaps better). I also think cherry tomatoes might not be a bad extra, either. Oh, and although the recipe called for fresh corn, I used frozen, because even spoiled Californians can’t get good corn in March, which is as it should be. The frozen tasted just fine.

The original recipe calls for red quinoa, which makes the dish extra-pretty, but Trader Joe’s was inexplicably out of it this week, so the beige quinoa had to do (as far as I can discern, they taste exactly the same anyway). I ditched the recipe’s annoyingly convoluted directions for preparing the quinoa, which involved cheesecloth and boiling plus steaming, and just used the back-of-box directions as I usually do. I’m sure the more complicated method results in some barely perceptible improvement in texture, but I tried that once for this corn-mint quinoa recipe and didn’t find it worth the hassle. In addition, I reduced the quinoa amount from 1½ cups to 1 cup, just because every other recipe I’ve made uses 1 cup and it always seems to result in plenty of quinoa. In retrospect, this was the right call; there seemed to be just the correct balance between the quinoa and the other ingredients as it was, and any more quinoa would risk being too much. We still got five servings of salad out of it; the first night, we had small-medium portions with chicken quesadillas on the side (mostly because I feared that A wouldn’t like the salad, being a bean hater; rather surprisingly, however, he praised it), but the three more generous leftover servings made satisfying vegetarian main dishes in their own right. Zippy, colorful, and packed with vitamins and protein, this is definitely a keeper.

Dressing:
5 tablespoons fresh lime juice
1 teaspoon salt
1 clove garlic, minced
¼ cup finely chopped fresh cilantro
1 teaspoon ground cumin
⅓ cup olive oil
½ teaspoon freshly ground black pepper, to taste

Salad:
1 cup red quinoa (normal quinoa works just fine, too)
½ teaspoon salt, plus extra to taste
1 15-ounce can black beans, rinsed and drained
1 cup corn kernels, fresh (cut from about 2 large cooked ears) or frozen (defrosted)
1 cup finely chopped bell pepper
1 whole jalapeño pepper, seeded and minced
¼ cup finely chopped fresh cilantro
¼ cup finely chopped green onion
1 ripe avocado, diced (optional)
4 ounces feta or cotija cheese, diced or crumbled (optional)

1. Rinse the quinoa well under cold water, then add to a medium saucepan with 2 cups of water and ½ teaspoon salt. Bring to a boil, then turn down the heat to medium-low, cover, and cook until the water is absorbed and quinoa is fluffy and chewy, about 15–20 minutes.

2. Empty cooked quinoa into a large bowl and allow it to cool almost to room temperature, stirring occasionally. (This will help the vinaigrette coat everything without the quinoa absorbing too much of it.)

3. While quinoa is cooling, make the dressing: In a small bowl, whisk together lime juice, 1 teaspoon salt, minced garlic, ¼ cup chopped cilantro, and cumin and add oil in a stream, whisking. Add black pepper, stir, and set aside.

4. When the quinoa has cooled, add the beans, corn, peppers, cilantro, green onions, and avocado and/or cheese if desired, and toss gently with the dressing.

Serves: 4–6
Time: 45 minutes
Leftover potential: Good. (If using avocado, prevent it from browning by tossing it in a little lime juice before adding it to the salad.)

Friday, February 04, 2011

CHEESY CHILI MAC WITH VEGGIES


I’ve never had Hamburger Helper or any other chili mac in my life, but as soon as I stumbled upon this gussied-up homemade version (after following a random assortment of blog links regarding something else entirely) at The Well-Fed Newlyweds, I suddenly had to have it. How could I resist a cheesy, beefy, spicy skillet pasta? What actually attracted me—after the cheese—was that the recipe cleverly adds corn, green chiles, and cilantro for a fresher twist on the classic, and inspired by some remarks in the comments, I snuck in a few more healthy additions: red bell pepper and zucchini. I also swapped in a jalapeno for the canned chiles and dialed back the cheese a little bit. All of these were good changes, but then I had to go ahead and make one more inadvertent adaptation: I misread the recipe and used two 15-ounce cans of tomato sauce (to be fair, that’s the only size they come in at Trader Joe’s, so the existence of a smaller size wasn’t even on my radar), nearly double the amount called for. As you might expect, my finished product was plenty delicious, but decidedly saucy. Considering I’d bulked up the solid side of things by adding more vegetables, using a bit more liquid probably wouldn’t have been a bad idea, but I’m guessing 14 extra ounces was overkill. Granted, If I hadn’t known there was supposed to be less sauce, I don’t think my first remark upon tasting it would have been, “Why, this chili mac has too much sauce!” But knowing I’d made an error, I couldn’t shake the suspicion that I’d thrown the flavor balance and texture out of whack. In other words: We enjoyed this easy, friendly, and unpretentious meal, and I’ll be making it again—but with the correct amount of sauce. Only then shall I render my final verdict.

1 tablespoon canola oil
1 pound lean ground beef
1 medium onion, minced
1 small red bell pepper, finely chopped
1 small zucchini, finely chopped
2–3 teaspoons chili powder (depending on your desired level of spiciness; I think I used 2 teaspoon regular chili powder plus ½ teaspoon chipotle chili powder)
¾ teaspoon ground coriander
¾ teaspoon ground cumin
½ teaspoon salt
3 cloves garlic, minced
1 tablespoon light brown sugar, lightly packed
2 8-ounce cans tomato sauce
2 cups water
8 ounces (2 cups) elbow macaroni
1 cup fresh or frozen corn kernels (if frozen, no need to defrost)
1 4.5-ounce can chopped green chiles (or 1 large jalapeno, minced)
1½ cups shredded cheese (I used cheddar and pepper Jack), divided
2 tablespoons fresh cilantro, chopped

1. Heat the oil in a large (12-inch) skillet over medium heat. Add the ground beef, onion, red pepper, zucchini, chili powder, coriander, and cumin. (If you’re using a jalapeno instead of canned green chiles, add it now too.) Cook the beef until it is no longer pink, then drain off any accumulated grease, if necessary. (If the beef is really lean, you probably won’t need to drain it.)

2. Add the garlic and brown sugar. Stir constantly for 30 seconds. Stir in the tomato sauce, water, and macaroni. Cover the skillet and cook, stirring occasionally, until the macaroni is cooked through.

3. Remove the skillet from the heat and stir in 1 cup of the cheese and the corn and green chiles (unless you’re using a jalapeno, in which case you already added it in Step 1). Top with the remaining cup of cheese, and cover the skillet. Let the skillet sit for a minute or two until the cheese melts, then sprinkle the cilantro over the top.

Serves: 6
Time: 45 minutes
Leftover potential: Good.

Thursday, September 23, 2010

CORN WITH FETA, CILANTRO, AND LIME


Yeah, as I’ve mentioned, I’m totally obsessed with corn this summer, and even though I’ve been eating it in record quantities, I’m not sick of it yet. So I’m hastily trying out as many of my bookmarked corn recipes as possible before the end of the season leaves me bereft. This one from Sassy Radish made it to the top of my list this week because I already had feta (another of my recent food obsessions) and cream in the fridge, and I’m a sucker for cilantro and lime. Not surprisingly, it’s fantastic. Creamy but not too creamy, warm but still fresh and summery, it makes a nice, zippy alternative to my default fave, corn on the cob. I halved the original recipe (though I threw in a bit more cilantro, mint, and lime than the halved version called for) and am seriously considering making some more this weekend with the rest of my feta. Corn doesn't need any adornment besides salt and maybe some pepper or a pat of butter in my book, but these delicious flavors sure don’t hurt it.

6 ears corn
1 tablespoon olive oil
1 tablespoon butter
½ teaspoon salt
¼ cup cream
3 ounces crumbled feta
½ cup cilantro, finely chopped
1 teaspoon mint, finely chopped
Juice of ½ lime
Freshly ground black pepper to taste

1. Shuck the corn and cut off the kernels off the cobs. Over medium heat, melt the butter with the olive oil in a large skillet. Add the corn and stir to coat with butter and oil. Cook over medium to medium-high heat for about 5 minutes, until some of the kernels begin to brown, but overall the corn retains its firm, crisp texture. Add salt and cream and cook for another minute or two. Remove from heat.

2. Add feta, cilantro, mint, lime juice, and pepper to taste to the skillet and mix well. Serve warm.

Serves: 4–5
Time: 25 minutes
Leftover potential: Good

Tuesday, September 21, 2010

GOLDEN CORN SALAD WITH FRESH BASIL


This may seem similar to a Cooking Light potatoes-and-corn-and-other-vegetables-in-Dijon-vinaigrette salad I tried earlier this summer, but I liked this one much more. (I was trying to be bravely open-minded about the first version in my blog entry, but let’s face it, I won’t make it again.) The new recipe is more traditionally salady (only the potatoes are cooked), has less mustard, has basil instead of tarragon, and really features the corn (about which I am completely obsessive this summer), with the potatoes playing only a supporting role. I didn’t have white balsamic vinegar, so I used white wine vinegar instead, and I left out the goat cheese (I had intended to replace it with feta, but then at the last minute it seemed like the salad didn’t need cheese at all), but otherwise I followed the recipe and it was quite straightforward. Be forewarned, though: This makes a lot of salad. (I like how the magazine photo just shows a few arugula leaves scattered around, when in reality the recipe calls for 6 cups of the stuff; I actually ran out of room in my salad bowl.) I was serving it as a side dish with chicken, but when I read the recipe description more carefully, I realized it was intended to yield four main-dish servings, and apparently big ones. I got about six generous side servings. Luckily, the leftovers were tasty. If you still have access to fresh corn in September (looks like ours will last for a few more weeks here in Southern California), this is a great way to celebrate it.

8 ounces small yellow or red potatoes
3 cups fresh corn kernels (about 4 ears)
2 cups assorted cherry tomatoes, halved
1½ cups chopped red bell pepper
¼ cup minced shallots
3 tablespoons white balsamic vinegar (I used white wine vinegar)
1 tablespoon Dijon mustard
½ teaspoon kosher salt
¼ teaspoon black pepper
3 tablespoons extra-virgin olive oil
6 cups arugula, trimmed
½ cup torn fresh basil leaves
2 ounces goat cheese, sliced (I omitted this)

1. Place potatoes in a small saucepan and cover with water. Bring to a boil; cook 11 minutes or until tender. Drain and let cool, then cut potatoes in half lengthwise.

2. Combine potatoes, corn, tomatoes, and bell pepper in a large bowl.

3. Combine shallots and next 4 ingredients (through black pepper) in a small bowl, stirring with a whisk. Slowly pour oil into shallot mixture, whisking constantly. Drizzle over corn mixture and toss well. Add arugula; toss. Sprinkle with basil and top evenly with goat cheese.

Serves: 4 (as a main dish) to 6 (as a side dish)
Time: 30 minutes
Leftover potential: OK (the arugula gets a little wilty, but it’s still fine for a few days)

Friday, September 10, 2010

SUMMER SQUASH AND CORN CHOWDER


This is a perfect end-of-summer soup, sweet and light and loaded with lots of fresh garden veggies, yet with the savory, comforting quality of a creamy chowder. The weather turned autumnal suddenly (and probably only temporarily, considering September and October are usually our hottest months) here in L.A., and we ended up eating this on a perfect Soup Day, chilly and overcast, but it would have been just as welcome on a warm summer night with a nice tomato salad (or bruschetta, the original serving suggestion, which I skipped only because I am lazy and was undergoing dental work earlier in the day, hence why soup made it into the meal plan to begin with).

I have a couple of other good corn chowder recipes in my arsenal already, so when I spotted this one in the gem-packed August issue of Cooking Light, I questioned whether I really needed to try another. But what sets this one apart is the lack of potatoes—the base is just corn pureed with milk, which adds body without heaviness. Also, the inclusion of yellow summer squash, a vegetable often overlooked in favor of its cousin zucchini; you see a lot of mixed yellow-and-green-squash combos, but rarely a recipe for just yellow squash on its own. Also, cheddar cheese, my first and truest cheesy love and a natural compatriot of corn and bacon.

First of all, I do think Cooking Light is crazy for publishing a corn soup recipe IN AUGUST that calls for frozen corn. Sure, corn is one of the more decent-quality frozen vegetables and it’s fine to allow the option for using frozen corn if fresh is unavailable, but if you’re building an entire recipe around two seasonal vegetables, why would you completely ignore the possibility of fresh corn? I can only guess it’s because the Dinner Tonight section, in which this recipe ran, is geared toward quick recipes, and cutting the kernels off fresh corn would have put this over the 30-minute mark (although of course these promised timeframes exist only in the test kitchens anyway—I think I’m pretty dang efficient as a cook and it always takes me longer than the advertised 30 minutes anyway). Which is sad, because fresh corn is one of the great delights of this world and really makes this dish awesome (not that you shouldn’t try it if you don’t have fresh corn; I’m sure it’s perfectly tasty when made with frozen as well).

Secondly, some of the CL online commenters are even wackier than the magazine itself. While this recipe scored a deserved four out of five stars and has mainly glowing reviews, there were a few heated negative ones that gave me pause when I was weighing the decision to make the soup. Now I can confidently say that those complaints are due to user error, personal tastes, or just plain nuttiness. Among my faves: “I don’t really get this dish. It’s a bunch of vegetables sautéed, then served in warm milk” (apparently this reviewer missed the step of pureeing the corn and milk into a thick base entirely), “I did not get four full servings” (we ended up with four-plus, and I measure ingredients almost as obsessively as CL does), and “the squash had a very prominent flavor” (er, there’s a pound of it in there and it’s mentioned in the recipe title). Not to mention the person who rated it one star with the review “Good recipe! ..wow what a great taste of summer” and the person who rated it two stars with a review admitting they hadn’t made it yet and asking if anyone had tried adding crabmeat to it. (Oh, I could do you a whole separate rant on recipe reviewers who are always saying they threw in some chicken or shrimp “just to make it a full meal.” I’m a happy omnivore, but I don’t get the “it’s not a full meal without meat in there somewhere” contingent. We had big bowls of this soup with small bowls of peaches on the side. It was definitely a full meal.)

But anyway, this was an easy and surprisingly flavorful soup, and we both enjoyed it (that’s a big compliment coming from A, who is not much of a soup lover). I’ll admit I used a bit more bacon and cheese than the parsimonious CL, which I’m sure did not hurt the deliciousness factor, but it was the corn and squash that really shone through (with the celery, which I do not ordinarily like in soup, playing a surprisingly important supporting role in balancing out the sweetness with a bitter tang). I also really enjoyed that it only made four servings. Sometimes it’s nice to make a big pot of soup and enjoy it for weeks (or months, if you freeze some), but summer is about fleeting pleasures, and corn soup is one of those.

2–4 slices bacon, diced
¾ cup sliced green onions, divided
¼ cup chopped celery
1 pound yellow summer squash, chopped
1 pound fresh (from 3–4 large ears) or frozen (thawed) corn kernels, divided
2¼ cups 1% milk, divided
1 teaspoon chopped fresh thyme
½ teaspoon salt, plus extra to taste
¼ teaspoon freshly ground black pepper, plus extra to taste
¼–½ cup shredded cheddar cheese

1. Cook bacon in a large Dutch oven over medium-high heat until crisp. Remove bacon from pan with a slotted spoon and drain on paper towels. Add ½ cup onions, celery, and squash to drippings in pan; sauté 8 minutes or until vegetables are tender.

2. Reserve 1 cup corn; set aside. Place the remaining corn and 1 cup milk in a blender; process until smooth. Add remaining 1¼ cups milk, thyme, ½ teaspoon salt, and pepper to blender; process just until combined.

3. Add pureed mixture and reserved 1 cup corn to pan. Reduce heat to medium; cook 5 minutes or until thoroughly heated, stirring constantly. Season with salt and pepper to taste. Divide soup evenly between 4 bowls; top each serving with some bacon, remaining onions, and cheese.

Serves: 4
Time: 40 minutes
Leftover potential: Good

Tuesday, August 03, 2010

SOUTHWESTERN SALAD WITH CILANTRO-LIME VINAIGRETTE


I’ve discussed this before, but I have a weird aversion to green salad recipes. Unless it’s really complex or has an exotic feature (like meat or fruit, or both), I tend to look away, thinking, “Big whoop! Different vegetables on top of lettuce. I could’ve thought of that!” The trouble is, I never do think of it, and just end up eating plain spring mix and dressing 90% of the time. So I’m trying to be more open-minded. I spotted this utterly delicious-looking cilantro-lime dressing at Whipped and immediately bookmarked it (if two flavor combos had to compete for my summer adoration, it would be a cage match between lemon-basil and cilantro-lime), but only later did I think to click through to the original recipe and its accompanying salad at For the Love of Cooking. It looked so fresh and colorful and full of things I love (avocado! corn! black beans!) that it immediately broke through my salad-recipe resistance. With a quesadilla on the side, it made for a delicious and satisfying Summer Salad Night.

Obviously, measurements are approximate (I probably ended up using more corn and black beans, just because I had them), and you can customize however you like to fit your tastes. I didn’t tinker much, except that since we were having quesadillas, I left out the cheese the first time around. But A was a bit underwhelmed by the salad, and at his suggestion, I threw in some extra shredded pepper Jack the next day when we ate the leftovers for lunch (I stored the tomato/onion/pepper/bean/corn mixture, the dressing, the lettuce, and the half-avocado all separately). It added an important creamy/savory/spicy component, so I’ll definitely add it again next time (although I imagine crumbled cotija would also be quite tasty). Although I also skipped the tortilla strips—I had some tortilla chips I thought I’d use, but the pepitas seemed to fulfill the salty/crunchy role well enough— if I had some extra corn tortillas next time, I’d probably cut and bake them and throw them in there. I could also see this being good with pieces of cooked chicken added, if you feel you need more protein to round out the meal. As for the dressing, I might try leaving out the vinegar next time; I was pretty (overly?) enthusiastic with the lime, so that acidity would probably be enough. But it was still utterly tasty, and easy enough to make with my immersion blender that I’d happily try it over just corn, black beans, tomatoes, or even my habitual plain salad greens.

Cilantro-lime vinaigrette:
½ cup chopped cilantro
¼ cup canola oil
1–2 tablespoons fresh lime juice
1 tablespoon apple cider vinegar or red wine vinegar
Salt and pepper to taste
1 clove garlic, minced
½ teaspoon dried oregano

Salad:
1 head Romaine lettuce, chopped
¾ cup cherry or grape tomatoes, halved if large
2 green onions, sliced
2 small red, yellow, or orange bell peppers, diced
½ cup black beans
½ cup fresh (cooked and cut from cob) or frozen (thawed) sweet corn
1 tablespoons raw or toasted pumpkin seeds (pepitas)
1 ripe avocado, diced
¼ cup crumbled cotija or shredded Monterey Jack cheese
1 handful chopped corn chips or baked or fried corn or flour tortilla strips

1. Combine all the dressing ingredients in a blender or food processor (or put them in a small bowl and use an immersion blender). Blend well and then let the flavors mingle for at least 30 minutes before using.

2. In a large salad bowl, combine all the salad ingredients, add the dressing, and toss well.

Serves: 4
Time: 35 minutes
Leftover potential: Low, unless you store the lettuce separately from the dressing and other ingredients.