Showing posts with label Citrus. Show all posts

Thursday, January 15, 2015

ROASTED CHICKEN WITH SMOKED PAPRIKA, BLOOD ORANGE, AND GINGER


 I messed up big time. I first made this dish (by Melissa Clark via Elly Says Opa) on May 7, 2013. I took a photo. I recall enjoying my meal. Then, for some reason, the recipe languished untouched in my “Try Again” file for the next year and a half—so long I couldn’t even remember why it was there anymore. Was it blogworthy? Was it worth revisiting? When are blood oranges in season, again?

At last, seized by a recent fit of New Year’s-inspired mental housecleaning, I spotted blood oranges at the farmers’ market and decided to release the recipe from its limbo one way or another. And the joke’s on me, because this is one of the most delicious chicken recipes I’ve made in recent memory, and we all could have been eating it on the regular for the past 18 months if I hadn’t been such a putz. An unusual assortment of super-flavored ingredients are pureed into a vibrant green paste somewhat reminiscent of Cuban mojo sauce, but with the spicy bite of ginger in there too. I actually wouldn’t say the smoked paprika and blood orange of the title are the dominant tastes (in fact, I don’t see much reason why you couldn’t just use a regular orange, except that blood oranges are cool and I never remember to buy them otherwise)—cilantro and jalapeno are at the forefront for me, but maybe that’s just because I can’t resist using double or more the quantity of cilantro (2 tablespoons just looks so scant!). I’ve always been a sucker for tomatillo salsa, green chutney and Peruvian green sauce, and this fit right into that family.

After some marinating (a whole day is preferable) and a stint in the oven, you get tender, burnished, brightly flavored roasted chicken and a sauce so fantastic you’ll want to make sure you have something to soak it up. I highly recommend baking a batch of Smoked Paprika Roasted Potatoes along with the chicken and then drizzling them with the pan juices. Throw in something green (asparagus or green beans or salad) and you’ve got a lively, mostly hands-off dinner for just about any season. I can’t believe I’ve been missing out on it for so long.

1 teaspoon orange zest
¼ cup freshly squeezed orange juice, preferably blood orange
2 tablespoons olive oil
3 cloves garlic, chopped
2-4 tablespoons cilantro
1 jalapeño, seeded if desired, chopped
1 tablespoon grated fresh ginger root
1¼ teaspoons kosher salt
¾ teaspoon smoked paprika
1¾ to 2 pounds bone-in, skin-on chicken thighs, drumsticks, or whole legs
Sliced scallions, cilantro, and orange wedges for serving
  1. In a blender or food processor, combine the orange zest and juice, olive oil, garlic, cilantro, jalapeño, ginger, salt, and paprika. Blend until pureed. Combine the chicken and marinade in a large bowl; cover and refrigerate 1 to 24 hours.
  2. Preheat the oven to 475 degrees. Place the chicken and its marinade in a 9-by-12-inch baking dish and roast until skin is browned and meat juices are no longer pink, about 45 minutes. Serve drizzled with juices and sprinkled with scallions and cilantro, with orange wedges for squeezing over the meat.
Serves: 4
Time: 1 hour, plus 1 to 24 hours of marinating
Leftover potential: Good.

Friday, July 04, 2014

LEMON COOKIES WITH TOASTED COCONUT FROSTING


If I had to name my mom’s favorite foods, at least as far as I know, lemon and coconut would top the list—so when I saw this recipe at Two Peas and Their Pod, I knew it would be the perfect treat to bake for her birthday. Frosted cookies don’t mail well, but I was fortunate enough to be able to celebrate with Mom in person, as her birthday happened to be the first day of my parents’ annual California visit. I’m glad I had this idea, not only because everyone (and especially my mother) really enjoyed the cookies, but also because I probably wouldn’t have gotten around to making them if I hadn’t had such a festive semi-selfless excuse; frosted cookies are just so much more of a hassle than regular ones. Missing out on these tender, sunny sugar cookies with fluffy coconut-flavored frosting and crispy toasted coconut would have been a shame. After all, lemon and coconut are fave flavors of mine too…it must be genetic.

I used regular milk in the frosting because I didn’t want to open a whole can of coconut milk just for a spoonful of it, but if you happened to have some just sitting around, it would amp up the flavor even more—a triple coconut dose. The frosting turned out on the soft side, which, combined with the flakes of coconut on top, makes eating these a rather messy endeavor (they’re a little more tractable when frozen), but I didn’t want to add any more sugar to stiffen it because it was already quite sweet. It might have been cloying on its own, but the cookies themselves aren’t overly sugary, so together they balance out.

Cookies:
2¼ cups all-purpose flour
½ teaspoon baking powder
½ teaspoon salt
¾ cup granulated sugar
2 tablespoons lemon zest
1 cup (2 sticks) unsalted butter, at room temperature
1 large egg
½ teaspoon vanilla extract
½ teaspoon fresh lemon juice
Frosting:
½ cup (1 stick) unsalted butter, at room temperature
2 cups confectioners’ sugar
1 teaspoon coconut extract
1 tablespoon coconut milk (or regular milk)
1 cup unsweetened coconut flakes

  1. Preheat the oven to 350 degrees. Line two baking sheets with parchment paper or silicone baking mats.
  2. Combine flour, baking powder, and salt in a small bowl. Whisk and set aside.
  3. In another small bowl, add granulated sugar and lemon zest. Rub the sugar and lemon zest together with your fingers until fragrant.
  4. In the bowl of a stand mixer (or in a large bowl with a hand-held mixer), beat butter and sugar/lemon mixture together until light and fluffy. Beat in egg, vanilla, and fresh lemon juice. Mix until smooth.
  5. Slowly beat in flour mixture on low speed until blended.
  6. Drop dough by tablespoons onto prepared baking sheets, spacing 2 inches apart. Gently flatten dough with the palm of your hand.
  7. Bake for 12-14 minutes or until cookies are just set and slightly golden brown. Cool cookies on baking sheet for 2 minutes and transfer to cooking racks. Cool completely.
  8. While the cookies are cooling, make the frosting. In a stand mixer (or using a hand-held mixer), mix together butter and sugar. Mix on low speed until well blended and then increase speed to medium and beat for another 3 minutes. Add coconut extract and coconut milk (or regular milk). Beat on medium speed for 1 minute or until frosting is smooth and creamy. You may need to add a little more sugar or coconut milk, depending on your desired consistency.
  9. Once the cookies are out of the oven, turn the heat down to 325 and spread the coconut in a thin layer on a baking sheet. Put it in the oven just until light brown and fragrant, 5-10 minutes, stirring halfway through.
  10. Frost the cooled cookies and sprinkle toasted coconut on top.

Yields: About 2 dozen
Time: 1 hour
Leftover potential: Great; store in an airtight container for several days at room temperature or indefinitely in the freezer.

Wednesday, January 16, 2013

CHILI-LIME ROASTED SQUASH SALAD


I was in serious danger of getting tired of butternut squash. The squash = winter equation is so ingrained in me, and I have so many great squash recipes, from soup to pizza to pasta, that I end up buying one about every other week, but lately I’ve been less enamored of its mushy (sometimes mealy) sweetness. What I needed was to spice things up, literally. When I spotted this Everyday Food recipe at The Bitten Word, I was intrigued by its flavor profile. Instead of pairing squash with the usual suspects—fallish ingredients like sage, maple, cinnamon, apples and pears, or sausage—it went in the opposite direction, with the summery-seeming southwestern tastes of chili, lime, and cilantro. It turns out that the heat of the spice, the tang of the citrus, and the herby freshness were exactly what I needed to shake off the squash doldrums.

I followed the recipe exactly, except that I threw in a bit of smoky chipotle chili powder with the regular stuff (recommended), and since I’m not especially passionate about Romaine hearts and noticed that the photo on the Bitten Word showed different greens instead, I used a bagged baby spring mix from Trader Joe’s. The recipe is a bit vague about what temperature the squash should be when you serve it; I like warm salads when they involve spinach or arugula, but hate wilted lettuce, so I compromised and went with room temperature. Roasted squash is always best right out of the oven, when the exterior is still crisp and caramelized, but the leftovers the next day were decent despite the soggier squash; I heated it briefly in the microwave (less than 30 seconds) just to take the chill off it before I added it to the greens.

This is just a personal taste thing, but I think next time I might cube the squash instead of slicing it, then just toss it with the olive oil and chili powders instead of sprinkling the chili powder on top—that would distribute the seasoning more evenly, help the squash cook more quickly, and make the salad easier to eat. I loved the salty crunch of the pepitas as a foil for the tenderness of the squash, but the cheese (I used feta, since I had some on hand) didn’t do as much for me; its creaminess seemed to blend too much with the squash, and it didn’t add much beyond salt and color contrast. I can’t believe I’m saying this, since I’m usually more apt to add feta to recipes that don’t call for it, but I think next time I’d leave it off entirely. Maybe cotija, which seems a bit drier and firmer, might work better, but for me, I’d rather just eat a quesadilla on the side to round this out into a meal than include cheese in the salad.

Chili + lime + cilantro is one of my favorite flavor combinations, but I never would have thought to apply it to squash (even though of course it’s been done before; now I want to try this version). I’m so glad I found this fantastic salad to expand my horizons and rehab the poor old butternut.

1 butternut squash (about 2 pounds), peeled, halved, seeded, and cut crosswise into ½-inch slices
¼ cup extra-virgin olive oil, divided
1 teaspoon chili powder (I like to use ½ teaspoon regular and ½ teaspoon chipotle)
Salt and pepper
3 tablespoons lime juice (1–2 limes)
⅓ cup chopped fresh cilantro
¾ teaspoon honey
1 head Romaine lettuce, chopped, or about 5 ounces mixed spring greens
¼ cup toasted pepitas
¾ cup (3 ounces) crumbled Cotija or feta cheese (optional)

1. Preheat oven to 400 degrees.

2. On a rimmed baking sheet, toss squash with 1 tablespoon oil and arrange in a single layer. Sprinkle with chili powder and season with salt and pepper. Bake until soft and lightly golden, 20 to 25 minutes.

3. Whisk together lime juice, cilantro, honey, and remaining 3 tablespoons oil; season with salt and pepper.

4. Arrange lettuce on a platter or in serving bowls, then top with squash, pepitas, and cheese, if using; drizzle with dressing.

Serves: 4
Time: 40 minutes
Leftover potential: OK; store all components (roasted squash, dressing, greens, pepitas, and cheese) separately and assemble right before eating.

Tuesday, October 16, 2012

PEANUT-LIME CHICKEN RICE NOODLE SALAD


A quick search of my blog archives confirms that this is the time when, like clockwork, I habitually complain that autumn in Los Angeles doesn’t really get started until late October or even November, leaving us sweltering in 100-degree temperatures while the rest of the nation merrily goes apple picking in cozy sweaters. Apparently I am freshly surprised/enraged by this every year. You just get used to having enviable weather, you know? And fall, traditional fall, is so fleetingly lovely and nostalgia-laden that it’s frustrating to miss out on it.

This September seemed especially brutal, with several record-breaking heat waves, and I never thought I’d admit it, but I actually grew tired of tomatoes, corn, and peaches. Luckily, lime, cilantro, and cucumber were still on my cravings list, so it seemed a good time to bust out this refreshing-sounding Asian-inspired salad from Smitten Kitchen. I’d been putting it off because it sounded complicated, and I’m not gonna lie, it is. Amazingly, this is the simplified version, streamlined from the New York Times original, and it still has you making two sauces, marinating and grilling chicken, cooking noodles, and chopping lots of vegetables. It calls for a whopping 21 tablespoons of freshly squeezed lime juice, which for me worked out to nearly 10 limes and a serious case of hand cramps. It also involves more than half a cup of fish sauce, the foul-smelling concoction that I only grudgingly came to terms with the week before and had never used in such quantity, filling my kitchen with an odor that brought the cats running with eager interest while my appetite withered away. At a certain point, I ran out of counter space for the many different bowls, pots, cutting boards, grills, blenders, measuring cups and spoons, and ingredients this recipe demanded, and I began to question my sanity.

But all told, it really didn’t end up taking as long as I’d feared. All the individual tasks are simple, and many (such as the sauce-making and marinating) could be done ahead of time. Most important, the end result was seriously, seriously delicious. There’s a lot of ingredient overlap with last week’s banh mi, but whereas we were ambivalent about those, we flat-out loved this. It’s such a complex layering of flavors and textures, all incredibly fresh and vivid (and not really fishy, thank goodness). It’s substantial and satisfying while still feeling light. The leftovers were even better. Despite the hassle, it’s a keeper, and since I have a half-package of rice noodles left over in the cupboard, you can bet I’ll be making it again soon, without any modifications.

It’s a bit confusing that one of the sauces is called a "dipping sauce" when you never dip anything into it, but I couldn't think of a better name, so dipping sauce it remains. I used jalapenos instead of Serranos or Thai chiles, which was partly due to laziness and partly due to wimpiness in the face of spice, but I reasoned that jalapenos are great with similar ingredients on the banh mi, and they were just fine here. Every now and then I’d get a spicier bite, but for the most part the salad wasn’t very hot, which suited me just fine. Since the Smitten Kitchen post mentioned wanting more vegetables, I doubled the carrot and cucumber quantities. Deb suggested maybe adding sweet red pepper and thin blanched green beans, which would be nice, but then someone in the comments mentioned using edamame and that sounded perfect to me—as, indeed, it turned out to be. A claims not to like edamame, but even he enjoyed them in this context. Winner winner noodle dinner!

Dipping sauce:
6 tablespoons fish sauce
6 tablespoons brown sugar
¾ cup freshly squeezed lime juice
2 garlic cloves, minced
6–8 small Thai chiles or 1–2 Serrano chiles (I used 2 jalapenos), thinly sliced

Peanut dressing:
3 tablespoons fish sauce
3 tablespoons rice vinegar
½ cup + 1 tablespoon lime juice
3 tablespoons soy sauce
1 1.5-inch chunk ginger, peeled and sliced
6 tablespoons natural creamy unsalted peanut butter (I used salted and it was fine)
1 tablespoon sesame oil
Pinch of cayenne

Chicken and noodle salad:
1¼ pounds boneless, skinless chicken thighs
8 ounces dried rice vermicelli or other rice noodles
4 small Persian cucumbers, cut in ¼-inch half-moons
4 medium carrots, thinly julienned
1 cup cooked, shelled edamame
1 handful each chopped fresh basil, mint, and cilantro
4 scallions, sliced
¼ cup crushed or chopped roasted peanuts
Lime wedges for garnish

1. To make the dipping sauce, whisk ingredients in a small bowl, making sure to dissolve the sugar. Let sit for at least 15 minutes. (Can be done ahead; refrigerate and use within a few days.)

2. To make the peanut dressing, in a blender or small food processor, puree all ingredients to a smooth sauce, about the thickness of heavy cream. (Can be done ahead; refrigerate and use within a few days.)

3. To marinate the chicken, stir together about half the dipping sauce and one-third of the peanut dressing in the bottom of a shallow bowl. Add the chicken to the mixture and toss to coat. Let marinate at least 15 minutes.

4. Cook the noodles according to the package directions. Drain when noodles are al dente, and cool under running water. Fluff and leave in strainer to drain well, stirring periodically to keep them from sticking together.

5. To cook the chicken, grill it on an outdoor grill or a stove-top grill pan (I used the George Foreman), or run under the broiler until cooked through and nicely browned, about 3 to 4 minutes a side. Let cool slightly, then chop roughly into ¾-inch pieces.

6. To serve, toss vegetables with 1 tablespoon dipping sauce in a small bowl. Divide the cooked noodles among 4 to 6 bowls. (If your noodles stick together a lot, you might find it helpful, as I did, to toss each portion of them with a tablespoon of dipping sauce now, instead of adding it after the vegetables and chicken; it really loosened them up for me.) Top each bowl equally with vegetable mixture and chopped chicken. Toss each bowl with 1 tablespoon of each the dipping sauce and dressing, or to taste (we used more). Add the herbs, peanuts, and scallions to each bowl and serve with additional dressing and dipping sauce on the side, plus lime wedges to squeeze over the top.

Serves: 4-6
Time: 2 hours
Leftover potential: Great. I was worried because Deb mentioned storing all the ingredients separately, but I pre-mixed all the portions and they stayed as good as (or better than) new, at least for the couple of days before we devoured them all. 

Tuesday, September 25, 2012

COCONUT LIME SUGAR COOKIES


When I make cookies, I usually want something involving chocolate or oatmeal, often both. Sugar cookies seem to boring to bother with—until I taste one and am reminded that they were one of my go-tos as a kid. This is probably because they tended to be frosting delivery devices, but still, a plain sugar cookie is nearly as delightfully nostalgic. What tempted me in this recipe, from Everybody Likes Sandwiches via Poppytalk, was the lime and the coconut, two of my favorite flavors—especially in the summer—but a combination I’ve never tried in cookie form. I was surprised to find that those elements are fairly subtle here, but I wasn’t too disappointed, because what resulted was essentially an excellent sugar cookie with the perfect crisp-chewy texture, but with intriguing notes of citrus and toasted coconut. They taste a lot like the sugar cookies my mom made when I was little, which she made with lemon extract (almond, of course, being reserved solely for holiday spritz). And they’re incredibly addictive.

Maybe it was because I baked these on a hot day, but mine turned out completely different than the ones in the photos accompanying the original recipe; those are thick and rounded, whereas mine are wide and flat, bakery-style. Whatever I did, I want to do it again, because the texture was my favorite thing about these cookies. I kept daydreaming about how perfect they would be as the base for an ice cream sandwich. Someone should get on that, stat.

These cookies are already on the sweet side, so do make sure you use unsweetened coconut. I found mine in the bulk section at Whole Foods.

2¾ cups all-purpose flour
½ cup unsweetened (dried) shredded coconut
1 teaspoon baking soda
½ teaspoon baking powder
½ teaspoon salt
1 cup butter, softened
1½ cups white sugar, plus about ¼–½ cup extra for coating the cookies
1 egg
½ teaspoon vanilla extract
Zest from 1 or 2 limes
3 tablespoons fresh lime juice

1. Toast coconut in a small sauté pan over medium heat until fragrant and lightly browned.

2. Preheat oven to 350 degrees and line baking sheets with parchment or Silpat.

3. In a medium mixing bowl, whisk together flour, toasted coconut, baking soda, baking powder, and salt. Set aside.

4. In the bowl of a stand mixer fitted with the paddle attachment, or in a large mixing bowl using a hand-held mixer, cream the butter and 1½ cups sugar together until fluffy. Add the egg and mix well, then add the vanilla, lime zest, and lime juice. Slowly mix in the dry ingredients until combined.

5. Place some sugar (start with about ¼ cup and add more as needed) in a shallow bowl. Form dough into heaping-teaspoon-sized balls and then roll in sugar. Flatten slightly and place on lined cookie sheets two inches apart. Bake for 10 minutes or until bottoms are lightly browned. Cool for a few minutes before moving to a wire rack to cool completely.

Makes: 2–3 dozen
Time: 40 minutes
Leftover potential: High, if stored in the freezer; if stored at room temperature, the chewy texture will disappear after a couple of days.

Friday, September 14, 2012

ORANGE QUINOA SALAD WITH CHICKEN, CUCUMBER, AND CRANBERRIES


This is my new favorite quinoa salad and it isn’t even really a quinoa salad. The original Cooking Light recipe called for couscous, which I’m no particular fan of; it’s really just tiny pasta, and as you know, I already have enough pasta recipes to last a lifetime, so if I’m going to eat a grain-like salad I want it to be made with actual whole grains (or, in quinoa’s case, seeds). I became obsessed with adapting it for quinoa, even though I wasn’t sure whether boiling quinoa in orange juice and spices would work (with couscous, of course, you just soak it) or just result in a sticky, bitter mess. I’m pleased to report that it works just fine, infusing the quinoa with tons of flavor along the way.

Also new to me was poaching chicken; I usually have some cooked chicken in the freezer left over from making chicken broth, but this long, hot summer hasn’t exactly been conducive to keeping boiling pots on the stove for hours, so I was without. I’d tried poaching chicken a few times early in my cooking career and it always turned out dry and bland, but Just Bento set me straight. It turns out that the secret to perfectly moist poached chicken is the same as the secret to perfect hard-boiled eggs: bring to a boil, then remove from heat, cover, and let sit in the hot water until cooked. (The other secret is plenty of salt, so that essentially you’re brining the chicken.) Magical!

This salad has everything you could want (from a salad, at least). It has textural contrasts: the chewy quinoa, the crisp cucumber and onion, the crunchy almonds, and the tender chicken. It has flavor contrasts: the sweet-tart cranberries and citrus, the warm spices, the fresh green cucumber and cilantro, the meaty chicken, the sharp onion, the salty mustard, the nutty quinoa and, well, nuts. It’s packed with protein from the chicken, quinoa, and almonds, making it a satisfying dinner or workday lunch. It has fruit, nuts, vegetables, meat, and starch, and although it doesn’t need any more help in the deliciousness department, if you want to round out the food groups you can add a little crumbled feta as well (I wouldn’t bother buying feta for this purpose, but since I had a little leftover chunk in the fridge that I needed to get rid of, I tried it and it certainly wasn’t a bad addition). I especially love how well it bridges the gap between summer and fall. As I’ve mentioned, September in Southern California tends to make me cranky because the rest of the country is moving on to autumnal foods while we’re still sweating through our hottest weather of the year. With the orange, cranberry, cinnamon, and mustard, this salad wouldn’t be out of place at Thanksgiving, yet it’s quick, cold, and refreshing enough for the most sweltering days. I love it so much that I’ve made it twice in three weeks. Even if you’re a quinoa skeptic, this is one you have to try.

1 cup freshly squeezed orange juice, divided (from 2–3 oranges)
¾ cup water
1 teaspoon salt, divided
1 teaspoon ground coriander
¼ teaspoon ground cinnamon
¼ teaspoon black pepper, divided
1 cup uncooked quinoa, rinsed and drained
¼ cup sweetened dried cranberries
¼ cup sliced almonds
1½ cups chopped, cooked chicken breast*
1 cup chopped cucumber
⅓ cup chopped red onion
¼–½ cup chopped fresh cilantro
1–2 tablespoons freshly squeezed lime juice
2 teaspoons Dijon mustard
1½ tablespoons extra-virgin olive oil

*I used poached chicken, made as follows: Take about 1 pound boneless, skinless chicken breasts, cut them in half lengthwise so they’re less thick in the middle, and place in a heavy, shallow pan (one that has a tight-fitting lid, which you’ll need later). Add water just to barely cover and 2 teaspoons salt, and bring to a boil over high heat. Turn chicken over, remove pan from heat, cover, and let rest for 10 to 15 minutes or until chicken is no longer pink in the middle. Remove from pan, let cool slightly, and dice. This will make a bit more than you need for this recipe, but it can be added to many other dishes (salads, tacos, pizza, etc.) and freezes well.

1. Combine quinoa, ¾ cup orange juice, water, ½ teaspoon salt, coriander, cinnamon, and ⅛ teaspoon pepper in a medium saucepan; bring to a boil over high heat. Cover, reduce heat to medium-low, and cook until liquid is absorbed and quinoa is tender, about 15–20 minutes. Remove from heat; stir in cranberries. Cover and let stand 5 minutes; fluff with a fork. Transfer quinoa mixture to a large bowl and let cool to room temperature.

2. Heat a small skillet over medium heat. Add almonds to pan; cook 3 minutes or until toasted, stirring frequently. Set aside and let cool.

3. Whisk together remaining ¼ cup orange juice, ½ teaspoon salt, ⅛ teaspoon pepper, lime juice, and mustard. Gradually add oil to juice mixture, whisking constantly until emulsified.

4. Add almonds, chicken, cucumber, red onion, and cilantro to the bowl of cooled quinoa. Drizzle dressing over the tip and toss well to coat.

Serves: 4
Time: 40 minutes (1 hour if you’re also poaching the chicken)
Leftover potential: Great.

Thursday, September 06, 2012

SWISS CHARD AND LEMON RICOTTA PASTA


Can you believe I have more than 450 recipes here (whoa), and not a single one uses Swiss chard? Honestly, I have nothing against the stuff, but ever since I discovered kale it’s been my go-to leafy green, leaving little room for experimentation with others. Then I saw this recipe on Food52 and it spoke to me. Specifically, it said, “Give chard a chance, you moron.” (Chard can be kind of a jerk. Fortunately, it’s pretty and it tastes good.) Also: “Look, I have bacon and lemon and cheese.” Sold!

Somehow I wasn’t really expecting this to taste like more than the sum of its parts, but boy was I wrong: This was a fantastically delicious and well balanced pasta dish. The only change I made was to double the recipe and add the lemon juice as well as the zest, both excellent decisions. In retrospect, I might have increased the cheese quantities just slightly (noted below), and I definitely wanted even more chard. Like all leafy greens, it seems like you’re buying a ton, but it cooks down so dramatically. I bought two large rainbow bunches, dutifully measured out six generous cups, and…that’s all I used. I easily could have added another two cups with the amount I had left over, and looking at the tiny flecks of green in the finished pasta, I wished I had. More greens are never a bad thing.

My vegetable bible, Jack Bishop’s Vegetables Every Day, says that the chard stems cook at a different rate than the leaves, so I didn’t include them even though the original recipe said “including the stems.” Do what you want! I included the thinner rib near the leaf, just not the really thick, celery-like lower stem. If you don’t use them for this, you can always cook them up separately another time. (Which I intend to do next time I make this. Which, by the way, will be really soon. As usual when I write glowingly about a recipe, I am now craving it.)

6–8 cups raw Swiss chard (2 large bunches), sliced (leaves and thinner ribs, but not the thickest part of the stems)
1 pound spaghetti
4 strips bacon, cut into ¼-inch slices
1 large shallot, minced
⅔–1 cup ricotta cheese
¼–½ cup grated Parmesan cheese, plus extra to taste
Zest and juice from 1 large lemon
½ teaspoon salt, plus extra to taste
¼ teaspoon dried red pepper flakes

1. Bring a large pot of well-salted water to a boil over high heat. Blanch the Swiss chard for 5 minutes. Scoop out the chard with a slotted spoon, transfer to a colander, and drain well, squeezing out as much of the water as possible. Chop again and set aside.

2. Keep the pot of water boiling, and add the spaghetti noodles. Cook until al dente. Remove 1 cup of cooking liquid, then drain the noodles.

3. Meanwhile, fry bacon in a large skillet over medium heat until just crispy. Add the shallot and sauté until soft. Add the Swiss chard and toss well to break up the chard clumps.

4. Combine the ricotta and Parmesan cheeses in a small bowl, and add the lemon zest and juice, ½ teaspoon salt, and red pepper flakes. Add to the Swiss chard mixture in the skillet and mix well.

5. Add cooked spaghetti to the skillet and mix well. Gradually add pasta water as needed to thin the sauce to desired consistency. Serve topped with additional grated Parmesan.

Serves: 6
Time: 1 hour
Leftover potential: Good.

Tuesday, June 19, 2012

ORZO SALAD WITH SPINACH, FETA, AND LEMON


Clearly, even though I keep telling myself I’m not in the market for any more pasta recipes, I am still powerless to resist certain ingredients, and feta and lemon are definitely on the list. This is basically a spring/summer version of one of my favorites, orzo with chicken, lemon, and dill—similar core elements, but cool and refreshing instead of hot and melty, brightened up with lots of green vegetables.

My mouse hand crept relentlessly toward the “Save on Delicious” button as soon as I spotted this Dinner With Julie post in my feed reader. I paused only to think, “Could I add even more green things to this concoction?” After a quick Food Blog Search session, the answer was clear (thanks to this Two Peas and Their Pod recipe): asparagus. That was the only change I made to the original, except that I increased the orzo quantity to use the whole package, and skipped the rice vinegar (which I don’t have) in favor of more lemon juice.

All quantities are pretty much up to you here. I’m not exactly sure how much spinach I used, but I remember thinking there could be more of it; I loved the way its crisp, springy texture contrasted with the softer ones of the pasta and cheese—even after the salad spent several days in the fridge, it magically didn’t seem to get wilted or slimy—and I ended up adding even more of it to the leftovers, until it felt like half pasta and half greens. So I’m guessing at 6 ounces; use whatever seems right to you. Same with the onion; a little raw onion can go a long way, of course, but its crunch and bite are welcome here. And let’s face it, I probably had a heavier hand with the feta. I liked the asparagus, but you could leave it out (and, if you’re making the pasta more than a few hours ahead of serving, you may want to, because asparagus is quicker to discolor when subjected to acid and age). Whatever you do, this is a fresh, incredibly quick and easy, light but satisfying salad that would make a perfect entrée on a hot day or an excellent addition to a picnic, BBQ, or potluck menu.

This is one of those basic discoveries that gets me really excited. Sometimes I glance at a recipe and wonder if it’s really worth my trying, even though it looks tasty, because it seems so simple and overlaps so many other recipes I’ve made before. Because I tend to gravitate toward certain ingredients, I’ve tried a lot of different combinations of them over the years. I try to resist letting my recipe collection balloon out of control; my ideal has always been to have a streamlined, well-curated list of favorites, but of course thanks to the number of food blogs I read and my own need for variety in writing this one, my virtual recipe box is always bulging. I tend to forget the fact (or maybe I just fear it, and the boundless options it represents) that ingredients can be combined in many different ways, and just a small variation can yield brand-new flavors, colors, and textures. In other words, even though this salad didn’t seem surprising or revolutionary to me at first glance (it’s no strawberry pizza, for example), I enjoyed it so enormously that it instantly won a spot in my regular rotation.

1 pound orzo
½ pound asparagus (optional), tough ends trimmed off, sliced into 1-inch pieces
6 ounces fresh spinach, thinly sliced
1 small red onion, finely chopped
4 ounces crumbled feta
Grated zest and juice of 1–2 lemons
2–3 tablespoons olive oil
Salt and pepper to taste

1. Cook the orzo according to the package directions; drain well, running under cool water to cool it down, then dump into a bowl.

2. If using asparagus, steam until crisp-tender. Run under cold water to stop cooking, then add to the bowl with the orzo.

3. Add the spinach, onion, feta, and lemon zest to the orzo.

4. In a small bowl, whisk together the lemon juice, olive oil, and salt and pepper to taste. Drizzle over the orzo mixture and toss well to coat.

Serves: 6
Time: 30 minutes
Leftover potential: Great. Will keep in the fridge for up to a week.

Thursday, May 17, 2012

ORANGE CURRY ALMONDS


As threatened—er, promised—I reworked the magical roasted nut recipe yet again, just to cover all my citrus bases. (I’m ignoring grapefruit here, as I do in all areas of my life.) I think it’s a really good flavor combo. I used Trader Joe’s curry powder, my favorite storebought variety, which has a nice, bright citrusy/floral taste that I correctly suspected would marry well with the orange. (I think I was inspired by these cookies...which now makes me wonder if I could get coconut in here too, somehow.) There’s a little heat to these, but mostly just a deep, savory spice that makes them seem richer and substantial than the other two varieties I’ve made—or maybe it’s just that almonds fill me up more quickly than other nuts. Whereas I could demolish handfuls of the chili lime peanuts or lemon pepper cashews if I wasn’t careful, I’m full and satisfied after a dozen or so of these almonds. Whether for that reason or just because I prefer lemon and lime to orange, these have lingered longer in my kitchen than the other two kinds I’ve made, and I do think I’d name them my least favorite of the three. (They also, for some reason, seem to be on the verge of oversaltiness, even though I used the same amount of salt as in the other two recipes, which struck me as being just the right amount. I might cut back on the salt next time—or perhaps I just measured poorly this time?) But that’s mainly because the first two were so very kickass. I’m still pleased to have “invented” these and I do consider them a successful snack: addictively crisp, excitingly tasty, fairly wholesome, and not like anything I’ve ever seen in a store. For someone who rarely improvises, I feel like I’m on a roll lately!

Freshly grated zest of 1 large orange
¼ cup freshly squeezed orange juice
1 tablespoon kosher salt
2 teaspoons sugar
4–5 teaspoons curry powder
1 pound unsalted almonds

1. Preheat oven to 250 degrees.

2. Whisk orange zest, orange juice, salt, sugar, and curry powder together in a large bowl. Add almonds and stir until evenly coated.

3. Scrape nuts onto a large, rimmed baking sheet (line with parchment if desired, for ease in cleanup). Bake until nuts are fragrant, dry, and beginning to darken, about 30 minutes.

Serves: About 16
Time: 40 minutes
Leftover potential: Good; will keep in an airtight container at room temperature for at least two weeks

Friday, May 04, 2012

POTATO-LEEK PIZZA WITH RICOTTA AND LEMON


Yeah, I already have a potato-leek pizza recipe—but this one has ricotta and lemon zest and tastes like springtime. The Kitchn calls it a “flatbread,” but I know a pizza when I see one. And this one is fab.

I was a bit worried about getting the potato sliced thinly enough to cook through, since I don’t have a mandoline. (Microsoft Word really wants to change this to “mandolin.” Well, I don’t have one of those, either.) Soaking the potato slices in cold water seemed odd to me; I’ve seen this mentioned in some French fry recipes (I think it draws off the excess starch) but have never tried it before, and was kind of worried by how stiff and curled they were when I pulled them out of their bath—I feared I’d soaked them too long and ruined them, but now after some Internet research I see that you can soak potatoes for hours without damage. And whether it was the water or my careful slicing skills, it worked, and the potatoes got nice and tender. I really love the flavors here—just don’t leave off the lemon zest (as I almost accidentally did when I was eating the leftovers), because it’s what makes this pizza special!

2 large leeks
1 large red-skinned waxy potato
Olive oil to taste
Salt and pepper to taste
1 to 2 cups ricotta cheese
Leaves from 4 sprigs thyme
1 pound pizza dough

1 cup shredded Parmesan or Pecorino Romano cheese (I believe I threw in some Asiago and that was good, too)
Zest from two large lemons

1. Preheat the oven to 450 degrees.

2. Trim the roots off the leeks and then slice each leek (white and light green parts only) into very thin rounds. Place the slices in a large bowl and fill with water. Toss the leeks with your fingers, separating the individual rings. Set aside for a few minutes to allow the dirt to settle to the bottom.

3. Slice the potato into thin rounds about ⅛ inch thick. Place slices in a bowl of cool water and set aside.

4. Set a saucepan over medium heat and add about a teaspoon of oil. Transfer the leeks to the saucepan using a slotted spoon and cook until they are bright green and wilted. Season with salt and pepper to taste and set aside.

5. Roll out the dough on a baking sheet and spread with ricotta cheese. Scatter the thyme over the cheese. Arrange the potato slices in overlapping layers and top with leeks. Sprinkle the cheese evenly over the top.

6. Bake for about 15 to 18 minutes, rotating once, until the edges are golden, the leeks have started to crisp, and the potatoes are tender. Remove from the oven and toss the lemon zest over the surface of the hot pizza.

Serves: 4
Time: 45 minutes
Leftover potential: Good.

Thursday, April 05, 2012

ORANGE-GINGER CARROT SOUP


Confession: This is the fifth carrot soup on this site. I just can’t resist a steaming bowl of smooth, sunny orange liquid, apparently. I’ve got them plain, with coriander, roasted with fennel, and curried with coconut, but what I didn’t have was perhaps one of the most common iterations, carrot ginger. In fact, I think the first time I ever tried any kind of pureed carrot soup, way back in a British pub in the mid-1990s (I think it was Oxford’s Eagle and Child, favored haunt of Lewis and Tolkien, but I might be confusing my memories), it was carrot ginger. It stuck in my mind because it was a total revelation to me, an inveterate cooked-carrot hater. Carrot soup, imagine that!

Unlike many people I know, I’m not a ginger fiend, and I probably could have lived quite happily without such a recipe in my collection if my friend S (who really should have a food blog of her own; her cooking is way bolder and more creative than mine) hadn’t specifically recommended this one after making it herself. Suddenly carrot ginger soup sounded tantalizing to me, and the inclusion of citrus sealed the deal.

Surprise, surprise, this lived up to its reputation. The flavors are well balanced—sweet from the carrots, bright from the orange, and peppy from the ginger—yet relatively gentle, and it’s easy to make. But thank goodness I was paying attention while cooking, because the recipe was really poorly written. Although I’ve only tried a few other recipes from the Food Network site, all of them have suffered from a notable lack of editing. If I didn’t know better, I would have pureed my bay leaf right along with the rest of the soup ingredients, because the instructions never told me to take it out. They never said anything about peeling or cutting up the 2-inch chunk of ginger, either, but I figured that slicing it into smaller pieces would help it cook through and ensure smooth pureeing. Not to mention that I was directed to slice the carrots “thinly,” a waste of knife skills because they were going to get pureed anyway and just needed to be small and consistently sized enough to cook quickly and evenly. And why ask me for an entire bunch of cilantro in the ingredient list when it turns out I only need 2 tablespoons? (I used more like 4, because I love cilantro.) The whole thing annoyed me. Good thing the soup was delicious. I’ll definitely make it again…using my own rewritten recipe.

1 pound carrots, coarsely diced
1 medium onion, chopped
6 garlic cloves, peeled and chopped
1 2-inch piece fresh ginger, peeled and sliced into thick coins
3 tablespoons vegetable oil
Zest (about 2 teaspoons) and juice (about ½ cup) of 1 large orange
4½ cups low-sodium chicken broth (or vegetable broth if you want a vegetarian version)
1 bay leaf
Salt and pepper to taste
2–4 tablespoons minced fresh cilantro

1. In a large soup pot, heat oil over medium heat. Add carrots, onion, garlic, and ginger and cook, stirring occasionally, until onion is tender, 6 to 8 minutes.

2. Add chicken stock, orange zest, and bay leaf to cooking vegetables. Bring to a boil. Reduce heat to medium-low, cover, and cook, stirring occasionally, until carrots are completely tender, about 20 minutes.

3. Remove bay leaf and discard. In a food processor or blender, puree soup in batches until smooth; return to saucepan (or better yet, just puree it in the pot using an immersion blender).

4. Stir in orange juice and season with salt and pepper to taste. Cook over medium heat, stirring occasionally, until heated through, 2 to 3 minutes. Serve sprinkled with cilantro.

Serves: 4–5
Time: 1 hour
Leftover potential: Excellent; tastes even better the next day and can be frozen.

Friday, March 09, 2012

LEMON PEPPER CASHEWS


I’m so proud of these—maybe even prouder than I am of my newfound egg-poaching ability, because I made up this recipe myself! I’d spotted and bookmarked a lemon-pepper cashew recipe ages ago, and ever since then, the lovely concept had been taking root in my imagination and appetite. I love lemon, I love pepper, and I love cashews, and I know I love at least two of them at the same time—in fact, Trader Joe’s used to carry black pepper cashews that I adored. But when I finally decided it was time to make them, I took a closer look at the recipe and found that it was laden with sugar: a whopping ¼ cup of the stuff for just 1 cup of cashews! I’m sure it was delicious, but as I’ve discussed before, I like to save sweetness for dessert, not snacktime, and I’m only in the market for sweet/spicy/savory roasted-nut recipes, which are surprisingly hard to come by. I launched a Web search for other lemon pepper cashew recipes, but most of the ones I found were just the same recipe all over again, except for a small minority that employed storebought lemon pepper seasoning instead, which: no. I live in Southern California and I’m going to use fresh lemons, damnit.

What I wanted was something exactly like the chili lime peanut recipe I’d recently fallen for, but with cashews instead of peanuts, lemon zest and juice instead of lime, and black pepper instead of chili powder. So…why didn’t I just adapt it myself? It sounds simple, but if you’ve been reading this blog for any length of time you’ll know that I don’t exactly work off-recipe very well. I might add another garlic clove here and substitute feta for goat cheese there, but it’s rare that I build anything from the ground up. Still, since I was desperate for lemon pepper cashews and couldn’t find any recipe that would do, I took matters into my own hands, figured out the proportions, and got to work. The entire time, I was convinced that it wouldn’t succeed, so imagine my shock when I tasted my first cashew and it was wonderful—intensely lemony, spicily peppery, addictively crunchy, with just the right undertones of salt and sugar. Be forewarned: these are quite bold and zesty. (The lemon flavor is maybe even stronger than the pepper; I used the zest of two lemons because I was juicing another lemon anyway for another recipe, but feel free to cut back to just one lemon if you aren’t a fanatic.) But they were also a hit with all those who tried them (my highly scientific sampling group of three: me, A, and A’s friend), and A declared them even better than the original chili lime version. These are going to be a frequent snack at our house, I know.

Now I feel I should round out the citrus-nut trifecta by adapting this recipe one more time to use oranges. Orange curry almonds? Orange cinnamon pecans? Hmm….

Freshly grated zest of 1–2 lemons
¼ cup freshly squeezed lemon juice
1 tablespoon kosher salt
2 teaspoons sugar
4 teaspoons freshly, coarsely ground black pepper
1 pound unsalted cashews

1. Preheat oven to 250 degrees.

2. Whisk lemon zest, lemon juice, salt, sugar, and pepper together in a large bowl. Add cashews and stir until evenly coated.

3. Scrape nuts onto a large, rimmed baking sheet (line with parchment if desired, for ease in cleanup). Bake until nuts are fragrant, dry, and beginning to darken, about 30 minutes.

Serves: About 16
Time: 40 minutes
Leftover potential: Excellent; will keep in an airtight container at room temperature for at least a week

Wednesday, February 15, 2012

CHILI LIME PEANUTS


Although I’m not a huge snacker, when my hunger pangs strike I tend to lose all capacity for rational thought, so I try to make sure I always have some quick and wholesome munchies on hand to restore my sanity between mealtimes. Nuts are the most satiating pick-me-up I’ve tried, but the plain ones can get a bit dull after a while. The Internet is rife with seasoned nut recipes, and I’ve been bookmarking them avidly for years, intending to spice up my snacking routine, but when I finally started sorting through them all, I realized that the majority fall on the sweet end of the flavor spectrum; even those that claim to be spicy have an equally strong dose of sugar. Candied nuts are great for special occasions (they make easy homemade holiday gifts, for instance), but they’re a bit much for every day.

It’s actually harder than I expected to find straight-up savory nut recipes. I do have a great one for rosemary cashews with only a couple of teaspoons of sugar, which I make every year at Christmas, but (a) those are so delicious that I can’t stop gobbling them, and nuts are only a healthy snack if you eat them in small quantities, and (b) I like the idea of having special recipes I only bring out once a year, so making them regularly would take away the magic. I tried another recipe that had promising-looking savory elements like Worcestershire sauce and an array of spices, and although it was definitely tasty, it was far too sweet and buttery to qualify as sensible emergency rations. Then I unearthed this recipe from Serious Eats, and it is absolutely perfect. There’s a tiny bit of sugar, but only enough to temper the sourness of the lime; the dominant flavor is spice. I’d been worried about the heat level, but it was just right for me—enough to bring a glow to my cheeks and make my mouth feel like something’s going on in there, but not so much that I need to eat them with a beverage clutched in my hand to put out the fire. (If your heat tolerance falls below “medium,” though, I’d recommend cutting back to ½ teaspoon cayenne for starters.) These zesty peanuts are definitely addictive, but not so much that I can’t resist shoving them all in my mouth, and the bold flavor excites my taste buds enough that even a moderate portion feels like a richly satisfying snack. Plus, they’re insanely easy to make, with only about 5 to 10 minutes of hands-on labor. I can’t wait to try them on a hot summer day, washed down by a cold beer—but they’re just as lovely when eaten out of a Tupperware container from my purse when I start to feel cranky and shaky while standing in a long checkout line at Kohl’s.

I doubled the lime zest, because I was juicing two limes anyway, so why just zest one of them? It probably wasn’t necessary, because the lime flavor comes through more clearly than you might expect, but I’m a citrus fiend and I enjoy that sort of thing. My seasoning-to-nut ratio was also a bit off, because I bought a 1-pound package of peanuts at Trader Joe’s that claimed to contain “about 16” quarter-cup servings, which I assumed would be approximately the 4 cups the recipe required. Upon taking them home and measuring them out myself, I learned that this is only true if you think that 3½ cups is “about” 4. But you know what? It turned out just fine, and I wouldn’t change a thing. These are going to be one of my go-to snacks from now on. If you don’t like peanuts or are allergic, I assume the recipe would work just as well with other nuts; I can’t wait to try it with cashews.

Freshly grated zest of 1–2 limes
¼ cup freshly squeezed lime juice (from 2–3 large limes)
2 tablespoons chili powder (I used half regular and half chipotle)
1 tablespoon kosher salt
2 teaspoons sugar
¾ teaspoon cayenne pepper
4 cups shelled, unsalted peanuts

1. Preheat oven to 250 degrees.

2. Whisk lime zest, lime juice, chili powder, salt, sugar, and cayenne pepper together in a large bowl. Add peanuts and stir until evenly coated.

3. Scrape nuts onto a large, rimmed baking sheet (line with parchment if desired, for ease in cleanup). Bake until nuts are fragrant, dry, and beginning to darken, about 30 minutes.

Yields: 4 cups (about 16 servings)
Time: 40 minutes
Leftover potential: Excellent; will keep in an airtight container at room temperature for at least a couple of weeks.

Tuesday, January 31, 2012

ROASTED CARROTS AND PARSNIPS WITH FENNEL AND ORANGE


The Crispy Pork Medallions recipe was accompanied in Cooking Light by a basic roasted root vegetable medley, but that looked kind of boring. Still, I needed something to go with it and I love roasted vegetables, so I turned to Food Blog Search to see if it would bring me something more thrilling, and ding! This recipe from The Kitchn caught my eye immediately. I enjoyed a brief flirtation with roasted parsnips last winter, although I think it’s odd that I complained about them being hard to find, because they are plentiful at the farmers’ market right now; maybe they were out of season by March? If so, I’d better eat my weight in them right now, because I freakin’ love those ugly buggers. They’re not unlike carrots, but sweeter when cooked, with an addictive peppery undertone (Wikipedia describes this as “reminiscent of butterscotch, honey, and soft cardamom,” a description I’m not sure I would have come up with myself, but I adore all three of those things, so OK!) and the softer, buttery texture of sweet potatoes. The balsamic-glazed variety is still my favorite, but this one is a close runner-up, since it also has fennel, one of my other winter vegetable obsessions, plus carrots and oranges to brighten things up. The oranges are an especially nice touch; I generally hew towards lemon and lime when cooking with citrus, but oranges and carrots make very good friends. Roasting an orange felt strange, but it resulted in awesome flavor.

The first time I made this (yes, I’ve made it twice, along with the pork; I think these two recipes will become inextricably linked for me, because they really are perfect together) I followed the original recipe a bit too literally; I ended up with vegetable pieces that were too big and took too long to cook, which wasn’t helped by the fact that I had peeled and sliced my oranges, which meant they dissolved into puddles of juice and made my vegetables steam instead of getting crisp and brown. It all worked out in the end, but after practicing a second time I’ve made some changes: More parsnips, because they are awesome; smaller vegetable pieces; and oranges that are just quartered (as in this recipe, where I roast lemons) and then squeezed over the vegetables, once during roasting to create a glaze, and once just before serving for an extra burst of flavor. The result is a festival of warm, comforting, caramelized winter vegetables, with enough zips of color and citrus flavor to lift you out of the dark seasonal doldrums.

¾ pound carrots
¾ pound parsnips
1 medium fennel bulb
2 medium oranges
3 tablespoons olive oil
1 tablespoon maple syrup (I recommend Grade B)
Coarse salt to taste
Freshly ground black pepper to taste

1. Preheat oven to 425 degrees.

2. Peel the carrots and parsnips, or just scrub them well. Cut them in half crosswise and then into quarters (or, if they are large, eighths) lengthwise, so they are in uniform chunks (sticks about 2 to 4 inches long and ½ to 1 inch wide worked well for me). If the parsnips have a tough, woody center, cut it out.

3. Cut the fennel into wedges (I did eighths).

4. Wash the oranges and slice them into quarters.

5. In a large bowl, toss the carrots, parsnips, fennel, and oranges with the olive oil and maple syrup and season generously with salt and pepper. Spread out evenly on a large rimmed baking sheet (line with parchment or foil for easier cleanup).

6. Roast, turning occasionally, until tender and browned, about 30 minutes. Five minutes before the end of cooking, use a tongs to squeeze the juice from half of the orange pieces over the vegetables, tossing to coat; return baking sheet to oven and finish roasting.

7. Remove vegetables from oven, use a tongs to squeeze the remaining orange pieces over the vegetables (discard orange pieces after squeezing), season vegetables to taste, and serve.

Serves: 2-4
Time: 45 minutes
Leftover potential: OK; they reheat fine, if a bit less crisp, if you can manage not to scarf them all down immediately.

Thursday, November 17, 2011

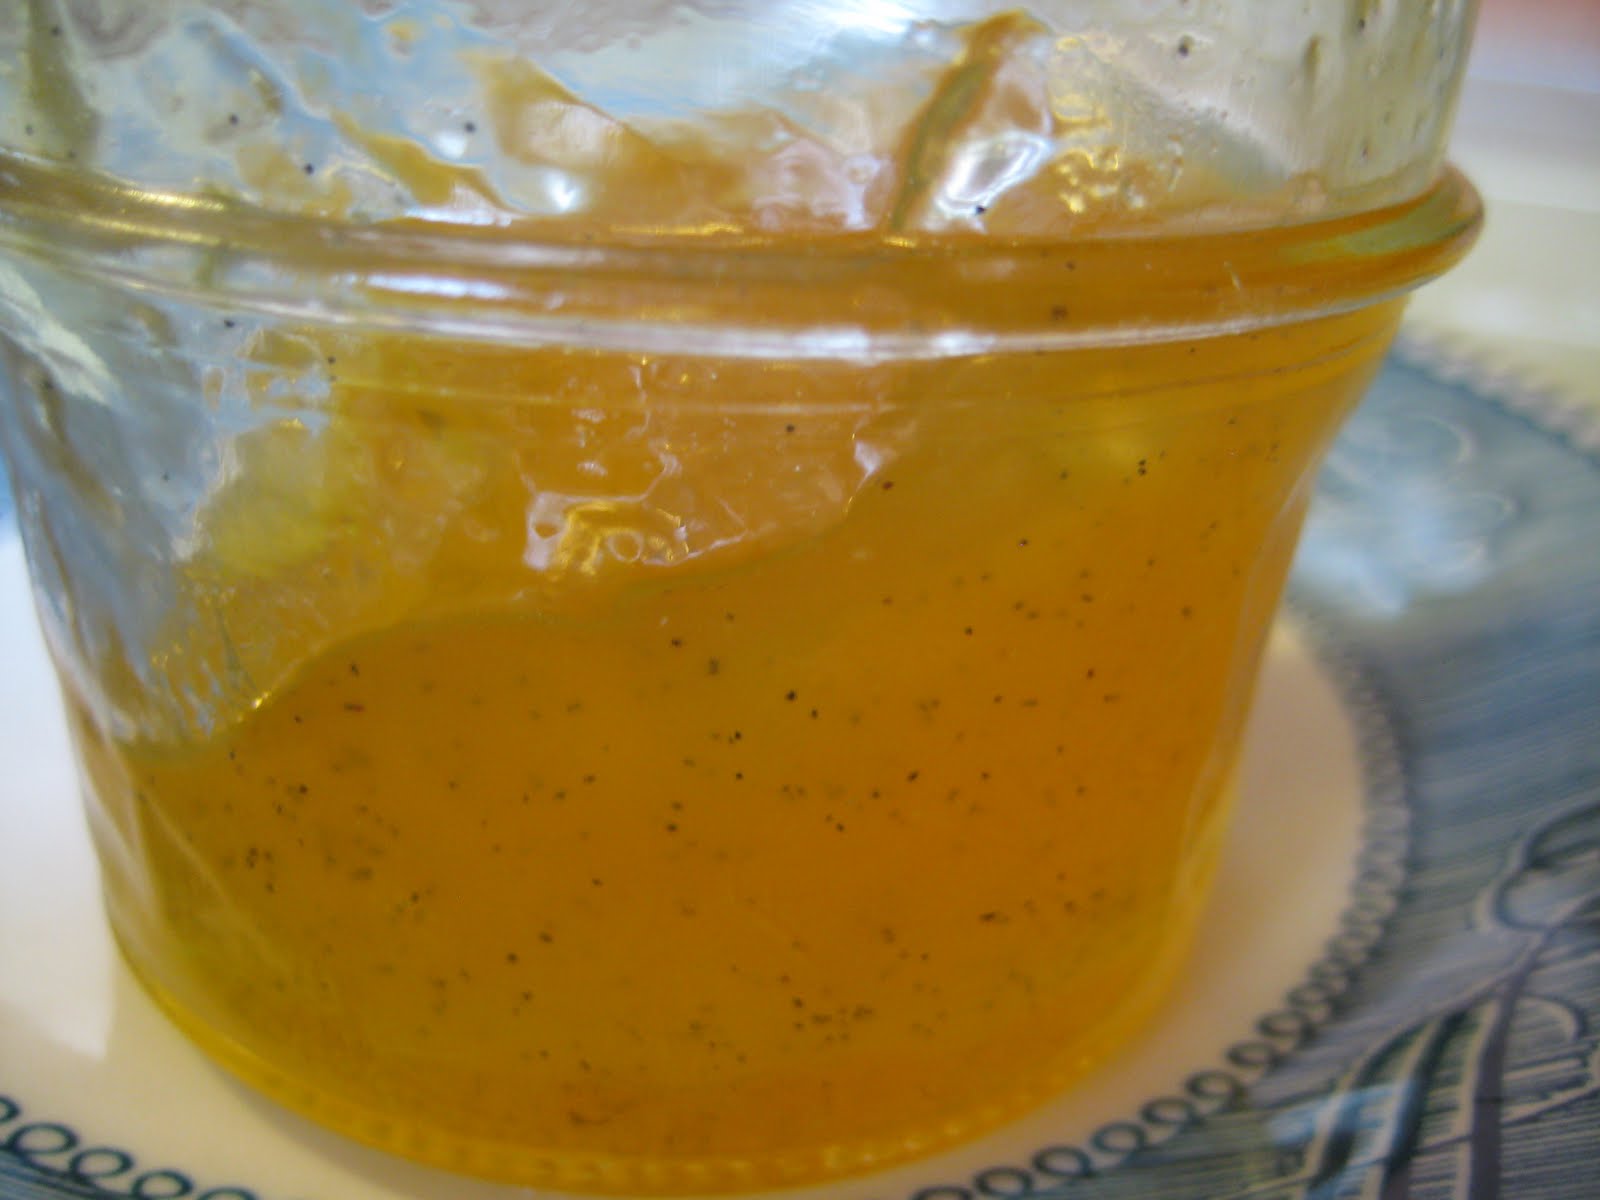
VANILLA ORANGE JELLY


As promised, here’s the recipe for the orange jelly I made months ago, which turns out to be the perfect topping for pumpkin spice pancakes.

Making jam requires, first and foremost, large quantities of fresh, preferably cheap fruit, which makes Southern California a pretty good place to live if you’re into home canning. Although I lament that I’ll never be able to make raspberry or blackberry jam unless I move away or become independently wealthy—and I have to pick my own blueberries and hoard the resulting paltry jars of jam like precious jewels—the fact that I can have heaps of fantastic strawberries (my very favorite) nearly all year around makes up for it. The one SoCal specialty I’d never managed to take advantage of, however, was citrus fruit. I can buy a 5-pound bag of perfect oranges at the farmers’ market for just a few dollars, but I loathe marmalade, so canning with oranges seemed off the table until I spotted this recipe, tantalizingly called “Creamsicle Jelly,” at Food in Jars. I’d never made jelly before; it had never even occurred to me. I mainly associate it with the grape stuff you (not I, never) might put on a peanut-butter sandwich. But of course, if you want to can with oranges and hate those chewy, bitter pieces of rind cluttering up your marmalade, jelly it must be. I don’t especially love orange-flavored things, but Creamsicles are an exception, so the genius idea of adding vanilla was too good to resist. (You’ll notice I retitled the recipe here, simply because, on reflection, “Creamsicle” sort of implies that there’s cream in the jelly, which is inaccurate and kind of gross. If you want the full Creamsicle experience, mix some of this into your morning yogurt—it’s great.)

I wanted this so bad that I finally broke down and bought a candy thermometer, something I’d resisted for years because I’m inexplicably terrified of anything involving melting sugar. (Which is too bad, considering that I adore caramel and toffee.) You’ll notice that the original recipe has a lot of troubleshooting addendums, because many commenters seemed to have problems getting it to set (or having it set too much). I made this so long ago that I don’t remember the details of how I went about it, except that I followed the instructions and they worked for me. I thought the jelly wasn’t going to set; when I took the jars after the canner and even 24 hours later, the contents still looked so runny that I figured I’d just tell everyone it was supposed to be orange-vanilla syrup, but I stuck the jars under my bed and the next time I pulled the box out, the jelly appeared to have set. The jar that’s in my fridge is just about the same consistency as most of my jams, not too thick and not too loose, perfectly spoonable/spreadable, and the flavor is delicious—quite sweet, but with deep, real orange flavor and the distinct aroma of vanilla. Considering that I can get my hands on as many good oranges as I want, pretty much whenever I want them, I’ll definitely be making this again.

4 cups freshly squeezed orange juice
4 cups sugar
2 vanilla beans, split and scraped
1 packet liquid pectin (half a box) (Ball brand is recommended)

1. Prepare jars and closures as in steps 1–2 here.

2. Combine orange juice, sugar, vanilla bean scrapings, and beans in a large pot (this one is a foamer). Bring to a boil over high heat and cook until volume is reduced by approximately one-third to one-half. Use a thermometer to track the temperature, so that you know when you’re getting to 220 degrees (the set point of jams and jellies). When it has reached 220 degrees and is able to maintain that temperature even after a good stir, add the pectin. (Note that the jelly may reach 220 degrees several times during cooking before it is actually time to add the pectin. It needs at least 30 minutes of boiling, if not more, in order to set up well.) Cook for an additional 2 to 3 minutes and remove from heat.

3. Remove the vanilla beans from the pot. Pour jam into prepared jars, wipe rims, apply lids, screw on bands, and process in a boiling-water canner for 10 minutes, as in steps 7–9 here. (Note that jelly may not appear set immediately after canning; mine became firmer over the course of several days.)

Yields: About 8 4-ounce jars
Time: Can’t remember; at least 3 hours
Leftover potential: Awesome! Sealed jars will keep for 1 year.

Friday, October 14, 2011

LEMON PUDDING


And so we come to the end of my effort to make homemade versions of all my favorite Jell-O instant pudding varieties. (Well, I might try coconut someday…and maybe pumpkin…but I will not be attempting “cheesecake,” “Oreo,” “chocolate fudge,” “Devil’s food” [don’t ask me how Kraft’s three kinds of chocolate pudding differ from one another], “white chocolate,” “egg custard,” or “flan.” [Kraft’s online description: “But don’t be fooled by its elitist attitude this flavor is beloved by everyone.” Aside from the heinous lack of punctuation, how is flan even a flavor? Is it shorthand for caramel? And while we’re at it, the concept of custard-flavored pudding kind of blows my mind, too. Isn’t that like saying “yam-flavored sweet potato”?])

I used Food Blog Search to find my way to this recipe, from a book called Luscious Lemon Desserts by Lori Longbotham. There’s not much to say about it except that it’s lemon, it’s pudding, and it’s delicious. The recipe is structured a bit differently from other ones I’ve tried, in that you cook the egg at the same time as all the other ingredients instead of adding it later, but the result was pretty much the same. I like a really thick pudding, so for my taste, I should have cooked the pudding a tiny bit longer; I forgot that I’d be stirring in an entire ½ cup of liquid at the very end, which thinned it out somewhat. I also freaked out and threw in some vanilla at the last minute, on the principle that vanilla is delicious with everything and would give it a richer, smoother taste. I liked the resulting flavor, but I’m not sure I can out-and-out recommend it because the bright taste of the unadulterated lemon is great, too—I’d go with straight lemon for a spring/summer version, whereas mine was maybe more appropriate for fall/winter.

As I was making this, I pondered why other fruit-flavored puddings aren’t common. Why not strawberry, for instance? Couldn’t you make a lime or orange pudding using the same method as this lemon one, or would that just be gross? As you know, I had a hard time even finding a banana pudding recipe that had real banana in it. Most of my searches for fruit puddings turn up bread puddings, British-style puddings, or pudding cakes, not plain old pudding pudding. Although I’m not necessarily sure this is something I want to pursue—my ideas for future pudding experiments tend more toward peanut butter or maple. Which off-the-beaten-track pudding flavors sound good to you?

¾ cup sugar
¼ cup cornstarch
2½ cups milk
3 large egg yolks, lightly beaten
2 tablespoons finely grated lemon zest
A pinch of salt
½ cup freshly squeezed lemon juice
2 tablespoons unsalted butter, at room temperature
½ teaspoon vanilla extract (optional)

1. Whisk together the sugar and the cornstarch in a medium saucepan. Add the milk and whisk until smooth. Add the egg yolks, zest, and salt and cook over medium heat, stirring frequently at first and constantly towards the end, until thickened.

2. Remove the pan from the heat and stir in the lemon juice and butter. Press through a fine-mesh strainer into a large serving bowl or four individual serving dishes. Let cool to room temperature. Refrigerate, loosely covered, for at least 2 hours or up to 3 days, until set and thoroughly chilled.

Serves: 4
Time: 30 minutes
Leftover potential: Good, for a few days (I've found that homemade pudding eventually gets runny or sort of separates if you keep it too long, although it comes together with a vigorous stirring and still retains its essential yumminess).

Thursday, September 08, 2011

HERB GARDEN POTATO SALAD WITH SPINACH AND LEMON


I seem to be accumulating a lot of potato salad recipes for someone who hates potato salad—or at least claimed to until last year, when I realized it doesn’t necessarily have to be ice-cold and dripping with mayonnaise). Just when I think I’m all set with my two faves, along comes another good-looking recipe, like this one from The Kitchn, so alluring with its lemony greenness. I love potatoes with dill and parsley and shallots, I love lemon-olive oil dressings, and I love spinach, so it seemed like it couldn’t go wrong—and it didn’t, even though I tried my best to flub it by temporarily forgetting how many ounces are in two pounds and only putting in three-quarters of the amount of potatoes. Luckily, one of the main things I like about this recipe is how many greens are packed in here, yet they’re wilted by the heat of the potatoes so you still feel like you’re eating a potato dish, not a leafy salad with potatoes in it. Even A, not always a veggie fan, claimed to like my overly high ratio of spinach to potatoes and said he’d happily have it that way again.

Aside from that inadvertent change, I did make one important improvement to the recipe: adding Dijon mustard to the dressing. I think mustard and potatoes are BFFs, but even if you don’t care for the flavor of mustard that much, a dab of it in a salad dressing will work savory wonders without necessarily being identifiable as mustard. I always add it to my everyday lemon vinaigrette, and since the dressing here was basically the same thing, I thought it seemed a shame to leave it out. Mine was probably a pretty heaping spoonful, but I’ve added it to the recipe below as a more modest 1 teaspoon; use your judgment depending on your degree of mustard love. My one regret: Adding the 1 teaspoon of sugar that the original recipe called for. I was trying to play by the rules the first time around and trust that it added some important element, but I should have trusted my instincts—I enjoy my lemony tartness straight up, so I could taste the sweetness in the dressing and didn’t like it. I wouldn’t add the sugar in the future, and I’ve removed it from the recipe below.

Lemons and dill and new potatoes always remind me of spring, so that’s when I’d be most likely to crave this salad, but it was good in the summer too. Plus, since it can be served warm and the ingredients are things most people can get fresh year-round, it would be a lively way to brighten up your winter diet.

2 pounds extra-small Yukon Gold potatoes
1 large lemon, juiced and zested
⅓ cup olive oil
1 teaspoon Dijon mustard
5 ounces fresh baby spinach, well-washed
⅔ cup flat-leaf parsley leaves, loosely packed
⅔ cup fresh dill fronds, loosely packed
3 shallots, peeled and thinly sliced
Coarse salt and freshly ground black pepper

1. Heat a large pot of water to boiling and salt the water generously. Add the potatoes and cook for 15 to 18 minutes, or until they are quite tender and creamy. Drain, slice each potato in half, and place them in a large bowl.

2. In a measuring cup, whisk together the lemon juice, zest, mustard, and olive oil. Whisk until well-combined; it will be thick and opaque yellow. Pour over the hot potatoes and stir gently until the potatoes are coated with dressing.

3. Slice the spinach leaves into thin ribbons. Mince the parsley leaves and the dill fronds as well. Add the spinach, parsley, dill, and shallots to the potatoes, and toss gently. The spinach and herbs will wilt as they are combined with the hot potatoes. Taste and season with salt and pepper as needed. Serve warm, at room temperature, or chilled.

Serves: 4–6
Time: 45 minutes
Leftover potential: Good.

Tuesday, April 05, 2011

ROASTED CHICKEN THIGHS WITH FENNEL AND LEMON


I love lemon more every day, and I downright crave it in the springtime, so I will take a second glance at any recipe that has it in the title. Add fennel, one of my latest vegetable fascinations, and I’m downright powerless to resist. This recipe from The Kitchn has the added virtues of being ridiculously quick and easy to prepare. The chicken turned out well (chicken thighs stay so moist and flavorful, even when boneless and skinless)—and the fennel was absolutely phenomenal. I don’t know if it was the roasting, the chicken juices, the lemon, the wine, or a combination of all four, but it achieved a level of caramelization and flavor previously unknown to me. Even A, the fennel skeptic, thought it was terrific. (In fact, he loved the dish as a whole, specifically praising the chicken, which I’d found pleasant but unremarkable and basically an excuse to get to the fennel.)

Our sole complaint? Not enough of it. The chicken thighs were petite, and I would have gladly eaten three or four times the amount of fennel I ended up with. I’d already used a bit more than the recipe called for, and I’m glad I did, because it shrank down to a few mouthfuls per serving. Next time I’ll use more chicken and even more fennel, then increase the oil, wine, and lemon accordingly (the version below reflects that).

1½ pounds boneless, skinless chicken thighs
2 large or 3 medium fennel bulbs (about 2 pounds)
4 large garlic cloves, minced
3 tablespoons olive oil
3 tablespoons white wine
1 large or 2 medium lemons
1½ teaspoons kosher salt
Freshly ground black pepper

1. Heat the oven to 425 degrees. Place the chicken thighs in a large bowl.

2. Trim the stalks and fronds off the fennel bulbs. Cut each bulb in quarters (I like to remove the hard center core at the base and discard it), then slice each quarter into ½-inch-thick slices. Add to the bowl with the chicken. Mince about 1 tablespoon of fennel fronds and also add to the bowl.

3. Add the minced garlic, olive oil, and white wine to the bowl. Zest and juice the lemon, and add both to the bowl. Toss all the ingredients together, and add the salt and a generous amount of black pepper.

4. Spread the chicken and fennel on a large baking sheet (coated with foil or parchment, if you want to minimize mess and sticking), arranging the fennel around the outside and placing the chicken pieces closely together in the center. Pour any remaining juices in the bowl over the chicken.

5. Roast for 30 minutes, or until the chicken reaches an internal temperature of about 160°F, and the fennel is tender and beginning to brown around the edges. Take the pan out of the oven, and cover with foil. Let it rest for about 5 to 10 minutes before serving.

Serves: 4
Time: 1 hour
Leftover potential: Good.

Tuesday, March 22, 2011

SLOW-ROASTED SALMON IN LEMON-MUSTARD-HERB SAUCE


I was a seafood hater for the first 20 years or so of my life and I’ve been trying to make up for it since, but the fact remains that I’m still something of an innocent when it comes to fish. Although I’ve got halibut fish and chips and fish tacos nailed, I can’t quite convince myself to love salmon (except in sushi, where it’s my fave). I’ve tried a number of worthy salmon recipes over the years, but mostly out of a sense of healthful duty, and nowadays I rarely seem to make them because eating salmon feels like such a chore. No matter how delicious the seasonings, after the first few bites I just don’t enjoy the texture; it seems so dry and chewy in comparison to the unctuous, buttery feeling of the raw stuff. So I wish someone had told me earlier that there’s an easy solution to Dry Salmon Sadness: letting it come to room temperature and then cooking it very gently at a low heat. In other words, try a little tenderness.

Now that I look, this cooking method seems to be widely represented on the Internet, but I stumbled across it at my new food blog addiction Anger Burger, where Sunday (who calls it “Improbable Salmon”) writes, “I’m acutely aware that many people reading this are terrified of cooking fish, to which I can only say: start with this recipe first. It is very difficult to screw up. The idea is that you cook the salmon in a very low oven for a twice as long as you’d normally cook it, and the result is fish that is buttery soft and moist. And you have a window of like 10 minutes where you can go ‘Wait, is it done? Did I screw up?’ and it will A) yes, be done, and B), no, you did not screw up.” Armed with this assurance, I forged ahead with the recipe, which provides a generic template for a Dijon vinaigrette to marinate and sauce the fish; I adapted it to my tastes, as written below (lemon, parsley, dill), but there are a lot of other combinations of acids (like orange juice) and herbs (like basil) you might try. (Or—oh!—lime and cilantro?!) I loved my version of the sauce, though—lemon and dill are so classic with fish, so perfect for spring, and so excellent with mustard, which, yes, is fast becoming my new BFF. And the fish was incredibly easy to make and just as freaky-pink and excitingly juicy as promised. It still wasn’t as good as eating salmon sashimi, but it was a damn sight closer than any recipe I’ve ever tried.

Now that I’ve done this, I’m sort of shocked that so many of the other salmon recipes I’ve encountered have been the exact opposite, baking the fish into submission at temps as high as 500 degrees. Obviously, the high heat is necessary to get a crispy pesto or caramelized sugar, but in retrospect I mostly liked those recipes because they covered up the salmonyness of the salmon, whereas this recipe lets it shine. I still won’t be eating salmon every week (unless I win the lottery and then someone builds a sushi restaurant next door to my apartment), but when I do want to make it, this recipe’s the one for me.

By the way, I served this with arugula, potato, and green bean salad and it was a perfect pairing.

2 tablespoons lemon juice
1 tablespoon Dijon mustard
1 tablespoon chopped fresh parsley
1 tablespoon chopped fresh dill
1 small clove garlic, minced
3 tablespoons olive oil
Salt and pepper to taste
8–12 ounces salmon fillet

1. In a small bowl, combine all ingredients except the salmon and whisk until emulsified (or you can use a small jar and shake it well). Taste for seasonings; make sure it’s a little saltier than you think is right, because it will be diluted when on the fish.

2. Remove salmon from the fridge, rinse under cold water, and pat dry with paper towels. Cut the salmon into two pieces of equal size. Coat each piece well with the sauce and place 1 inch apart on a baking sheet or dish coated with aluminum foil. Pour remaining sauce over fish.

3. Allow salmon to marinate at room temperature for 20 to 30 minutes while you heat the oven to 250 and make any side dishes you plan to serve.

4. To bake, put the fish in the oven and bake for 15 minutes. After 15 minutes, test for doneness by breaking open the largest piece of salmon and checking that it flakes. (The fish will still be dark pink and very soft—not the firm and opaque salmon you’re used to—but it is actually cooked and safe to eat; however, you can cook it for 5 more minutes if you’re unsure.)

Serves: 2
Time: 1 hour
Leftover potential: Unknown

Friday, January 28, 2011

PORK MEATBALLS WITH NOODLES AND LEMON-THYME SAUCE


I first made this recipe from The Kitchn about a year ago, but for some inexplicable reason I never posted it (even though I remember taking photos and everything). I’m so glad I suddenly decided to try it again, because it’s incredibly delicious. I’ve never been a particular fan of meatballs, but these are enough to make me reconsider—moist, tender, and flavorful, bathed in a tangy, plate-lickingly addictive lemon-thyme pan sauce. Be forewarned: The sauce will be on the thin side, but don’t worry about it. The more sauce, the better! I think the first time I made this, I kept cooking it down in an effort to thicken it and ended up with too little; I recall the meatballs and noodles being somewhat dry. This time I was in a hurry and didn’t bother letting it reduce much, so my portions were a bit soupy but oh so tasty, with the sauce permeating the meatballs and coating every cranny of the noodles. (If you don’t like noodles, potatoes, rice, or bread would also be good sauce-soaker-uppers.)

I like that this is a substantial dinner (I recommend a nice green salad on the side) but feels so much lighter than the traditional leaden meatballs in tomato or cream sauce. Its citrusy zip will brighten up a dark winter’s day, but you could also enjoy it in the spring…Excuse me now while I enjoy a reverie about how good asparagus would taste dipped in lemon-thyme sauce.

POSTSCRIPT, JUNE 2011: I was on to something up there, because you know what's good in this? Asparagus! Just cut it into one-inch pieces, steam it, and throw it into the pan with the sauce, meatballs, and noodles. The green makes it pretty, the tastes go beautifully together, and you've got a one-dish meal right there. I'm doing it all the time from now on.

½ cup milk
¼ cup breadcrumbs
1 small yellow onion, finely diced
Extra-virgin olive oil
Salt
1 egg
1 pound ground pork
¼ cup freshly grated Parmesan cheese, plus extra to taste
4 tablespoons chopped fresh sage leaves
1 teaspoon plus 1 tablespoon finely chopped fresh thyme, divided
⅛ teaspoon cayenne pepper
Freshly ground black pepper
1½ cups chicken broth
¾ cup dry white wine
¼ cup fresh squeezed lemon juice (about 1 lemon)
Zest of one lemon
8 ounces uncooked egg noodles

1. Put the milk and breadcrumbs in a small bowl and mix with a fork. When the crumbs have softened, squeeze out the milk and discard it.

2. Gently sauté the onion in a little olive oil until it is soft but not colored. Season with a pinch of salt and set it aside to cool.

3. In a large bowl, beat the egg with a fork or whisk. Add the pork, breadcrumbs, onion, ¼ cup Parmesan, sage, 1 teaspoon thyme, cayenne, black pepper, and 1 teaspoon salt. Mix with hands thoroughly.

4. Shape the mixture into walnut-sized balls. (I made mine on the small side and got about 40 of them.)

5. Over medium heat, place a skillet large enough to hold all the meatballs in one uncrowded layer. (For extra flavor and convenience, I used the same skillet I’d just used for sautéing the onions.) Add a little olive oil. When the skillet is heated, add the meatballs, shaking the skillet to keep them from sticking. Using tongs to turn so they brown evenly, cook the meatballs until they are no longer pink in the center and lightly browned on all sides. Remove from the skillet to a plate.

6. Add the chicken broth and wine to the skillet and simmer until reduced by about a third. Add the lemon juice and thyme, then return the meatballs to the skillet. Simmer at least 10 minutes, but up to half an hour.

7. Meanwhile, bring a large pot of salted water to a boil and cook the noodles until al dente. Drain and add to the skillet with the sauce and meatballs. Toss well and serve garnished with lemon zest and grated Parmesan.

Serves: 4
Time: 1 to 1½ hours
Leftover potential: Good. If you want, you can do steps 1–4 several hours or even a day ahead (or you could probably freeze the uncooked meatballs as long as you like). Leftovers from the finished dish will keep well in the fridge for a week or so.