Showing posts with label Cakes. Show all posts
Friday, June 29, 2012
ROASTED STRAWBERRY BUTTERMILK CAKE
Roasted strawberries! I had never heard of such a thing before, but of course it makes perfect sense. (More sense than strawberry pizza, anyway.) After a sojourn in the oven with sweetness-boosting syrup and savoriness-boosting oil and salt (I know it feels weird to be putting oil and salt on berries, but just roll with it), they break down into a magical, deeply concentrated, intoxicatingly perfumed, almost jammy concoction that’s then tossed in balsamic vinegar for a final flavorful coup de grace. Is there any food that can’t be improved by roasting? I don’t want to know the answer to that.
This recipe from Joy the Baker isn’t perfect, or at least my execution of it wasn’t, but it won me over nonetheless. The strawberries came out wonderfully, although given the volume of the cake I would be tempted to use even more of them next time; the result was more “cake with occasional strawberry” than “strawberry cake.” The cake itself doesn’t contain a lot of butter or sugar, which is great, but my batter turned out worrisomely thick and floury-tasting (I’m an inveterate batter-sampler and usually think it tastes even better than the cooked version, but this one was not very delicious). I’m fully willing to believe that I mismeasured the flour—I do remember being in a rush and resorting to the scooping method rather than the more accurate spoon-in-and-level—but it still made me nervous. When the cake had cooled I cut myself a slice and was underwhelmed. I loved the roasted strawberries, but overall the cake seemed too dense and blah. I stuck the rest of the cake in the fridge and went to bed, telling myself that I’d just have to roast strawberries and eat them in other ways (on yogurt? over ice cream?) while sticking with my favorite tender, moist, lemon-spiked berry buttermilk cake.
The next day, I tried another slice and…it was pretty good! I know that many foods are tastier the next day, but I don’t usually think of cake as one of them. While it still wasn’t ultra-flavorful, the cake now seemed like a worthy vehicle for the strawberries, and I suddenly liked it enough to revise my initial “not worth making again” judgment. Over the next couple of days, I even found myself savoring a slice for breakfast (with a wholesome side dish of yogurt), and I have never been a cake-for-breakfast eater, not even doughnuts or muffins or cinnamon rolls or other socially accepted cake-like foods. That should give you an idea of how not-very-sweet this cake is. I grew to like its not-sweetness, and even its sturdiness, which kept the berries from sinking to the bottom. Maybe it was Stockholm syndrome, but by the time the cake was gone, I’d decided I would definitely make it again. Maybe even specifically for breakfast.
I made no changes to the recipe beyond using a few more strawberries (I’ll use even more next time, possibly even doubling the whole roasted-strawberry recipe), baking it in a 12-inch skillet instead of an 11-inch, because that’s what I’ve got (the cake still seemed plenty thick, regardless), and using granulated sugar on top because I didn’t have turbinado (it was fine, although I’m sure turbinado would add more crunch). I used vanilla but might try almond next time to see if it adds a more discernible flavor (or maybe I’ll use both). Next time, as I mentioned, I’ll measure my flour more carefully and err on the scant side. I’m also tempted to throw all the strawberries onto the cake before baking, instead of adding half then and half later, because that didn’t seem to make much difference in flavor or texture.
8 ounces (or more) medium strawberries, hulled
2 tablespoons maple syrup
1 tablespoon olive oil
1 pinch of salt + ½ teaspoon, divided
2 teaspoons balsamic vinegar
2½ cups all-purpose flour
1 tablespoon baking powder
½ cup granulated sugar
½ teaspoon salt
2 large eggs
1½ cups buttermilk
¼ cup unsalted butter, melted and slightly cooled
1 teaspoon pure vanilla extract or ¼ teaspoon pure almond extract
3 tablespoons turbinado sugar (or just granulated sugar) for topping
1. Place a rack in the center of the oven and preheat oven to 375 degrees. Line a rimmed baking sheet with parchment paper. (The strawberries get juicy, so a rimmed baking sheet is important.)
2. In a large bowl, whisk together maple syrup, olive oil, and salt until completely incorporated. Cut each strawberry in half and place in the bowl. Toss well until each strawberry is coated. Arrange strawberries in a single layer on the prepared baking sheet.
3. Roast strawberries for 40 minutes. (The juices will thicken, but remove the strawberries from the oven before the juices begin to burn.) Remove the berries and juice from the pan while still warm. Place in a small bowl, stir in balsamic vinegar, and set aside.
4. Increase oven heat to 400 degrees. Butter an 11- or 12-inch cast-iron skillet. (You can also use an 11-inch round tart or quiche pan, or a 9×13-inch pan, although the cake will be thinner and you’ll need to keep a close eye on it in the oven.)
5. In a large bowl, whisk together flour, baking powder, salt and sugar.
6. In a small bowl, whisk together buttermilk, eggs, and butter. Whisk in the vanilla or almond extract.
7. Add the buttermilk mixture all at once to the dry ingredients. Stir until just combined and no lumps remain. Spoon batter into the prepared pan and top with half of the roasted strawberries and juice. Sprinkle generously with turbinado sugar.
8. Bake for 20 to 25 minutes, or until a skewer inserted in the center of the cake comes out clean. (Keep a close eye on it so it doesn’t overcook and dry out.) Allow cake to cool to room temperature before slicing to serve. Serve with the remaining roasted strawberries on top.
Serves: About 8
Time: 1½ hours
Leftover potential: OK; cake will last in an airtight container in the refrigerator for up to 3 days.
Tuesday, February 22, 2011
APPLE CINNAMON BUTTERMILK CAKE

After the banana cake of awesomeness, I was on an everyday-cake kick—plus I had an open container of buttermilk to use up—so it seemed like a good time to try this recipe from Pinch My Salt. It should have been a slam dunk, given that it’s just a slight adaptation of my old fave Berry Buttermilk Cake. And yet… Well, no doubt it suffered in such close comparison to the banana cake, with which I had become slightly obsessed. For one thing, while not difficult to make, the apple cake wasn’t quite as easy to put together, requiring the use of an electric mixer (since it’s butter-based instead of oil-based) and the peeling and chopping of an apple. For another, I didn’t care for the way the apple chunks retained their al dente bite, interrupting the tender cake I craved. But most notably, somehow everything I love most about the berry version—moist, sunny yellow crumbs; crunchy sugar top; delectable lemon-vanilla flavor—wasn’t present in the apple version. Sure, I like berries more than apples to begin with, but who knew I loved lemon so much more than cinnamon? Did I somehow flub the apple cake, or was all the magic of the berry cake really in that half-teaspoon of lemon zest?
Granted, this was only a letdown when measured directly against the banana and berry cakes. The cake was rustic but gorgeous and was devoured quite happily in a matter of days. I may simply not be as much of an apple-cake-type person as I thought I was, and that’s OK (at least as long as there are bananas and berries around). If you’re craving the warmth of cinnamon and baked apple in a simple, tangy cake, you should definitely give this a try.
1 cup all-purpose flour
½ teaspoon baking powder
½ teaspoon cinnamon, plus extra for sprinkling
½ teaspoon baking soda
¼ teaspoon salt
4 tablespoons unsalted butter (½ stick), at room temperature
⅔ cup plus 1 heaping tablespoon sugar, divided
1 teaspoon vanilla extract
1 large egg
½ cup buttermilk
1 cup peeled and chopped baking apple (I used Fuji)
1. Preheat oven to 400 degrees and butter and flour an 8-inch round cake pan.
2. In a medium bowl, whisk together flour, baking soda, baking powder, ½ teaspoon cinnamon, and salt; set aside.
3. In a separate bowl, beat butter and ⅔ cup sugar with an electric mixer until pale and fluffy, about two minutes. Add vanilla and egg and beat well. With the mixer set to low speed, beat in about a third of the flour mixture. Add half the buttermilk and continue beating on low speed until incorporated. Scraping down sides of bowl as necessary, beat in another third of flour mixture, then the remaining buttermilk. Finally, beat in the remaining flour mixture until just combined.
4. Scrape batter into the cake pan, smoothing the top with a spatula. Scatter apple pieces evenly over the top of the cake batter, then sprinkle evenly with 1 heaping tablespoon sugar. Sprinkle lightly with cinnamon.
5. Bake until cake is golden and a toothpick inserted in the center comes out clean, 25 to 30 minutes. Cool in the pan for ten minutes, then turn out onto a wire rack to cool until warm. Invert onto a plate.
Serves: 8
Time: 1 hour
Leftover potential: Good.
Wednesday, February 16, 2011
BANANA CARDAMOM CAKE

Banana makes baked goods so tasty and moist, but I never quite know what I’m supposed to do with its usual manifestation, banana bread. It seems too sweet for a snack or a meal component, but not, well, desserty enough for dessert. Banana cake, though, is something I can get on board with, especially when it takes just 10 minutes to stir together. This beautifully simple recipe from Hogwash results in something magical: not overly sweet (not much sweeter than some banana breads, really) but with the springy, tender crumb structure of cake, which makes it undeniably dessert. I have a fancy banana cake I bake for A’s birthday, with rum and brown sugar and chocolate ganache, but this is an everyday cake, lightened by buttermilk and mellowed by cardamom (I’ll admit that as a cardamom obsessive I expected more of an overtly cardamom taste, but it plays more of a supporting role here and that’s OK—either that or my cardamom is getting old and weak), needing no frosting or other accompaniment (although you could gussy it up with whipped cream if you wanted to). And did I mention it’s incredibly, incredibly easy to make? You could whip this up on the spur of the moment if you had unexpected company, or, like me, you could just throw it together on a Tuesday night when the craving for cake hits you. I have a feeling that craving will now be striking fairly often, so I’d better stock up on ripe bananas.
Vegetable oil spray
1¾ cups all-purpose flour
2 teaspoons baking powder
1 teaspoon ground cardamom
¼ teaspoon salt
2 very ripe bananas, well mashed
1 cup sugar
1 cup buttermilk
2 large eggs
1 teaspoon vanilla
½ cup vegetable oil
1. Preheat the oven to 350 degrees. Spray a 9-inch cake pan with the vegetable oil spray and set aside.
2. Whisk the flour, baking powder, cardamom, and salt together into a mixing bowl and set aside.
3. Mash the bananas in the bottom of another mixing bowl. Add the sugar, buttermilk, eggs, and vanilla, and whisk until well blended. Add the dry ingredients and the oil, and gently fold the batter together with a spatula, just until no dry spots remain.
4. Pour the batter into the pan and bake the cake on the middle rack for 35 to 40 minutes, or until lightly browned at the edges and just barely beginning to crack in the center.
5. When the cake is done, let it cool for about 10 minutes. Run a small knife around the edge. Using oven mitts, place a cooling rack on top of the cake pan and flip the cake and the rack together. Remove the cake pan, so the cake is upside-down on the rack. Place a serving plate upside-down on the bottom of the cake, and flip the plate and the rack together, so the cake is now right side-up on the serving plate.
Serves: 8
Time: 1 hour
Leftover potential: Good. We stored ours in the fridge for about three days and it was good even when eaten cold.
Friday, April 23, 2010
COCONUT CUPCAKES

Every year at about this time, I crave coconut cake. That’s because when I was little, my mom would always make me a birthday cake shaped like a bunny, with coconut fur and jellybean eyes. I loved those cakes. But soon, my taste in birthday desserts started skewing toward the chocolatey, and I never looked back. I don’t think I’ve tasted coconut cake in years, and I haven’t even had cake for my birthday in recent memory; since moving to California, I’ve established a tradition of having a beach bonfire party, so hot dogs and s’mores are the new treat of choice. Plus I like cookies and candy and pie and ice cream more than I like cake. Plus I’ve got no one to make a cake for me (mom is far away, and baking is not one of A’s many skills), and it’s a little sad to have to make your own birthday cake, right?
Not if you’ve got a food blog! When I saw these cupcakes at Ezra Pound Cake a few months ago, I knew I needed a good excuse to make them, so I bookmarked them for my birthday. Besides the fact that they were (a) coconut and (b) cupcakes, what tempted me most about them was the inclusion of almond extract, one of my favorite flavors, and buttermilk, which is always stellar in baked goods, and the cream cheese frosting (I don’t love frosting, but I make an exception for cream cheese frosting—which is odd, because I don’t love cream cheese, either). Plus, the recipe was from Ina Garten, as so many delicious things tend to be. My birthday was on a Friday this year, which was not terribly conducive to cake-baking, but I quickly overcame that obstacle by simply declaring Saturday my birthday as well. Friday would be my office party and my bonfire, and Saturday would be cake baking, fun stuff (a trip to Descanso Gardens and a mini-golf outing), dinner at my favorite sushi restaurant, cake eating, and gift opening.
When I embarked on my baking and was setting out all the butter on the counter to bring it to room temperature, I realized this recipe is definitely a once-a-year treat. We’re talking three sticks of butter for a dozen cupcakes, plus the buttermilk and cream cheese. Aside from my Butter Guilt, however, the baking and frosting proceeded smoothly (it’s pretty much just standard cake procedure). I made no recipe changes, except that I used the ol’ milk + lemon juice buttermilk substitute because I didn’t want to make a special trip to the store to buy a whole carton when I just needed ½ cup. Real buttermilk is always better, though, so in the future I’ll try to make the effort. The cupcakes were still plenty good, but when I use buttermilk I can always taste that nice tang and notice the extra-tender texture it imparts, while when I use a substitute it just seems more…neutral.
These cupcakes were so, so good—exactly what I’d been craving. The cake part was good but unobtrusive, buttery and not too sweet, a perfect canvas to showcase the coconut flavor and the frosting (I did think the cake seemed just a little stiffer than I like it, but that may have been my fault, not the recipe’s). The frosting was excellent: perfectly pillowy texture, again not too sweet. The weird thing was that the cupcakes seemed to actually get better with time. I liked them when we ate them on Saturday, but the frosting seemed too tangy and cream-cheesy, and the coconut flavor wasn’t as strong as I’d been expecting. We stuck the rest of the cupcakes in the fridge, and the next day when I had one (after letting it sit out on the counter for half an hour or so to bring it back up to room temperature), I was amazed. Either my palate was out of whack on Saturday, or the coconut had really permeated the cupcakes by Sunday. I’d thought I was going to try to pawn off the rest of the cupcakes on my coworkers on Monday, but it turned out there was no way I was going to part with them, and we enjoyed cupcakes for dessert every night this week. Now they’re gone and I have something to look forward to next April, because these are definitely becoming a birthday tradition for me.
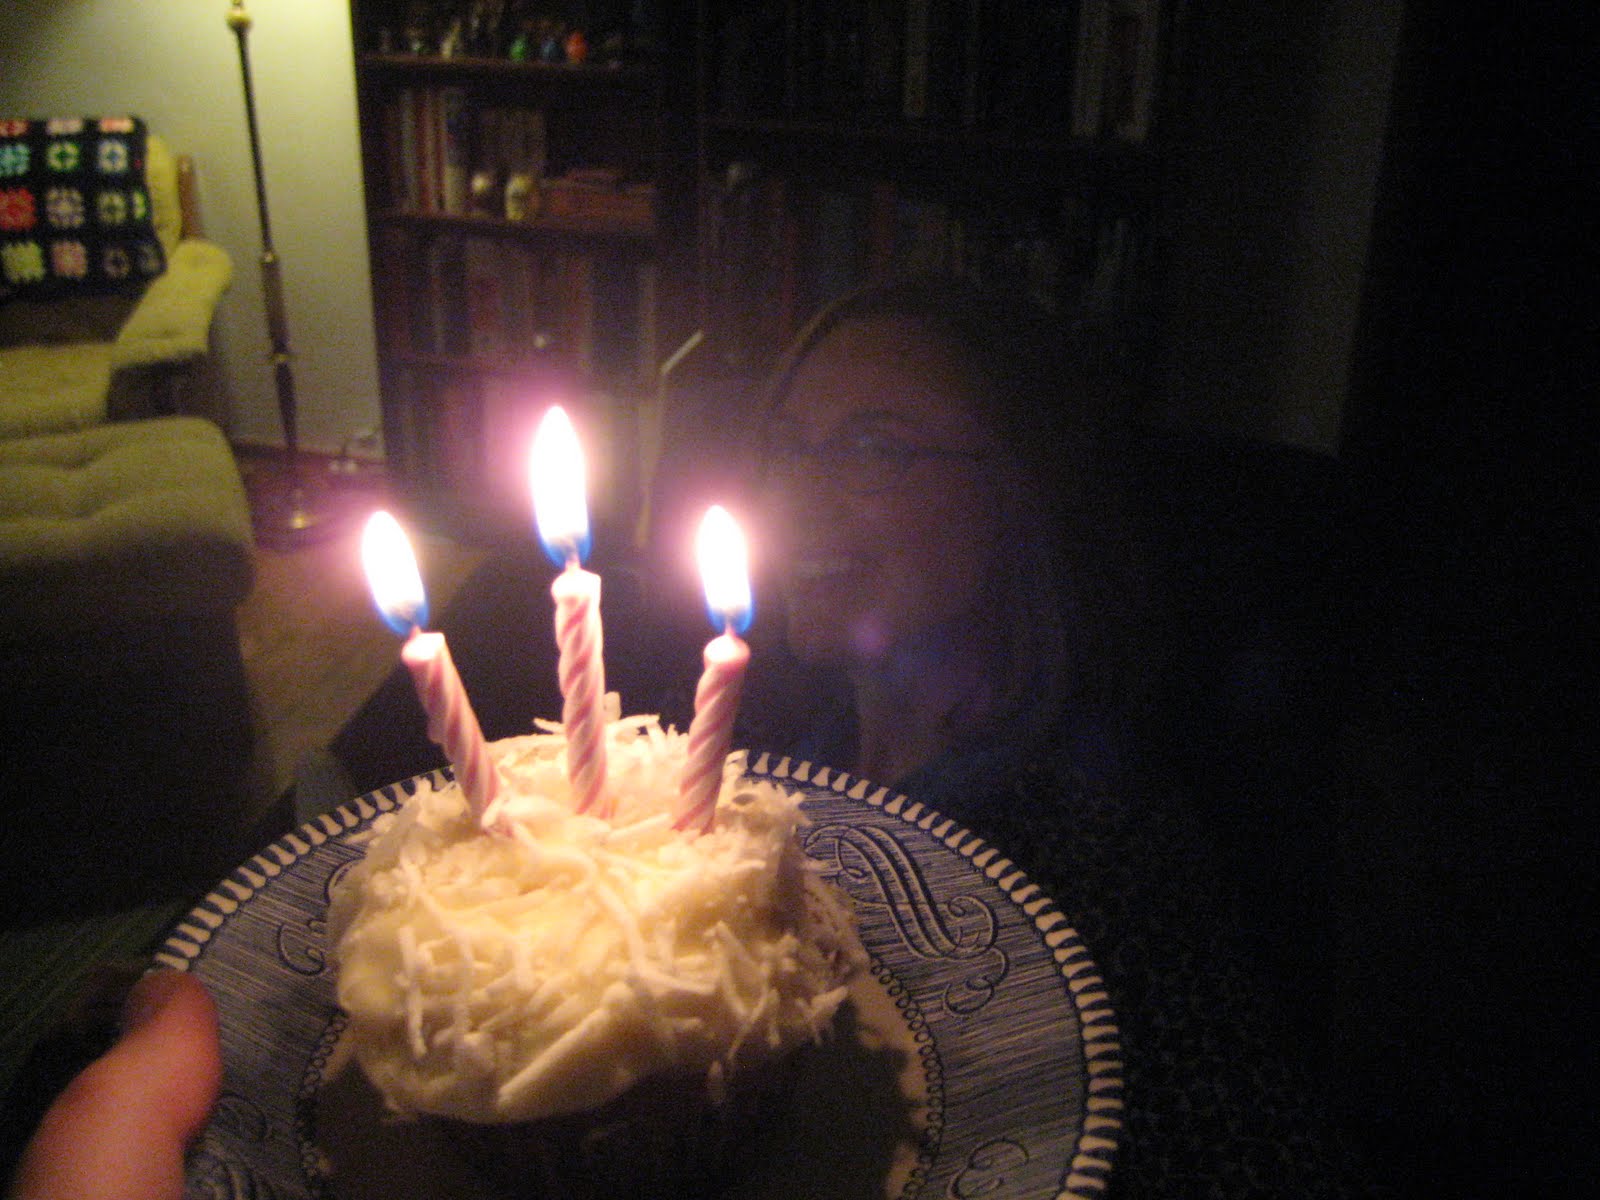
I’m so glad I went ahead and made my own cake. For one thing, I’d forgotten how happy it makes me to blow out the candles. But more importantly, it feels really good to indulge in exactly what you want. I’d considered just going out and buying two cupcakes from the cupcake shop in our neighborhood, and that would have been fine, but it wouldn’t have been as satisfying. Baking is fun, and when you put labor into something you’re going to eat and it turns out just as good as you’d hoped (or better), it’s like a gift to yourself. Happy birthday, me.

For the cake:
¾ cup (1½ sticks) unsalted butter, at room temperature
1 cup sugar
2 extra-large eggs, at room temperature
¾ teaspoon pure vanilla extract
¾ teaspoon pure almond extract
1½ cups flour
½ teaspoon baking powder
¼ teaspoon baking soda
¼ teaspoon kosher salt
½ cup buttermilk
3½ ounces sweetened, shredded coconut
For the frosting:
½ pound (8 ounces) cream cheese, room temperature
¾ cup (1½ sticks) unsalted butter, room temperature
½ teaspoon pure vanilla extract
¼ teaspoon pure almond extract
12 ounces confectioners’ sugar, sifted
3½ ounces sweetened, shredded coconut
1. Preheat the oven to 325 degrees. Line a muffin pan with paper liners.
2. In the bowl of an electric mixer fitted with the paddle attachment, cream the butter and sugar on high speed until light and fluffy, about 5 minutes. With the mixer on low speed, add the eggs, one at a time, scraping down the bowl after each addition. Add the vanilla and almond extracts; mix well.
3. In a separate bowl, sift the flour, baking powder, baking soda, and salt.
4. Add one-third of the dry ingredients to the batter, then add half the buttermilk. Repeat with another one-third of the dry ingredients and the rest of the buttermilk, then add the remaining dry ingredients. Mix until just combined. Fold in coconut.
5. Fill each paper liner to the top with batter. Bake for 25 to 35 minutes, until the tops are brown and a toothpick comes out clean. Cool in the pan for 15 minutes. Remove to a baking rack and cool completely.
6. Meanwhile, make the frosting. In the bowl of an electric mixer fitted with the paddle attachment, cream the cream cheese, butter, and vanilla and almond extracts. Add the confectioners’ sugar and mix until smooth.
7. Frost the cupcakes. Sprinkle with the remaining 3½ ounces coconut.
Yields: 12
Time: 1½ hours
Leftover potential: Good. We kept them in the fridge, bringing them up to room temperature before we ate them, and they were still just as good six days later.
Thursday, September 17, 2009
FRUIT AND BROWNED BUTTER CAKE

I made this dessert with some gorgeous “dinosaur egg” pluots a couple of weeks ago, but even though it knocked my socks off and A’s too, I neglected to write about it. At first I couldn’t figure out why I kept procrastinating, and then one day I caught myself thinking, “Hmm, I seem to have forgotten what this tastes like…how will I describe it on my blog? It’s been so long since I tasted it, I really don’t think I can do it justice anymore. Maybe I should whip up another batch, just to inspire myself.” Yes, I had managed to trick myself into making this again. Sometimes having a food blog comes in handy.
Purely in the spirit of scientific inquiry, I used nectarines the second time, and it turned out just as amazingly as the first time around. So: versatile, possibly foolproof? Check. Delicious? CHECK. Astoundingly easy, requiring only a few common ingredients (I didn’t plan on making that second batch ahead of time—just gave in to my craving one day and delightedly found that all the ingredients were already in my kitchen) and some fruit that happens to be in season right now? Check, check, and check. Clearly, I can’t in good conscience keep the recipe from you people any longer.
This isn’t really a cake per se, but that’s what the original recipe (from Classic Home Desserts by Richard Sax) calls it: Quick Apple Cake. Occasionally, while eating, you do get a chunk that seems cake-reminiscent, where the batter has oozed down to surround a piece of fruit. But on the site where I found the recipe, Baking With Julie, it looks more like a pie, baked in a pie plate and cut into wedges. I don’t own a pie plate, if you can believe it, so I used an 8-inch square Pyrex baking dish, and rather than slicing the dessert (which didn’t have much structural integrity anyway the first time I made it, probably because I used too many of those juicy pluots) I just scooped out spoonfuls into bowls, like a cobbler or crisp or crumble—and indeed it’s put together that way, with lots of cooked fruit on the bottom and just a layer of batter on top. Julie calls it “Browned Butter Bliss,” and that’s certainly accurate, as well as being kind of catchy—and really, if we can have desserts called grunts, slumps, buckles, bettys, and pandowdies, why can’t we popularize the bliss? Still, I’m not sure I can pull it off without air quotes, so in the end I opted for a more straight-up descriptive name, mainly so I don’t have to deal with the “huh?” that would probably result each time I told A we were having Bliss for dessert.
The magical ingredient here is the browned butter, which gives the cake a wonderful caramelized flavor (seriously: taste a fingerful of the uncooked batter; the caramel is even more pronounced than in the finished dessert). If you’ve never browned butter before, all that means is melting butter in a pan on the stovetop and then letting it go a shade or two darker—this happens quickly, so you do have to be vigilant, but otherwise it requires no skill on your part. Then you just mix that—by hand; no mixer required—with some sugar, eggs, and flour, and pour the batter over some cut-up fruit you’ve tossed with a little sugar in the baking dish. You don’t even have to peel that fruit! Sprinkle some more sugar on top and bake. One bowl, one baking dish, a few measuring cups, and that’s it. In 40 minutes you’ll have meltingly soft baked fruit, sweetened but still a little tart, nestled beneath a crusty, buttery topping. I’m willing to bet you could use just about any pie-friendly fruit: peaches, plums, apricots, berries, cherries, pears….Obviously I’m going to have to experiment with each and every one. And I haven’t even tried it with ice cream or whipped cream yet—it’s plenty good plain, whether eaten warm from the pan or cold from the fridge the next day. I'd also like to try it with brown sugar, though that might just be gilding the lily.
Even more so than the berry buttermilk cake, my other favorite simple-baked-fruit-dessert discovery of this summer, this is a recipe I can totally envision myself effortlessly memorizing, then whipping up spontaneously at a moment’s notice when guests drop by (of course, guests never really just “drop by” my apartment, but in this fantasy I live in some close-knit, old-timey community with all my friends in easy reach and leisurely afternoons to spend in each others’ kitchens). Or, you know, when I just have some fruit lying around that needs to be eaten.
8 or so small plums or apricots, or 3 large peaches or nectarines, thickly sliced (the original calls for 3 tart apples, peeled and thinly sliced, in which case also add a squeeze of lemon juice to them in the pan)
¾ cup + 3 tablespoons sugar
½ teaspoon cinnamon (optional; I didn’t use it)
½ cup butter
2 large eggs
1 cup all-purpose flour
1. Preheat the oven to 350 degrees.
2. Butter a pie plate or 8-inch square baking dish. Toss your fruit in the baking dish with about 2 tablespoons sugar and the cinnamon, if using; spread evenly over the bottom of the dish.
3. Melt the butter in a small saucepan over medium heat (I find that a light-colored [i.e., non-nonstick, such as stainless steel] pan works better, because you can see the color of the butter more clearly) and keep cooking it, swirling the pan occasionally, for about 5 minutes or until it turns golden brown (you should see brown flecks in the butter). Remove from heat and pour into a medium mixing bowl.
4. Stir the ¾ cup of sugar into the butter, then the eggs, then the flour. Pour over the fruit and sprinkle with the last tablespoon of sugar.
5. Bake for 40–45 minutes, until golden and crusty, and the juices ooze from around the edges. Serve warm with vanilla ice cream, whipped cream or thick vanilla yogurt.
Serves: 4–8
Time: 1 hour
Leftover potential: High. I was surprised how much I liked the cold leftovers the next day—almost more than the hot-from-the-oven version (though if you wanted, you could just reheat the leftovers in the microwave—which I’d do if I were serving it with ice cream; I love that warm/cold contrast). Sure, the cake topping gets less crisp, but the flavors seem to meld more.
Tuesday, June 16, 2009
BLUEBERRY BUTTERMILK CAKE

On Saturday morning, A and I picked over seven pounds of blueberries. Last year when I did this with my friend J, the weather was unbearably hot and sunny and the blueberries were small and relatively picked over. This year, it was cool and cloudy and the blueberries were big, ripe, and plentiful, so I was able to pick nearly a pound more in what felt like half the time—and then come home with double that amount, thanks to A lending an extra pair of intensely blueberry-loving hands. Here is what 7.25 pounds of blueberries looks like, in case you were wondering:

So we have been decadently devouring fresh blueberries by the bowlful, but of course, I wanted to make something special with our bounty. This berry-studded buttermilk cake recipe was published in Gourmet this month and has been making the food blog rounds: I first saw it, looking delectable in its original raspberries, at The Smitten Kitchen, then at Sassy Radish, and then again, with blueberries this time, at The Food Librarian. I’m not much of a cake eater or baker, but these simple single-layer no-frosting “everyday cakes” always look so cozy and charming to me, I couldn’t resist this one—and I’m so glad I didn’t. It was easy and so good—light, moist, not too sweet, with the tang of buttermilk, the irresistible (especially when paired with blueberries) zip of lemon zest, and an addictive crispy-sugared top. It’s the kind of thing you could whip up at the height of summer without breaking a sweat and bring to a picnic or barbeque.
The Food Librarian noted that all her blueberries sank to the bottom, so I dusted mine with flour before setting them gently atop the batter and they didn’t sink quite as uniformly as hers—but they still sank; I guess they were just too plump not to. This wasn’t a problem until I went to flip the cake out of the pan and of course, it wouldn’t release at first, then splatted out onto the cooling rack in a heap. I might have been too impatient, it’s true—maybe I should have let it cool in the pan just a little longer—or maybe that soft, juicy, berry-laden bottom was just destined not to hold up (though I noticed the Food Librarian’s came out just fine, darn it). So my cake was extra “rustic”-looking and I had to work hard to salvage a non-mangled slice for photographic purposes, but it tasted so good, who cares? We ate it for dessert, we ate it for breakfast, I’m going to go home and eat the rest of it right now, and I’m making it again later in the week (still at least 3 pounds of blueberries left!). I’d also love to try it with strawberries.
I’m including the weights for all the ingredients because, thanks to my cute little kitchen scale, I actually used them this time! Precision!
1 cup (130 grams) all-purpose flour
½ teaspoon (2 grams) baking powder
½ teaspoon (2 grams) baking soda
¼ teaspoon salt
¼ cup (56 grams) unsalted butter, softened
⅔ cup (146 grams) plus 1½ tablespoons (22 grams) sugar, divided
½ teaspoon pure vanilla extract
½ teaspoon finely grated lemon zest
1 large (57 grams) egg
½ cup well-shaken buttermilk (you can substitute 1 cup of milk with 1 tablespoon vinegar or lemon juice stirred into it, but really, if the word “buttermilk” is in the title of the recipe, don’t you think you should spring for the real stuff?)
1 cup fresh blueberries (about 5 oz) (dust them with a pinch of flour if you’re worried about them sinking)
1. Preheat oven to 400 degrees with the rack in middle. Butter and flour a 9-inch round cake pan.
2. Whisk together flour, baking powder, baking soda, and salt in a large bowl and set aside. In a larger bowl, beat butter and ⅔ cup (146 grams) sugar with an electric mixer at medium-high speed until pale and fluffy, about two minutes, then beat in vanilla and lemon zest. Add egg and beat well.
3. At low speed, mix in flour mixture in three batches, alternating with buttermilk, beginning and ending with flour. Mix until just combined. Spoon batter into cake pan, smoothing top. Scatter blueberries evenly over top and sprinkle with remaining 1½ tablespoons (22 grams) sugar.
4. Bake until cake is golden and a toothpick inserted into center comes out clean, 20 to 25 minutes. Cool in pan 10 minutes, then turn out onto a rack and cool to warm, 10 to 15 minutes more. Invert onto a plate.
Yield: 1 9-inch cake
Time: 1 hour
Leftover potential: High, assuming you don’t eat it all in one sitting. I kept it in a covered container in the fridge and found that I really liked eating it slightly chilled. It stayed moist for days.
Wednesday, April 29, 2009
BANANA CAKE WITH CHOCOLATE GANACHE (A'S BIRTHDAY CAKE)

From-scratch cakes aren’t hard to make, but I only seem to do it about once per year: for A’s birthday. I’m just not much of a cake fan, particularly when there are cookies and candy around. Every now and then, however, cake really hits the spot—and this one was so good, it made me want to bake cakes all the time.
I made the banana cake, lifted from this recipe at The Smitten Kitchen, for A’s last birthday and mentioned it in passing here, but wasn’t quite satisfied enough to write a full post. That’s because I mucked up the frosting—the original recipe was a caramel-walnut-banana cake, but the Smitten Kitchen verdict was that the banana cake was the best part, and besides, A wanted chocolate banana cake. So I picked a new-to-me recipe for fudge frosting off the Web and it totally failed, leaving me no choice but to whip up an emergency batch of standard chocolate frosting from the Better Homes and Gardens Cookbook. Nothing wrong with that, but when I tasted the cake it became clear that it was crying out for a more bitter counterpoint, like a dark chocolate ganache. I spent the ensuing year secretly (and, occasionally, not-so-secretly) hoping that A would pick banana cake for his birthday again so I’d have an excuse to take another shot at this cake. And he did.
I hadn’t made ganache before, but I’d heard it was easy, and it certainly lived up to that reputation. In the comments on the cake post, Deb recommended this ganache recipe as a nice pairing for the banana cake, so I used that as a starting point. I omitted the coffee, because we are not coffee people and I didn’t have any around or want to buy any, and I increased the cream just slightly. Then, although Deb said it hadn’t worked for her with this particular ganache, I used the lazy heat-cream-and-pour-over-chocolate method (well described in this Orangette post about a very similar cake) because the words “double boiler” in a recipe are always a huge turnoff for me. I slacked even more by heating my cream up in the microwave rather than on the stove. When it looked like my chocolate wasn’t melting into the cream enough, I even popped the whole bowl of cream and chocolate into the microwave for 10 seconds. Despite all these shortcuts, the ganache came together just fine—easy to spread over the cake, just the right amount to cover, firmed up admirably to a texture somewhere between fudge and frosting (so prettily glossy I had trouble photographing it!), and tasted amazing (use the best-quality chocolate you can, of course; I used the last of my fancy Callebaut chocolate chips from last year’s birthday gift card to Surfas).
In short: I will strenuously urge myself not to wait an entire year before making this cake again. Sure, it’s a great way to celebrate a special occasion, but it’s also simple enough for everyday eating. The cake itself is a cinch to make and well worth buying cake flour and a small bottle of rum for. It would probably be just dandy on its own, dusted with powdered sugar, garnished with strawberries, dolloped with whipped cream, or maybe with chocolate chips mixed into the batter—but why not make ganache when ganache is so ridiculously easy to make?

1¾ cups cake flour
1 teaspoon baking powder
¾ teaspoon baking soda
½ teaspoon salt
½ cup (1 stick) unsalted butter, room temperature
½ cup sugar
½ cup (packed) golden brown sugar (I used dark; no big deal)
2 large eggs
1 cup mashed very ripe bananas (2 to 3 large)
3 tablespoons sour cream
1 tablespoon dark rum
1 teaspoon vanilla extract
4 ounces semisweet chocolate chips or finely chopped chocolate
⅓ cup heavy cream
1. Preheat oven to 350 degrees.
2. Sift flour, baking powder, baking soda, and salt into a medium bowl.
3. Using an electric mixer, beat butter and both sugars in a large bowl until blended. Beat in eggs one at a time, then mashed bananas, sour cream, rum, and vanilla. Beat in dry ingredients in two additions just until combined. Spoon batter into a buttered 9-inch cake pan.
4. Bake cake until tester inserted into center comes out clean, about 40 minutes. Place pan on a cooling rack and let sit for 15 minutes. Invert cake out of pan onto rack and cool completely.
5. Place chocolate in a medium mixing bowl. Either on the stovetop or in the microwave, heat cream until it is steaming and about to boil. Pour cream over chocolate and whisk until most of the chocolate is melted; then cover and let stand for 5 minutes. Stir or whisk gently until the mixture is completely smooth. Drizzle or spread over cake and let cool.
Yield: One 9-inch cake
Time: About 2 hours (including cooling time)
Leftover potential: High. I keep leftover cake in the fridge and eat it cold, washed down with a glass of milk. A even had some for breakfast.
Wednesday, August 29, 2007
BLACK-BOTTOM CUPCAKES

I am just bursting with self-congratulation. I used to think I just couldn’t make great cake, but this recipe has proven me wrong. When I saw it at the Smitten Kitchen, it sounded so simple and so good that I had to try making it for my friends’ shared birthday celebration a couple of weeks ago. Since I was planning to bake them on a Wednesday night and tote them around with me the whole next day before meeting the birthday girls for dinner, the fact that I didn’t have to make frosting and then worry about said frosting getting smeared all over the place during the transport process was majorly appealing.
The cake recipe sounded a little odd—brown sugar? vinegar? The vinegar had only given me mild pause initially, but when I was driving home from work on my planned cupcake-baking evening, I happened to hear this story on NPR, in which the interviewer simply could not get over the fact that the “wacky cake” recipe called for vinegar. “Vinegar?” she kept repeating. “Really? Vinegar?!” I started to get nervous. Now, with the levelheaded benefit of hindsight, I realize the interviewer just didn’t know what she was talking about. Both the wacky cake and the black-bottom cake recipes don’t call for milk, butter, or eggs, which means they’re probably rooted in either the Great Depression or World War II. Any elementary-school science student knows that baking soda + vinegar = fizz, so I’m guessing the vinegar helps to leaven the cake in the absence of eggs. Ah, chemistry!
The cupcakes were extremely easy to make. I used Scharffen Berger for both the chopped chocolate and the cocoa (I can’t believe that since embarking on this recent baking spree, I’ve become the sort of person who keeps both Dutch-process [Droste] and non-Dutch-process [Scharffen Berger] cocoa around the house, in deference to the varying preferences of different recipe writers). I used my KitchenAid to beat the cream-cheese filling and then, because Deb had complained that her cupcakes didn’t look as perfect as the originals, and because it was a hot day in Pasadena, I chilled the bowl of filling in the refrigerator while I made the cake batter, in the hopes that the filling would stay neatly in the centers of the cupcakes. I was a bit tense when filling the muffin cups—the cake batter seemed to fill them up almost completely, so I went easy on the filling to avoid overflowing them (also, I was worried the cupcakes would end up too cheesy-tasting, but after trying them I decided the filling was so good, I shouldn’t have held back). I ended up with leftover batter and filling, and my cupcakes still puffed up way above the top of the muffin cups during baking. Maybe I should have made a thirteenth cupcake? The overflowing didn’t do much harm, aside from making the cupcake tops a little hard to peel away from the pans, and making my cupcakes generally resemble toadstools. Chilling the filling did make it easier to work with, but it didn’t make my cupcakes look any better. They were definitely homestyle, maybe a little homely, but I didn’t mind—in fact, it was cool the way each of them turned out uniquely, with different patterns of black and white swirls on top. I do wish my chocolate chunks hadn't all sunk to the bottom, though; maybe I needed to chop them finer?
Anyway, the taste was the important thing: Absolutely delectable, I'm pleased to report. I tried one fresh out of the oven, just to make sure I hadn’t mismeasured, overmixed, overcooked, or otherwise ruined them, and it tasted good, but I was amazed at how much more flavorful they tasted when I ate one straight out of the refrigerator the next day. It was actually better chilled. No one who tried them could specifically taste the vinegar until they were told it was there, but everyone agreed they liked the little tang it added to the cake—it kept it from being too sweet and balanced out the unctuousness of the cream-cheese filling. Best of all, the cupcakes were utterly moist and tender, something I’ve never achieved in a cake before. Even three days later, they tasted fresh. This is definitely my go-to cupcake recipe from now on.

8 ounces cream cheese, regular or reduced-fat, at room temperature
⅓ cup granulated sugar
1 large egg, at room temperature
2 ounces bittersweet or semisweet chocolate, coarsely chopped
1½ cups all-purpose flour
1 cup firmly packed light brown sugar
5 tablespoons natural unsweetened cocoa powder (not Dutch-process)
1 teaspoon baking soda
¼ teaspoon salt
1 cup water
⅓ cup canola oil
1 tablespoon white or cider vinegar
1 teaspoon vanilla extract
1. To make the filling, beat together the cream cheese, granulated sugar, and egg until smooth. Stir in the chopped chocolate pieces. Set aside. (If you like, chill the filling in the refrigerator while you make the cupcakes—this will make it easier to work with and will help you create a more uniform cream-cheese center.)
2. Adjust the rack to the center of the oven and preheat to 350 degrees. Butter a 12-cup muffin tin, or line the tin with paper muffin cups.
3. In a medium bowl, sift together the flour, brown sugar, cocoa powder, baking soda, and salt. In a separate bowl, mix together the water, oil, vinegar, and vanilla.
4. Make a well in the center of the dry ingredients and stir in the wet ingredients until the batter is just smooth. (Do not overmix, or you will end up with less-than-tender cupcakes.)
5. Divide the batter among the muffin cups. Spoon a few tablespoons of the filling into the center of each cupcake, dividing the filling evenly. This will fill the cups almost completely, which is fine.
6. Bake for 25 minutes, or until the tops are slightly golden brown and the cupcakes feel springy when gently pressed.
Yield: 1 dozen
Time: 45 minutes
Subscribe to:
Posts (Atom)