Showing posts with label Appetizers/snacks. Show all posts

Wednesday, January 27, 2016

PICKLED CARROT STICKS


Back in my pickier eating days, raw carrot sticks were my go-to vegetable—in fact, I think I may have taken cheese, crackers, and carrot sticks to school for lunch almost every day of my K-12 education. I still grab them on occasion when I need vitamins and crunch on the go (plane trips, for instance), but let’s face it, they’re on the bland side. I wish it hadn’t taken me about a decade to realize that the way to make myself fall in love with raw carrots again was to pickle them.

I had this recipe from Sassy Radish bookmarked for more than a year before I finally took the briny plunge. As my friend S and I were planning our annual Halloween scary-but-not-too-scary filmfest and fall feast, I realized we’d need something crisp and fresh to balance out all the delicious cheese and snacks and sweets, and what could be more appropriately festive for than bright orange carrots? These pickles were a cinch to throw together and a huge hit with me, S, A and everyone else I’ve shared them with since. The flavor is a knockout, with an absolutely perfect salty-sour-sweet-spicy ratio, and I love the texture too—not mushy from cooking, just gently bathed in the hot brine enough to barely soften them and still retain their bite. They make a snappy, refreshing accompaniment for rich winter meals like goulash, and an addictive snack all year round.

I inadvertently made this recipe even better when I realized I’d run out of dill seed, couldn’t find it at any of the grocery stores I visited (note to self: Whole Foods has it), and decided to swap in cumin seed instead, on the theory that cumin and carrots often make appearances together. The pickles turned out so fantastic that now I’m afraid to mess with a good thing, and I keep right on using cumin seed even though I’ve replenished my dill supply. Other than that, the only changes I made were to use red pepper flakes instead of a whole chile, and to pack my pickles in a flat rectangular glass container because I didn’t have any appropriately sized jars, which necessitated increasing the liquid quantities just slightly so the brine covered all the carrots. I don’t normally peel my carrots and didn’t bother the first time I made this, but I went for it the second time around and do think it helps the brine penetrate, as well as resulting in prettier pickles.

1 pound carrots, peeled and cut into thin sticks
1¼ cup cider vinegar
1¼ cup water
3 tablespoons sugar
1½ tablespoons kosher salt
2 garlic cloves, slightly crushed
1 teaspoon cumin seeds
A heaping ¼ teaspoon red pepper flakes
½ teaspoon fennel seeds
½ teaspoon black peppercorns
¼ teaspoon celery seed
¼ teaspoon yellow mustard seed
  1. Place carrots in a large jar (or I use a shallow rectangular glass container with a lid).
  2. Combine the remaining ingredients in a small saucepan and bring them to a boil. Remove from heat and let stand for 3 minutes.
  3. Pour pickling liquid over carrots, and let cool, uncovered.
  4. Seal and refrigerate for at least 24 hours before using.
Yields: 1 pound
Time: 20 minutes (plus at least 24 hours of pickling)
Leftover potential: Pretty much the whole point. Will keep in the fridge for up to a month, getting more flavorful every day.

Thursday, May 08, 2014

BAKED EGG ROLLS


Egg rolls are one of A’s favorite foods (after tacos), but I never considered making them at home because I’m afraid of deep-frying. It didn’t occur to me that egg rolls could be baked until I saw this recipe at Budget Bytes. I did think egg rolls that weren’t fried and didn’t contain meat might be a bridge too far for A, so following a lead in the comments, I swapped out the veggie filling for one that included pork. This took a little manipulating, since the pork version was intended for potstickers and was thus uncooked, so I ended up making a mashup of the two different recipes. Unfortunately, I didn’t take good notes, and enough time elapsed before I made these again that I didn’t remember what I’d done before and had to figure it out all over again. Luckily, the filling is forgiving.

You should know that I’m cabbage-averse, although I’m slowly warming to the stuff. I was a little put off by the thought of using a whole head, so the first time around I just bought a bag of pre-shredded cabbage from Trader Joe’s. That’s probably why I only ended up with enough filling to stuff 12 of my 20 egg roll wrappers, although this didn’t occur to me at the time. On my second attempt I increased the pork to ¾ pound, upped the carrot and green onions, and used a whole head of cabbage. (Luckily, Budget Bytes has helpful slicing instructions with photos, since I hadn’t tried to take on a head of cabbage since my CSA gave me one in 2007.) It turns out there’s a lot more cabbage in a head than in a bag! I filled 20 egg roll wrappers generously and still had a little filling left over. So maybe I should have stuck with just ½ pound pork? (A would say no.) In both iterations, the filling tasted great, which is the important thing. I even liked the cabbage.

Are baked egg rolls the same as fried ones? They aren’t going to fool anyone into thinking they’re takeout; the texture is crunchier, chewier, a bit drier (definitely have your favorite dipping sauce on hand; I love Trader Joe’s gyoza sauce, which is basically soy sauce, vinegar and sesame oil with some seasonings, but sweet chili sauce or spicy mustard are also good options). I actually think I might prefer the baked version, though. Four or five plus a side dish (see my next post for that) adds up to a reasonable meal with a decent serving of fresh veggies that doesn’t feel too heavy, and they even make passable leftovers. (I think if you reheated them in the oven or toaster oven they’d regain their crispness and be near-new again, but even zapped in the microwave and thus a bit softer, they were just as tasty.)

These may be a bit more complicated than tacos, but they still weren’t too hard for a weeknight and will definitely be a regular menu feature.

½-¾ pound ground pork
2 tablespoons vegetable oil
1-inch segment fresh ginger, peeled and grated or minced
1 clove garlic, minced
2 green onions, sliced
1 medium carrot, shredded
1 small head green cabbage, cored and thinly shredded
½ teaspoon salt
¼ cup soy sauce
1 teaspoon sesame oil
Freshly ground black pepper to taste
1 package of 20 egg roll wrappers
Nonstick spray (or additional vegetable oil)

1. Heat a large skillet or wok over medium heat. Add the pork and brown, breaking up with a spoon, until cooked through. Remove with a slotted spoon and drain on a paper-towel lined plate, leaving the skillet on the burner.

2. Add 1-2 tablespoons vegetable oil to the skillet. Add the green onion, garlic, and ginger and sauté until slightly softened (1-2 minutes). Add the carrot, sauté for one minute more, and then add the cabbage and ½ teaspoon salt. Continue to cook and stir until the cabbage has reduced in volume by half.

3. Return the pork to the skillet, then add the soy sauce and cook until slightly thickened. Drizzle the sesame oil on top and stir in. Turn the heat off and add a few grindings of pepper. Give the mixture a taste and adjust the seasonings to your liking. Let the mixture cool slightly.

4. Begin to fill and roll the egg rolls. Place one wrapper at a time on a clean surface and place about ¼-1/3 cup of the pork mixture just off center, close to one of the corners on the square. Roll the corner up and over the filling, fold each side in, and then roll the rest of the way up. Keep a small bowl of water near by and use it as “glue” to hold the corners of the egg roll wrapper in place.

5. Preheat the oven to 425 degrees. Prepare a baking sheet by covering with foil. Place the egg rolls on the baking sheet and coat with nonstick spray or brush with vegetable oil. Roll them over and spray/brush the other side with oil. Bake for about 20 minutes or until golden brown and crispy. Turn the egg rolls over halfway through cooking and rotate your baking sheet if you have hot spots in your oven.

Serves: 4-5 as a main dish, more as an appetizer
Time: 1 hour 15 minutes
Leftover potential: Surprisingly OK. Reheat in the oven or toaster oven for best results, but microwave is fine if you don’t mind a softer texture. You can also freeze the unbaked egg rolls and just pop them into the oven without thawing, although the texture may not be as good as with the freshly made ones.

Monday, September 23, 2013

BAKED TORTILLA CHIPS


Making my own tortilla chips is exactly the kind of fussy kitchen experiment I didn’t think I had time for anymore. Now that I’m back in an office for 40 hours a week (no more cozy telecommuting days while bread dough rose on the counter or beans simmered on the stove) and working a faster-paced job that leaves me drained by the time evening rolls around, I’m trying to get back to basics with quicker, less ambitious weekday meals that make plenty of leftovers and can hit the table before 8 p.m. But when you find yourself with a giant stack of tortillas getting stale in the fridge, you have to do something—and it turns out that, after immersion-blender mayonnaise, this is about the easiest DIY I’ve ever tried.

The last time we stopped by the Mexican market to get fresh corn tortillas for fish tacos, they were out of our usual 24-count bags. All that remained were the massive “family size” packages, easily eight inches tall. They still only cost a couple of bucks, so we rolled with it. The leftover tortillas get too dry for making tacos after a couple of days, but they remain perfectly good for tortilla soup, tostadas, and quesadillas. After a couple of weeks, however, despite our best efforts, we barely seemed to have made a dent in the pile, so I consulted the Internet and found this nifty procedure at The Kitchn for making baked tortilla chips.

And really, it couldn’t be any simpler. Coat baking sheets and tortillas with oil, sprinkle with salt, bake until crisp. You can use cooking spray if you want to make it even easier; I usually do that on the baking sheets, but I don’t think it gives even enough coverage on the tortillas themselves, so I prefer to use my silicon pastry brush. It takes surprisingly little oil, so you might even consider this downright healthy—if you can actually manage not to gobble up every warm, salty, crispy morsel right out of the oven. The first time I made these I was so impressed that they actually turned out like real tortilla chips that A and I stood over the baking sheets and happily snacked away…until I realized I’d eaten the equivalent of about six tortillas in one sitting. Be forewarned, the texture is a bit different than storebought/fried chips, less shatteringly crispy and with a little bit of chew, especially when they’re still warm. You can dry them out by leaving them in the oven with the heat off after baking, but I’ve found that can almost make them too crunchy for me, at least with the tortillas I've been using. Because they’re a bit sturdier, though, it makes them great for nachos, dipping, and so forth. (Next time I post I’ll share with you a recipe I used them in that knocked my socks right off.) And the flavor is excellent.

You can do this in any quantity you like. I’ve found that 10 to 12 corn tortillas yields the right number of chips to cover two of my large baking sheets in a single layer (and two sheets is all that fits into my oven at one time). Even at that rate, it took us six batches or (over the course of several weeks) so to get through all our leftover tortillas. Luckily, this recipe works just fine with older tortillas—the chips maybe get a bit denser in texture, but the flavor is unaffected. Of course, now that we’ve finally finished off the bag, I find myself craving them again, so there’s probably a trip to the Mexican market in my near future. I can see that this is going to become a vicious—but delicious—circle.

Good-quality corn tortillas
Neutral vegetable oil, like grapeseed or canola
Coarse salt

1. Preheat oven to 350 degrees. Pour a tablespoon or so of oil into a bowl. Brush a thin coating onto one or two baking sheets and set aside.

2. Place one tortilla on a cutting board and brush the top with a light layer of oil. (You don’t need a lot of oil, but make sure it’s spread evenly across the entire surface, including the edges.) Place another tortilla on top of the oiled one and brush its top with oil. Continue until all your tortillas are oiled and stacked in one pile.

3. Cut your tortilla stack in half. Cut one of the halves in half and cut each of those halves in half again, forming wedges. Repeat with other side, so you have eight stacks of tortilla wedges.

4. Arrange the tortilla wedges in a single layer on the baking sheets (don’t overlap them or they won’t get crisp), un-oiled sides facing down so that they have contact with the oil on the tray. Sprinkle a pinch or two of coarse salt evenly over the tops.

5. Place the trays in the oven and bake for 8 to 12 minutes. Check your chips at 8 minutes and rotate your pans. The chips are done when the edges are crisp and dry and slightly lifted from the tray. They should be a few shades darker, though not completely browned. The chips will still be slightly flexible in the middle, but they will crisp further as they cool. If you want crispier chips, turn the oven off and let them sit in there until they dry out a bit more, from 10 to 60 minutes.

6. Remove trays from the oven and let cool slightly.

Yield: Whatever quantity you like.
Time: 20 minutes
Leftover potential: These are best when fresh, but can be stored (after cooling) in an airtight container for several days.

Wednesday, May 15, 2013

CHIPOTLE-ROSEMARY ROASTED NUTS


As I’ve mentioned before, I’m not a habitual snacker, but I’m terrified of being hungry—it makes me cranky and weak and shaky and indecisive. So I always feel better when I’ve got something to nibble on just in case, and nothing staves off my hunger pangs more than a handful of nuts. Having snacks on hand became especially important when I started my new job. Spending all day trying to learn the ropes is exhausting and overwhelming to begin with, but the company was extra busy and short-staffed when I came on board, so I was working incredibly hard right off the bat. I made sure that I was always supplied with a little container of nuts to feed my brain in the midmorning and late afternoon, but I burned through my small repertoire of roasted-nut recipes fairly quickly and decided to start in on my backlog of bookmarked new versions. This one, from Ina Garten via Eggs on Sunday, is a bit on the sweeter side than what I usually aim for, but boy howdy, is it delicious. A has declared it the all-time best, and I’m not inclined to argue.

Garten is also the creator of my special-occasion (specifically, Christmastime) nut recipe, Rosemary Roasted Cashews, and this shares some of the same ingredients and mix of sweet-spicy-salty-savory elements but takes everything up several notches. Here we have rosemary again, but also orange juice and zest, maple syrup, and a generous dose of smoky chipotle chili. The result is well-balanced and irresistible. And even though I had to laugh at the odd quantities of the different nuts called for in the recipe (basically, lots of cashews, a medium amount of walnuts and pecans, and just a few almonds, all adding up, inexplicably, to 31 ounces—for pete’s sake, why not two pounds, Ina?), I did follow it precisely for experimentation’s sake and loved the variety of the mixture. I used the bulk section at Whole Foods to get the exact amounts called for, but if it’s easier for you to buy prepackaged nuts, there’s no reason you couldn’t use, say, half cashews and half pecans and round up the quantities to an even number of pounds.

The first time I made this, I halved it because it seemed like a lot and nuts are expensive, y’all. I baked the nuts for exactly the time specified (I wasn’t thinking; I should have reduced it) and came within a hair’s breadth of burning them. They were still tasty, but decidedly on the dark—er, caramelized—side. The second time, I made the full recipe, but foolishly followed the instructions to the letter and plopped them all on a single baking sheet, even though there wasn’t room to spread them out in a single layer. Consequently, they took forever to cook. I baked them for about 15 minutes longer than the recipe said to, and they were still a little sticky when I took them out. I convinced myself they’d firm up when they cooled, but they remained a little chewy even then. Again, still tasty, but I feel as though I’ve yet to execute the recipe perfectly. I did correct the directions below to use two baking sheets if you’re making the full batch. Which you really should, because if they’re so delicious when I’ve messed them up, imagine how good they’ll be when I finally get them right!

3 cups whole roasted unsalted cashews (14 ounces)
2 cups whole walnut halves (7 ounces)
2 cups whole pecan halves (7 ounces)
½ cup whole almonds (3 ounces)
2 tablespoons olive or vegetable oil
1/3 cup pure maple syrup
¼ cup light brown sugar, lightly packed
3 tablespoons freshly squeezed orange juice
Zest of half an orange
2 teaspoons ground chipotle powder
4 tablespoons minced fresh rosemary leaves, divided
2-3 teaspoons coarse kosher salt

1. Preheat the oven to 350 degrees and line two rimmed baking sheets with parchment paper.

2. In a large bowl, stir together the nuts, oil, maple syrup, brown sugar, orange juice and zest, and chipotle powder. Toss to coat the nuts evenly. Add 2 tablespoons of rosemary and 1 to 2 teaspoons of kosher salt, and toss again.

3. Divide the nuts between the two baking sheets and spread them out in a single layer. Roast for 25 minutes, stirring about halfway through, until glazed and golden brown. Remove from the oven and sprinkle with another teaspoon or so of salt and the remaining 2 tablespoons of minced rosemary.

4. Stir well and set the nuts aside on their baking sheets to cool at room temperature, stirring occasionally to prevent them from sticking together too much as they cool. Store in an airtight container.

Serves: 12-16
Time: 40 minutes
Leftover potential: Good; will keep in a sealed container at room temperature for at least a week, or can be frozen indefinitely.

Friday, October 19, 2012

SPICY HONEY-ROASTED PEANUTS


I had nearly a full package of peanuts left over after making the peanut-lime chicken-noodle salad, so I decided to cross honey-roasted peanuts off my cooking to-do list. (What, you don’t keep one of those?) I’d long had a cardamom version bookmarked, but at the last minute I spotted this one from Confections of a Foodie Bride and switched to it because the idea of a spicy version was irresistible.

This recipe could not be any easier. A little microwaving, some stirring, some baking, a bit more stirring, and you’re there: from zero to deliciousness in 25 minutes. It was only with great difficulty that I stopped myself from eating the entire batch while it was still warm and gooey on the baking sheet. It was like some amazing peanut salted toffee confection. I don’t think it even really needed the final coating of sugar. That definitely gave it the crunchy, sandy texture of storebought honey-roasted peanuts, but for me, the added sweetness was unnecessary and overshadowed the other flavors. The recipe called for adding 4 tablespoons of sugar after the peanuts were cooked; I sprinkled on the first two tablespoons, then near the end of the third tablespoon I started thinking, “Hmm, this looks like a lot of sugar,” so I quit. I think next time I’ll try just 2 post-cooking tablespoons, but really, I can attest that these were quite tasty without any extra sugar beyond what they were baked with. I’m also eager to try the cardamom recipe for contrast, because it uses hardly any sugar at all, only 1 tablespoon total.

Still, it’s going to be pretty hard to beat these. They really reminded me of the storebought kind, but a million times better, with roasty caramel undertones that nostalgically reminded me of the peanut brittle my mom used to make for Christmas when I was a kid. (I didn’t work too hard to separate them into individual peanuts for total verisimilitude; the big chewy clumps were actually my favorite part.) The honey flavor is excellent, they’re addictively crunchy, and there’s a good dose of salt to balance the sweetness, all of which makes them so compulsively edible that I’m not going to allow myself to make them on a regular basis, because otherwise I’ll be gobbling up a pound of peanuts a week. A and I made short work of them, and A loved them so much he wouldn’t have me change a thing (he reacted with dismay when I mentioned reducing the sugar, but really, I don’t think he’ll notice when I do it next time, because they’ll still be insanely good). I do think the red pepper flakes could be increased if you want a snack that could actually be described as “spicy,” however. The ½ teaspoon that the original recipe called for added a nice savory note and a gentle heat that I really only noticed as an aftertaste, which I liked just fine, but if tasting blindfolded, I don’t think most people would really know there was spice there. I’m going to take it up to ¾ teaspoon next time for a bigger punch.

1 pound cocktail peanuts (mine were salted)
⅓ cup honey
½–¾ teaspoon red pepper flakes
½ cup sugar or to taste, divided
½ teaspoon salt

1. Preheat oven to 350 degrees. Line a baking sheet with parchment or a silicone mat.

2. Place peanuts in a large bowl.

3. Microwave honey and red pepper flakes in a small bowl for 30 seconds and pour over the peanuts. Add ¼ cup sugar and the salt, stirring well.

4. Spread peanut mixture onto the baking sheet in a single layer and bake for 20 minutes, stirring every 5 minutes.

5. Let cool for 2 to 3 minutes and then stir the peanuts, scraping the honey from the parchment/silicone to coat the peanuts. If desired, sprinkle with 1–2 tablespoons sugar and stir again, then sprinkle with 1–2 tablespoons more sugar.

6. Let cool completely, then break up the peanut clumps into smaller pieces and store in an airtight container.

Yields: About 3 cups
Time: 30 minutes
Leftover potential: Good; will keep in an airtight container at room temperature for at least five days.

Monday, September 17, 2012

ROASTED CHERRY TOMATOES


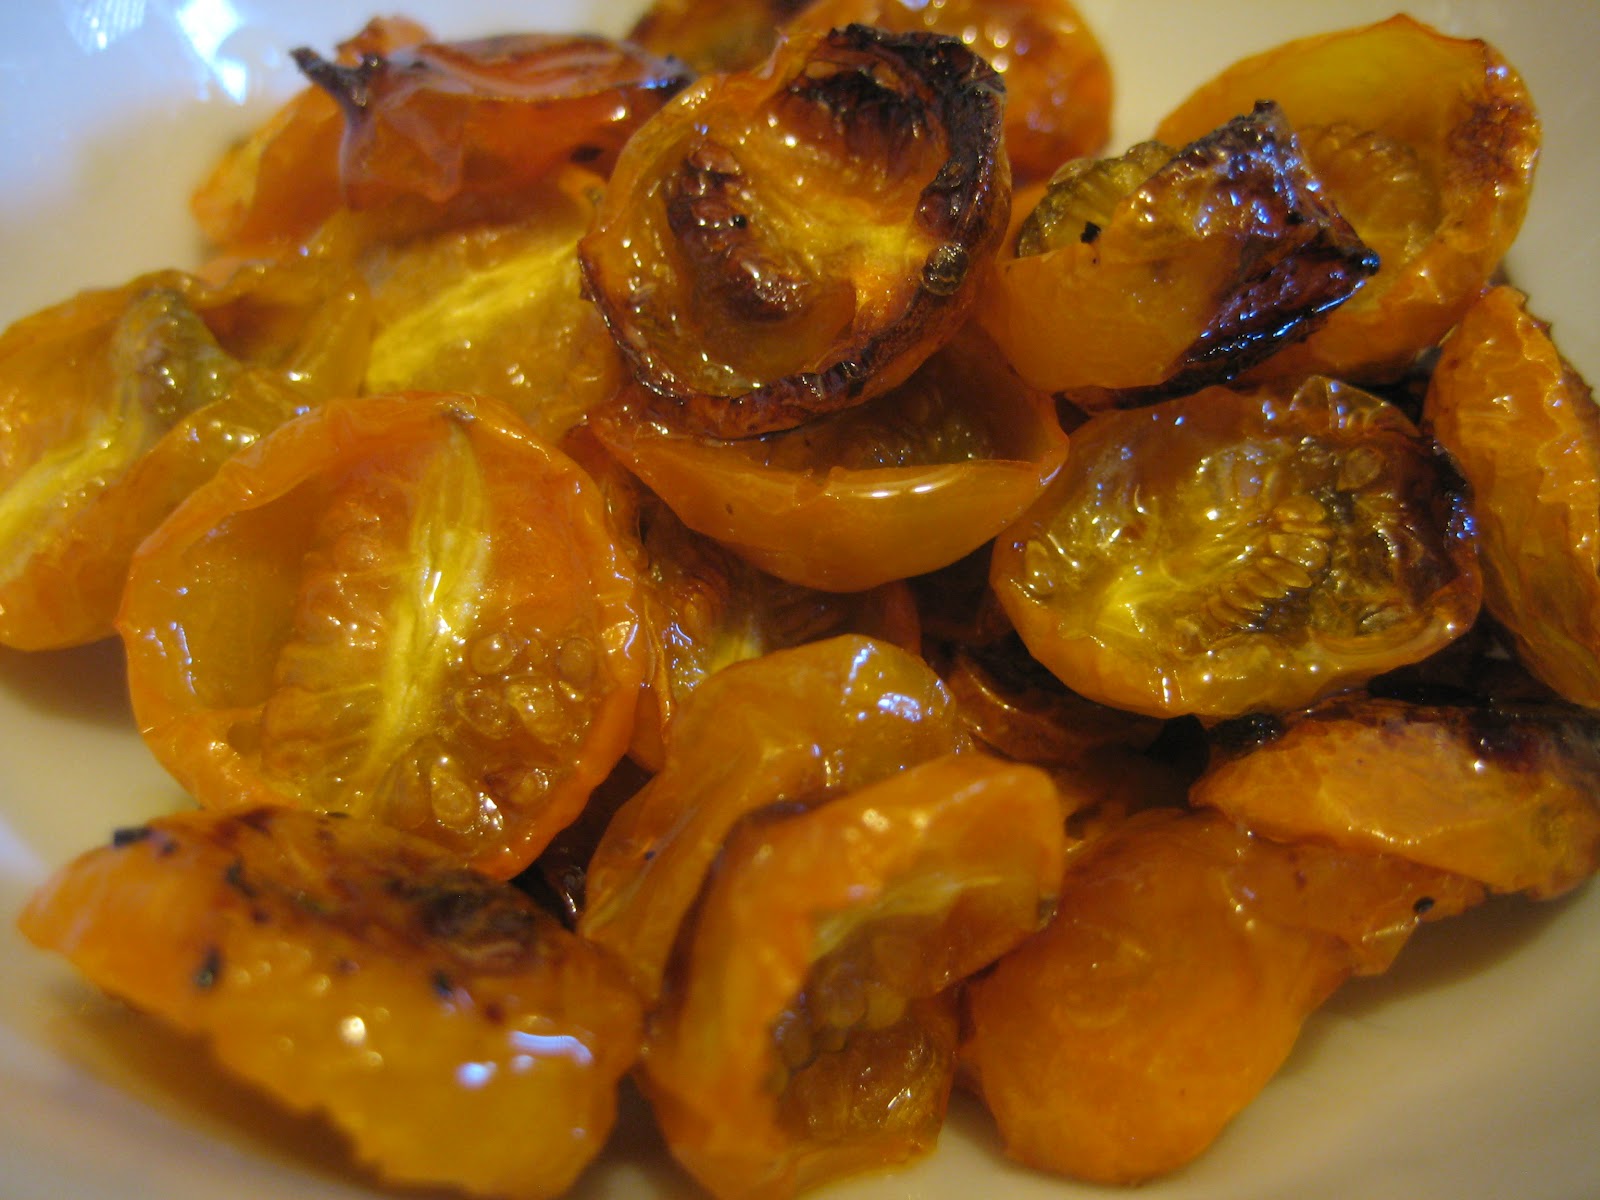
Here’s another secret I’ve been keeping from you: the best thing ever to do with leftover cherry tomatoes (or grape tomatoes, or whatever shape the little guys happen to be). I don’t know about you, but often I used to be plagued by partially used baskets of small tomatoes; sure, you can just eat the really good height-of-summer ones out of hand, but what about the slightly softened, wizened ones that remain at the end of the week, or the less-than-desirable wintertime grocery-store ones that taste OK when cooked but are bland when raw? If I couldn’t sneak them into a meal somewhere, too often they’d end up in the trash. One Friday, faced with yet another wilting cherry tomato surplus, I started Food Blog Searching and found this recipe at Leite’s Culinaria, from Heidi Swanson’s Super Natural Every Day. I didn’t have to buy any special ingredients, and it was so easy to throw together that I figured the stakes would be low if I failed, so I decided to give it a shot, letting the tomatoes brown in the often while I watched a movie, filling the apartment with a wonderful aroma. Putting maple syrup on tomatoes felt strange, but that dash of extra sweetness was the key to transforming my wrinkly old bottom-of-bowl specimens into amazingly addictive bits of caramelized tomato candy. (For best results, use Grade B syrup, which lends a tantalizing smokiness.)

I’ve always hated sun-dried tomatoes—the raisins of the tomato world!—but these were worlds away from any of the bitter, leathery monstrosities I’ve ever had. The flavor concentrates, but some juiciness remains, along with an irresistible tender-chewy texture (yes, these will stick in your teeth and you will love it) and the perfect sweet-tart-salty balance that all the finest snacks possess. I ate every single one straight off the baking sheet that day, and I’ve made these probably a dozen times since then, often just a half-recipe or less, depending on how many orphaned cherry tomatoes are on hand. The recipe is so simple, barely a recipe at all once you’ve made it a couple of times, that I tend to do this as an afterthought and immediately devour the evidence without photographing it. But finally, this time around, the lighting was pretty good and I already had my camera in the kitchen to document something else I was working on when these tomatoes came out of the oven, and now I can finally share these with you. Make them before tomato season is over! Or, if you must, make them in January with out-of-season ones from South America; it’s the best treatment for those poor things and will convert them into something far better. If you don’t want to eat them straight out of the oven, I’m sure they’re wonderful on pizzas, pasta, salads, and more. Just don’t forget to snack on the hardened puddles of syrupy juice that adhere to the edges of the parchment—they may look blackened and burnt, but peel them up and pop them in your mouth and they’re like little bites of toffee. Tomato toffee!

1 pint cherry tomatoes, any color, stemmed
¼ cup extra-virgin olive oil
1 tablespoon Grade B maple syrup
½ teaspoon coarse salt

1. Preheat the oven to 350 degrees.

2. Slice the tomatoes in half and place them on a parchment-lined rimmed baking sheet.

3. In a small bowl, whisk together the olive oil, maple syrup, and salt. Pour the mixture over the tomatoes and gently toss until well coated. Arrange the tomatoes in a single layer, cut side up, and roast, without stirring, until the tomatoes shrink a bit and caramelize around the edges, 45 to 60 minutes.

Time: 1 hour
Leftover potential: Good; I like to eat them right away, but they’ll keep for about a week in the refrigerator. Just let them cool, scrape them into a glass or plastic container along with any liquid that was left on the baking sheet, and seal tightly.

Thursday, September 13, 2012

EASY CHICKEN SATAY WITH PEANUT SAUCE


I wanted a little protein with my spring rolls, and since A and I will often order nothing but an assortment of appetizers when we get dinner from our local Thai restaurant, chicken satay (or saté, but I don’t feel like inserting that accent mark every time) seemed the perfect accompaniment, especially since peanut sauce could do double duty as a condiment for both. I’d spent so much time rounding up ingredients for the spring rolls that I picked this satay recipe from Cooking Light mainly because it was quick and easy and didn’t require me to buy anything new. It seemed so simple that as I was assembling it I began to doubt that it would taste like much at all, but happily, I was wrong. In the future I’d marinate the chicken for longer if I have the time, but even after 10 minutes’ soak it was surprisingly flavorful.

I doubled the sauce so I could use some of it as a spring roll dipping sauce. A thought it was fine on both foods, but for some reason I disliked it on the spring rolls while really enjoying it on the chicken. When I’m feeling more ambitious I might try more complex recipes for both—I’d like to imitate our Thai place’s satay, which involves coconut milk and curry powder—but I’d definitely make this one again in the meantime. It’s hard to go wrong with sweet and zesty grilled chicken for very little effort, after all.

I did this on the George Foreman, skipping the skewers entirely; you could also use a broiler if you don’t have a grill.

Satay:
1 pound skinless, boneless chicken breasts, cut into 8 strips
1 tablespoon brown sugar
2½ tablespoons low-sodium soy sauce
2 teaspoons minced fresh ginger
1 teaspoon lime zest
¼ teaspoon red pepper flakes
2 garlic cloves, minced

Peanut sauce:
1 tablespoon brown sugar
1½ tablespoons low-sodium soy sauce
1 tablespoon freshly squeezed lime juice
2 tablespoons natural-style creamy peanut butter
¼ teaspoon red pepper flakes
1 garlic clove, minced

1. Prepare grill.

2. Combine chicken and remaining satay ingredients (through 2 garlic cloves) in a medium bowl. Let stand 10 minutes.

3. While the chicken marinates, combine peanut sauce ingredients in a medium bowl, stirring until sugar dissolves.

4. Thread each chicken strip onto a wooden skewer. Place chicken on grill rack coated with cooking spray; grill 5 minutes on each side or until chicken is done. Serve satay with sauce.

Serves: 4
Time: 30 minutes
Leftover potential: Good.

Wednesday, September 12, 2012

SPRING ROLLS


This one’s really an oldie; I remember making spring rolls for summertime dinners when I lived on my own in St. Paul in my mid-twenties. I have no idea what the original source is; back then, when the Internet wasn’t the first place we looked for information, I used to check heaps of cookbooks out of the library and photocopy appealing-looking recipes. I haven’t spring rolls this since I moved to California 8½ years ago, partly because we have a beloved Thai restaurant a block away that makes great, inexpensive ones, and partly because I’ve been too lazy to seek out the ingredients. In St. Paul, rice wrappers were readily available in ordinary chain grocery stores, but for whatever reason, none of my usual shopping stops in Pasadena carry them. Luckily, I live on the edge of the San Gabriel Valley, which has a huge Asian American population (fun fact: eight of the ten cities in the United States with the largest proportion of Chinese Americans are located in the San Gabriel Valley!), yet it still took me nearly a decade to muster the energy for a field trip. (My commute to work is long, so on the weekends, I can rarely bring myself to pilot a car for more than a mile or two.) But this summer, with our local Thai restaurant under new management and threatening to change, and a disgustingly sticky heatwave making it impossible to contemplate turning on the stove or ingesting warm food, the time was finally right to make my own spring rolls again. A quick Googling guided me to a well-reviewed Asian grocery about five miles away, in San Gabriel. Somehow I managed to get lost going there, but after I’d driven in circles for 15 minutes I suddenly realized that I was surrounded by dozens of other Asian grocery stores that could provide exactly what I needed. Sure enough, the random place I stopped (sadly, I’ve already forgotten its name) had an entire wall of spring roll wrappers in a dizzying array of sizes and varieties. After some deliberation, I went with the Double Parrot brand (“Good for restaurant”) because they were made entirely of rice (other some kinds also contained tapioca flour, which I’m sure isn’t a bad thing or probably even a noticeable difference, but I figured I’d been instructed to get “rice wrappers,” so…) and had a pretty label, in a package large enough to see me through multiple batches of spring rolls.

And that was the hardest part of the spring-roll-making process. Second-hardest was tracking down bean sprouts, which—are they out of fashion or something? Is it the increased food-borne illness fear? Because they’re another ingredient I used to be able to pick up at an ordinary grocery store in St. Paul, but I had to scour four different places here (I finally found them at Fresh and Easy, in case anyone is wondering). The bean thread (saifun) noodles I just found in the Asian section at my regular Vons grocery store, though, no problem. Once you’ve hunted down your ingredients, all you do is soak the noodles in boiling water for 15 minutes (I find the texture of these, both cooked and uncooked, and their simple cooking process downright magical), chop up a bunch of veggies and herbs (I added cucumber to my original recipe, because our local Thai restaurant uses it and I love the added crunch), and roll everything up in the wrappers. I think the wrapping process is fun; I love the way the wrappers transform from what looks like sheets of textured plastic to a pliable, semigelatinous foodstuff with just a quick soaking in water. I always feel on the verge of disaster when I’m assembling these—tearing the wrappers, stuffing them too full, barely keeping them shut—and I’m not going to lie, my finished product is decidedly homely at times, but overall the process is surprisingly forgiving. It helps that you’re double-wrapping the rolls, so even the most bulbous and precarious ones get some extra shaping and reinforcement.

I’m sure there are fancier versions of spring rolls around, and maybe I’ll eventually try some, but I like how simple these are—a fresh and crunchy salad in handheld form, basically. I do wish I could recommend a good peanut sauce recipe, but alas, I’m still looking. I made these twice in the same week (two half-recipes), and the first time I also made an easy chicken satay (post forthcoming) and just doubled the peanut sauce recipe that went with that. The sauce was good with the chicken, but I didn’t really like it with the spring rolls. (Too—peanutty?) The second time I bought a bottle of Trader Joe’s Thai peanut sauce and liked it OK, but it still wasn’t quite what I wanted. I remember when I lived in St. Paul I’d buy Leeann Chin’s peanut sauce, but that’s not available here, and anyway, I’d rather be able to make my own. What I probably want is an exact replica of our favorite Thai restaurant’s sauce. I’m going to keep testing different versions, and hopefully I’ll settle on one I can recommend.

Anyway, the point of this whole saga is that I’m happy to be reunited with this recipe, and I feel foolish for letting my laziness keep us apart for so long.

2 ounces bean thread noodles (saifun)
1 tablespoon rice vinegar
1 teaspoon sugar
¼ teaspoon salt
1 scallion, including greens, minced
1 large carrot, peeled and shredded
1 medium Persian cucumber, julienned
1 cup loosely packed mung bean sprouts
¼ cup minced fresh basil
¼ cup minced fresh cilantro
2 tablespoons minced fresh mint
16 (8-inch) round rice wrappers
2 cups loosely packed shredded tender lettuce, such as Boston, Bibb, or mesclun

1. In a medium saucepan, bring 3 cups of water to a boil. Add bean thread noodles and remove pan from heat. Let sit 15 minutes until noodles are soft. Drain noodles and cut coarsely into 2-inch pieces. Meanwhile, in a small bowl, combine rice vinegar, sugar, and salt. Add noodles and toss well.

2. In a large bowl, combine scallion, carrot, cucumber, sprouts, basil, cilantro, and mint.

3. Fill a pie plate with warm water. Place one rice wrapper in the water and let soak until soft and pliable, about 1 minute. (Don’t soak it too long, or it will tear.) Place wrapper on a work surface and blot dry with a paper towel. Place a layer of lettuce over the surface. Sprinkle with vegetable and herb mixture and add a layer of noodles. Fold the wrapper’s sides, top, and bottom over the filling, then roll up. Soak another wrapper, place on work surface, blot dry, and place filled spring roll in center. Fold outer wrapper around the spring roll the way you did the first.

4. Place finished spring roll on a plate and cover with a damp paper towel. Repeat with remaining wrappers, making a total of 8 rolls. Serve with peanut sauce.

Serves: 4
Time: 45 minutes
Leftover potential: Not great—the wrappers will gradually dry out—but I’ve eaten a couple the next day and they haven’t been horrible.

Thursday, May 17, 2012

ORANGE CURRY ALMONDS


As threatened—er, promised—I reworked the magical roasted nut recipe yet again, just to cover all my citrus bases. (I’m ignoring grapefruit here, as I do in all areas of my life.) I think it’s a really good flavor combo. I used Trader Joe’s curry powder, my favorite storebought variety, which has a nice, bright citrusy/floral taste that I correctly suspected would marry well with the orange. (I think I was inspired by these cookies...which now makes me wonder if I could get coconut in here too, somehow.) There’s a little heat to these, but mostly just a deep, savory spice that makes them seem richer and substantial than the other two varieties I’ve made—or maybe it’s just that almonds fill me up more quickly than other nuts. Whereas I could demolish handfuls of the chili lime peanuts or lemon pepper cashews if I wasn’t careful, I’m full and satisfied after a dozen or so of these almonds. Whether for that reason or just because I prefer lemon and lime to orange, these have lingered longer in my kitchen than the other two kinds I’ve made, and I do think I’d name them my least favorite of the three. (They also, for some reason, seem to be on the verge of oversaltiness, even though I used the same amount of salt as in the other two recipes, which struck me as being just the right amount. I might cut back on the salt next time—or perhaps I just measured poorly this time?) But that’s mainly because the first two were so very kickass. I’m still pleased to have “invented” these and I do consider them a successful snack: addictively crisp, excitingly tasty, fairly wholesome, and not like anything I’ve ever seen in a store. For someone who rarely improvises, I feel like I’m on a roll lately!

Freshly grated zest of 1 large orange
¼ cup freshly squeezed orange juice
1 tablespoon kosher salt
2 teaspoons sugar
4–5 teaspoons curry powder
1 pound unsalted almonds

1. Preheat oven to 250 degrees.

2. Whisk orange zest, orange juice, salt, sugar, and curry powder together in a large bowl. Add almonds and stir until evenly coated.

3. Scrape nuts onto a large, rimmed baking sheet (line with parchment if desired, for ease in cleanup). Bake until nuts are fragrant, dry, and beginning to darken, about 30 minutes.

Serves: About 16
Time: 40 minutes
Leftover potential: Good; will keep in an airtight container at room temperature for at least two weeks

Friday, March 09, 2012

LEMON PEPPER CASHEWS


I’m so proud of these—maybe even prouder than I am of my newfound egg-poaching ability, because I made up this recipe myself! I’d spotted and bookmarked a lemon-pepper cashew recipe ages ago, and ever since then, the lovely concept had been taking root in my imagination and appetite. I love lemon, I love pepper, and I love cashews, and I know I love at least two of them at the same time—in fact, Trader Joe’s used to carry black pepper cashews that I adored. But when I finally decided it was time to make them, I took a closer look at the recipe and found that it was laden with sugar: a whopping ¼ cup of the stuff for just 1 cup of cashews! I’m sure it was delicious, but as I’ve discussed before, I like to save sweetness for dessert, not snacktime, and I’m only in the market for sweet/spicy/savory roasted-nut recipes, which are surprisingly hard to come by. I launched a Web search for other lemon pepper cashew recipes, but most of the ones I found were just the same recipe all over again, except for a small minority that employed storebought lemon pepper seasoning instead, which: no. I live in Southern California and I’m going to use fresh lemons, damnit.

What I wanted was something exactly like the chili lime peanut recipe I’d recently fallen for, but with cashews instead of peanuts, lemon zest and juice instead of lime, and black pepper instead of chili powder. So…why didn’t I just adapt it myself? It sounds simple, but if you’ve been reading this blog for any length of time you’ll know that I don’t exactly work off-recipe very well. I might add another garlic clove here and substitute feta for goat cheese there, but it’s rare that I build anything from the ground up. Still, since I was desperate for lemon pepper cashews and couldn’t find any recipe that would do, I took matters into my own hands, figured out the proportions, and got to work. The entire time, I was convinced that it wouldn’t succeed, so imagine my shock when I tasted my first cashew and it was wonderful—intensely lemony, spicily peppery, addictively crunchy, with just the right undertones of salt and sugar. Be forewarned: these are quite bold and zesty. (The lemon flavor is maybe even stronger than the pepper; I used the zest of two lemons because I was juicing another lemon anyway for another recipe, but feel free to cut back to just one lemon if you aren’t a fanatic.) But they were also a hit with all those who tried them (my highly scientific sampling group of three: me, A, and A’s friend), and A declared them even better than the original chili lime version. These are going to be a frequent snack at our house, I know.

Now I feel I should round out the citrus-nut trifecta by adapting this recipe one more time to use oranges. Orange curry almonds? Orange cinnamon pecans? Hmm….

Freshly grated zest of 1–2 lemons
¼ cup freshly squeezed lemon juice
1 tablespoon kosher salt
2 teaspoons sugar
4 teaspoons freshly, coarsely ground black pepper
1 pound unsalted cashews

1. Preheat oven to 250 degrees.

2. Whisk lemon zest, lemon juice, salt, sugar, and pepper together in a large bowl. Add cashews and stir until evenly coated.

3. Scrape nuts onto a large, rimmed baking sheet (line with parchment if desired, for ease in cleanup). Bake until nuts are fragrant, dry, and beginning to darken, about 30 minutes.

Serves: About 16
Time: 40 minutes
Leftover potential: Excellent; will keep in an airtight container at room temperature for at least a week

Wednesday, February 15, 2012

CHILI LIME PEANUTS


Although I’m not a huge snacker, when my hunger pangs strike I tend to lose all capacity for rational thought, so I try to make sure I always have some quick and wholesome munchies on hand to restore my sanity between mealtimes. Nuts are the most satiating pick-me-up I’ve tried, but the plain ones can get a bit dull after a while. The Internet is rife with seasoned nut recipes, and I’ve been bookmarking them avidly for years, intending to spice up my snacking routine, but when I finally started sorting through them all, I realized that the majority fall on the sweet end of the flavor spectrum; even those that claim to be spicy have an equally strong dose of sugar. Candied nuts are great for special occasions (they make easy homemade holiday gifts, for instance), but they’re a bit much for every day.

It’s actually harder than I expected to find straight-up savory nut recipes. I do have a great one for rosemary cashews with only a couple of teaspoons of sugar, which I make every year at Christmas, but (a) those are so delicious that I can’t stop gobbling them, and nuts are only a healthy snack if you eat them in small quantities, and (b) I like the idea of having special recipes I only bring out once a year, so making them regularly would take away the magic. I tried another recipe that had promising-looking savory elements like Worcestershire sauce and an array of spices, and although it was definitely tasty, it was far too sweet and buttery to qualify as sensible emergency rations. Then I unearthed this recipe from Serious Eats, and it is absolutely perfect. There’s a tiny bit of sugar, but only enough to temper the sourness of the lime; the dominant flavor is spice. I’d been worried about the heat level, but it was just right for me—enough to bring a glow to my cheeks and make my mouth feel like something’s going on in there, but not so much that I need to eat them with a beverage clutched in my hand to put out the fire. (If your heat tolerance falls below “medium,” though, I’d recommend cutting back to ½ teaspoon cayenne for starters.) These zesty peanuts are definitely addictive, but not so much that I can’t resist shoving them all in my mouth, and the bold flavor excites my taste buds enough that even a moderate portion feels like a richly satisfying snack. Plus, they’re insanely easy to make, with only about 5 to 10 minutes of hands-on labor. I can’t wait to try them on a hot summer day, washed down by a cold beer—but they’re just as lovely when eaten out of a Tupperware container from my purse when I start to feel cranky and shaky while standing in a long checkout line at Kohl’s.

I doubled the lime zest, because I was juicing two limes anyway, so why just zest one of them? It probably wasn’t necessary, because the lime flavor comes through more clearly than you might expect, but I’m a citrus fiend and I enjoy that sort of thing. My seasoning-to-nut ratio was also a bit off, because I bought a 1-pound package of peanuts at Trader Joe’s that claimed to contain “about 16” quarter-cup servings, which I assumed would be approximately the 4 cups the recipe required. Upon taking them home and measuring them out myself, I learned that this is only true if you think that 3½ cups is “about” 4. But you know what? It turned out just fine, and I wouldn’t change a thing. These are going to be one of my go-to snacks from now on. If you don’t like peanuts or are allergic, I assume the recipe would work just as well with other nuts; I can’t wait to try it with cashews.

Freshly grated zest of 1–2 limes
¼ cup freshly squeezed lime juice (from 2–3 large limes)
2 tablespoons chili powder (I used half regular and half chipotle)
1 tablespoon kosher salt
2 teaspoons sugar
¾ teaspoon cayenne pepper
4 cups shelled, unsalted peanuts

1. Preheat oven to 250 degrees.

2. Whisk lime zest, lime juice, chili powder, salt, sugar, and cayenne pepper together in a large bowl. Add peanuts and stir until evenly coated.

3. Scrape nuts onto a large, rimmed baking sheet (line with parchment if desired, for ease in cleanup). Bake until nuts are fragrant, dry, and beginning to darken, about 30 minutes.

Yields: 4 cups (about 16 servings)
Time: 40 minutes
Leftover potential: Excellent; will keep in an airtight container at room temperature for at least a couple of weeks.

Thursday, November 11, 2010

ROASTED SQUASH SEEDS


I can’t believe that at the ripe old age of 33, I’m still learning mind-blowing new facts such as this: It’s possible to roast the seeds of any winter squash as you do with pumpkin seeds. Really! I weep to think of all the squash seeds I’ve thoughtlessly discarded over the years when I could have been crunching on a delicious salty snack instead.

When I was a kid, my mom would always roast the seeds from our Halloween pumpkins, and now I get a visceral sense of nostalgia every time I eat them. But I can probably count on one hand the number of times I’ve had them as an adult. I’ve never been a pumpkin eater, and we don’t really carve jack-o-lanterns—I’m not that artsy or good with knives, and they always seem to rot spectacularly on the patio before Halloween even arrives. The few times I’ve tried to roast pumpkin seeds, they haven’t tasted as good as mom’s. But as soon as I learned this amazing fact about squash seeds (from an offhand mention at Smitten Kitchen), I consulted Simply Recipes for instructions, roasted some butternut squash seeds, and bingo! Just as good as I remembered. The secret is brining the seeds in salt water; the salt permeates the whole seed instead of sticking to the outside or (as often as not) falling off on the pan or in your hand.

Unless you’ve got a number of squash, the yield is going to be fairly small. I’ve roasted butternut squash seeds twice now and have gotten between ¼ and ½ cup each time. But this recipe is easily scalable to any quantity, so even if you’ve just got one little squash you’re going to turn into soup or serve on pasta or pizza, save the seeds! A negligible amount of labor will soon turn them into a couple of handfuls of tasty munchies.

Winter squash, such as butternut, pumpkin, or acorn
Salt
Olive oil

1. Preheat oven to 400 degrees.

2. Cut open the squash and use a strong metal spoon to scoop out the insides. Separate the seeds from the stringy core. Rinse the seeds in a colander.

3. In a small saucepan, add the seeds to water, about 2 cups of water to every half cup of seeds. Add 1½ teaspoons of salt for every cup of water (more if you like your seeds saltier). Bring to a boil and let simmer for 10 minutes. Remove from heat and drain.

4, Spread about a tablespoon of olive oil over the bottom of a baking sheet. Spread the seeds out over the baking sheet, all in one layer. Bake on the top rack until the seeds begin to brown, 10–20 minutes. (For smaller seeds, such as butternut or acorn, go with 10 minutes and keep a close eye on them; they’re usually done when they begin popping.) When seeds are toasted to your satisfaction, remove from the oven and let the pan cool on a rack.

Serves: Variable
Time: 30–40 minutes
Leftover potential: OK. The seeds will lose their crispness if you store them in a sealed container, but you can keep them in an open bowl on the counter for a day or two.

Monday, January 11, 2010

ROSEMARY ROASTED CASHEWS


Happy new year! I know that after the holidays know we’re all sick of sweets and snacks and trying to eat light and healthy fare. Believe me, one of my goals for the month (possibly the year, but I’m not making any promises) is along the lines of “more kale, fewer cookie plates.” But I’ve got all these recipes from my Christmas baking burning a hole in my pocket now—I didn’t share them in December because I didn’t really want to reveal the secret formulas right before I gave everyone treat assortments as gifts,* and also because I needed time to photograph them all—and I don’t want to wait a whole year until they’re more seasonally appropriate to post. So: things are going to be retroactively cookie-intense around here for a little while. But I’ll try to at least throw a few kale recipes into the mix as well.

(*I still feel a little shifty about sharing the recipes, like it’ll ruin the magic or something. I already posted all my jam recipes (and jam featured heavily in my gift-giving this year) when I was desperate for material during NaBloPoMo, so I guess I’m already on the slippery slope. I’m counting on all of you to forget this little peek behind the curtain by the time next Christmas rolls around and I hand you your treats. Or at least be too busy or lazy to simply whip them up yourself now that you’ve seen how easy they are.)

I’m always hoping to make more savory goodies to share at holiday time, because everyone (including me) gets so overloaded on the sweets, but the only savory recipe I’ve managed to get around to is this one. Luckily, it’s a doozy. I’ve made it for the past two years, and only financial concerns (cashews can be pricy) prevent me from making dozens of pounds at a time. This year I made a triple recipe and barely had a handful for myself. But that’s probably for the best, because I think I could eat these addictive little gems until I burst—which is why, even though they’d be perfect for any party or just a relaxing evening in front of the TV, I try to forget about them for the other 11 months of the year. They’re not particularly unwholesome if eaten in moderation (only a touch of butter, sugar, and salt), but moderation is hard to achieve when these are around. They’re just the perfect mix of salty, sweet, spicy and savory, with a festive green pine-needle zip from the rosemary. (Don’t skimp on the rosemary! Spice-phobes can cut back the cayenne and sodium-watchers can dial down the salt, but the rosemary makes the recipe.)

The recipe is from the Barefoot Contessa; taking a tip from the commenters, I modified the procedure slightly to add the butter and then the spices to give everything to stick to the cashews. It’s still a struggle, but you’ll have a better chance of success with this method—and luckily, I’ve found that most snackers find the stray crumbs of butter-sugar-spice-herb debris quite as tasty as the cashews themselves. Aside from the mixing issues, this recipe is hard to mess up—as long as you don’t scorch the cashews! For the love of all that’s good and holy, watch those cashews in the oven like a hawk, because there is nothing sadder than spending upwards of $5 per pound on some nuts and then ruining them right off the bat. I speak from experience. However, I can also attest that as long as they aren’t blackened, even the overcooked cashews are pretty tasty when the seasoning is applied, so you can always save that batch for yourself and make better ones to give away.

1¼ pounds unsalted cashew nuts (this is sort of an odd amount; at Trader Joe’s the cashews come in one-pound bags, so that’s what I usually use and it’s fine)
2 tablespoons coarsely chopped fresh rosemary leaves
½ teaspoon cayenne pepper
2 teaspoons dark brown sugar
2 teaspoons coarse kosher salt
1 tablespoon melted butter

1. Preheat the oven to 375 degrees.

2. Place the nuts on an ungreased baking sheet and bake for about 10 minutes until they are warmed through. (Watch them very closely to avoid burning. You don’t really want them to get especially brown; you just want them to be lightly toasted and activate their oils enough for the seasonings to stick.)

3. Meanwhile, combine the rosemary, pepper, sugar, and salt in a small bowl. Place the melted butter in a separate small bowl (or just use the container you melted it in). Have a large empty mixing bowl and a rubber spatula ready.

4. When you remove the nuts from the oven, immediately pour them into the large bowl, and working quickly, drizzle the butter over them, add the seasonings, and then toss well with the spatula. Serve warm or (once cooled) store in an airtight container (they’re even better the next day). Can be frozen for longer storage.

Yields: 1¼ pounds
Time: 20 minutes
Leftover potential: High, if you don’t scarf them all down immediately. They’ll stay fresh in the freezer for weeks.

Tuesday, June 09, 2009

GUACAMOLE MY WAY


Our favorite guacamole comes from a vendor at our farmers’ market, but lately it’s been getting too expensive to justify buying. Over $6 for a small container is pretty exorbitant, especially in a city where avocados literally grow on trees (my friend Editor A has one in her backyard). So, last time we had steak tacos for dinner, I decided to make my own guac, using a recipe from my files I hadn’t tried in years. A few of the details gave me pause (lemon juice instead of lime juice? tomatoes? cumin?), but I forged ahead and discovered that apparently my tastes have changed, because the resulting guacamole was...not very good. I mean, we ate it and it didn’t taste bad or anything, but it didn’t hold a candle to the pricy farmers’-market guacamole I’d had fantasies of effortlessly surpassing with my homemade version. FAIL.

So when I was presented with a mess of beautiful avocados from the CSA last week, I was a little worried about doing right by them. I promptly scrapped the old recipe and searched for a better one, but after scrolling through the comments of numerous blog posts and Epicurious entries, I realized that everyone’s guacamole ideal is different—garlic or no garlic (or garlic powder), onions or no onions, cilantro or no cilantro, tomatoes or no tomatoes, lemon or lime or orange juice, peppers or Tabasco sauce or cayenne or no spice at all, not to mention all the other crazy things people confess to adding, including sour cream, cream cheese, and Miracle Whip! In the end, I decided simplest was best. I chose the ingredients I considered to be indispensible—avocado, lots of lime juice, a little garlic (some people find raw garlic too overpowering, but I like it while I’m eating it; admittedly, however, when my mouth tastes like garlic hours later even after I’ve brushed my teeth, I have some regrets), cilantro, and plenty of salt—and concocted my own version. And cripes, it was one of the most delicious guacamoles I have ever eaten, rivaled only by the ur-guacamole I ate on my first trip to Mexico that got me liking guacamole in the first place. We ate the entire bowl for dinner, with just some corn chips for dipping and some corn fritters on the side. And I’m crossing my fingers for more avocados in the CSA box this week, because I can’t wait to make this again.

2 medium, ripe avocados
1 medium clove garlic
Coarse kosher salt to taste
Juice of 1 lime
1 handful minced fresh cilantro (maybe 2 heaping tablespoons?)

1. Peel, seed, and dice the avocados and place them in a medium glass bowl (preferably one that has a lid), but don’t mash them yet.

2. Mince the clove of garlic and sprinkle the garlic with a pinch of coarse salt. Let it sit for a minute or two, then mash it well with a fork until it makes a paste. Scatter the paste over the avocados in the bowl.

3. Add lime juice, cilantro, and coarse salt to taste to the bowl. (At Andy’s behest, I added a few drops of Tabasco sauce—most people use green Tabasco for guacamole, but I only had the red—but I’m not sure it really added anything, and I didn’t miss the spiciness.) Toss everything well, then mash with a fork to desired consistency. Taste for seasonings, adjust as necessary, and mix well.

4. Cover surface of guacamole with plastic wrap to prevent browning (some people, including me, perhaps superstitiously, also put one of the avocado pits in there), cover the bowl with a lid, and refrigerate for at least a few hours so the flavors can blend. I like to take it back out of the fridge about 15–20 minutes before eating, though, so it’s not ice-cold.

Serves: 2 or more
Time: 15 minutes
Leftover potential: Unknown

Wednesday, September 10, 2008

DILL PICKLES

Cucumbers in their brine, ready to go into the refrigerator and begin the pickling process

A snack-sized portion of the finished pickles, nom nom nom


OMG pickles! I love pickles! Well, I hate the sweet ones. And anything pickled that is not a cucumber. Let me start again…

I love dill pickles! And I am just kicking myself for not figuring out earlier how easy it is to make them in the refrigerator. (Canning them, while not that difficult either, is another story.) Make a brine with vinegar, water, and seasonings, and pour over salted cucumbers? I could have been doing this in kindergarten and eating awesome homemade pickles for an after-school snack every single day. Why did I have to put it off until Labor Day 2008? Ah, so many years wasted eating the store-bought ones….

In short, I have made pickles, and I am pleased with myself. They taste just like actual pickles! (I know, I know, they are actual pickles. But they were so easy to make, it seems like magic.) This very basic recipe, courtesy of Martha Stewart, makes a nice, mild dill pickle slice with a hint of garlic. I am sure it would be awesome on a hamburger or other sandwich of some kind, but so far I’ve just been eating them straight from the bowl whenever I crave a little salty, crunchy snack. Undoubtedly they are better for me than Doritos.

I was a little worried because when I was preparing to make these, I discovered that my big old bottle of white vinegar had expired. In…er, 2005. Turns out I don’t use a lot of white vinegar (balsamic, red wine, white wine, and cider, yes; white, no). The sad thing is that I went ahead and used the vinegar anyway. I know, I’m terrible! You’re never going to want to come over to my house for dinner, are you? Bad enough that at least one cat hair gets into everything I cook, but now I’m using ingredients that expired almost one presidential administration ago. To be fair, I gave the vinegar the sniff test and it smelled like…vinegar. What happens to vinegar when it gets old, anyway? Does it turn into wine? The pickles taste just like they’re supposed to and no one has died, so I suspect vinegar can’t really expire.

Oh, wait! This is what the Internet is for! Let’s check….

(Five minutes later) All right, the Vinegar Institute is on my side:

“The Vinegar Institute conducted studies to find out and confirmed that vinegar’s shelf life is almost indefinite. Because of its acid nature, vinegar is self-preserving and does not need refrigeration. White distilled vinegar will remain virtually unchanged over an extended period of time. And, while some changes can be observed in other types of vinegars, such as color changes or the development of a haze or sediment, this is only an aesthetic change. The product can still be used and enjoyed with confidence.”

I will certainly be using and enjoying the rest of my vinegar with confidence—to make more pickles! If you are a pickle fan, I strongly recommend that you do the same.

2 pounds Kirby cucumbers (small, unwaxed pickling cucumbers)
3 tablespoons coarse salt
3 cups water
2 cups distilled white vinegar
1 tablespoon dill seed
4 cloves garlic
2 bunches fresh dill, coarsely chopped

1. Cut the cucumbers into ½-inch rounds and place in a colander set over a bowl. Toss cucumbers well with salt and let drain in refrigerator for 1 hour.

2. About 20 minutes before cucumbers are done draining, bring water, vinegar, dill seed, and peeled garlic cloves to a boil in a medium saucepan, stirring occasionally. Reduce heat and simmer for 4 minutes. Let mixture cool slightly, about 10 minutes.

3. Remove cucumbers from refrigerator; rinse well and drain (discard any juice in the bowl). Pat dry between paper towels or in a dishtowel. Transfer cucumber slices to a large bowl (to save washing, I just dried out the one I’d drained them over and used it again). Add chopped dill to the bowl and toss to combine. Pour in the brine. Let cool completely, about 30 minutes.

4. Transfer mixture to airtight containers (I was able to skip this by making the pickles in a Pyrex bowl with a tight-fitting lid) and refrigerate at least 1 week. Pickles will keep in refrigerator for 3 more weeks.

Yields: 2 quarts
Time: 1 hour 30 minutes (but most of that is draining/cooling time during which you can go away and do something else), plus 1 week for the actual pickling process

Friday, June 23, 2006

PAM’S MEXICAN FUDGE

This is not chocolate. It’s savory, not sweet—in fact it has nothing to do with actual fudge, except that it is, in its own way, just as rich and tasty. One of my friends’ moms used to make it for neighborhood parties when I was a kid, and I always remember the grownups talking about how sinfully delicious it was. I, of course, was way too picky then to eat any food that contained anything remotely resembling a green pepper, but once I grew older and my tastes normalized, I sampled Mexican Fudge a few times when my mom made it. (I remember one Christmas Eve when Mom, Dad, and I prepared it as part of a sumptuous spread for ourselves, then all came down with a cold/flu that rendered us far too sick to enjoy any of it.) My mother passed on the recipe to me, but it never occurred to me to make it until I was called upon to throw a wedding shower for my friends P&R. My fellow bridesmaid, J, and I decided to serve a nacho bar of sorts, with my black-bean salsa, the awesome farmers’-market Holy Guacamole, and other things that can be eaten with tortilla chips. I remembered Mexican Fudge, saw how simple and easy the recipe was, and, flying in the face of one of the cardinal rules of hostessing (never serve anything you haven’t made before), whipped up a batch with some trepidation. And…it was a huge hit. I could have eaten half the pan myself, if I hadn’t felt a grudging compunction to save some for the actual guests. (I should have doubled the recipe—I only did 1.5 times the quantity.) This stuff is good, and easy enough for a small child (with good oven-safety skills) to make. After all, it’s basically just a big pan of jalapeno-infused melted cheese, with just enough egg to bind it into solid form.

2 cups grated cheddar cheese
2 cups grated Monterey Jack cheese
3 eggs
½ cup hot green taco or enchilada sauce (I used bottled salsa verde from the Mexican-foods aisle of the grocery store)

1. Preheat oven to 350 degrees.
2. Combine the grated cheeses and place half the mixture in a 9x9 baking dish.
3. Combine the eggs and sauce and pour over the cheese. Spread the remaining cheese on top.
4. Bake for 30 minutes, cool slightly, and cut into 1-inch squares. Serve (warm or at room temperature) with tortilla chips.

BLACK BEAN SALSA


This recipe is from my college friend S’s mom. S used to make it when we lived together; I remember sitting and watching TV and eating it straight out of the bowl with spoons, like a salad. I quickly acquired the recipe and made it for myself as a summer meal when I lived alone; now that I live with A I don’t make it much, since he is prejudiced against raw black beans (and I sympathize with his prejudice, since I don’t like them much myself in any context besides this one). But if he tried this I think he would like it, because how can you not when tomatoes and garlic and cilantro and onions and delicious vinaigrette are involved? Anyway, I made this for a wedding shower on Saturday and it was light, tasty, and super-easy. We served it as a dip-like thing, with tortilla chips, but the next day I sat down in front of the TV and ate the leftovers out of a bowl with a big soup spoon, just like the old days.

3 tablespoons red wine vinegar
3 tablespoons olive oil
2 small garlic cloves, minced
2 cans black beans
1 cup chopped green onions
6 to 8 Roma tomatoes (or cherry tomatoes, as shown above)
1/3 cup cilantro
1½ teaspoons cumin
salt and pepper to taste

1. Combine the first three ingredients in a large bowl.
2. Rinse and drain the black beans and add them to the bowl. Add chopped green onions. Peel, seed, and chop tomatoes and add them to the bowl. Remove stems from cilantro, chop, and add to mixture. Add cumin and salt and pepper to taste and mix well.
3. Serve with tortilla chips.

Makes 4 cups

Thursday, September 16, 2004

PITA CRISPS AND MOM’S HUMMUS


You don’t have to make these things together, but I always, always do. And it’s so good. When I lived alone, on many a summer night I’d simply have a big bowl of hummus, with pita crisps and a green salad, for dinner. The hummus recipe probably makes enough to serve at least four hungry people as a side dish or appetizer dip, but me, I’d eat half of it in one sitting. If the pita crisps ran out, I’d eat it with a spoon. And considering I don’t really like beans, especially cold beans, and especially not garbanzo beans, this is a good testimonial to the power of mom’s hummus. Easiest hummus in the world to make, too—no messing with tahini or anything fancy. (I suppose that might not make it "real" hummus and I should probably be calling it "chickpea dip" or something, but who cares? To me, the flavor is better without the tahini anyway.) As for the pita crisps, I don’t know where I got the recipe but they’re very good with the hummus.

So now that I’m cooking for two I’m aware that not everyone considers a big bowl of hummus a dinner, and when I make hummus and pita crisps I usually serve them with Fattoush (Tomato-Cucumber Salad With Herbs and Toasted Pita), and it all goes really nicely together. It’s complex to make so many things at once, especially in the pita-toasting department, and it does turn into a bit of a raw garlic extravaganza—which is delicious to me and quite healthy I’m told, and not overpowering while you’re eating it, but expect to have garlicmouth when you wake up the next morning. Regardless, it all makes a good, fresh, light (if you restrain yourself around the pita crisps), summery meal.

A took over the making of the pita crisps, spreading on the butter and sprinkling on the oregano and cheese while I was juggling the making of the hummus and fattoush. I highly recommend having a kitchen boy, if you can procure one.


PITA CRISPS
2 6-inch pita breads (the kind with pockets)
2 teaspoons butter
¼ cup freshly grated Parmesan cheese
2 teaspoons dried oregano

1. Preheat the broiler and get out a baking sheet. Cut the pitas in half across and split each half horizontally with your fingers, pulling the two sides of the pockets apart, to create 8 thin semicircular pieces. Then cut each semicircle into three triangular wedges. (I know, this sounds like a math problem.) Place the pieces, rough side up, in a single layer on the baking sheet.

2. Very lightly spread each pita piece with butter, then sprinkle each one with a small amount of cheese, and then sprinkle each generously with oregano. (I don’t bother with the measurements for the butter, cheese, or oregano anymore, as I make this so often it’s easy to eyeball how much to use.) Digression about annoyingness of recipe: it asks you to spread the pitas with butter, cheese, and oregano before cutting them into thirds—which probably makes it easier to butter, but also makes it much harder to cut them without dislodging all the cheese and oregano all over the baking sheet. Also, you’re told to “Toss together the Parmesan cheese and oregano in a small bowl.” Why dirty a whole bowl just for that? Sprinkling on the cheese and then shaking on the oregano works just as well. End of digression about annoyingness of recipe.

3. Broil the pitas for about 2 minutes, or until lightly browned. (Speaking from experience, I advise you to watch them closely! That broiler will burn them to a crisp if you give it the chance.) Take them out of the oven, let them cool slightly, and then eat them dipped into the hummus. They’re best right away, but any leftovers will hold up OK stored in a Ziplock bag for a couple more days.

Serves: I usually get enough out of it to match the amount of hummus I have, which is 2 generous servings. I pften double it so there's plenty for leftovers, because the hummus' flavor is even better the next day.

Time: 15 minutes


MOM’S HUMMUS
1 clove garlic
3 tablespoons fresh lemon juice
2 tablespoons olive oil
1/4 teaspoon paprika
1/8 teaspoon salt
1 15-ounce can garbanzo beans, drained with liquid reserved

1. Peel the garlic and throw the whole clove in the blender, then add the lemon juice, oil, paprika, and salt. Blend everything until it's smooth (the garlic should be totally pureed).

2. Open the can of beans, drain the liquid (bleah) into a small bowl, and dump the beans into the blender. Then it’s just a question of blending everything until it’s smooth, thinning as needed with the reserved liquid. (The recipe says you can also thin with yogurt, though I’ve never attempted this.) I personally prefer my hummus to be on the thin side, so I use maybe a third of the liquid. Do whatever seems right to you. Scrape the hummus out of the blender into some bowls, sprinkle extra paprika on if desired, scoop it up with the pita crisps, and enjoy.

Serves: 2, generously (again, I often double this to ensure leftovers)
Time: 15 minutes